3.5.6 Importing the Certificates into an Oracle Wallet
- Copy the certificates exported and saved during the process described above onto the database server (not the iAS server).
- As the Oracle user (or Administrator on Windows), start the Oracle Wallet Manager.
- Open the wallet that will be used by the credit bureau service. Create a new wallet if one does not already exist.
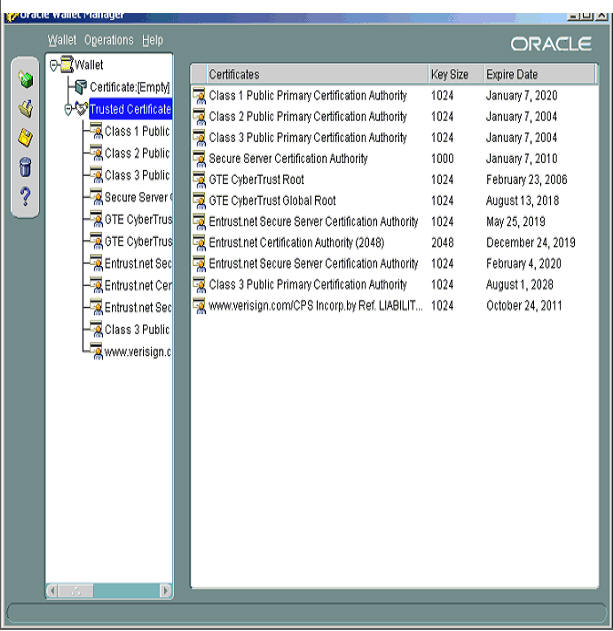
- View the list of Trusted Certificates in the wallet.
- Check the list of certificates against the list of certificates that are in use on the HTTPS servers used by the credit bureaus (and that were exported and saved during the export process described above).
- Click the Trusted Certificates heading in the left list box of the Oracle Wallet Manager.
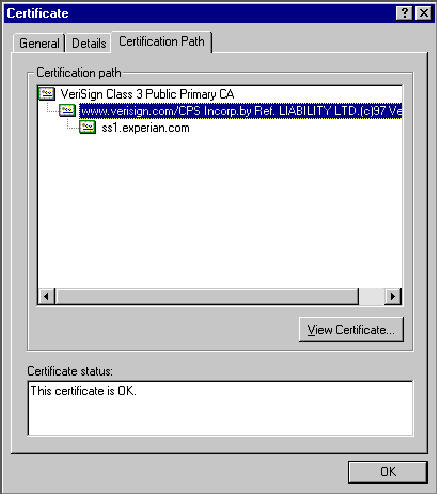
- Use Microsoft Internet Explorer to view the certificate details for the HTTPS web sites (File > Properties > Certificates > Certification Path > View Certificate > General) that will be contacted by the credit bureau service. Look through the list of certificates shown in the right panel of the Oracle Wallet Manager and look for a match between the Issued To and Valid To dates shown in the Internet Explorer View Certificate screen.
The screen shot below shows a certificate that is already in the wallet’s list of trusted certificates (see the last entry for the www.verisign.com/CPS certificate).
- On the Operations menu, choose Import Trusted Certificate and follow the prompts for locating and loading the files that were copied onto the database server in step 1 for any certificate not already stored in the wallet.
- On the Wallet menu, choose Save when finished loading certificates.
Parent topic: Credit Bureau

