3.6.1.4 Documents
Note:
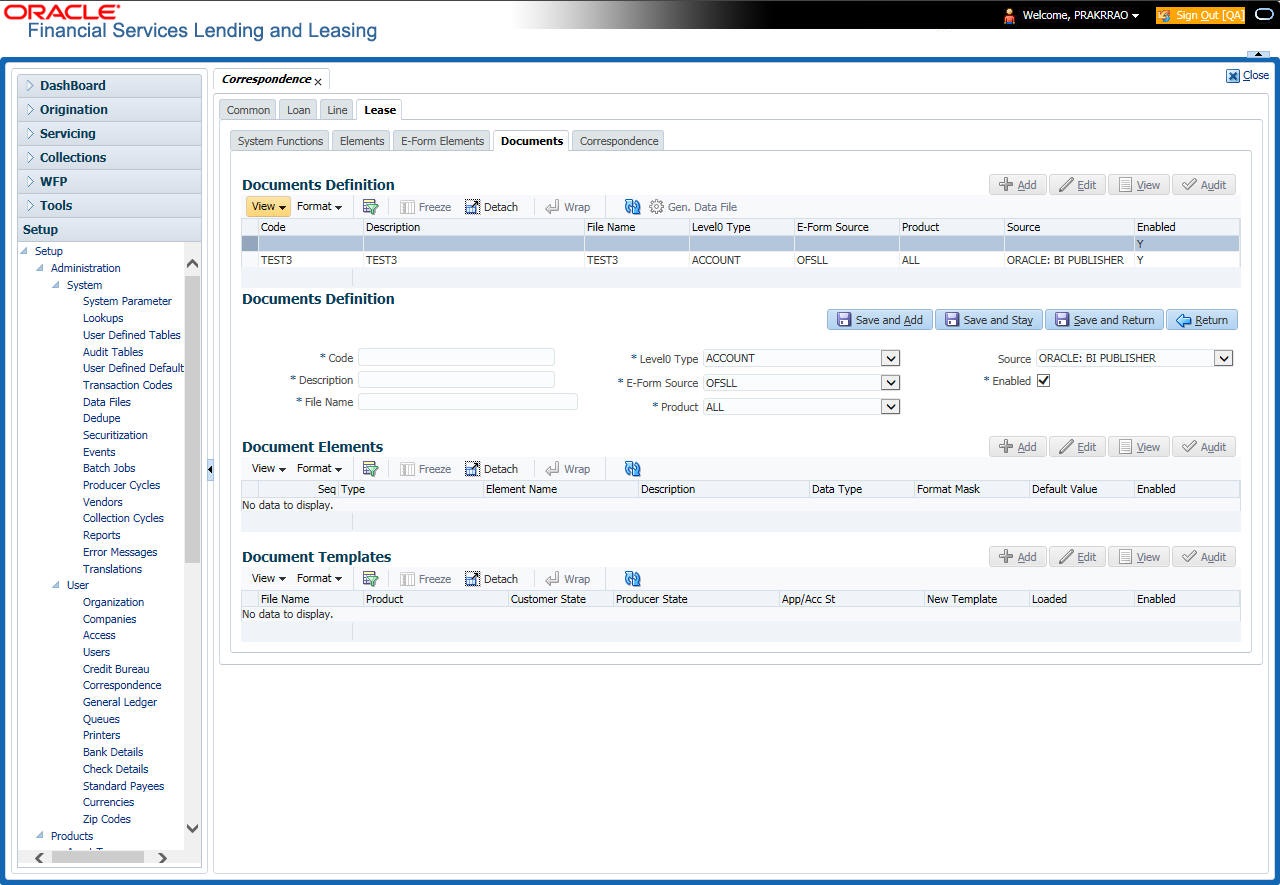
Oracle Financial Services Software assumes that the user is familiar with Word and the Merge Document command. If the user is creating e-form documents with XFDF, then Oracle Financial Services Software assumes that person is familiar with Adobe forms.- Click Setup > Setup > Administration > User > Correspondence > Lease > Documents.
- In the Document Definition section, perform any of the Basic Operations mentioned in Navigation chapter.
A brief description of the fields is given below:
Table 3-48 Document Definition
Field Do this Code Specify the document code to define the name for the new document. Description Specify the document description for the new document. This entry appears in the Correspondence section on the Request screen, when you generate an ad hoc correspondence. File Name Specify the document file name for the resulting file (Word or XFDF document).
Ensure that the name specified here is same as the BIP Template name since system refers to this file name for generating the correspondence.
Level0 Type Select the level0 type from the drop-down list. E-form Source Select the element e-form source from the drop-down list. Product Select the document product from the drop-down list. Source Select the document source type from the drop-down list. Enabled Check this box to enable the document definition. - Perform any of the Basic Actions mentioned in Navigation chapter.
- In the Document Elements section, perform any of the Basic Operations mentioned in Navigation chapter.
A brief description of the fields is given below:
Table 3-49 Document Elements
Field Do this Seq Specify the sequence number to order the document elements. Type Select element type from the following from the drop-down list. This list provides the following options:
System-defined – If you select, the value is supplied by the system and cannot be changed in the Correspondence Request screen.
Constant.
User Defined Element – If you select, you can choose the value and change it in the Correspondence Request screen.
User Defined Constant – If you choose, you can choose the value, but you cannot change it in the Correspondence Request screen.
Translated Element – If a document contains an e-form element and you do not select this option, then the value will not be translated.
Element Name Select the element name from the drop-down list. Description Specify element description.
Notes:
1. Check that the element name does not have blank spaces or special characters, such as the forward slash “/” or backward slash “\”.
2. If the element is system-defined, then the system will automatically complete this field.
Data Type Select the element data type from the drop-down list. Format Mask Select the element format mask from the drop-down list. Default Value Specify the element default value. Enabled Check this box to include the element in the document. - Perform any of the Basic Actions mentioned in Navigation chapter.
- In the Document Template section, you can set the information about the template which is attached to the correspondence documents. The template thus saved is similar to the template functionality available in MS word. Perform any of the Basic Operations mentioned in Navigation chapter.
A brief description of the fields is given below:
Table 3-50 Document Template
Field Do this File Name Specify the file name to define the name for the new template. Product Select the product for which the template is valid, from the dropdown list. Customer State Select the customer state for which the product is valid, from the drop-down list. Producer State Select the Producer state for which the product is valid, from the drop-down list. App/Acc St Select the Applicant/Account state for which the product is valid, from the drop-down list. New Template Check this box to load the template as a new template. Loaded Check this box to indicate that the template is loaded. Enabled Check this box to enable the template. Note:
You can define multiple templates for each document and the template file name (BIP template) is picked based on following criteria – Product and Producer / Account / Customer State. - Perform any of the Basic Actions mentioned in Navigation chapter.
The Document Elements sub screen records the system’s application or account information that appears in the ad hoc correspondence.
- In the Document Definition section of Setup > Setup > Administration > User > Correspondence >Lease > Documents, select the record for which you want to generate a data file.
- Click Gen. Data File button.
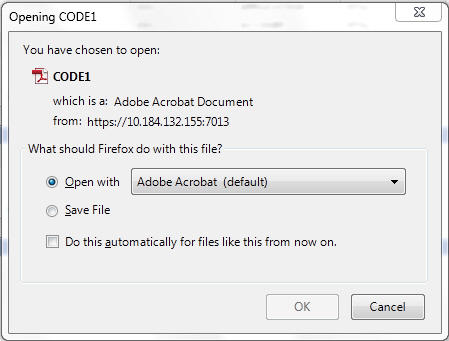
The system displays a new screen with the following options:
- Open with – Select to view the data file in the format you want. The adjacent drop-down list provides a list of formats compatible with the system. The system downloads the file and displays it.
- Save File – Select to save the data file on your system.
- Check the box Do this automatically for files like this from now on to apply selected properties for the files which are similar to the current one.
Parent topic: Correspondence

