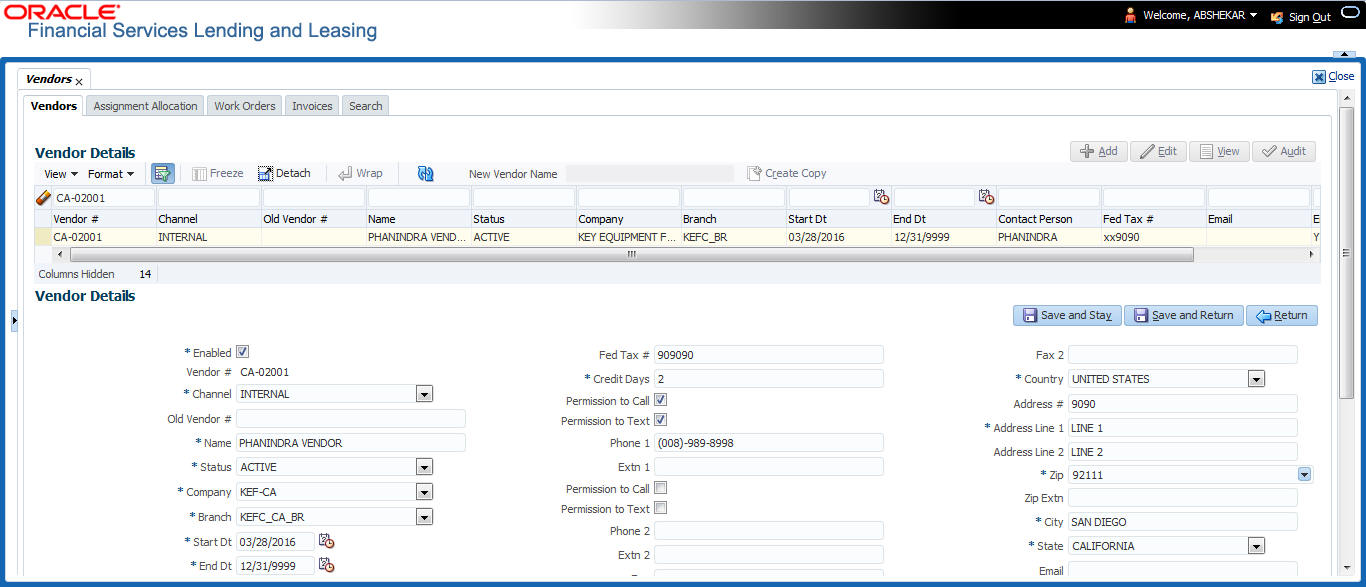
16.1 Vendors tab
- Click Origination > Origination > Vendors > Vendors. The details in the screen are grouped into the following tabs:
- Payment Details
- Vendor Groups
- Tracking Attributes
- Comments
- In the Origination > Origination > Vendors > Vendors > Vendor Details section, you can create or edit vendor details. While creating new, you can also use the copy feature to copy the existing details to new vendor. The copy option in the Vendor Details screen is controlled by the system defined parameter (UVN_VEN_NBR_SYS_GENERATED). Based on the valued defined for the parameter in Setup > Administration > System > System Parameter screen, you can copy the existing vendor details in the following ways:
- If the value of the parameter is set to Y (default), specify a new name in New Vendor Name field and click Create Copy.
- If the value of the parameter is set to N, specify a vendor number in New Vendor # field and click Create Copy.
- Perform any of the Basic Operations mentioned in Navigation chapter.
A brief description of the fields is given below:
Table 16-1 Vendor Details
Field Do this Enabled Check this box to enable the vendor. Vendor # The vendor number is either editable (default) or auto generated depending on the system parameter defined at setup screen.
System auto generates the vendor number when the following system parameter is set to Yes in Setup > Administration > System > System Parameter screen.- Parameter: UVN_VEN_NBR_SYS_GENERATED
- Description: VENDOR NUMBER IS SYSTEM GENERATED
Channel Select the vendor channel from the drop-down list. Old Vendor # Displays the old vendor number if exists. Name Specify the vendor name. Status Select the vendor status from the drop-down list. Company Select the vendor portfolio company from the drop-down list. Branch Select the vendor portfolio branch from the drop-down list. Start Dt Specify the vendor start date. You can select data even from the adjacent Calendar icon. End Dt Specify the vendor end date. You can select data even from the adjacent Calendar icon. Contact Person Specify the vendor contact name. Fed Tax # If available, enter the vendor federal tax identification number. If the organizational parameter UIX_HIDE_RESTRICTED_DATA is set to Y, this appears as a masked number; for example, XXXXX1234. Credit Days Specify the credit days for the vendor invoice. This number is used to check that Invoice Due Date is not more than the credit days from Invoice Date. Permission to Call Check this box if customer has provided permission to contact through the specified phone number. When selected, system auto validates this option against the phone number specified. Permission to Text Check this box if customer has provided permission to contact through text message. Phone 1 Specify primary phone number. Extn 1 Specify the primary phone extension. Permission to Call Check this box if customer has provided permission to contact through the specified phone number. When selected, system auto validates this option against the phone number specified. Permission to Text Check this box if customer has provided permission to contact through text message. Phone 2 Specify alternate phone number. Extn 2 Specify the alternate phone’s extension. Fax Specify the fax number. Fax 2 Specify the fax number 2. Country Select the country code from the drop-down list. Address # Specify the vendor address. Address Line 1 Specify address line 1. Address Line 2 Specify address line 2. Zip Select the zip code from the drop-down list. Zip Extn Specify the extension of the Zip code. City Specify the city. State Select the state from the drop-down list. Email Specify the email address. - Perform any of the Basic Actions mentioned in Navigation chapter.
This section consists of the following topics:
Parent topic: Vendors
