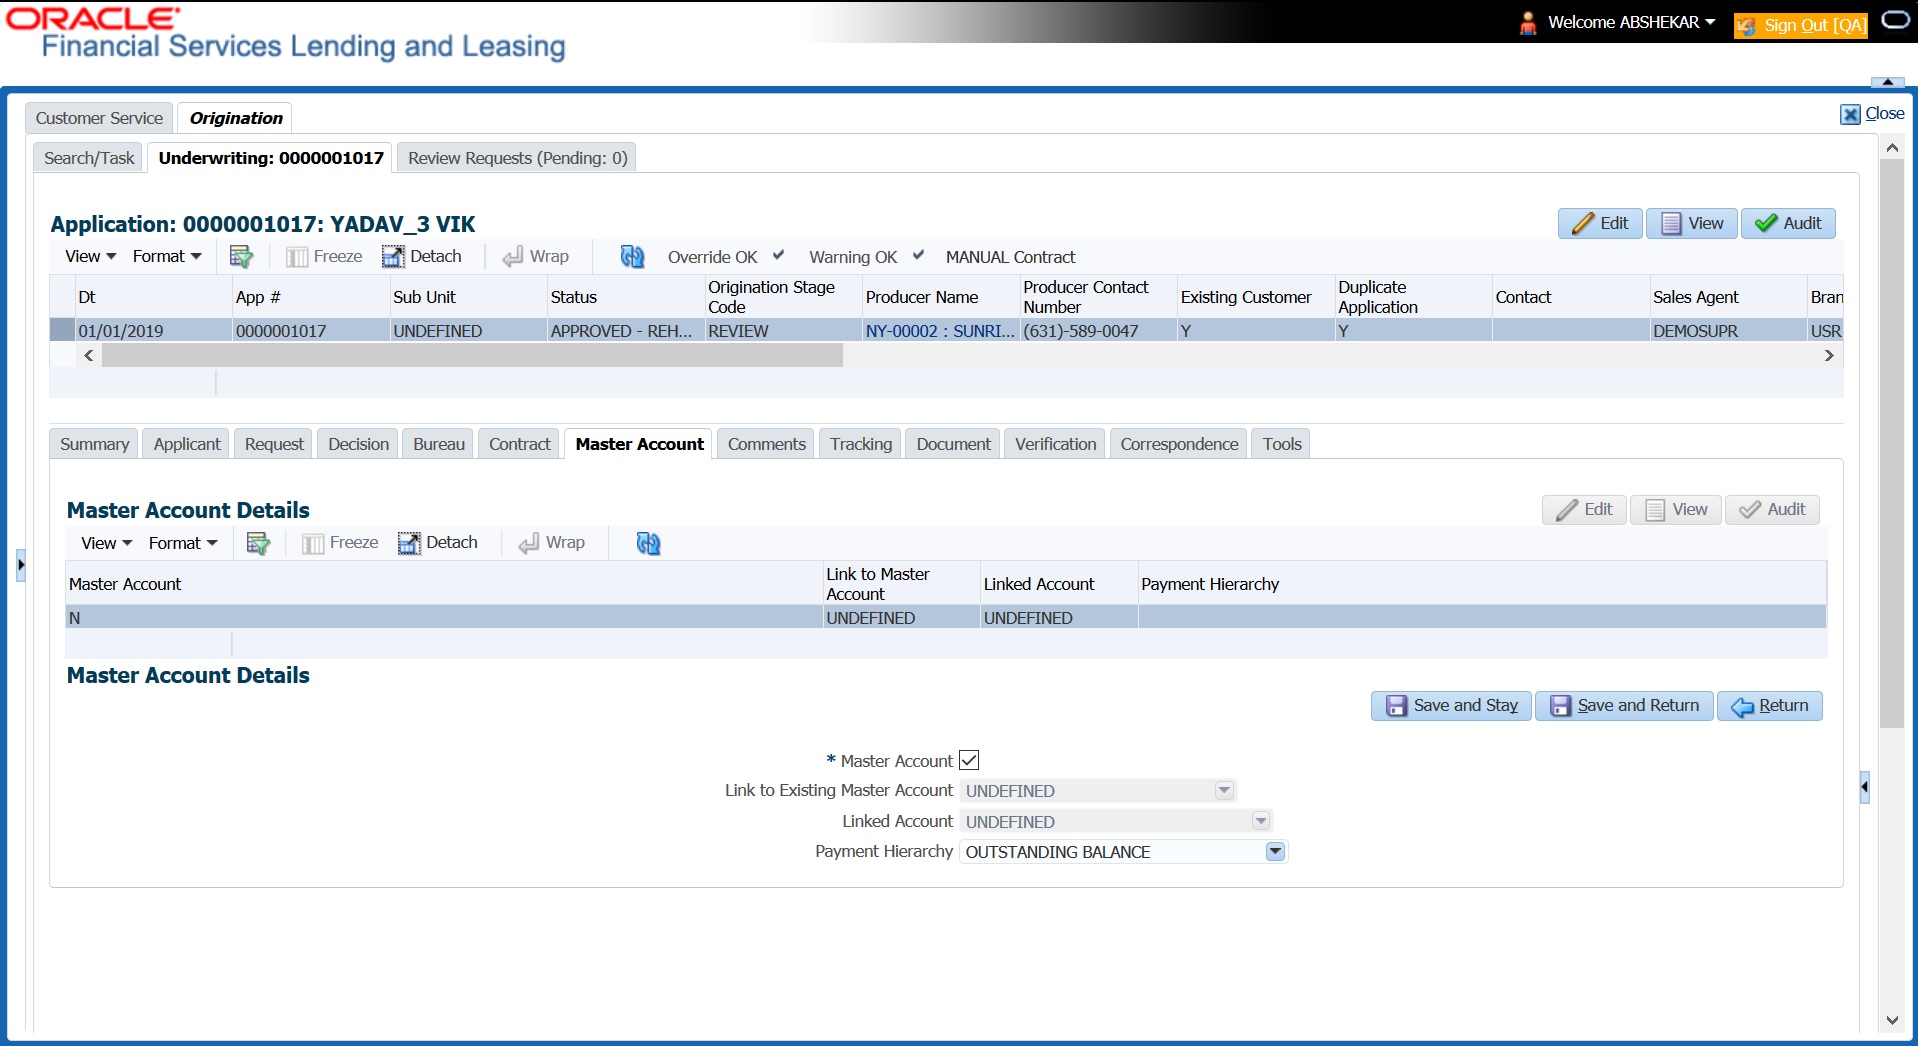
7.10 Master Account tab
The Master Account tab in Origination screen facilitates to categorize the current application to be considered as Master Account or link the current application to another existing master account in the system after funding. If the current application is considered as Master Account, you can also define Payment Hierarchy for payment appropriation during servicing.
Master account here refers an account which has similar type of accounts of the same customer grouped under one head. When there are multiple accounts of the same customer, marking one of them as Master Account and grouping all the associated loan/line/lease accounts under an Individual customer/Business in the system helps to generate consolidated statement, make payments, manage ACH, generate payoff quote, post due date change and extension transitions.
For example, grouping of all loan accounts under one master account of a customer, or grouping of lease accounts funded with same contract terms during the current financial year.
- Open the Underwriting screen and load the underwriting application you want to work with.
- Click Master Account tab.
- In the Master Account Details, click Edit. You can also perform any of the Basic Operations mentioned in Navigation chapter.
- Do one of the following:
- Master Account - Check this box to mark the current Application as Master Account. After funding the application, system populate the Master Account number same as Account number under the customer to be identified as Master Account in Servicing.
If the Account details are received from external system through Onboarding process and the application is already marked as Master Account, then the same Account # is populated in Master Account # field once the application is funded.
- Link to Existing Master Account - If there is already an existing Master Account defined for the customer, select the same from drop-down list to associate the current application to be a part of that account after funding. The list is populated with values in the format: Relationship Type - Title - Master Account #.
- Linked Account - If there is an account to be linked to the current application to have one-to-one mapping, select the same from drop-down list. The accounts are listed in format Customer ID - Title - Account #.
- The list is populated with those Accounts which are associated with Customer (i.e. added as an applicant) and the Link to Existing Customer option is checked.
- However, this list does not include Master Accounts and accounts which are already associated with other Accounts (i.e. already linked to some other account).
On funding the application, both the accounts (newly created and existing) are interlinked and system updates the Linked Account field with Account # respectively.Note:
If account is created using Account Onboarding Service, the LinkedAccountXrefNumber element available under ApplicationData parent element, can be used to indicate Linked Account Xref number to link to Associated Account if both Master and Associated Accounts are in a single payload.System performs the following edits before linking the accounts:- Ensure that the Billing Cycle and Due day of current application is same as the Linked Account Billing Cycle and Due Day. However this is not validated if both accounts are of Same Billing Cycle.
- If the current application is to be linked to a Master Account, ensure that the Product/Funding Type of both current application and Master Account are same and also belongs to same Company.
- The Current and Linked Account belongs to same Company.
- Payment Hierarchy - The field is enabled only on selecting the above Master Account check box. Select the required Hierarchy Definition to be used for payment appropriation from the drop-down list. The list is populated with all the pre-defined and enabled hierarchy definitions maintained Setup > Administration > Users > Payment Hierarchy screen. The Hierarchy Definition selected here is propagated to Customer Service > Account Details > Additional Details section.
- Master Account - Check this box to mark the current Application as Master Account. After funding the application, system populate the Master Account number same as Account number under the customer to be identified as Master Account in Servicing.
- Perform any of the Basic Actions mentioned in Navigation chapter.
Parent topic: Underwriting
