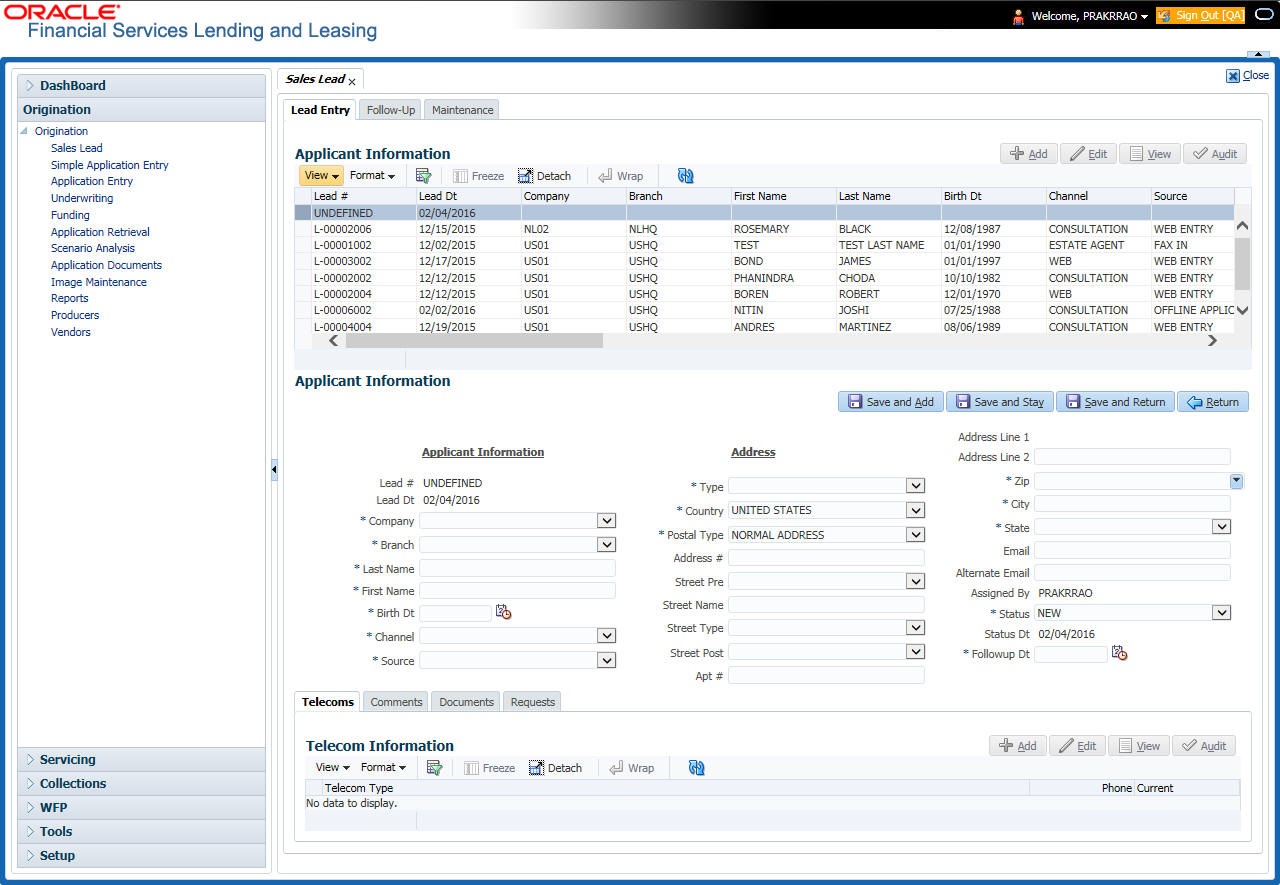
4.2 Lead Entry
The Lead Entry screen enables you to record information regarding prospective borrowers from a sales query or a call to be used in a follow-up call. The initial status for the lead can be set as NEW or FOLLOW-UP.
- On the Oracle financial Services Lending and Leasing Application home screen, click Origination > Origination > Sales Lead.
- On the Sales Lead screen, click Lead Entry tab.
- If you are entering a new applicant, click Add in the Applicant Information section.
-or-
If you want to edit an existing applicant, select it in the Applicant Information section.
If you click Previous, Oracle Financial Services Lending and Leasing displays information for the previous applicant. If you click Next, the system displays information for the next applicant.
- In the Applicant Information section, You can perform any of the Basic Operations mentioned in Navigation chapter.
A brief description of the fields is given below:
Applicant InformationTable 4-1 Applicant Information Section
Field Do this Lead # View the sales lead number. Lead Date View the sales lead date. System defaults the current date. Company Select the company name. Branch Select the branch name. Last Name Specify the applicant’s last name. First Name Specify the applicant’s first name. Birth Dt Specify the birth date. Channel Select the channel of the sales lead. Source Select the source of the sales lead. Address section Type Select the address type. Country Select the country from the drop-down list. Postal Type Select the postal address type from the drop-down list. Address # Specify the address. Street Pre Select the street prefix (directional) from the drop-down list. Street Name Specify the street name. Street Type Select the street type from the drop-down list. Street Post Select the street postfix (directional) from the drop-down list. Apt # Specify the apartment number. Address 1 Specify the first address line. Address 2 Specify the second address line. Zip Select the zip code from the drop-down list.
Note: For non US country, you have to enter zip code.
City Specify the city. State Select the state from the drop-down list. Email Specify the e-mail address. Alternate Email Specify the alternate e-mail address. Assigned By View the user code creating the sale lead. Status Select the status for the sale lead as NEW/FOLLOW UP/CLOSED/CONVERTED from the drop-down list. Status Dt View the last sales lead status change date. Follow-up Dt Select the sales lead follow-up date from the adjoining calendar. - Perform any of the Basic Actions mentioned in Navigation chapter.
This section consists of the following topics:
