- Extensibility Guide
- Create Custom Correspondence
- Creating Correspondence
8.1 Creating Correspondence
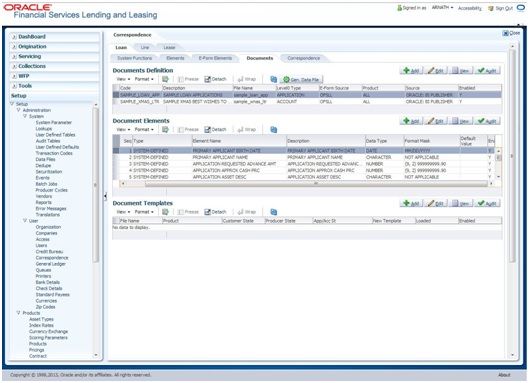
- On the Oracle Financial Services Lending and Leasing home page, click Setup > Setup > Administration > User > Correspondence > Loan/Line/Lease > Documents
- In the Document definition block, add a record. For example: SAMPLE_LOAN_APP A
brief description is given below:
Table 8-1 Document definition block
Field Do this Code Specify the document code to define the name for the new document. Description Specify the document description for the new document. This entry appears in the Correspondence section on the Request page, when you generate an ad hoc correspondence. File Name Specify the document file name for the resulting file (Word or XFDF document). Level0 Type Select the level0 type from the drop-down list. E-form Source Select the element e-form source from the drop-down list. Product Select the document product from the drop-down list. Source Select the document source type from the drop-down list. Enabled Check this box to enable the document definition. - In the Document Elements section, add the elements required in the
correspondence.
Brief description of the fields are given below:
Table 8-2 Description of the fields
Field Do this Seq Specify the sequence number to order the document elements. Type Select element type from the following from the drop-down list. This list provides the following options:
System-defined – If you select, the value is supplied by the system and cannot be changed in the Correspondence Request page.
Constant.
User Defined Element – If you select, you can choose the value and change it in the Correspondence Request screen.
User Defined Constant – If you choose, you can choose the value, but you cannot change it in the Correspondence Request screen.
Translated Element – If a document contains an e-form element and you do not select this option, then the value will not be translated.
Element Name Select the element name from the drop-down list. Description Specify element description.
Notes:
1. Check that the element name does not have blank spaces or special characters, such as the forward slash “/” or backward slash “\”.
2. If the element is system-defined, then the system will automatically complete this field.
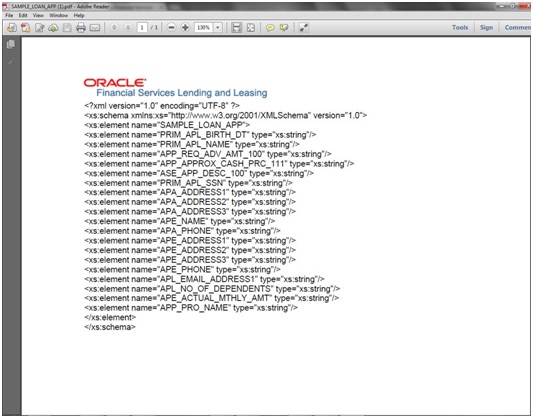
Data Type Select the element data type from the drop-down list. Format Mask Select the element format mask from the drop-down list. Default Value Specify the element default value. Enabled Check this box to include the element in the document. - Click on Gen.Data File to generate PDF file of the
report.
- Copy and save the content in the pdf file as an xml file. The saved xml file should have the same name as entered in the Code column of Document Definition section. For Example: SAMPLE_LOAN_APP.xml.
- Open MS Word.
Note:
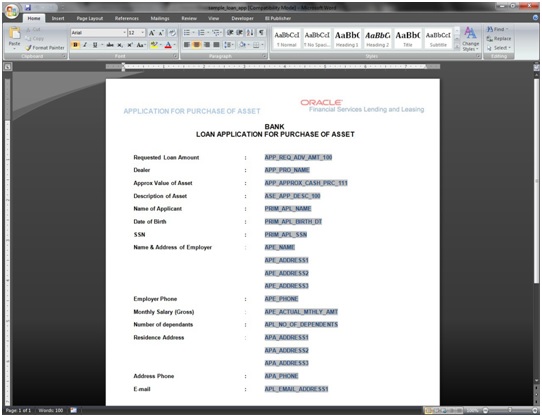
Oracle Financial Services Software assumes that BIP Desktop Tool is installed and the user is familiar with the BIP Report Tool. - In BI Publisher Tab in MS Word, click on Sample XML and import the saved xml file. For Example: SAMPLE_LOAN_APP.xml.
- Create the template by inserting required elements tag.
- The template created in MS Word should be saved with
.rtfextension. For Example: SAMPLE_LOAN_APP.rtfNote:
The.xmland.rtffile should be saved with the same name as entered in the Code column of Document Definition section. - Upload the rtf template in the BIP and create the data model with SQL query as
select CDO_XML_DOCUMENT from correspondence_docs where cdo_id =
                        :docId
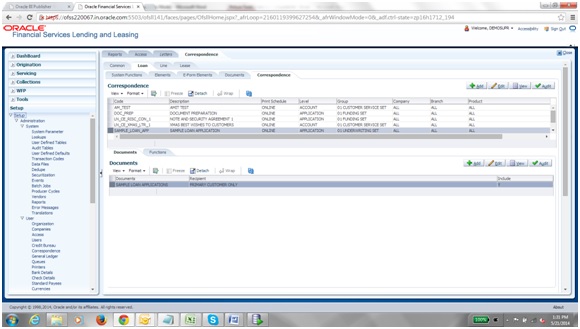
. - After the data model creation, launch the correspondence screen and click Correspondence tab.
- You can setup a correspondence with the created doc.
Parent topic: Create Custom Correspondence


