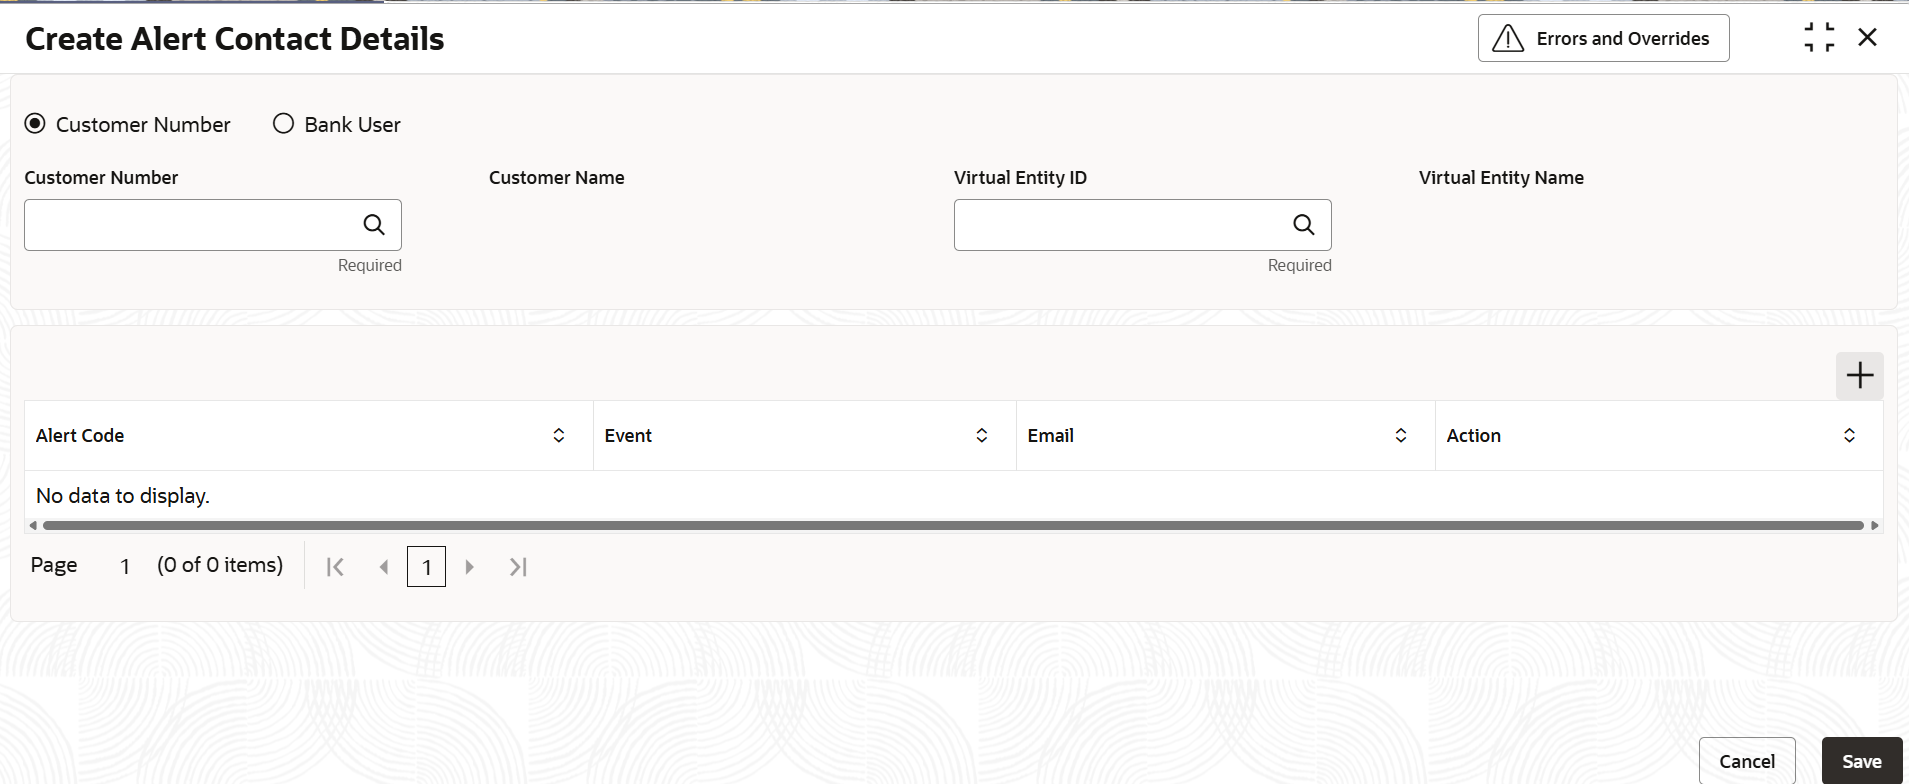
2.5.1 Create Alert Contact Details
This topic describes the systematic instruction to create contact details for sending alerts to a specific corporate.
- On Home screen, click Virtual Account
Management. Under Virtual Account
Management, click Alerts. Under
Alerts, click Alert Contact
Details. Under Alert Contact Details,
click Create Alert Contact DetailsThe Create Alert Contact Details screen displays.
- Specify the fields on Create Alert Contact Details screen.For more information on fields, refer to the field description table.
Note:
The fields marked as Required are mandatory.Table 2-5 Create Alert Contact Details - Field Description
Field Description Customer Number Select the customer number to update their contact number and email address. Note: This field will displays only if Customer Number is selected.
Customer Name Select customer Name for maintenance of contact number or email ID for customers. Note: This field will displays only if Customer Number is selected.
Virtual Entity ID Select the Virtual Entity to manage the contact number and email ID at the Entity Level for Alert Codes. The Entity IDs will be shown based on the Customer Selection. Note: This field will displays only if Customer Number is selected.
Virtual Entity Name Displays the Virtual Entity Name for managing contact numbers or email IDs at the Entity Level for Alert Codes. The Entity Name will appear based on the selected Entity ID. Note: This field will displays only if Customer Number is selected.
Bank User Select Bank User for maintenance of contact number or email ID for bank users. Alert Code Select the alert code for updating the contact details that require configuration. Users can set up several contact details for the same alert code. Event Select the Event for alerts. Email Select the Email to Configure the email ids to send the email alerts. Action Specify the actions needed for Alerts Configuring. - Click Add icon to add a row for a contact.
- Double-click the Alert Code column. Next, click the search icon and choose the alert code you need to link the contact details to.
- In the Event column, specify the Event.
- In the Email column, specify the contact person’s email ID.
- Click Add icon to add contact details for other alert codes and repeat the above steps.
- Click Edit icon under the Action column to edit the contact details entered.
- Click Delete icon under the Action column to delete a row.
- Click Save to save the record and send it for authorization.
Parent topic: Alert Contact Details
