- Guarantee Issuance User Guide
- Guarantee Issuance
- Data Enrichment
- Additional Details
2.7.6 Additional Details
This topic provides the systematic instructions to capture the additional details.
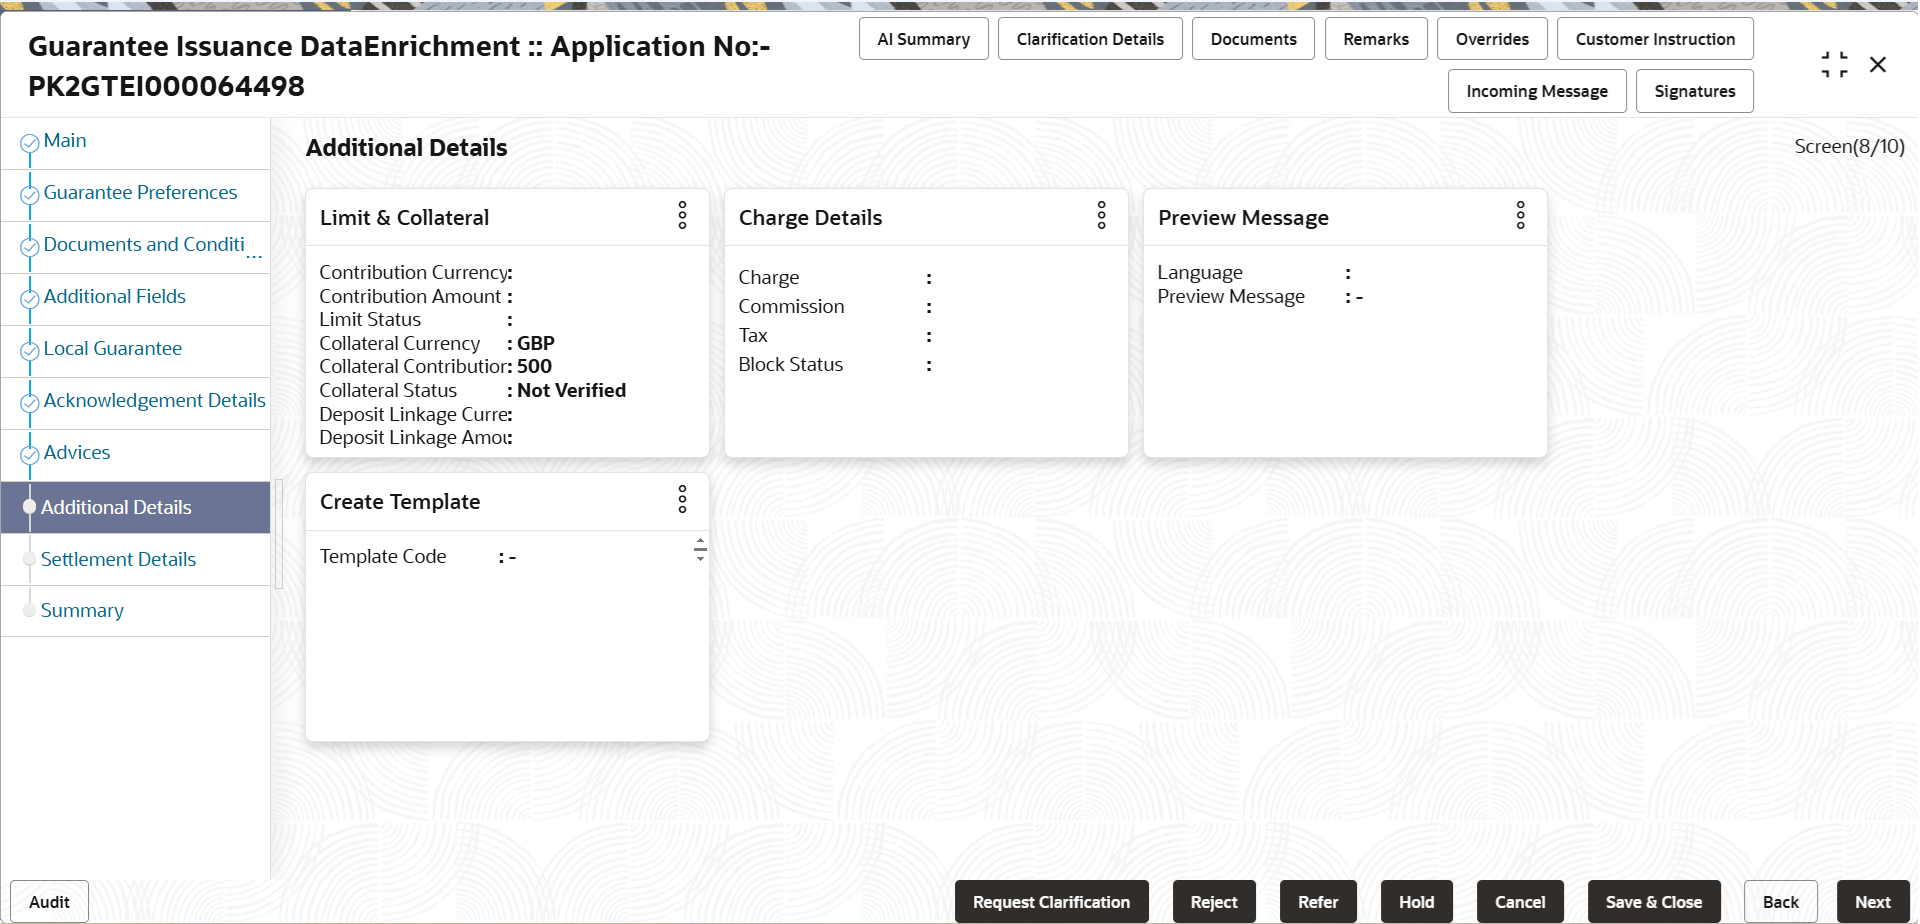
- On Additional Details screen, click
 on any Additional Details tile to view the details.
Figure 2-24 Additional Details

Description of the illustration deadditionaldetails.png - Click Save and Close to save the details and close the
screen.
Limits and Collaterals
For more information, refer to the field description table of Additional Details in Scrutiny stage.
- Click Save and Close to save the details and close the
screen.
Charge Details
For more information, refer to the field description table of Additional Details in Scrutiny stage.
- Click Save and Close to save the details and close the
screen.Preview Mesage
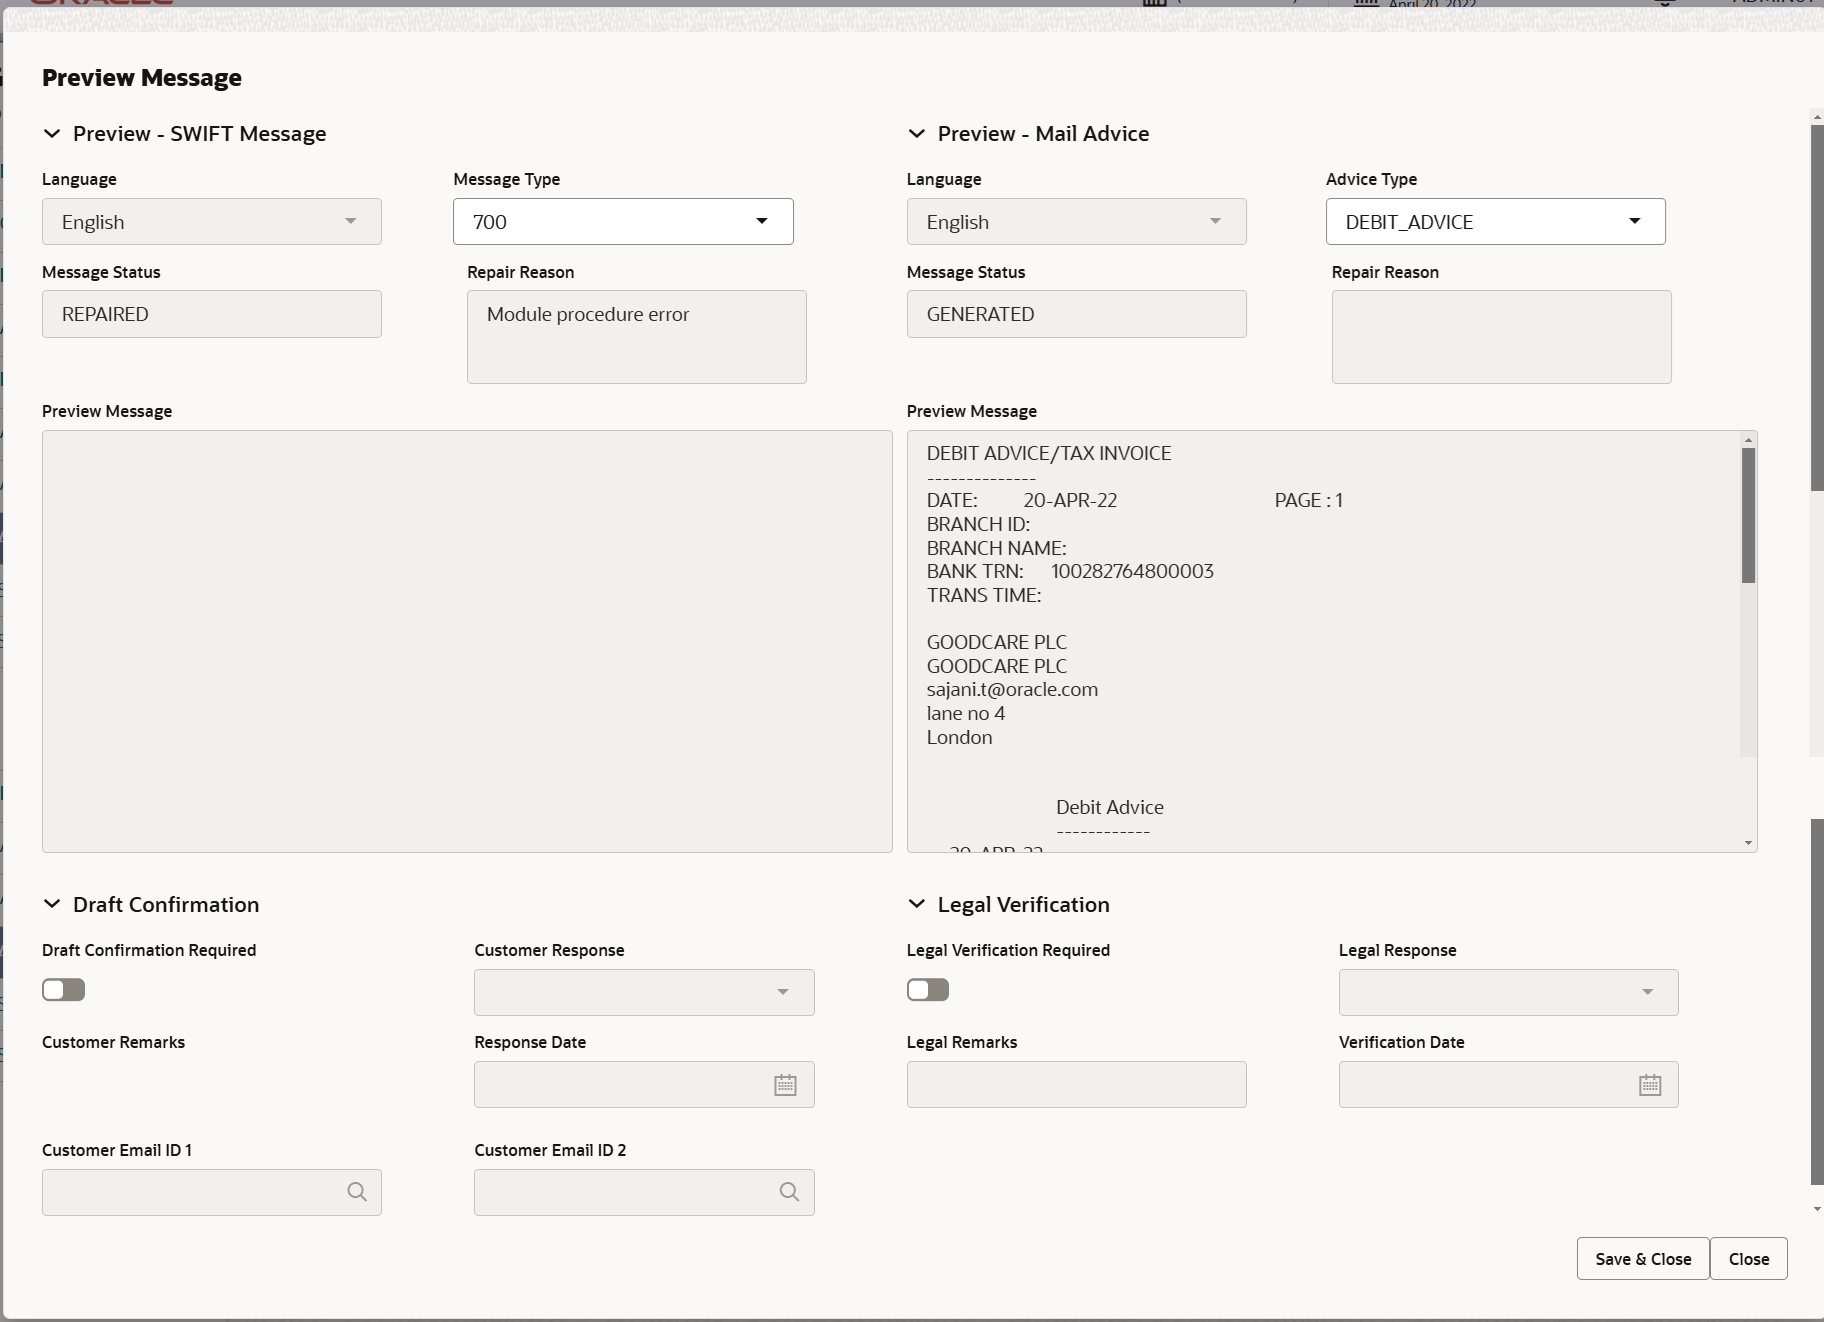
This screen provides preview of draft guarantee details. If required, the draft can be sent for legal verification to legal team and draft confirmation to customer.
The system sends Draft MT760 along with up to seven MT761 messages as attachment to the customer.
The Transaction Reference Number is masked, before sending the Draft Import LC for Customer approval.
If the Guarantee Issuance is at Counter Issuing Bank (CIB)/ Local Issuing Bank (LIB), preview message is populated with the outgoing MT760 and all the applicable MT761.

Description of the illustration depreviewmessage.pngFor more information on fields, refer to the field description table below.
Table 2-22 Preview Message - Field Description
Field Description Preview SWIFT Message This section displays the Preview SWIFT Message details. Language Read only field. The language to preview the draft guarantee details.
English is set as default language for the preview.
Message Type Select the message type from the drop down. User can choose to see preview of different message like MT 700, MT 740 and MT 701.
Message Status Read only field. Display the message status of draft message of guarantee details.
Repair Reason Read only field. Display the message status of draft message of guarantee details.
Preview Message This field displays a preview of the draft message. Based on the guarantee text captured in the previous screen, guarantee draft is generated in the back office and is displayed in this screen.
Preview - Mail Device This section displays the Preview - Mail Device details. Language Read only field. The language for the advice message.
English is set as default language for the preview.
Advice Type Select the advice type. Message Status Read only field. Display the message status of draft message of guarantee details.
Repair Reason Read only field. Display the message status of draft message of guarantee details.
Preview Message This field displays a preview of advice. Draft Confirmation Required This section displays the Draft Confirmation Required details. Draft Confirmation Required Enable the Draft Confirmation Required toggle, if the guarantee message needs to be approved by customer before issue. Note:
A bank user can share the Draft SWIFT message to the customer through email, before the actual transmission of SWIFT message to the Advising Bank.Customer Response Specify the response received from customer. If the response is received online, the response is auto populated in this field by the system
Customer Remarks Read only field. Displays the remarks from the customer for the draft.
Response Date Read only field. Displays the customer response received date.
Customer Email ID 1 This field efaults the email address of the customer. System fetches the Email ID from Customer Address maintenance in Back office and auto populates the available Email ID.
This field is enabled if Draft Confirmation Required toggle is enabled.
Customer Email ID 2 Click Search and select the Email ID from lookup from the Customer Email Address field of the customer maintenance in Back Office and replicated in OBTFPM. By default this field is blank.
This field is enabled if Draft Confirmation Required toggle is enabled.
Legal Verification Specify the Legal Verification details. Legal Verification Required Enable the Legal Verification toggle, if the guarantee message is to be verified and approved by Legal department before issue. The Legal Verification details must be captured in legal verification stage.
Legal Response Read only field. Displays the legal response received from customer.
Legal Remarks Read only field. Displays the legal remarks from the customer for the draft.
Verification Date Read only field. Displays the customer legal response received date.
- Click Save and Close to save the details and close the
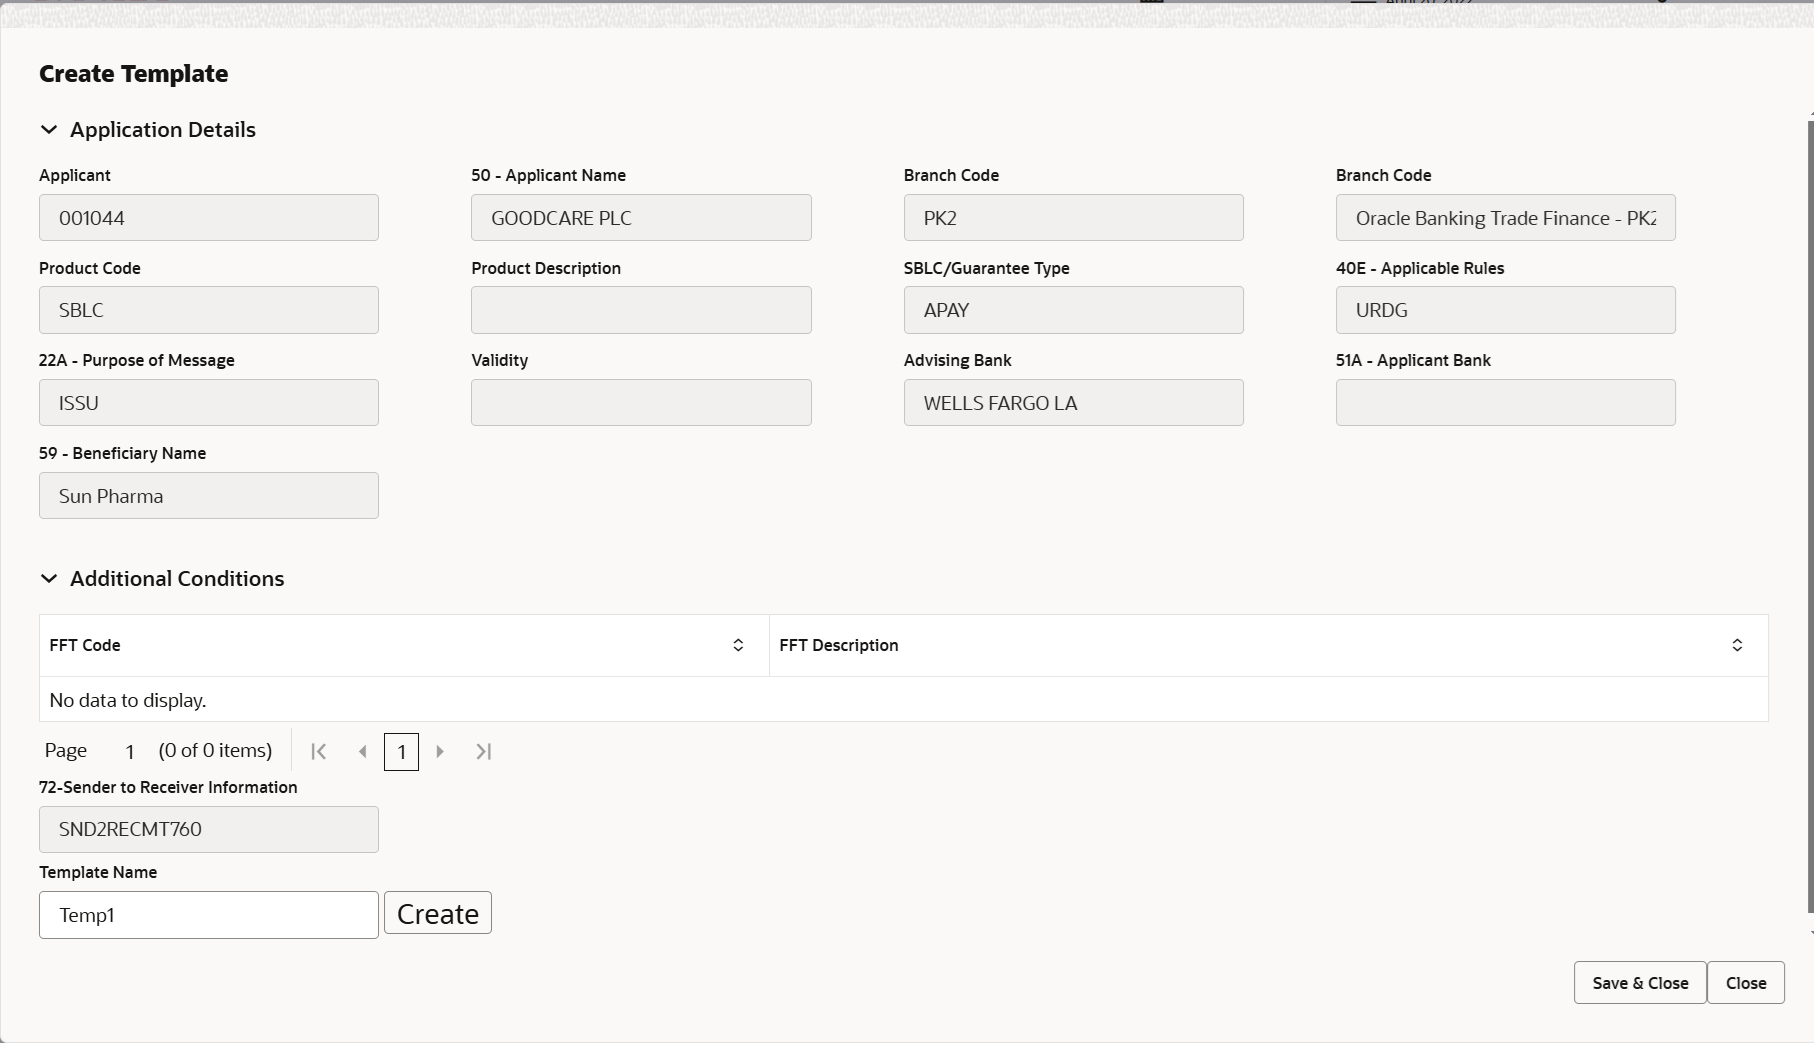
screen.Create TemplateThis option allows user to create a new template with the already captured details and the data can be reused with the template to reduce the effort. The user can enter the template name and create the template, details pertaining to the subsequent screens in scrutiny and data enrichment screens will be persisted and populated.
For more information on fields, refer to the field description table in Scrutiny stage.
- Click Save and Close to save the details and close the screen.
- Next.The task will move to next data segment.
Table 2-23 Additional Details - Action Buttons - Field Description
Field Description Documents Click to View/Upload the required document. Application displays the mandatory and optional documents.
The user can view and input/view application details simultaneously.
When a user clicks on the uploaded document, Document window get opened and on clicking the view icon of the uploaded document, Application screen should get split into two. The one side of the document allows to view and on the other side allows to input/view the details in the applicationRemarks Specify any additional information regarding the Guarantee. This information can be viewed by other users processing the request. Content from Remarks field should be handed off to Remarks field in Backend application.
Overrides Click to view the overrides accepted by the user. Customer Instructions Click to view/ input the following - Standard Instructions – In this section, the system will populate the details of Standard Instructions maintained for the customer. User will not be able to edit this.
- Transaction Level Instructions – In this section, OBTFPM user can input any Customer Instructions received as part of transaction processing. This section will be enabled only for customer initiated transactions.
Common Group Message Click Common Group Message button, to send MT799 and MT999 messages from within the task. Incoming Messages This button displays the multiple messages (MT760 + up to 7 MT761. Click to allow parsing of MT 760 along with MT761(up to 7) messages together to create a Guarantee Issuance.
In case of MT798, the User can click and view the MT798 message(784,760/761).
In case of MT798-MT726-MT759 request, user can view MT798 message(726-759) in this placeholder in Header of the task.
In case of MT798_MT788-MT799 request, user can view MT798 message (788-799) in this placeholder in Header of the process-task.
Signature Click the Signature button to verify the signature of the customer/ bank if required. The user can view the Customer Number and Name of the signatory, Signature image and the applicable operation instructions if any available in the back-office system.
If more than one signature is available, system should display all the signatures.
Save & Close Save the details provided and holds the task in ‘My Task’ queue for further update. This option will not submit the request. Cancel Cancel the Scrutiny stage inputs. The details updated in this stage are not saved. The task will be available in 'My Task' queue. Hold The details provided will be saved and status will be on hold. User must update the remarks on the reason for holding the task. This option is used, if there are any pending information yet to be received from applicant.
Reject On click of Reject, user must select a Reject Reason from a list displayed by the system. Reject Codes are:
- R1- Documents missing
- R2- Signature Missing
- R3- Input Error
- R4- Insufficient Balance/Limits
- R5 - Others
Select a Reject code and give a Reject Description.
This reject reason will be available in the remarks window throughout the process.
Refer Select a Refer Reason from the values displayed by the system. Refer Codes are:
- R1- Documents missing
- R2- Signature Missing
- R3- Input Error
- R4- Insufficient Balance/Limits
- R5 - Others
Next On click of Next, system validates if all the mandatory fields have been captured. Necessary error and override messages to be displayed. On successful validation, system moves the task to the next data segment.
Parent topic: Data Enrichment
