- Export LC Amendment User Guide
- Export LC Amendment
- Reject Approval
2.7 Reject Approval
This topic helps you quickly get acquainted with the Reject Approval process.
As a Reject approver, user can review a transaction rejected and
waiting for reject confirmation.
- Log in into OBTFPM application and on Home screen, click, Task.
- Under Task, click Free Task.
- Select the appropriate task and click Acquire & Edit to edit the task or click Acquire to edit the task from My Tasks.
- The acquired task will be available in My Tasks tab.
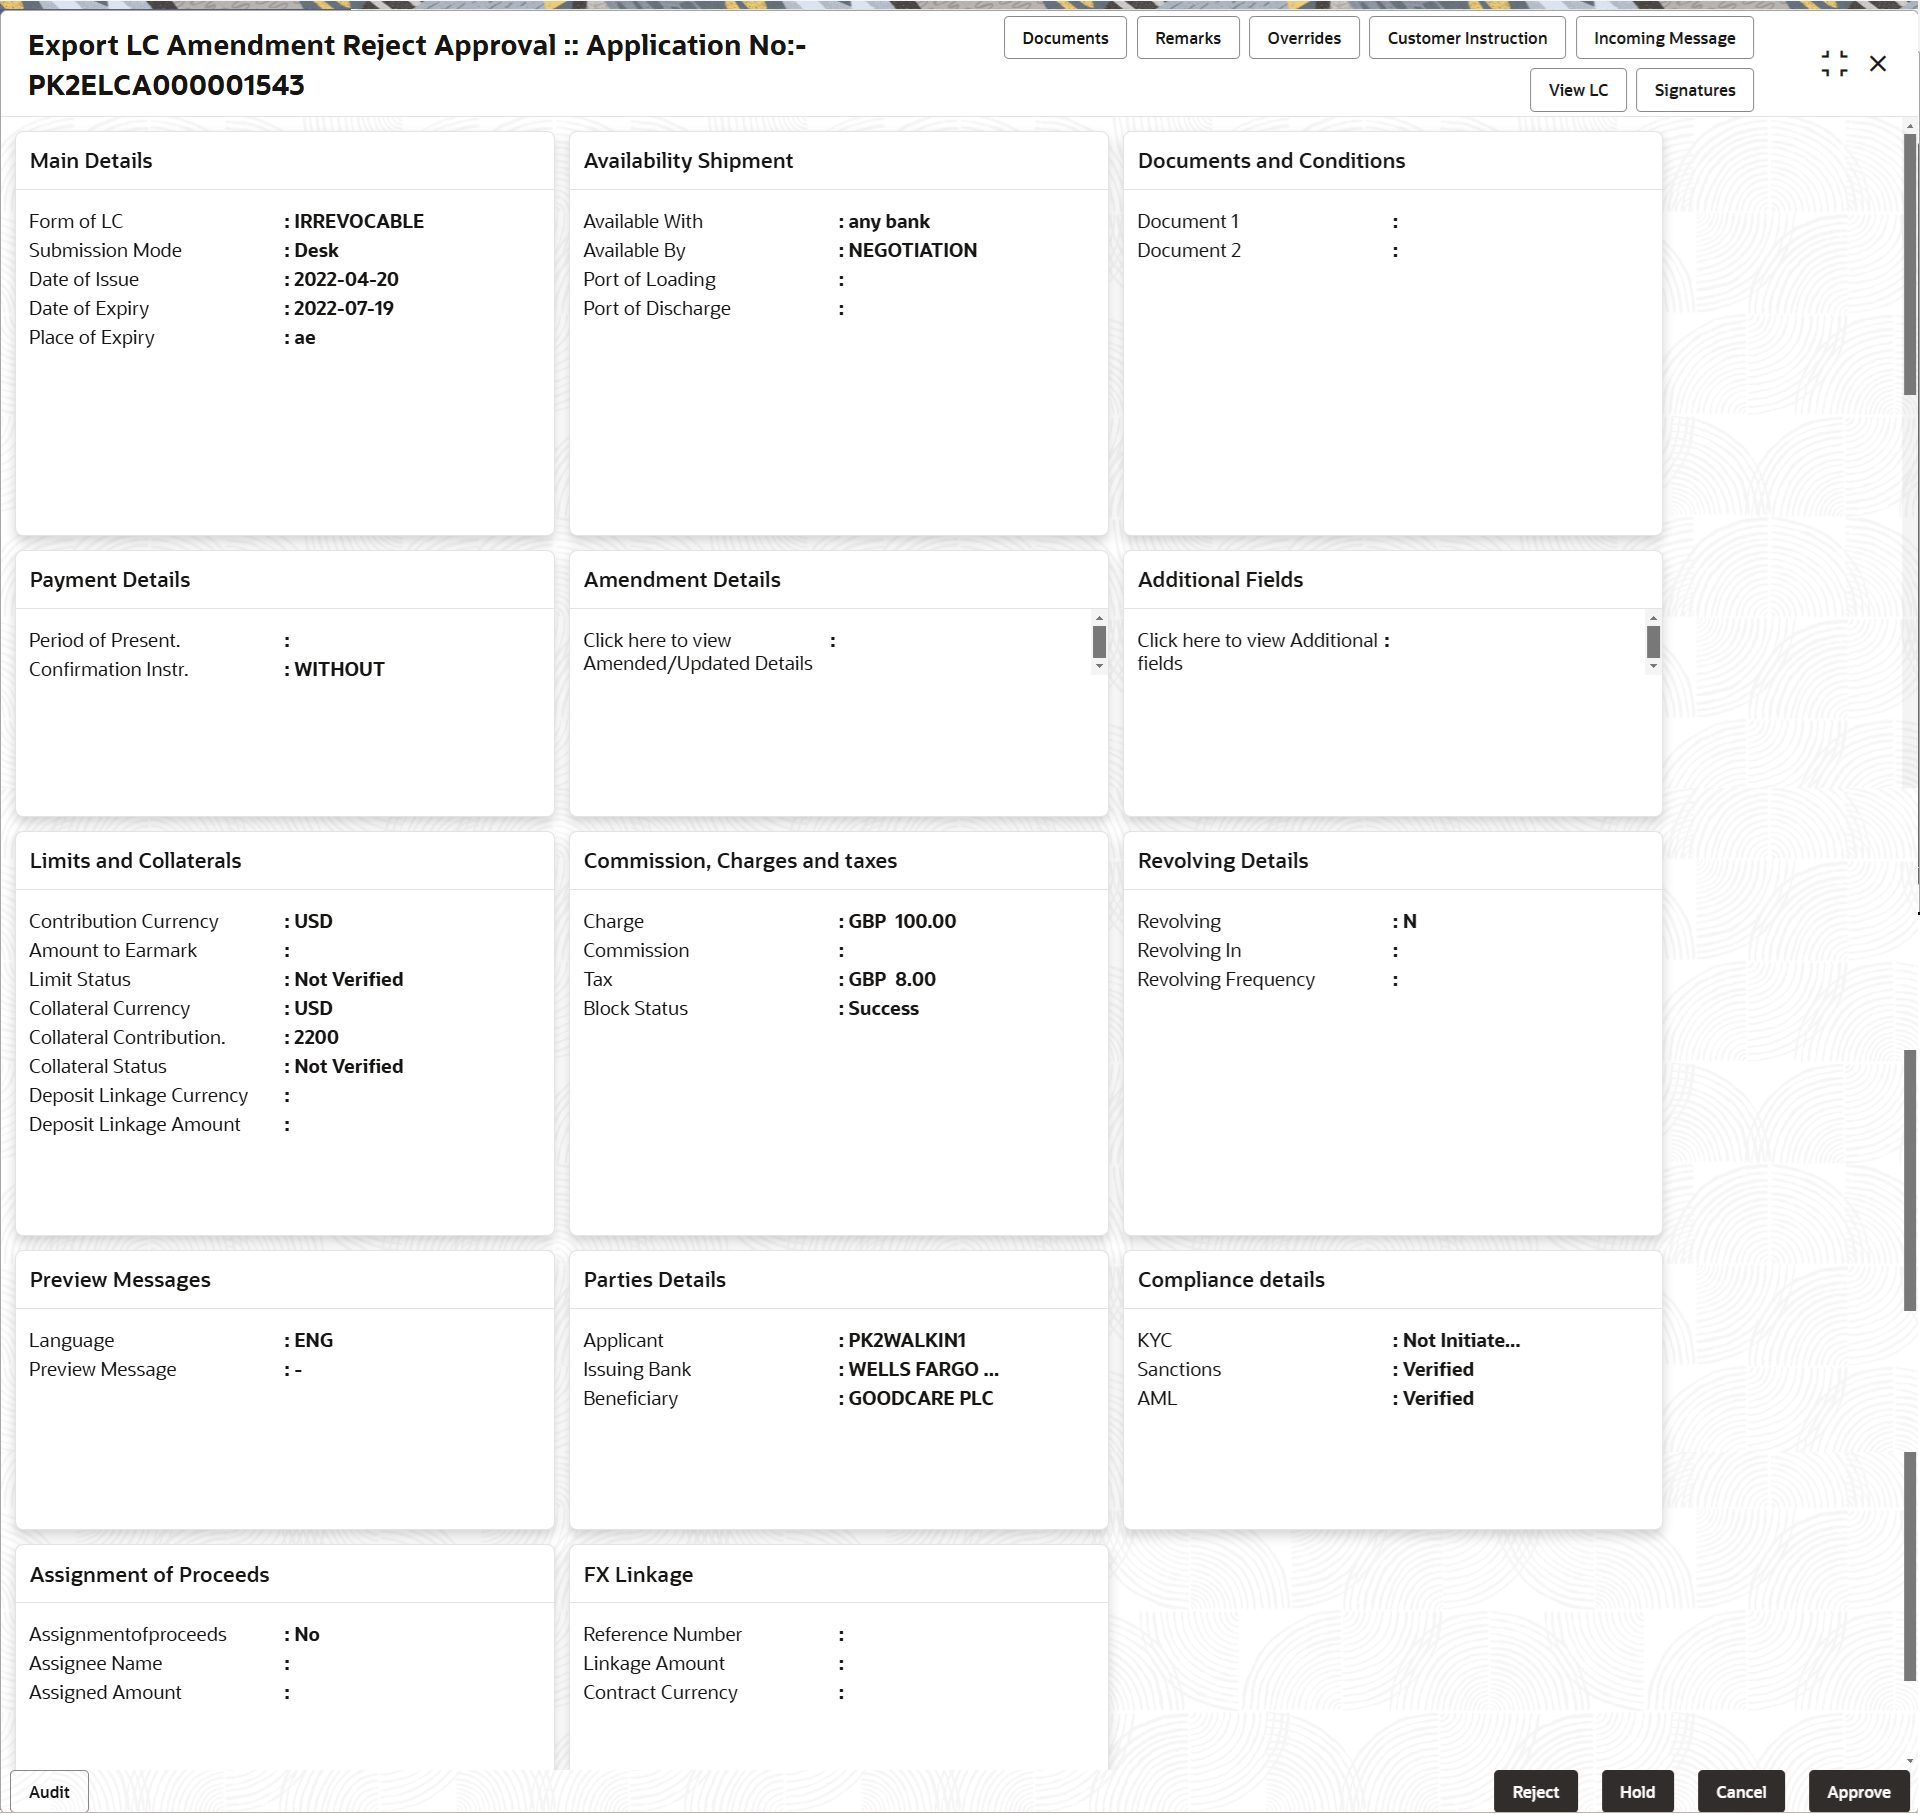
Click Edit.The Summary screen appears. The user can view the Summary tiles which displays list of important fields with values.
- Click each tile to drill down from reject summary tiles into respective data
segments to verify the details of all fields under the data segment.
The data captured during handling of the transaction until the stage when reject is given will be available in the summary tile. Other fields will be blank when verified from summary tile.
The data segment in which the task was rejected will have the tiles highlighted in a different colour (red).- Main Details - User can view and modify the application details and LC details, if required.
- Availability Shipment - User can view and modify availability and shipment details, if required.
- Documents and Conditions - User can view and modify the documents details grid and the additional conditions grid, if required.
- Payment Details - User can view and modify all details related to payments, if required.
- Amendment Details - User can view the amendment details of the issued LC.
- Additional Fields - User can view the details of additional fields of the issued LC.
- Limits and Collaterals - User can view and modify limits and collateral details, if required.
- Commission, Charges and taxes - User can view and modify Commission, charges and taxes details, if required.
- Revolving Details - User can view and modify revolving details on revolving LC, if applicable.
- Preview Messages - User can view and modify preview details, if required.
- Parties Details - User can view and modify party details like beneficiary, advising bank etc., if required.
- Compliance Details - User can view compliance details. The status must be verified for KYC and to be initiated for AML and Sanction Checks.
- Assignment of Proceeds - User can view the details of assignment of proceeds.
- FX Linkage - User can view athe FX linkage details.
For more information on Action Buttons, refer to the field description table below.
Table 2-36 Summary - Action Buttons - Field Description
Field Description Reject Approve On click of Reject Approve, the transaction is rejected. Reject Decline On click of Reject Decline, the task moves back to the stage where it was rejected. User can update the reason for reject decline in remarks. Hold User can put the transaction on ‘Hold’. Task will remain in Pending state. Cancel Cancel the Reject Approval.
Parent topic: Export LC Amendment
