7.2.2 JMS Server Creation
Follow the steps given below:
- Start the Administrative Console of Weblogic application server. You can start
this by entering Oracle Weblogic Admin Console URL in the address bar in an
internet browser.
http://10.10.10.10:1001/console Eg: http://10.10.10.10:1001/console
Following screen is displayed:
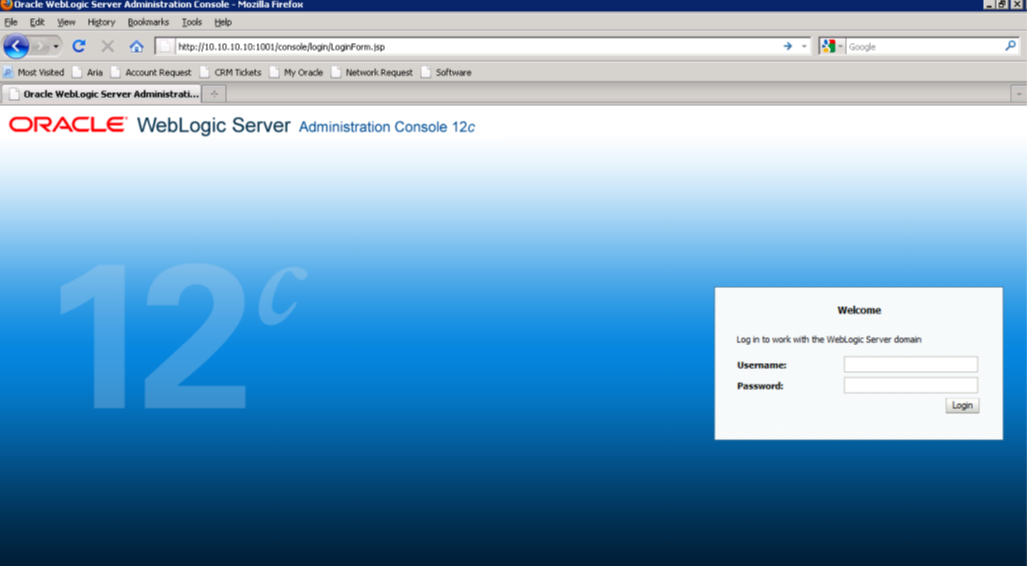
Description of the illustration picture31.png - Specify the Weblogic administrator user name and password. Click ‘Log In’.
- Navigate to Oracle Weblogic home page.
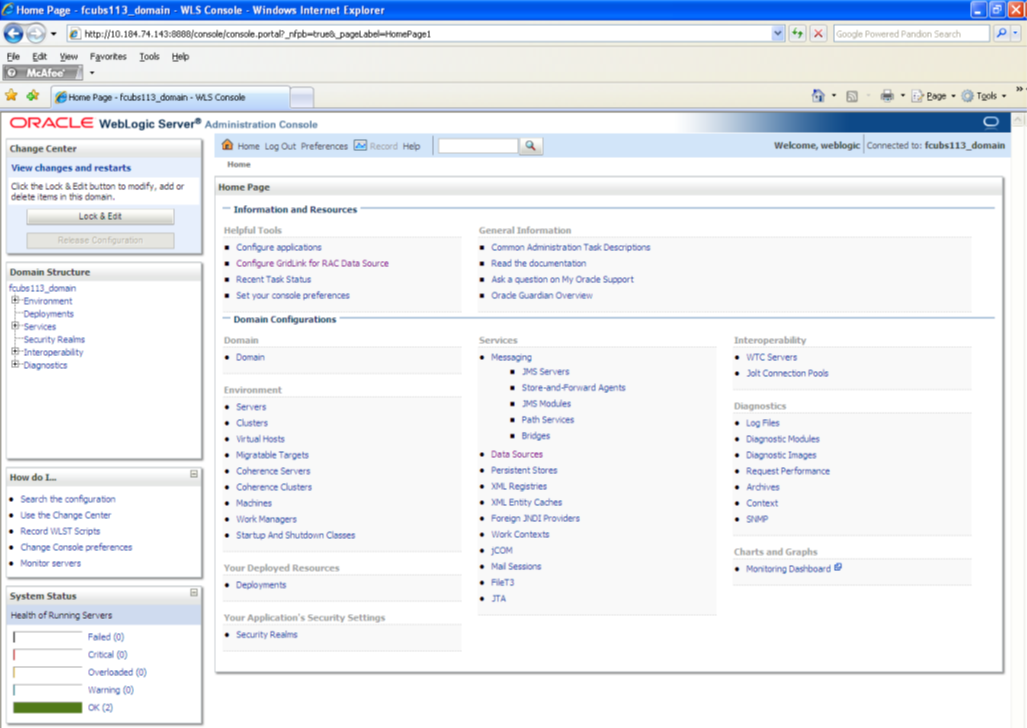
Description of the illustration picture32.png - Following screen is displayed:
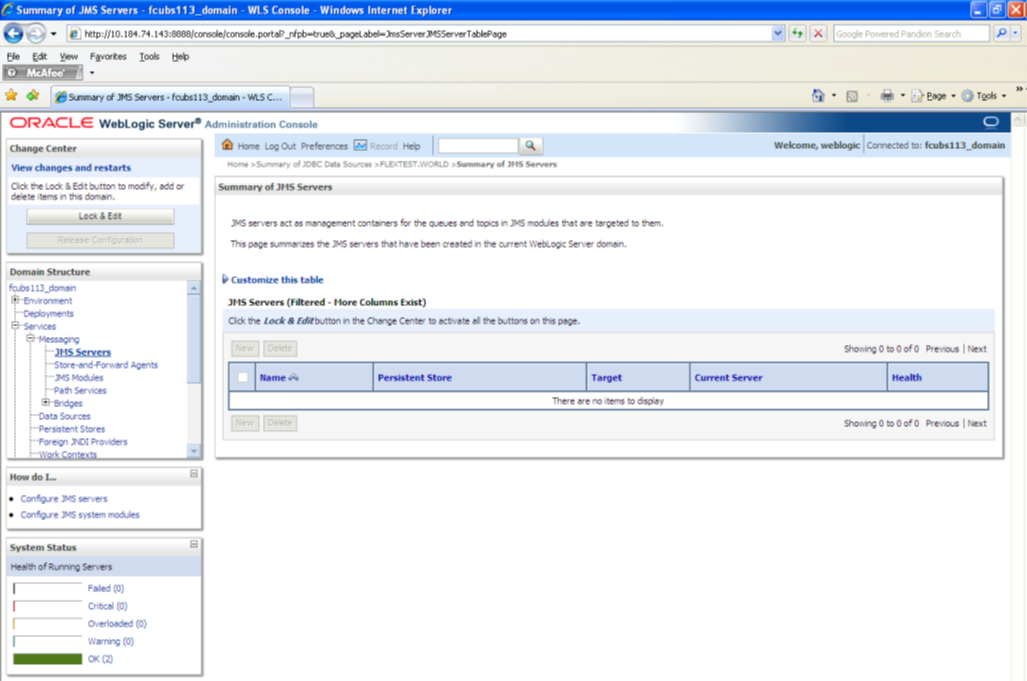
Description of the illustration picture33.png - Expand ‘Services’ and then ‘Messaging’ and ‘JMS Server ‘under it.
Click ‘Lock & Edit’ button.
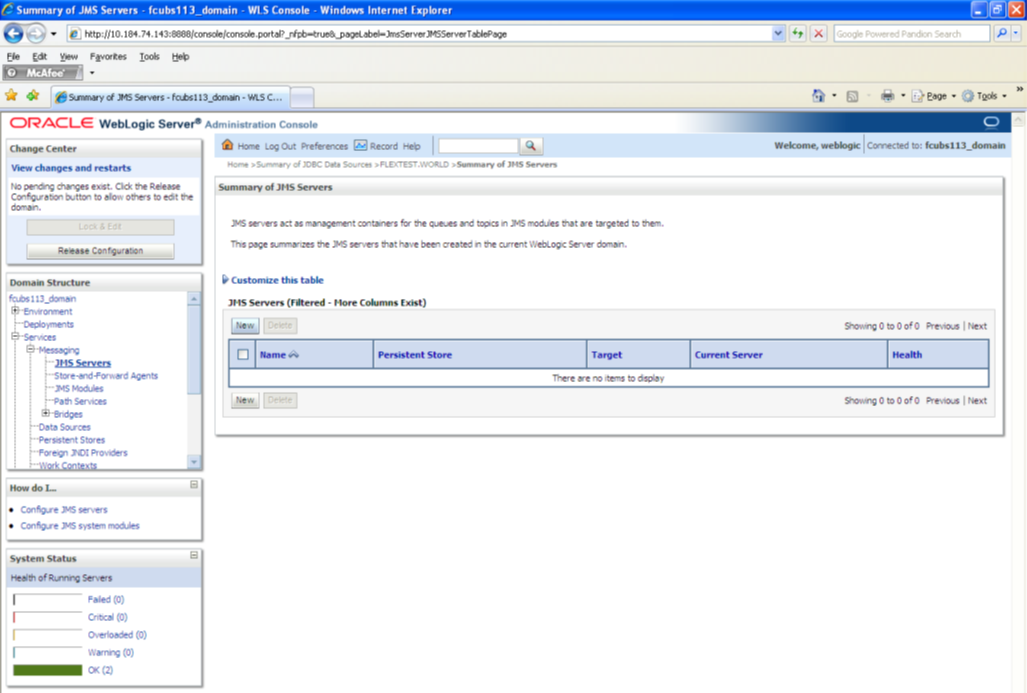
Description of the illustration picture34.png - Click ‘New’.
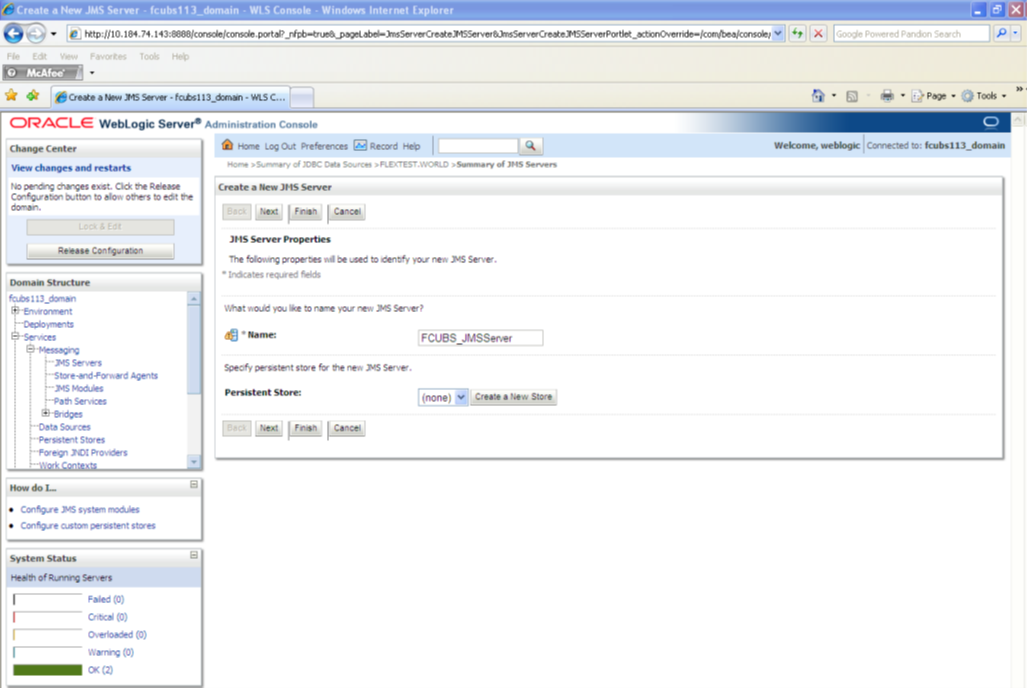
Description of the illustration picture35.png - Specify the following details:
JMS Server Name Specify the name of JMS Server. - Click ‘Create a new Store’ button. The following screen is displayed.
- Select ‘File Store’ as the type and click ‘Next’.
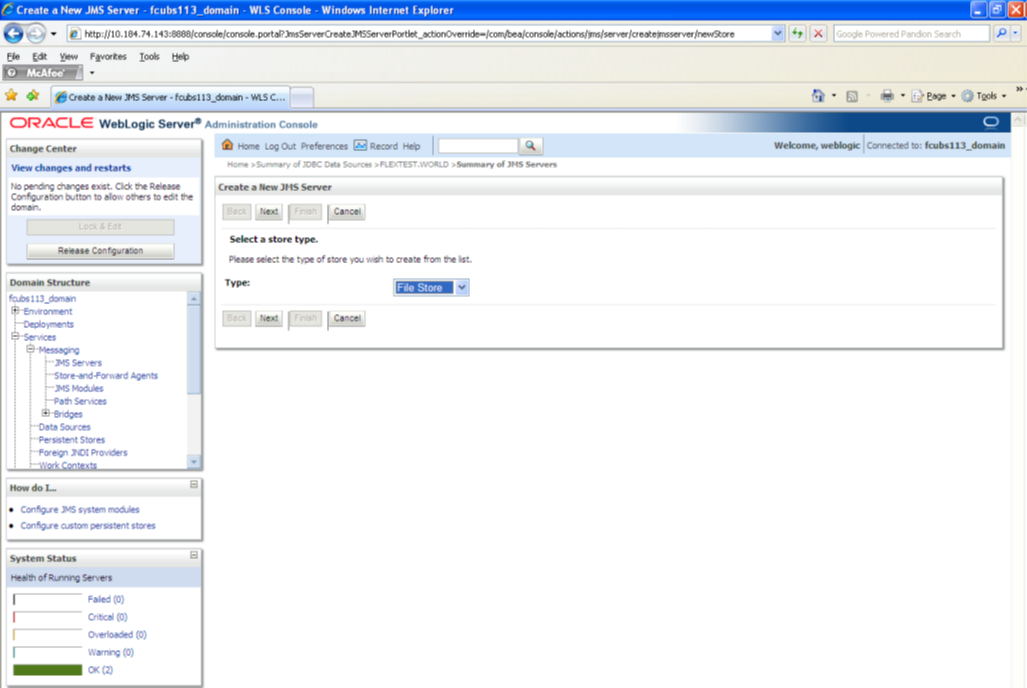
Description of the illustration picture36.pngFollowing screen is displayed:
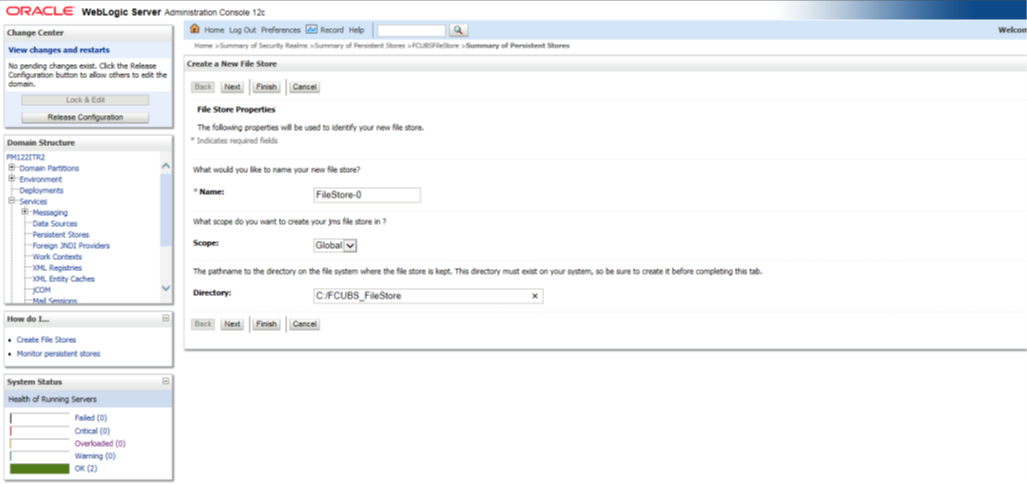
Description of the illustration picture37.png - To identify the new File Store, specify the following properties:
- Specify the file store name as FCUBS_FileStore.
- Select a server. For this file store, you may select ManagedServer1 (created by the user).
- Specify the Filestore Directory path as C:/FCUBS_FileStore.
- Click ‘OK’
The following screen is displayed with message ‘File store created successfully’.
- Click ‘Next’.
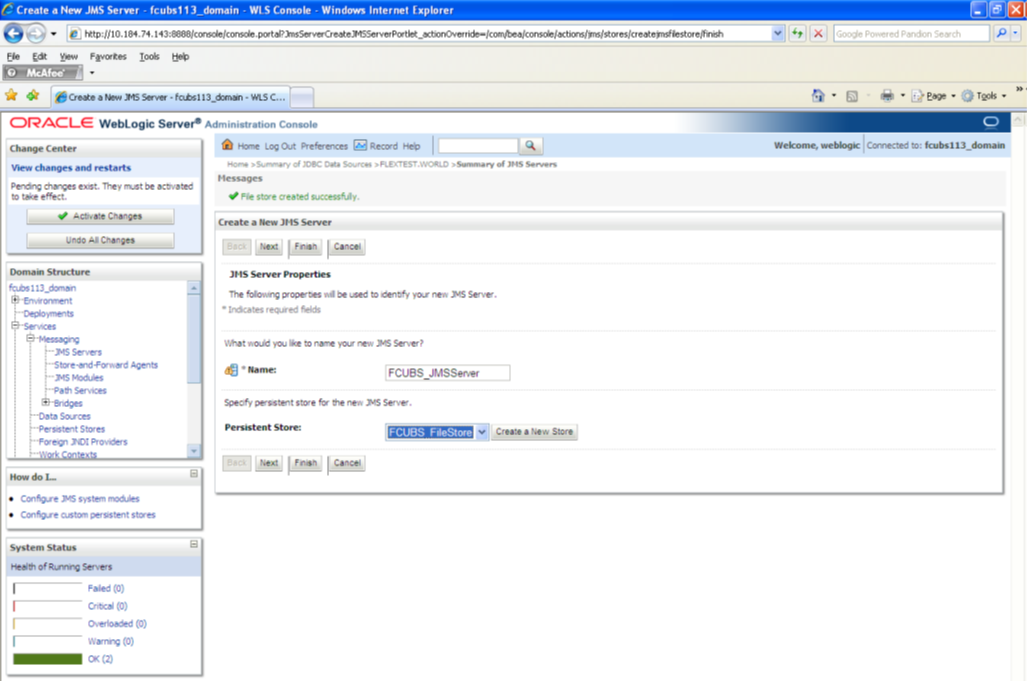
Description of the illustration picture38.png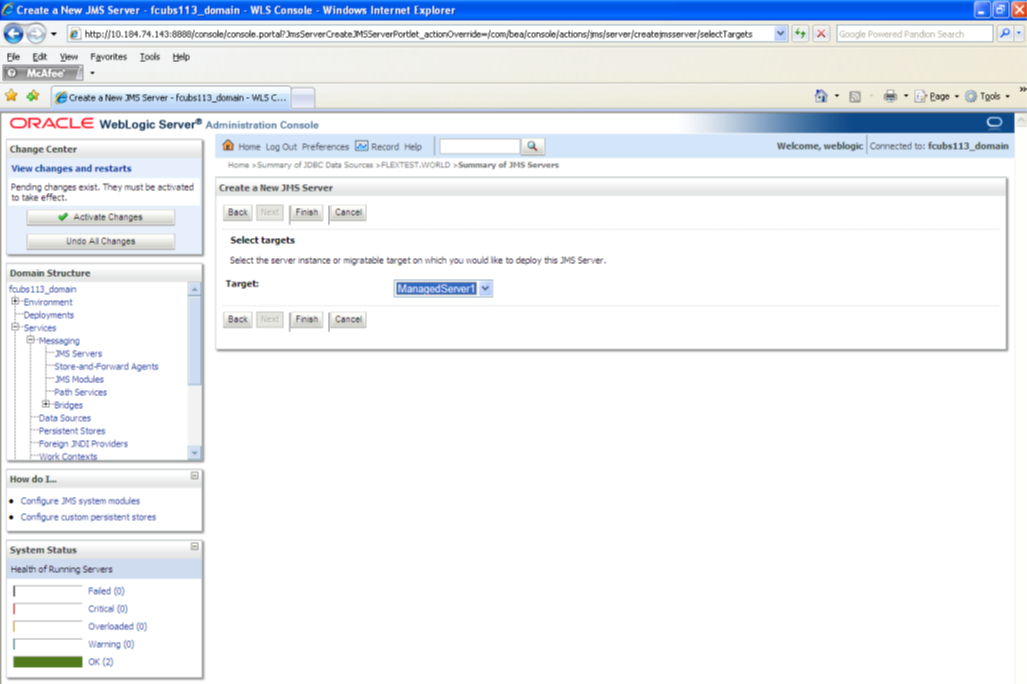
Description of the illustration picture39.png - Select the target managed server. Click ‘Finish’.
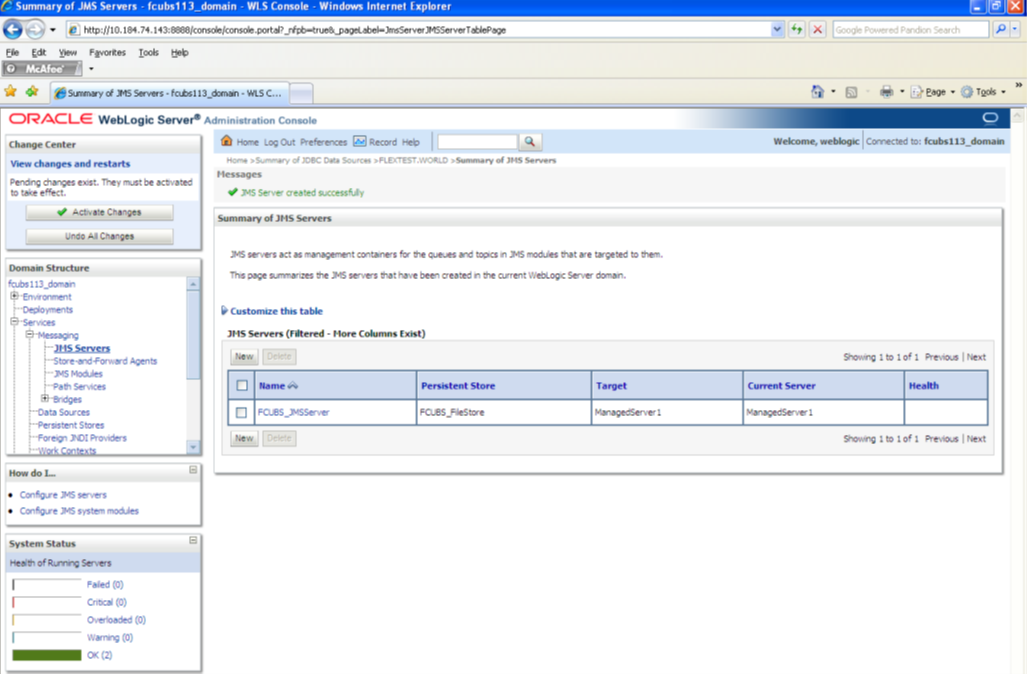
- The message ‘JMS Server created successfully’ is displayed.
- Click ‘Activate Changes’ under Change Center. The message ‘All changes have been activated. No restarts are necessary’ is displayed.
Parent topic: Resource Administration