- GATEWAY Property File Creation
- Creating Property Files
- Gateway EJB Application
1.2.1 Gateway EJB Application
This topic explains systematic instructions to create a property file by choosing Gateway EJB as the application type.
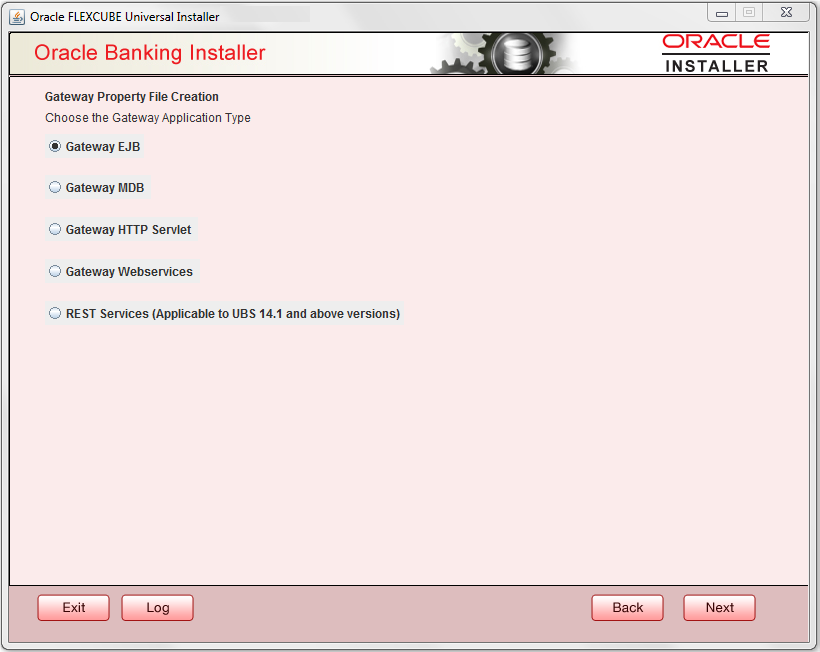
- On the Gateway Property File Creation screen, select
‘Gateway EJB’ as the application type, and click
Next.
Figure 1-4 Gateway Property File Creation
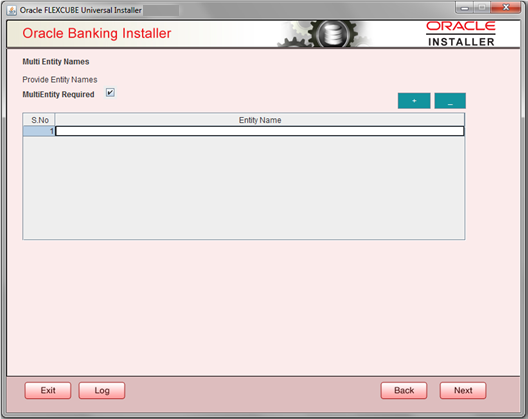
The installer displays the ‘Multi Entity’ screen.Figure 1-5 Multi Entity Names
- On the Multi Entity Names screen, specify the fields. For more information on fields, refer the table below:
Table 1-1 Multi Entity Names - Field Description.
Field Description MultiEntity Required Select the multi entity check box for enabling the multi entity deployment.
After selecting the multi entity option ‘+’, ‘-‘buttons will be enabled for capturing the entity Name.
+ Button New row will be added for capturing new entity name. - Button Select the entity name and click – button, deletion of existing entity name will be done. Entity Name Enter the entity name as single word. For example: ENTITY1
- Click ‘Next’. The Property File Creation screen
displays.
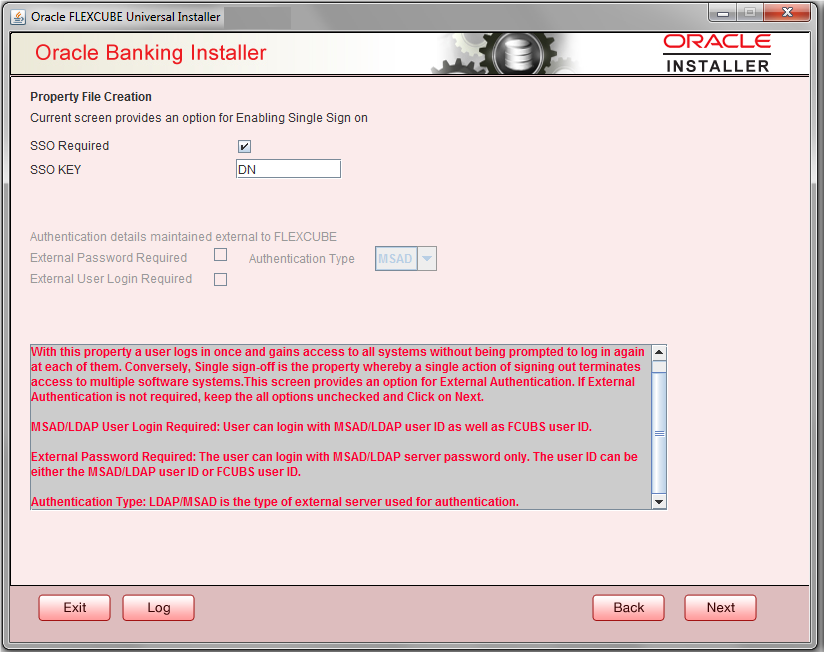
- On the Property File Creation screen, specify the
fields.
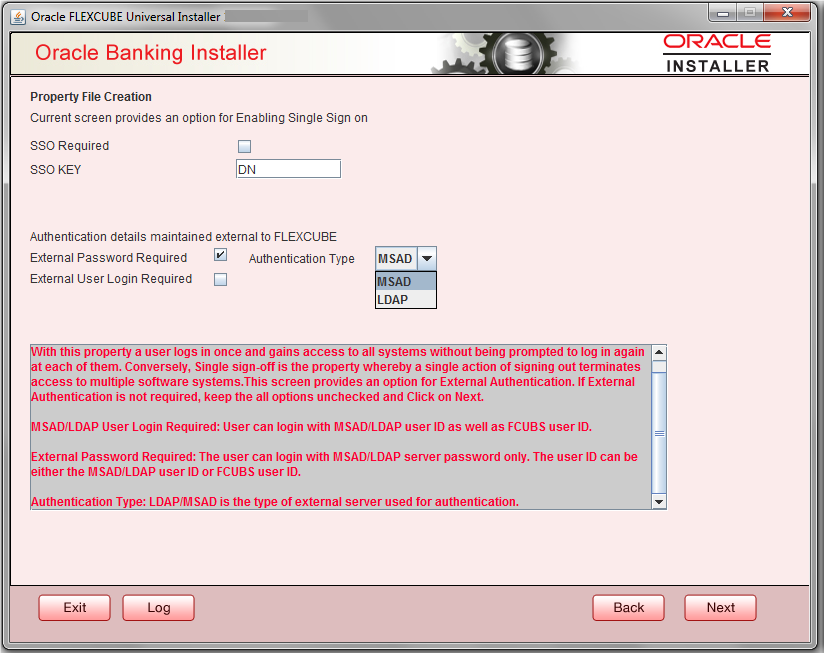
Figure 1-7 Property File Creation
For more information on fields, refer the table below:Table 1-2 Property File Creation
Field Description SSO Required Check this box to enable single sign-on (SSO). If you check this box, you need to specify the SSO Key. SSO Key Specify the SSO key. If you have checked the box ‘SSO Required’, it is mandatory to specify the SSO key.

If you have checked the box ‘SSO Required’, then the Installer will skip the following two screens and will directly navigate to the SSL screen shown below in this manual.If you have not checked the box ‘SSO Required’, then click ‘Next’. The following screen is displayed.
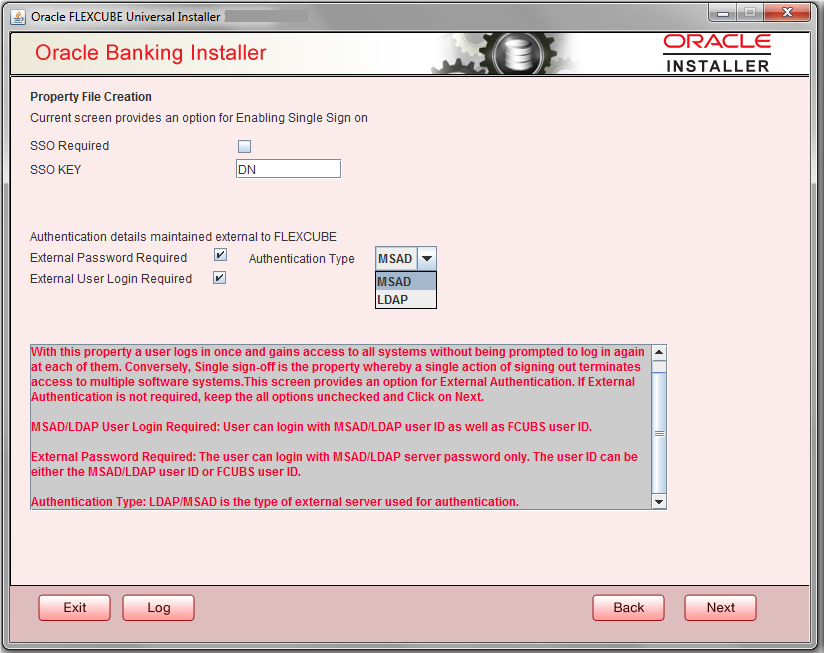
External User Login Required Check this box to enable user login using MSAD/LDAP user Id. Note:
If you check this box, the user can login with MSAD/LDAP server user Id as well as FCUBS user Id. If you do not check this box, the user can login using FCUBS user Id only. (MSAD: Microsoft Active Directory, LDAP: Lightweight Directory Access Protocol.)External Password Required Check this box to allow user login using MSAD/LDAP password irrespective of the user Id. If you check this box, the user can login using MSAD/LDAP server password only. The user Id can be one of the following:- MSAD/LDAP user Id
- OBTFM user Id
If you do not check this box, then the installer skips the following screen and directly navigates to the Modifying Gateway Properties screen.
Authentication Type Select the authentication type. This is the type of external server that is used. You can select one of the following options: - MSAD (Microsoft Active Directory)
- LDAP (Lightweight Directory Access Protocol)
- Select the authentication type.
Figure 1-8 Property File Creation
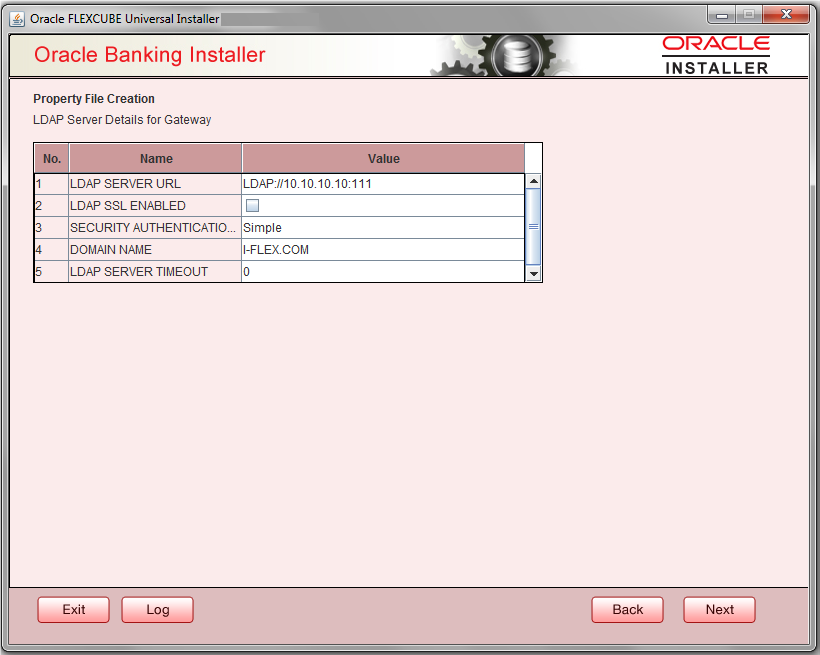
If you checked the boxes (External User Login Required and External Password Required, then the installer navigates to the following screen.
- Click Next.The Property File Creation screen displays.
- Specify the following LDAP server details.
For more information on fields, refer the table below:
Table 1-3 Property File Creation
Field Description LDAP Server URL Specify the URL to access the LDAP server where the external user ID and password are maintained. LDAP SSL Enabled Check this box if the LDAP server is SSL enabled. If you check this box, then you need to specify the SSL port also in the field LDAP SERVER URL. Security Authentication Type Depending on the authentication mechanism supported by the LDAP server, select one of the following: - simple
- strong
Note:
- Different servers support different authentication mechanisms.
- By default, the security authentication type is ‘Simple’; however, you can change this.
Domain Name Specify the domain name. LDAP Server Timeout Specify the LDAP server timeout in milliseconds. This must be a positive integer value. For example you can specify 1000, 10000 or 5000. If it is zero or less, it indicates that no read timeout is specified. Then the wait for the response infinite until it is received.
By default, the LDAP server timeout is zero; however, you can change this.
- Click ‘Next’. The following screen is displayed:
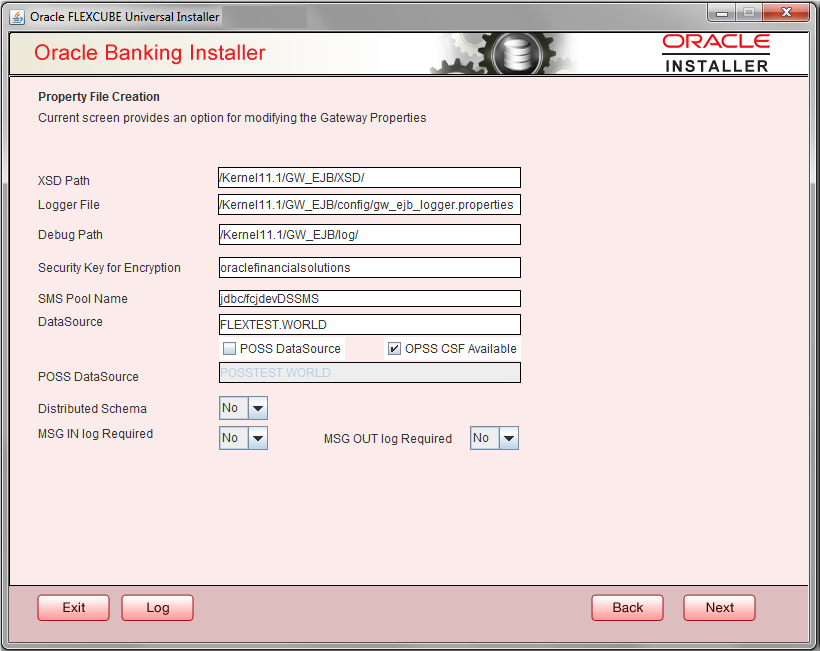
- Specify the following details.
For more information on fields, refer the table below:
Table 1-4 Property File Creation
Field Description XSD Path Specify the path to the XSD file. File name is not required. File separator must be ‘/’. There must be a ‘/’ at the end. All the relevant XSD files must be manually copied to this location.
Example:
For Windows: D:\Kernel11.1\GW_EJB\XSD\
For Linux: /Kernel11.1/GW_EJB/XSD/
Logger File Specify the path to the ‘gw_ejb_logger.properties’ file with the file name. The file must be manually copied to the specified location.
Example:
For windows: D:\Kernel11.1\GW_EJB\config\gw_ejb_logger.properties
For Linux: /Kernel11.1/GW_EJB/config/gw_ejb_logger.properties
Debug Path Specify the path to the folder where the application creates the logs. There must be a ‘/’ at the end. You need to manually create the specified folder structure.
Example:
For windows: D:\Kernel11.1\GW_EJB\log\
For Linux: /Kernel11.1/GW_EJB/log/
Security Key for Encryption Specify the security key for the Encryption,here in this case it is ‘Oraclefinancialsolutions’. SMS Pool Name Specify SMS Pool Name, here in this case it is ‘jdbc/fcjdevDSSMS’. DataSource The JDBC data source is an object bound to JNDI tree and provides database connectivity through a pool of JDBC connections. POSS Datasource Check this box if POSS is required. If you check this box, you need to specify the POSS Datasource Name in the field below this. OPSS CSF Available Indicate whether OPSS-CSF is installed or not.
Note:
Please choose this only if Oracle Platform Security Services - Credential Store Framework (CSF) is installed as per the guidelines in the pre-requisite document. It is recommended that you install CSF for safeguarding application specific security credentials.Distributed Schema If the schema is distributed, select ‘Yes’.
If the schema is not distributed, select ‘No’.
MSG IN LOG Required Choose Yes/No from drop down box. MSG OUT LOG Required Choose Yes/No from drop down box. Note:
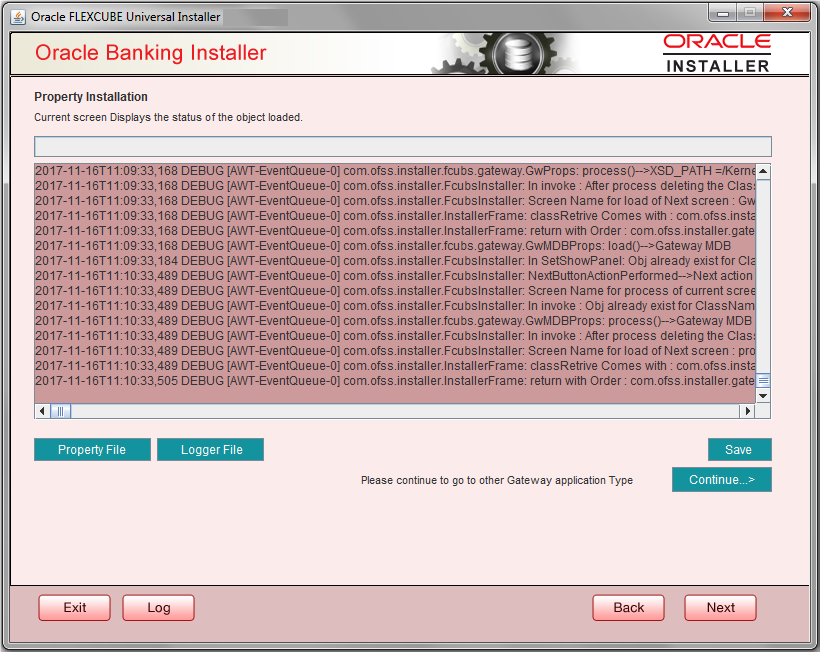
The Installer creates two files viz. ‘gw_ejb_logger.properties’ and ‘GW_EJB_Prop.propeties’ in the path provided to save the files. - Click ‘Next’. The following screen is displayed.The property file will be created in a temporary folder.
- Click ‘Property File’ to view the created property file.
- Click ‘Save’ to the save the created property file in desired location.
- Click ‘Next’ to navigate to the installer home screen.For Gateway EJB EAR Building refer ‘OBTF_EAR_Building document’
Parent topic: Creating Property Files
