- GATEWAY Property File Creation
- Creating Property Files
- REST Services Application
1.2.5 REST Services Application
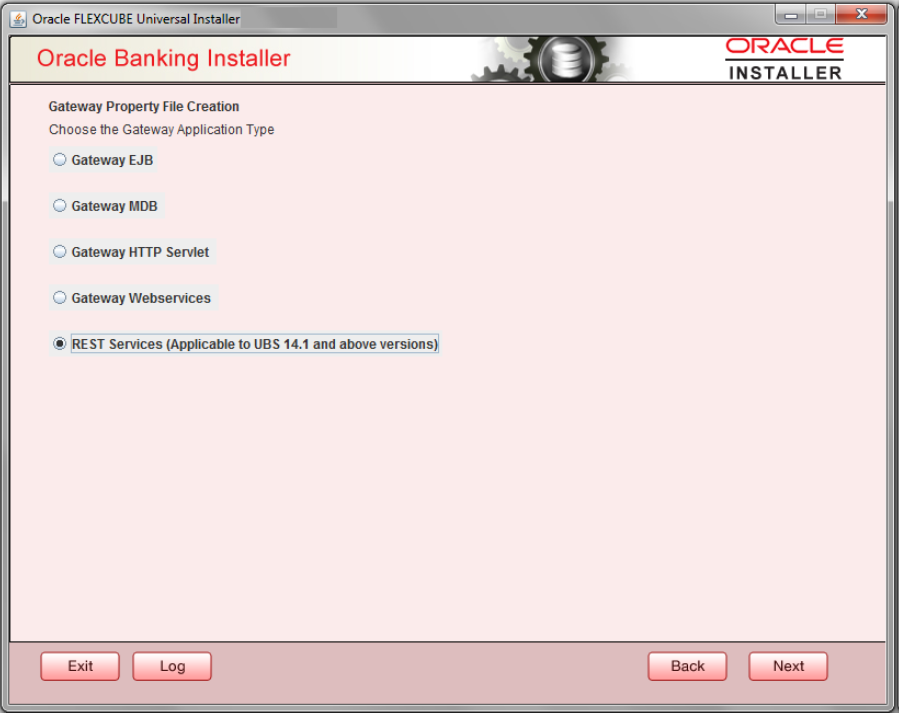
- Select ‘Rest Services’ as the application type as shown in the below
Screen.
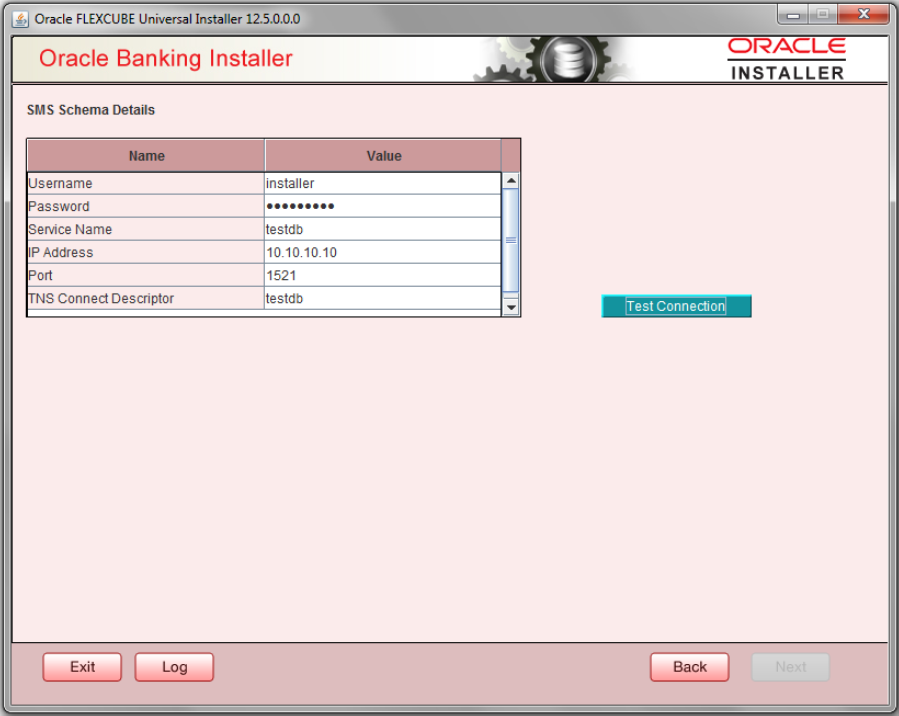
- Click ‘Next’. The following screen is displayed to capture Schema
details. Enter valid username, password, IP Address, port and TNS descriptor and
click on “Test Connection” button.
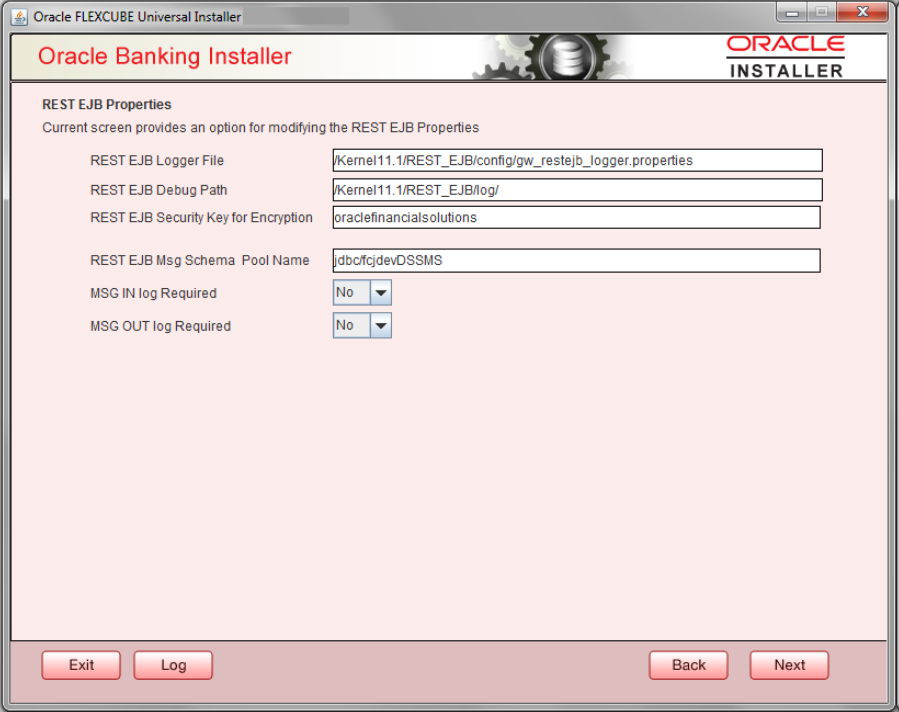
- Successful test connection will enable Next button. Click on it o proceed to next page.In above page, Enter the below REST EJB details.
For more information on fields, refer the table below:
Field Description REST EJB Logger File Enter logger property file path. REST EJB Debug Path Enter path where debugs are to be written. REST EJB Security Key for Encryption Specify the security key for the Encryption. In this case it is ‘oraclefinancialsolutions’. REST EJB Msg Schema Pool Name Enter valid pool name. by default it is : jdbc/fcjdevDSSMS MSG IN LOG Required Choose Yes/No from drop down box. MSG OUT LOG Required Choose Yes/No from drop down box - Click on 'Next' Button to enter REST Services information.
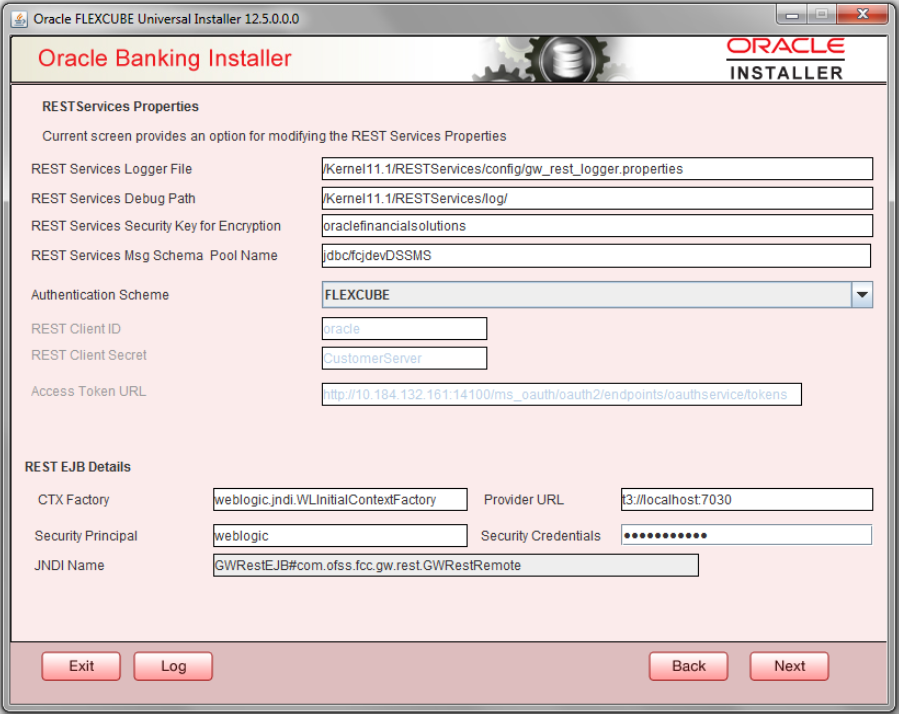
For more information on fields, refer the table below:
Field Description REST Services Logger File Enter logger property file path. REST Services Debug Path Enter path where debugs are to be written. REST Services Security Key for Encryption Specify the security key for the Encryption. In this case it is ‘oraclefinancialsolutions’. REST Services Msg Schema Pool Name Enter valid pool name. by default it is : jdbc/fcjdevDSSMS Authentication Scheme OAUTH and FLEXCUBE are two types of Authentication Schemes available.
Please note, for FLEXCUBE authentication Scheme, REST Client ID, REST Client Secret, Access Token URL are disabled.
The same has to be entered if AOUTH is selected.
CTX factory Provide valid CTX factory information. Provider URL Enter URL with valid port number. Security Principal Provide Security principal username. Security Credentials Provide Security principal password. JNDI Name JNDI Name will be defaulted based on application server selected.
Click on Next button.
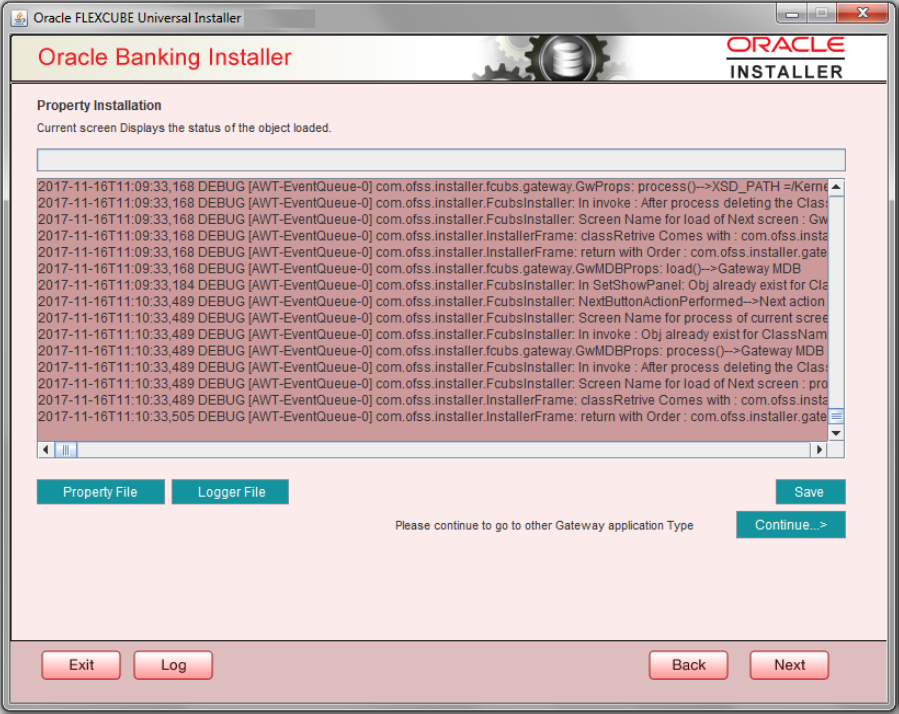
Description of the illustration 1.2.5_installation.png - Click ‘Property File’ to view the created property file.
- Click ‘Save’ to the save the created property file in desire location.
- Click ‘Continue’ to continue the installation process with gateway application type.
- Click ‘Next’ to navigate to the installer home screen.The property file will be created in a temporary folder.For Gateway MDB EAR Building refer ‘OBTF_EAR_Building document’.
Parent topic: Creating Property Files
