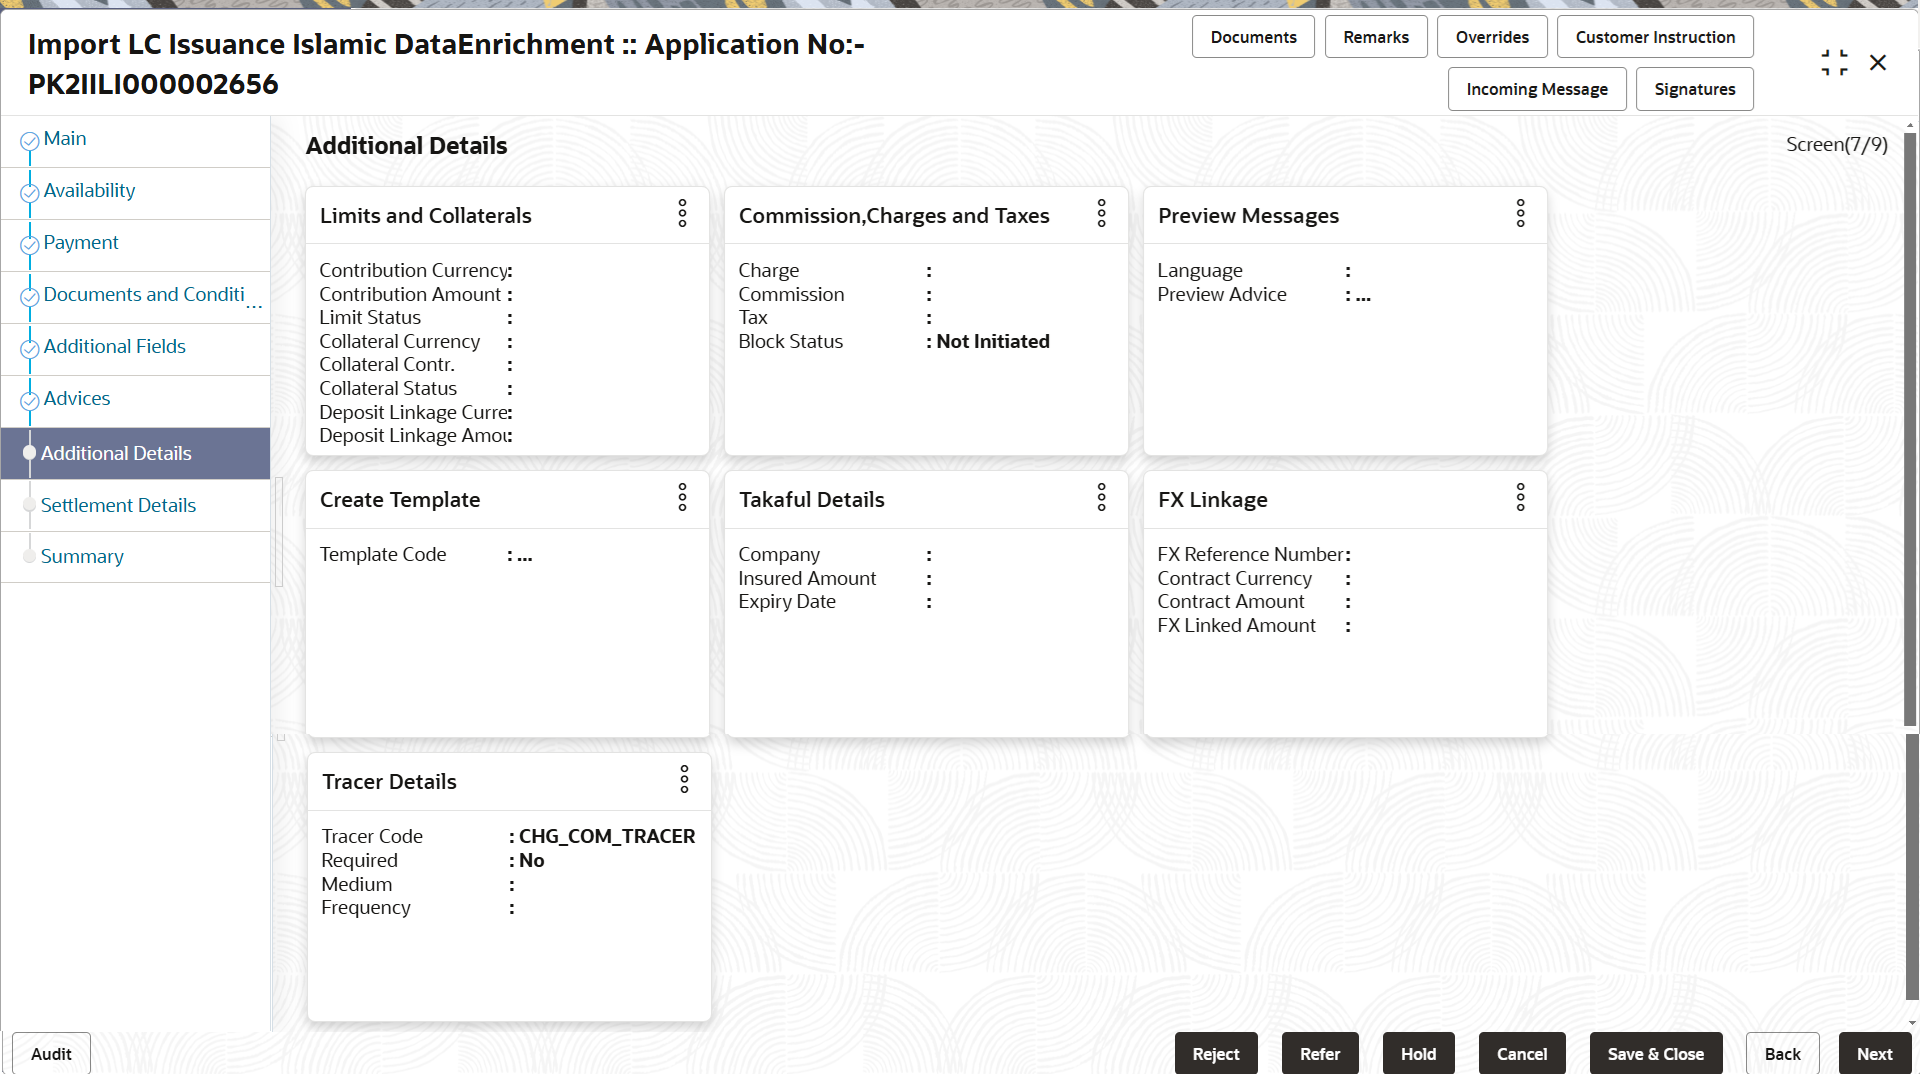
2.4.7 Additional Details
This topic provides the systematic instructions to capture the additional details.
- On Additional Details screen, click
 on any Additional Details tile to view the details.
 - Click Save and Close to save the details and close the
screen.
Limits and Collaterals
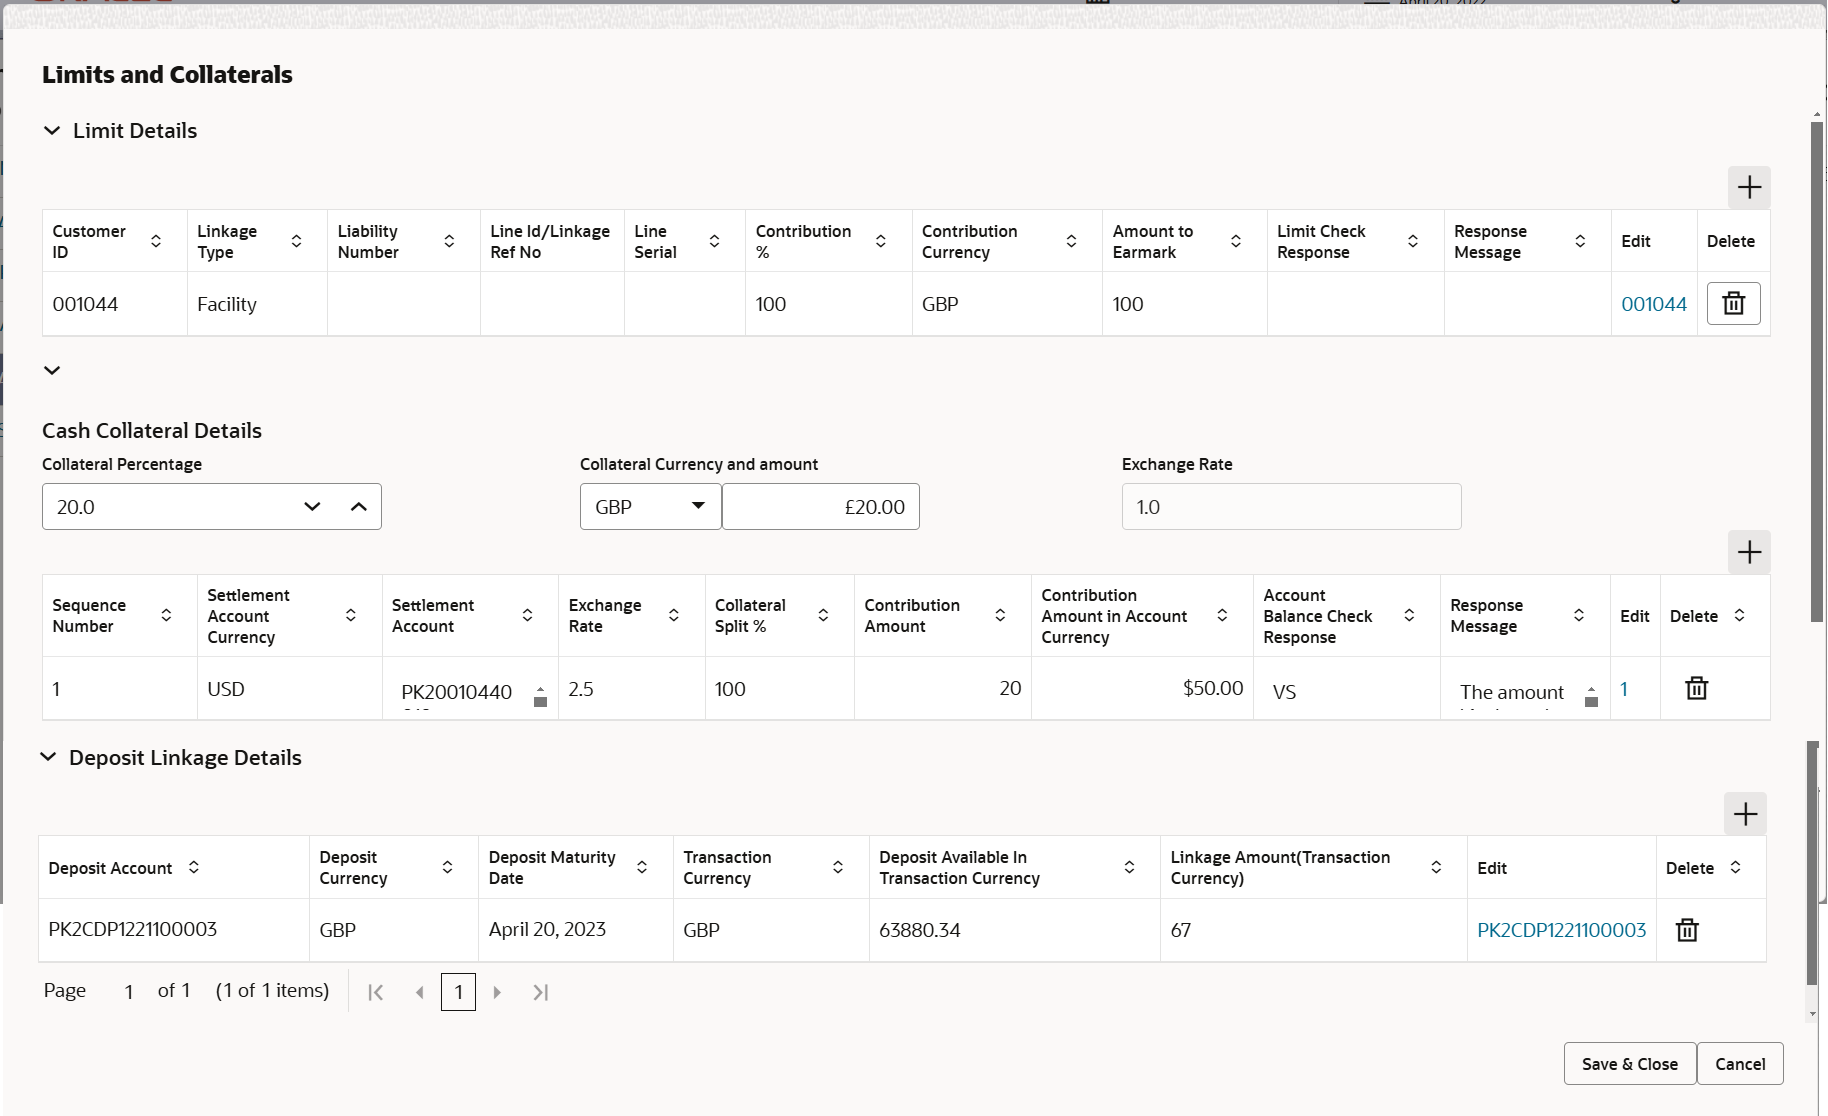
Description of the illustration scrutinylimitdetails.png
For more information on fields, refer to the field description table Table 2-14 in Scrutiny stage. - Click Save and Close to save the details and close the
screen.
Charge Details
This section displays charge details.
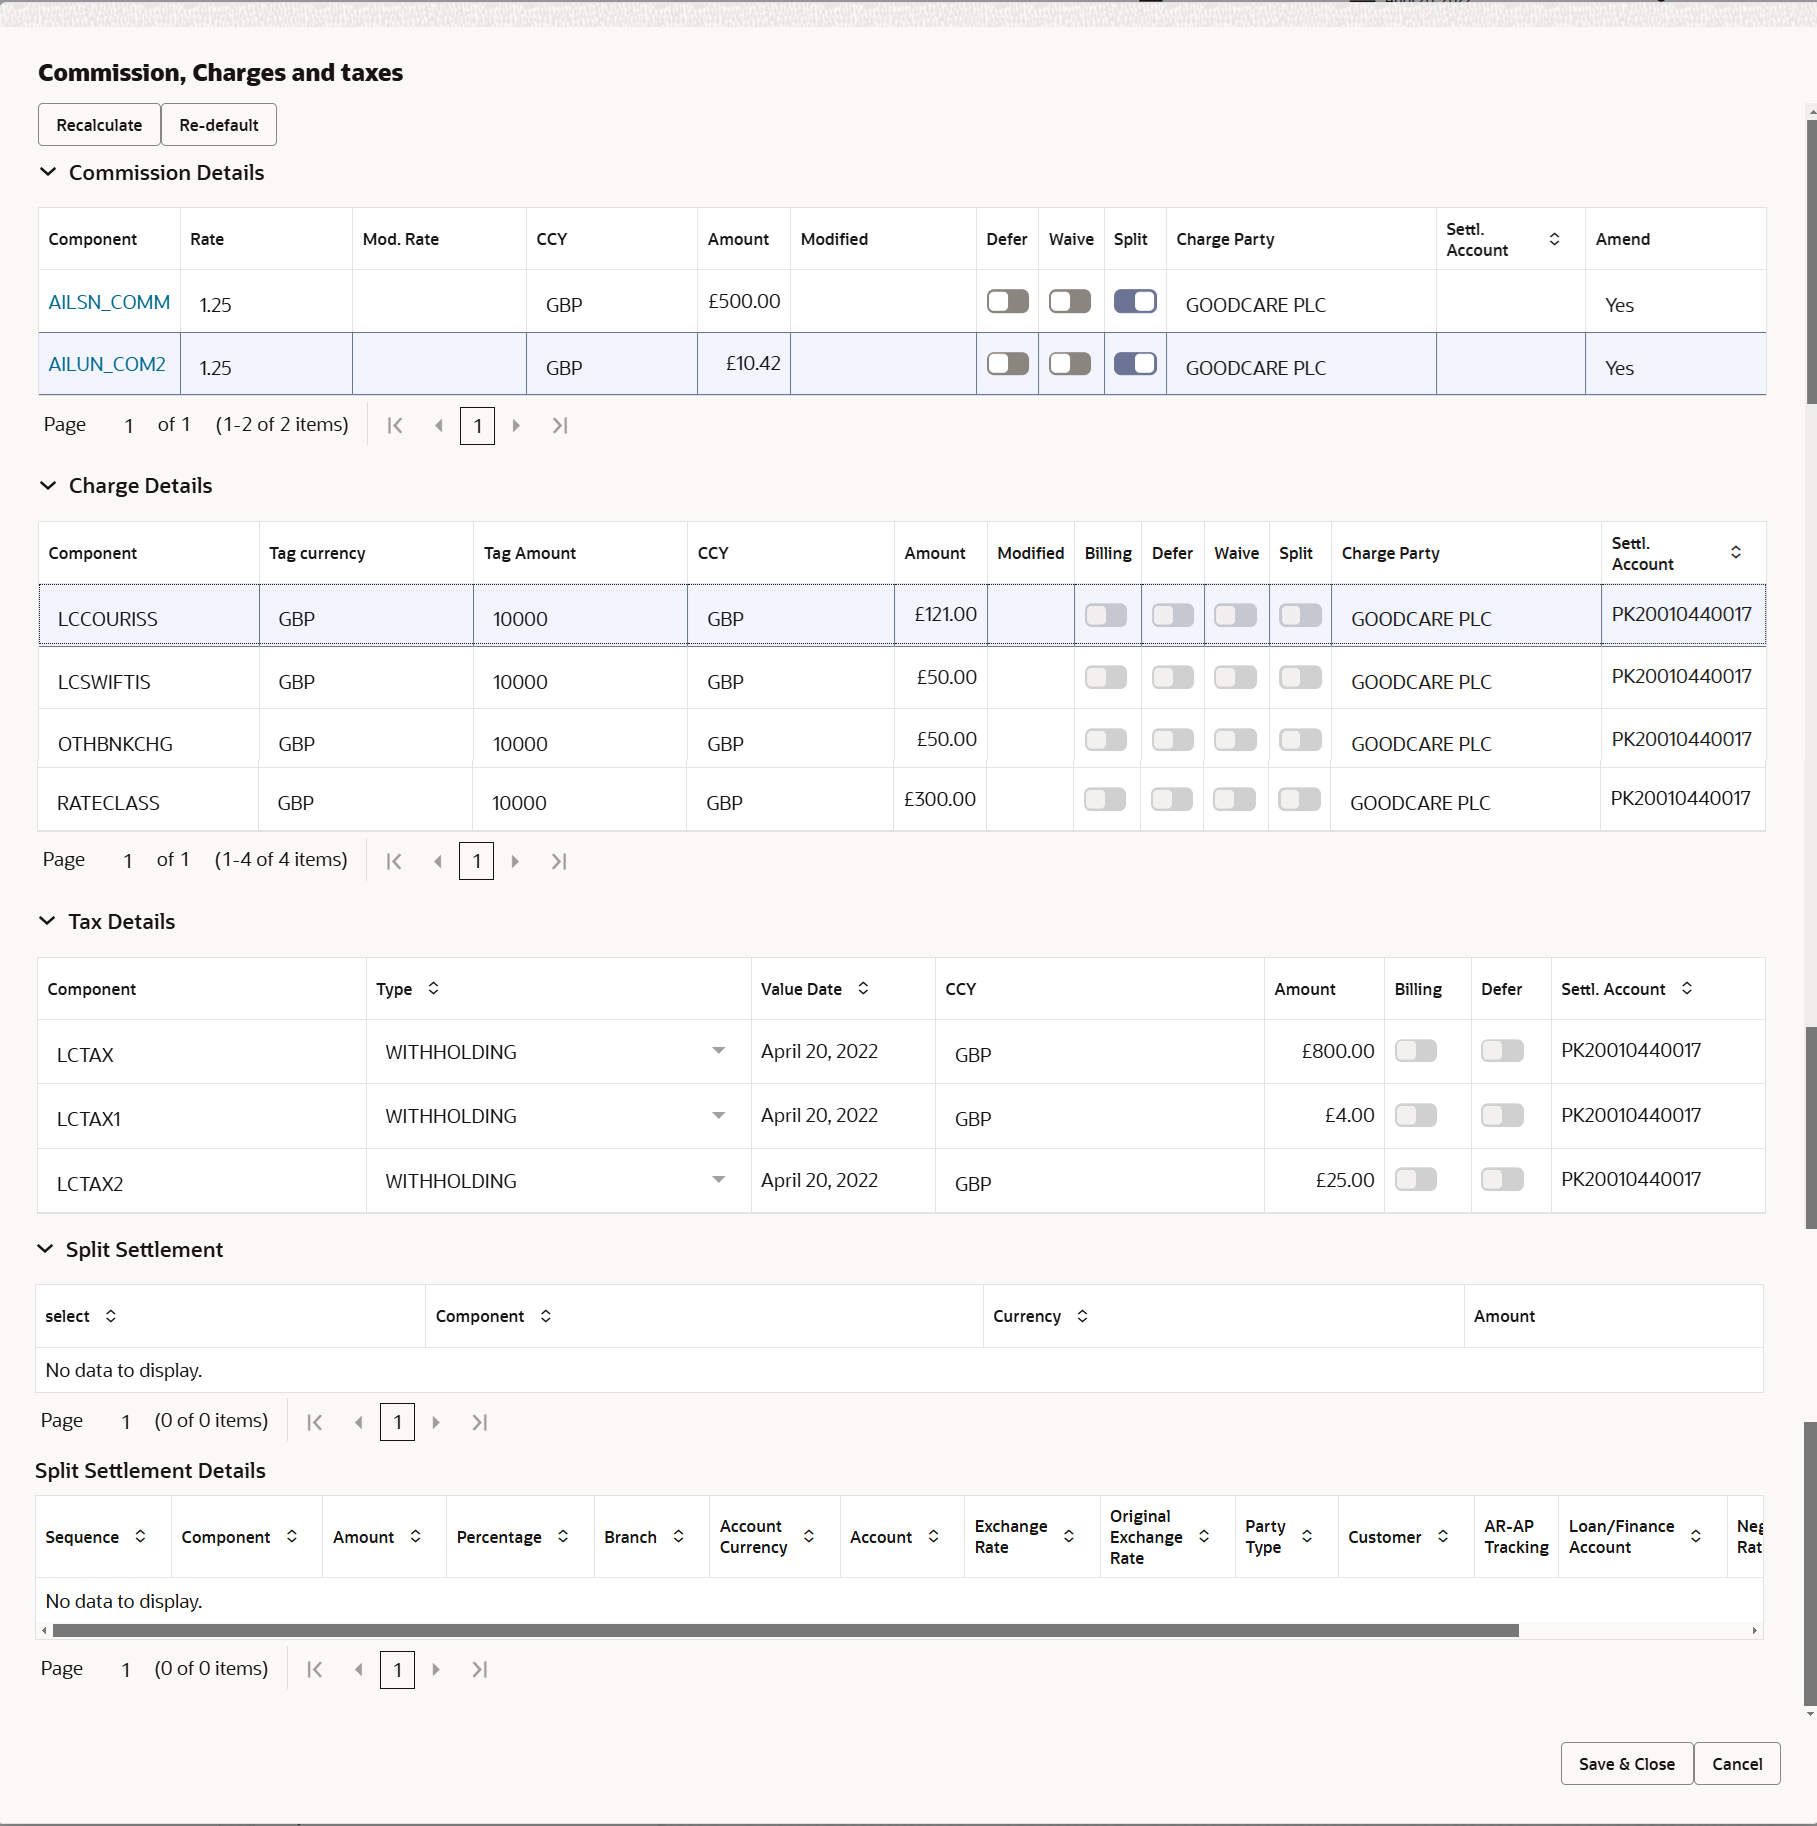
Description of the illustration scrutinychargedetails.pngFor more information on fields, refer to the field description table Table 2-15 in Scrutiny stage.
- Click Save and Close to save the details and close the
screen.Preview Mesage
User can preview the draft SWIFT message based on message type and the draft mail advice based on the advice type.
The OBTFPMCS user can send the draft of the message to the registered email id of the corporate customer as an attachment containing PDF. The PDF sent to the corporate customer is protected by a password. Password to be generated with first four digits of Customer Name and last four digits of Customer Number.Note:
A bank user can share the Draft SWIFT message to the customer through email, before the actual transmission of SWIFT message to the Advising Bank.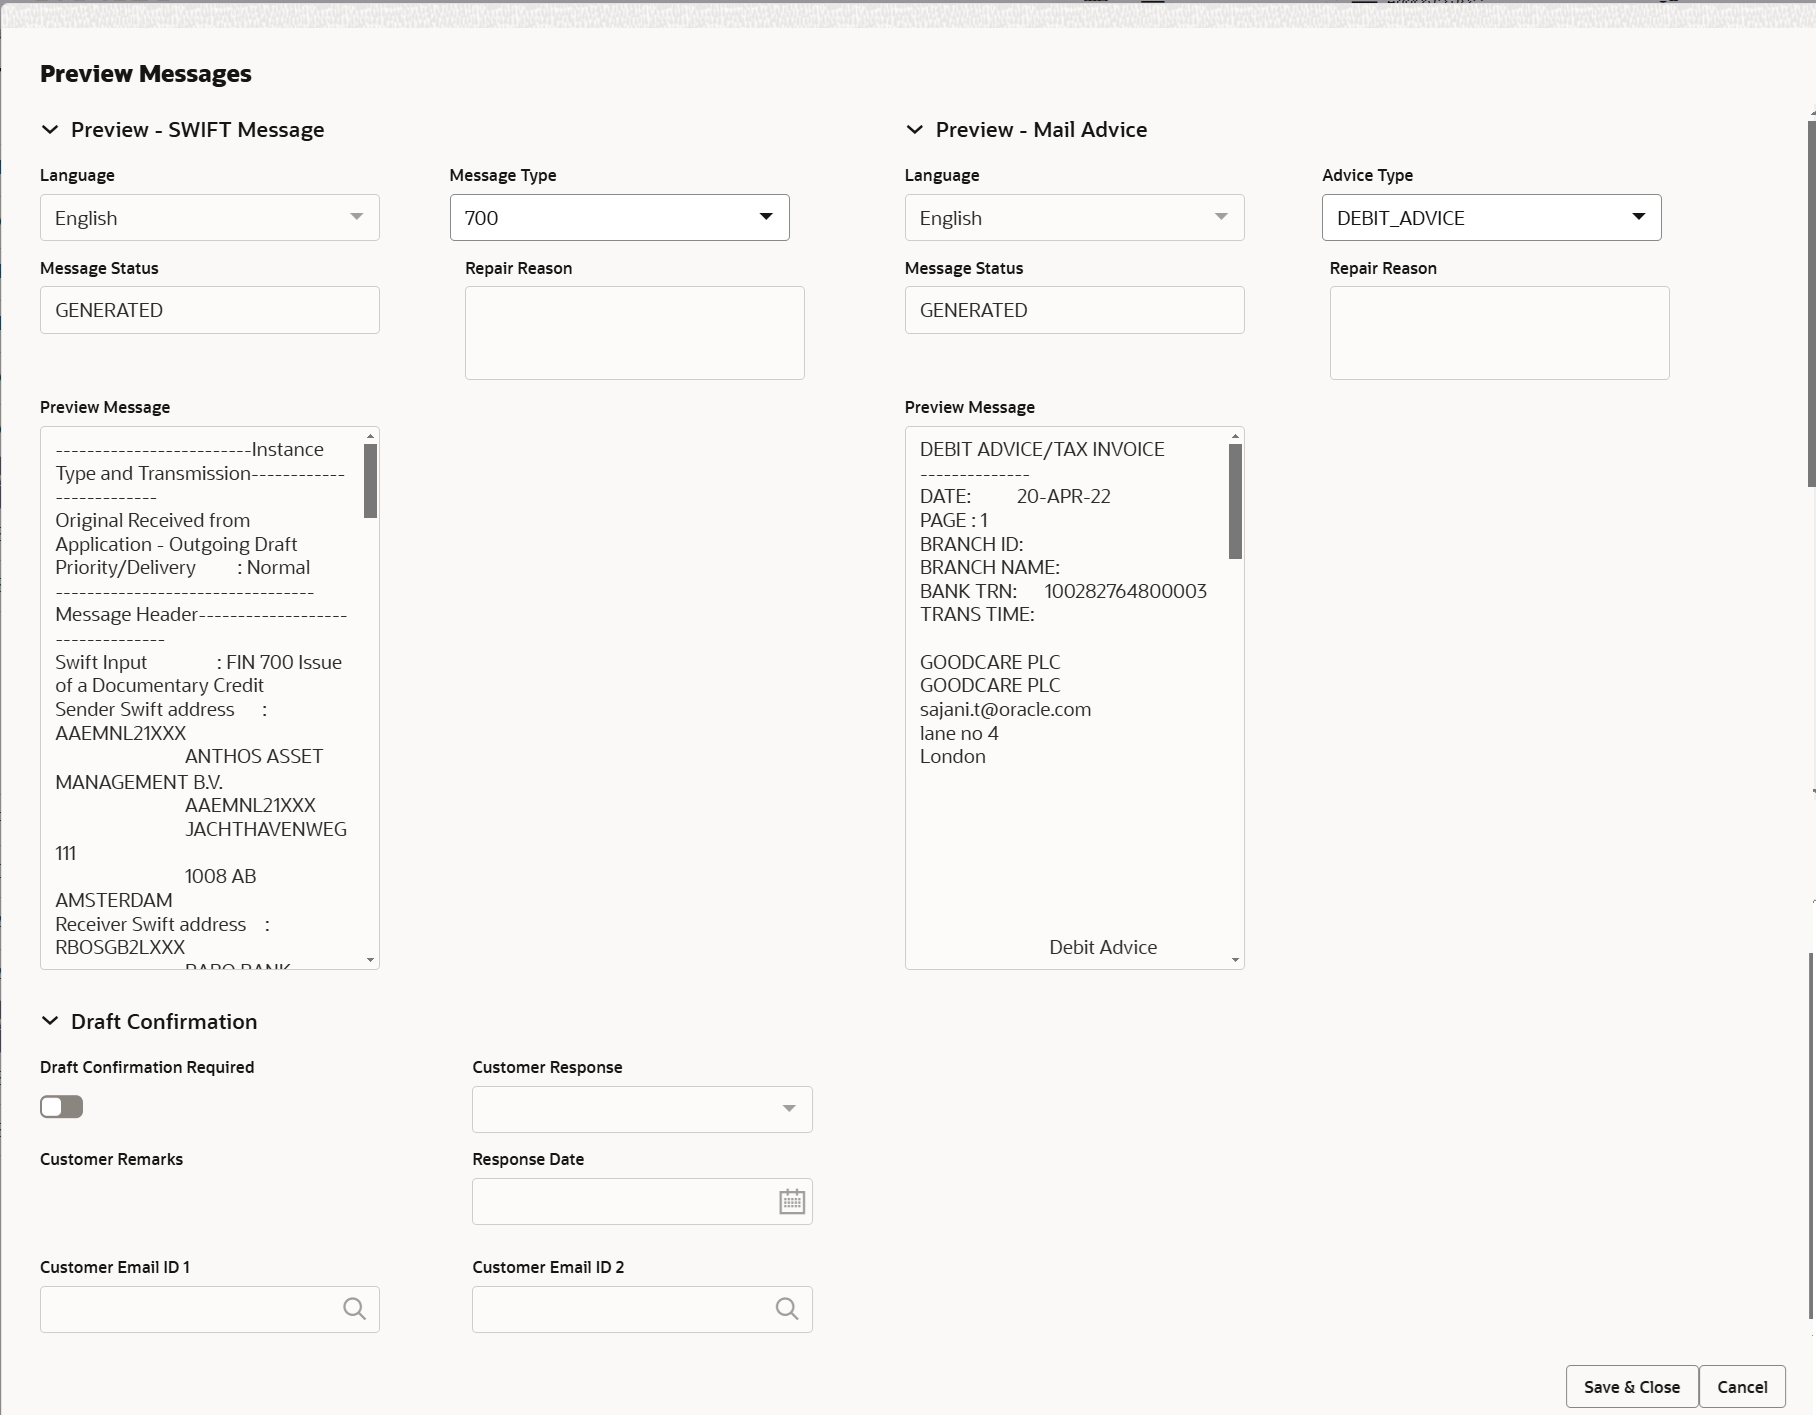
Description of the illustration deadditionaldetailspreview.pngFor more information on fields, refer to the field description table below.
Table 2-25 Preview Messages - Field Description
Field Description Preview SWIFT Message This section displays the preview of SWIFT Messages fields. Language Read only field. English is set as default language for the preview.
Message Type Select the message type. Message Status Read only field. Display the message status of draft message of issuance details.
Repair Reason Read only field. Display the message repair reason of draft message of issuance details.
Preview Message This field displays a preview of the draft message. Preview Mail Advice This section displays the preview of Mail Advice fields. Language Read only field. English is set as default language for the preview.
Advice Type Select the advice type. Message Status Read only field. Display the message status of draft message of issuance details.
Repair Reason Read only field. Display the message repair reason of draft message of issuance details.
Preview Message This field displays a preview of the draft message. Draft Confirmation This section displays the draft confirmation fields. Draft Confirmation Required Switch to  , if draft confirmation is required.
Customer Response Specify the response received from customer. If the response is received online, the response is auto populated in this field by the system. Customer Remarks Read only field. Display the remarks from the customer for the draft.
Response Date Read only field. Display the customer response received date.
Customer Email ID 1 Click Search icon to search and select the Email ID from lookup. The user can select from the Customer Email Address field of the customer maintenance in Back Office and replicated in OBTFPMCS.
By default this field is blank.
- Click Save and Close to save the details and close the
screen.Create Template
This option allows user to create a new template with the already captured details and the data can be reused with the template to reduce the effort. The user can enter the template name and create the template, details pertaining to the subsequent screens in scrutiny and data enrichment screens will be persisted and populated.
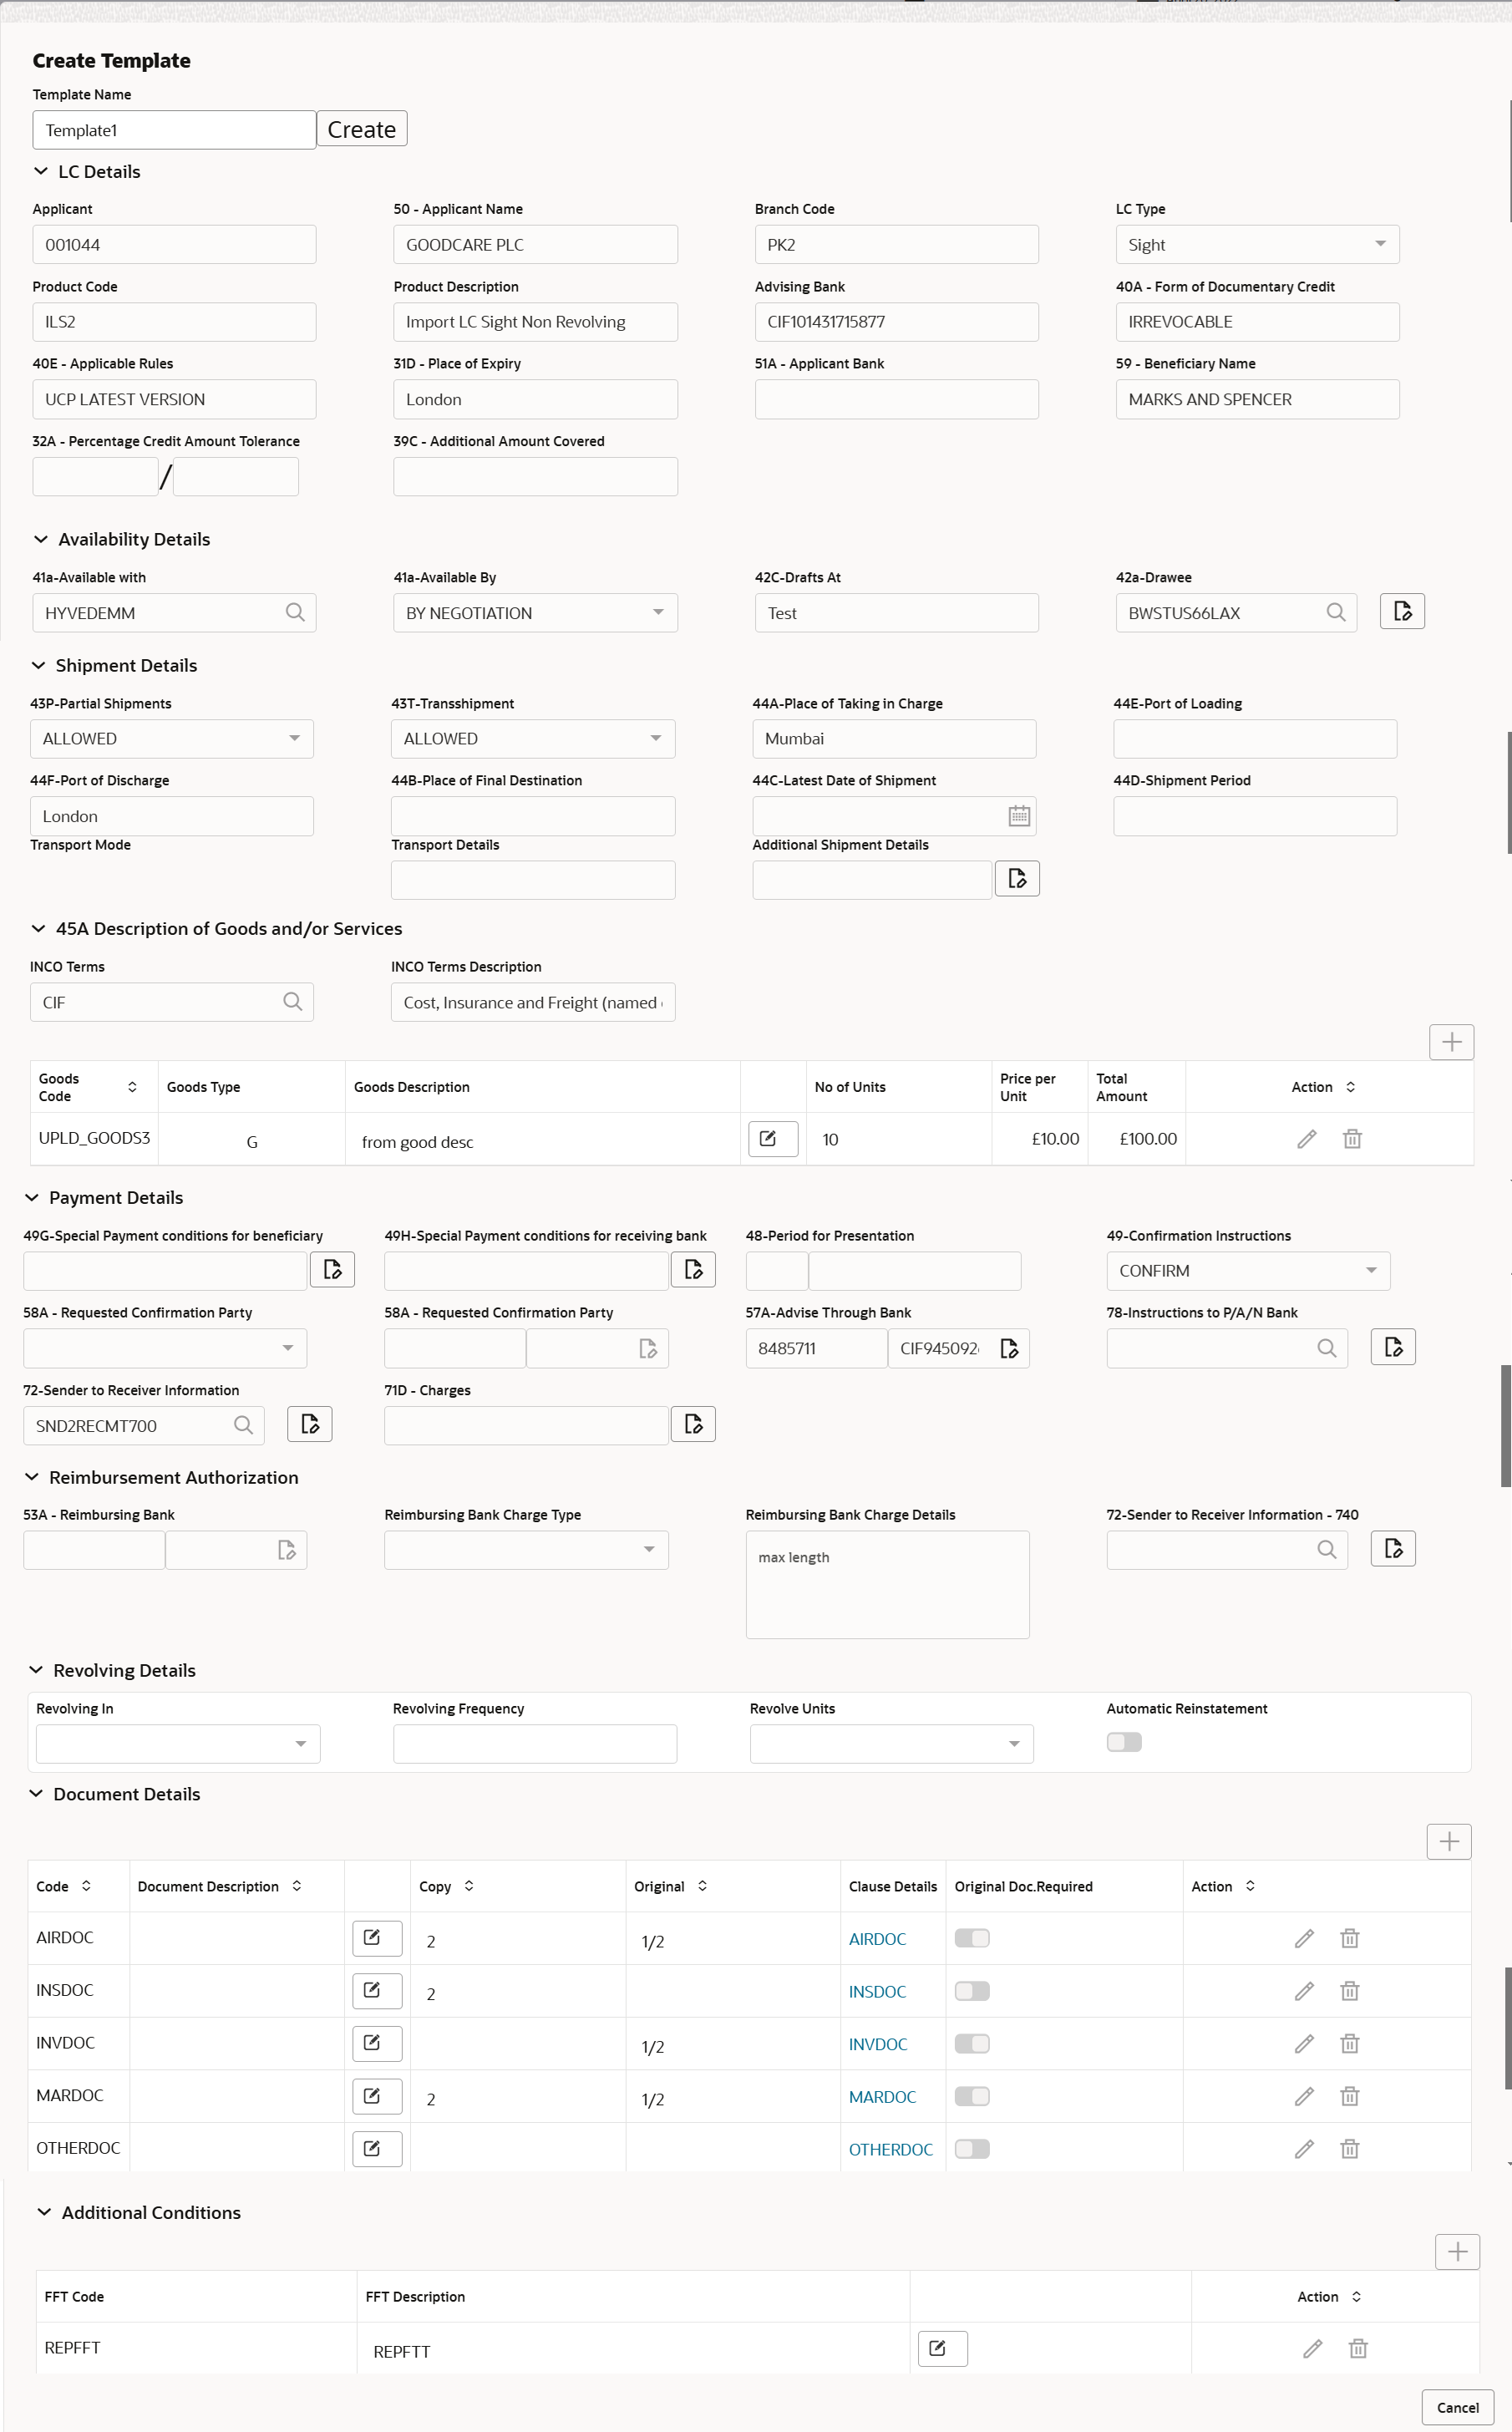
Description of the illustration createtempalte.png
For more information on fields, refer to the 'LC Details' field description table in Scrutiny stage.
- Click Save and Close to save the details and close the
screen.Takaful Details
The user can enter and view the Insurance details if the Takaful policy is applicable for the transaction.
Provide the Takaful details based on the description in the following table.
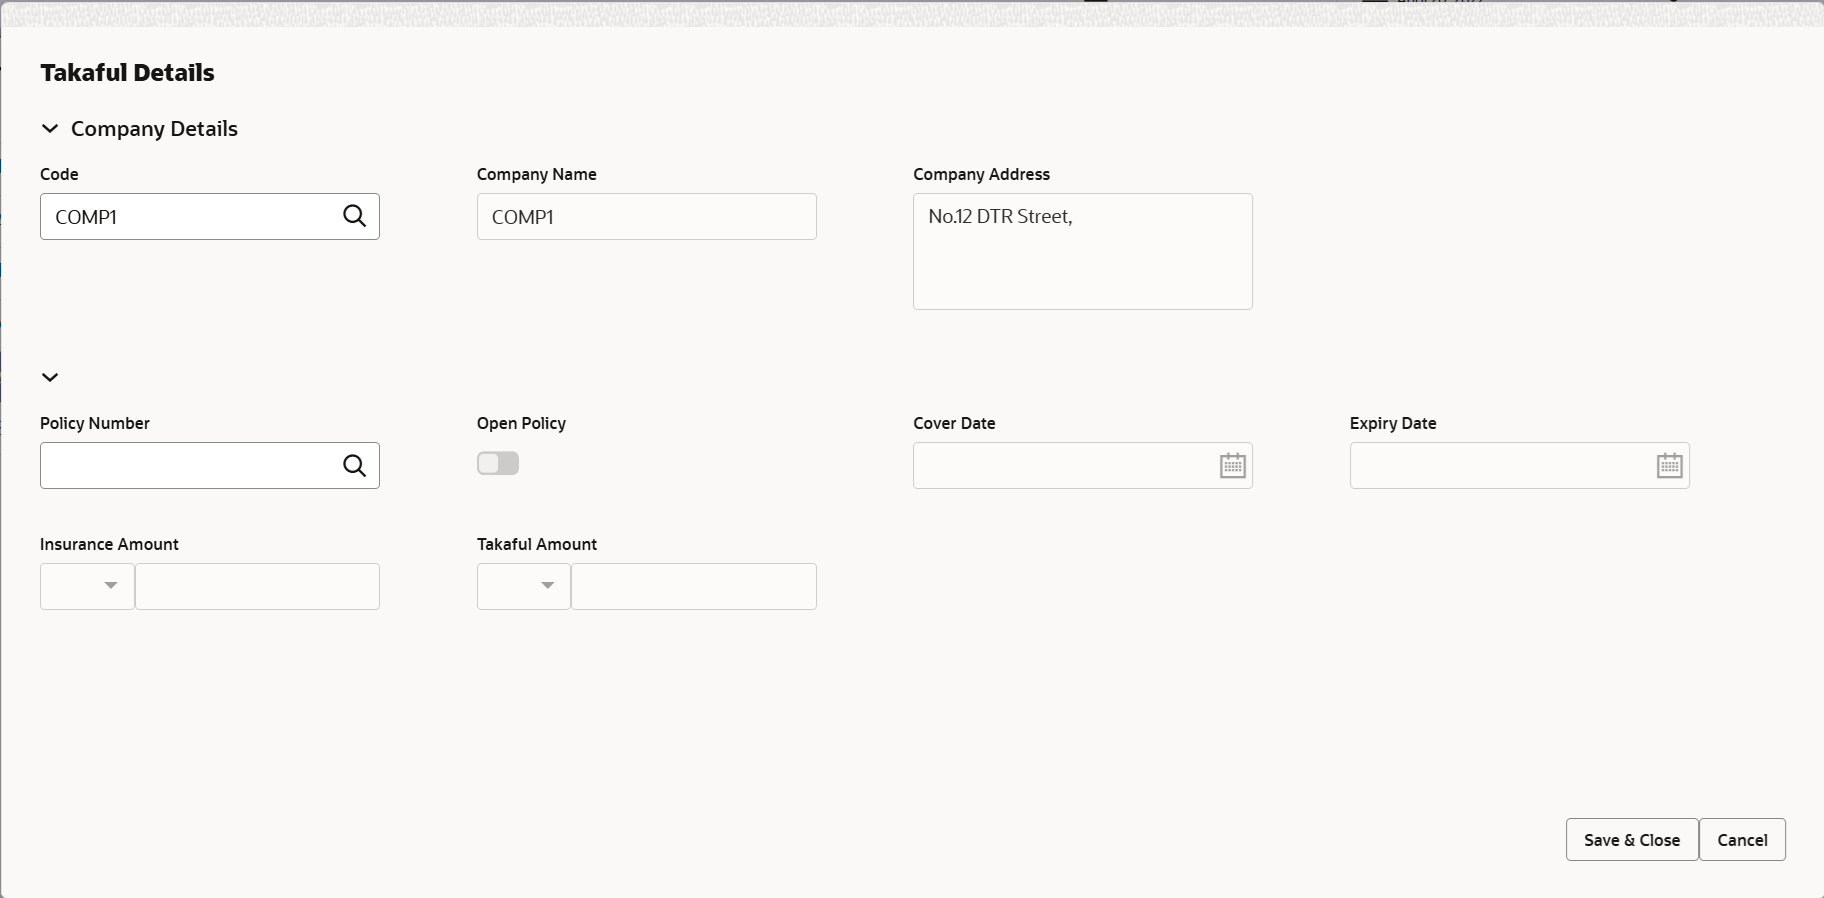
Description of the illustration takaful-details.png
For more information on fields, refer to the field description table below.
For more information on fields, refer to the field description table unresolvable-reference.html#GUID-84D37406-D8B7-4B7F-82E0-41AFEB41DB39__TABLE_OZQ_LRH_BSB in Scrutiny stage..
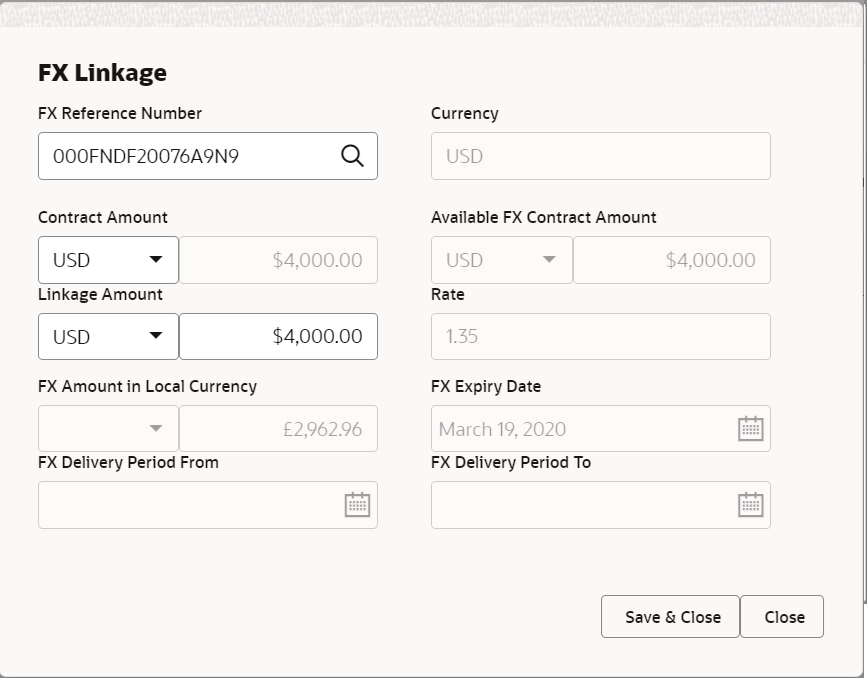
- Click Save and Close to save the details and close the screen.FX LinkageThis section enables the user to link the existing FX contract(s) to the LC transactions. User can link multiple forward FX contracts.
FX contract linkage with the Bill booking can happen only for immediate liquidation of sight payment or for Usance. For manual sight payment, the user needs to link the FX contract on the date of liquidation of the Bill.
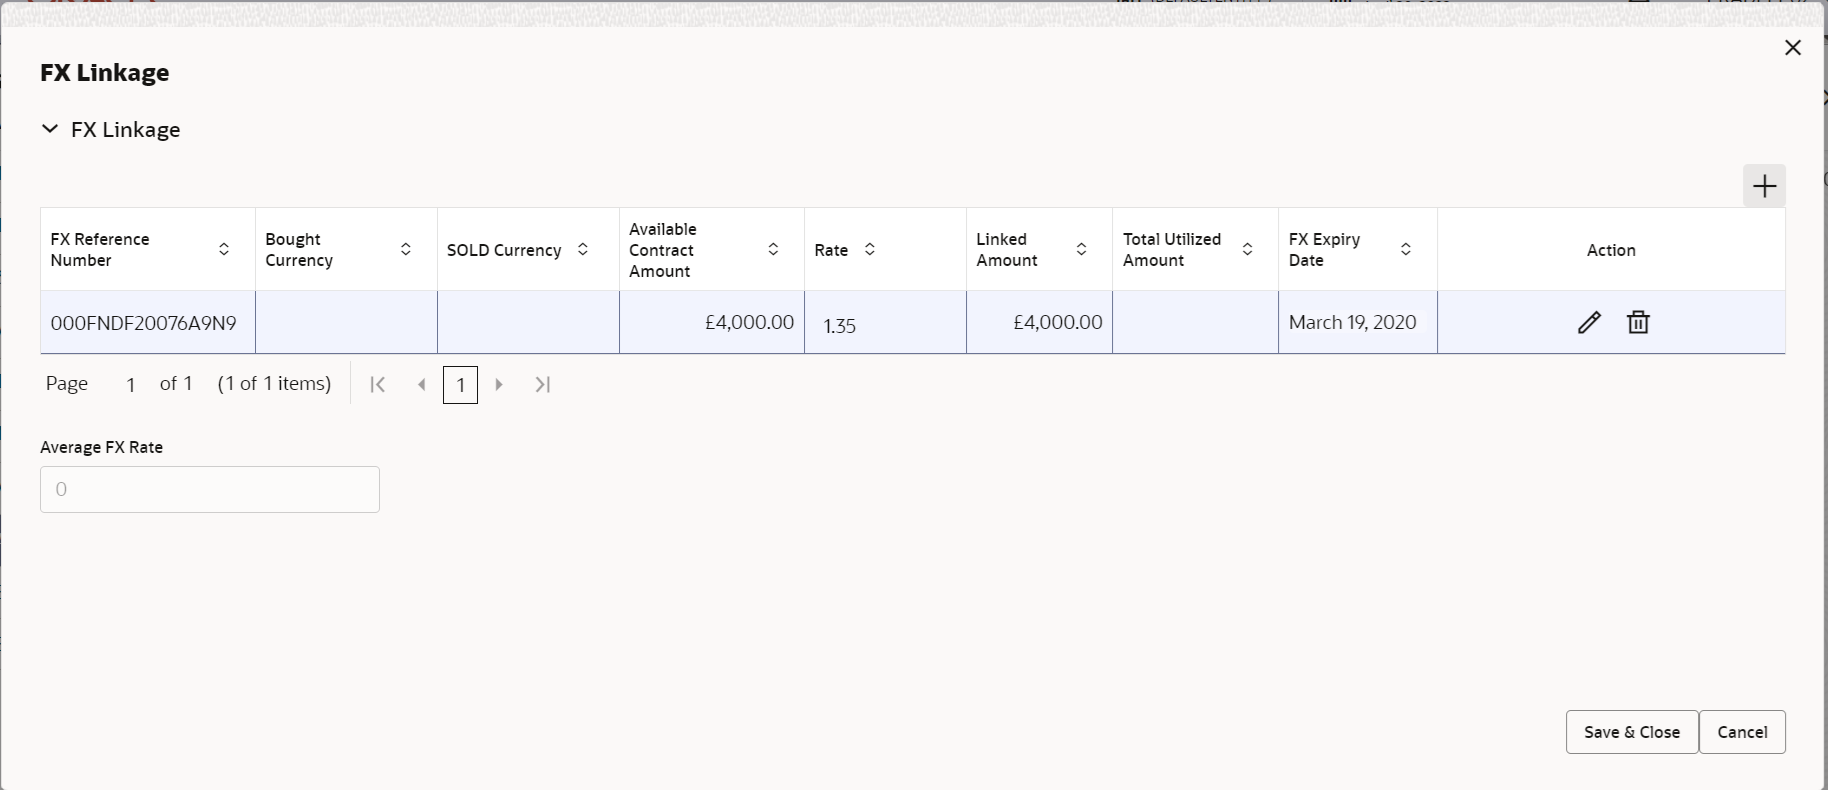
Description of the illustration fxlinkagedetails.pngFor more information on fields, refer to the field description table Table 2-17 in Scrutiny stage.
- Click Save and Close to save the details and close the screen.Tracer Details
User can trace the response for the discrepancies identified.
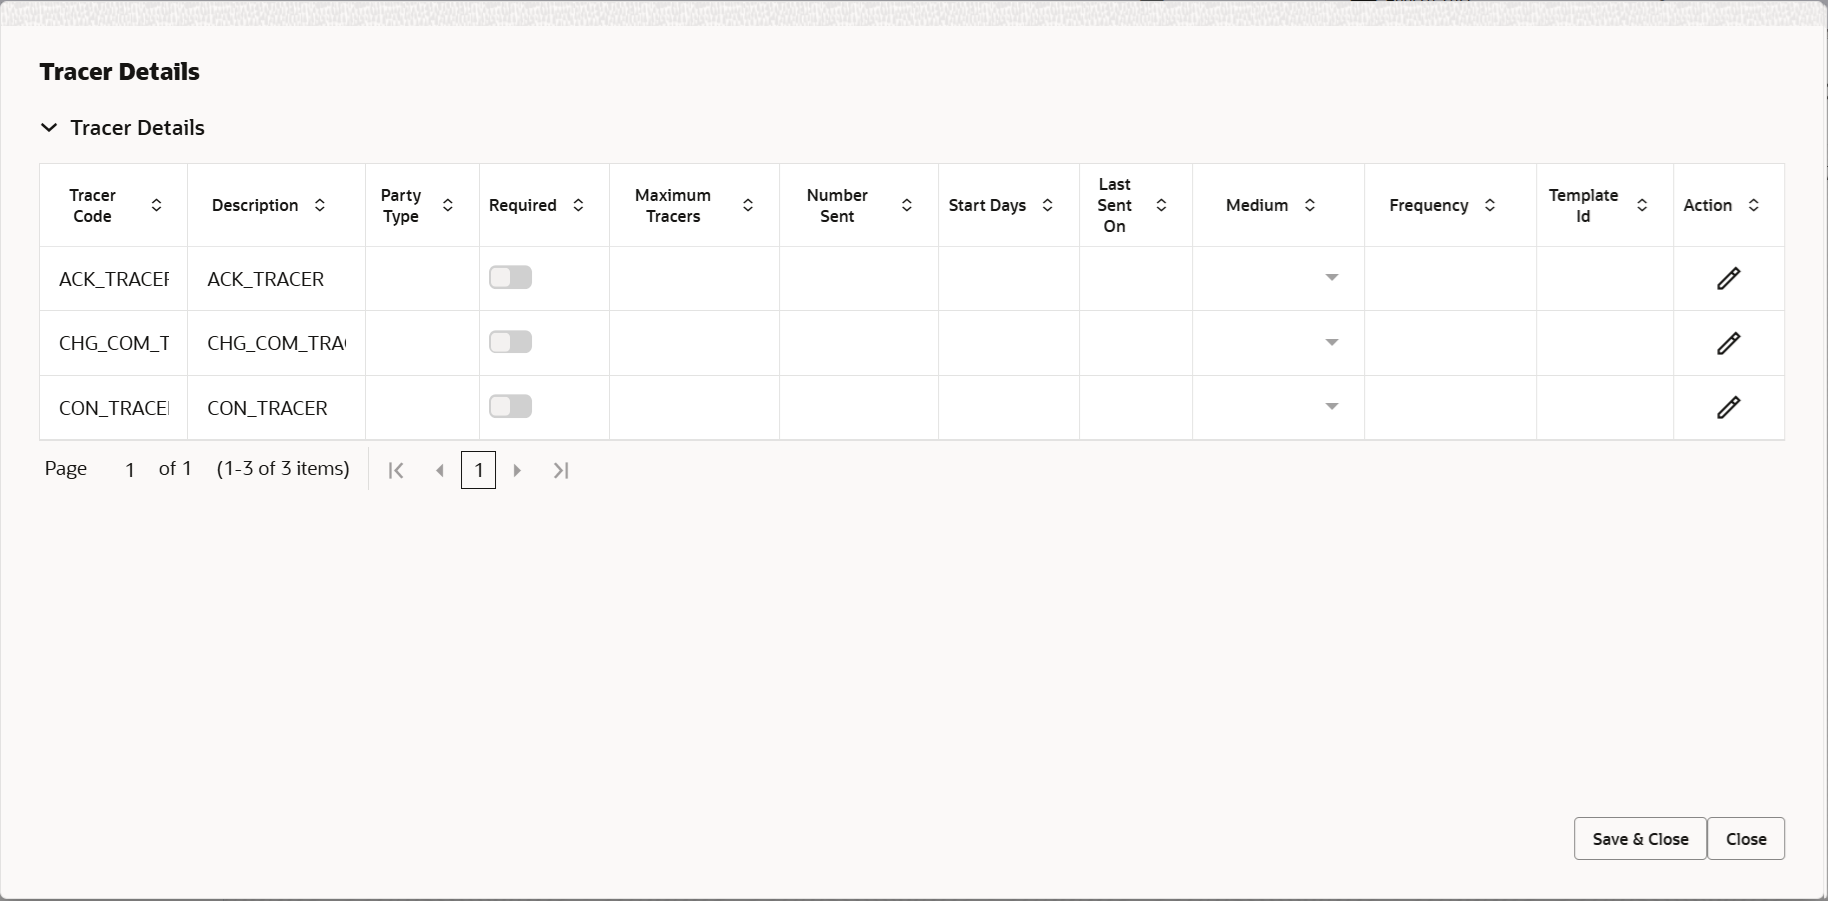
Description of the illustration detracerdetails.pngFor more information on fields, refer to the field description table below.
Table 2-26 Tracer Details - Field Description
Field Description Tracers Code Read only field. System defaults the value for tracer code from the latest LC.
Description Read only field. System defaults the value for description of tracer from the latest LC.
Party Type Click Search to search and select the party type from the lookup. Required Switch to  , if user requires to capture the tracer details.
Switch to
 , if user does not require to capture tracer
details.
Maximum Tracers Specify the value for maximum number of tracers. Number Sent Specify the value for number of tracers to be sent. Start Days pecify the value for tracer start days. Last Sent On Select the date on which the tracer is last sent. Tracer Medium Select the value for tracer medium. The options are:
- SWIFT
Tracer Frequency System defaults the days set up at the product level. Value can be 1, 2 etc. which represents daily, once in 2 days etc. The user can change the value.
Template ID Click Search to search and select the party type of the template ID from the lookup. - Click Save and Close to save the details and close the screen.
- Click Next.The task will move to next data segment.
For more information on action buttons, refer to the field description table Table 2-18 in Scrutiny stage.
Parent topic: Data Enrichment
