1.2.1 Create Bank Parameters
This topic provides the information to the user to configure the branch parameters. In the subsequent steps, let’s look at the steps to create branch parameters:
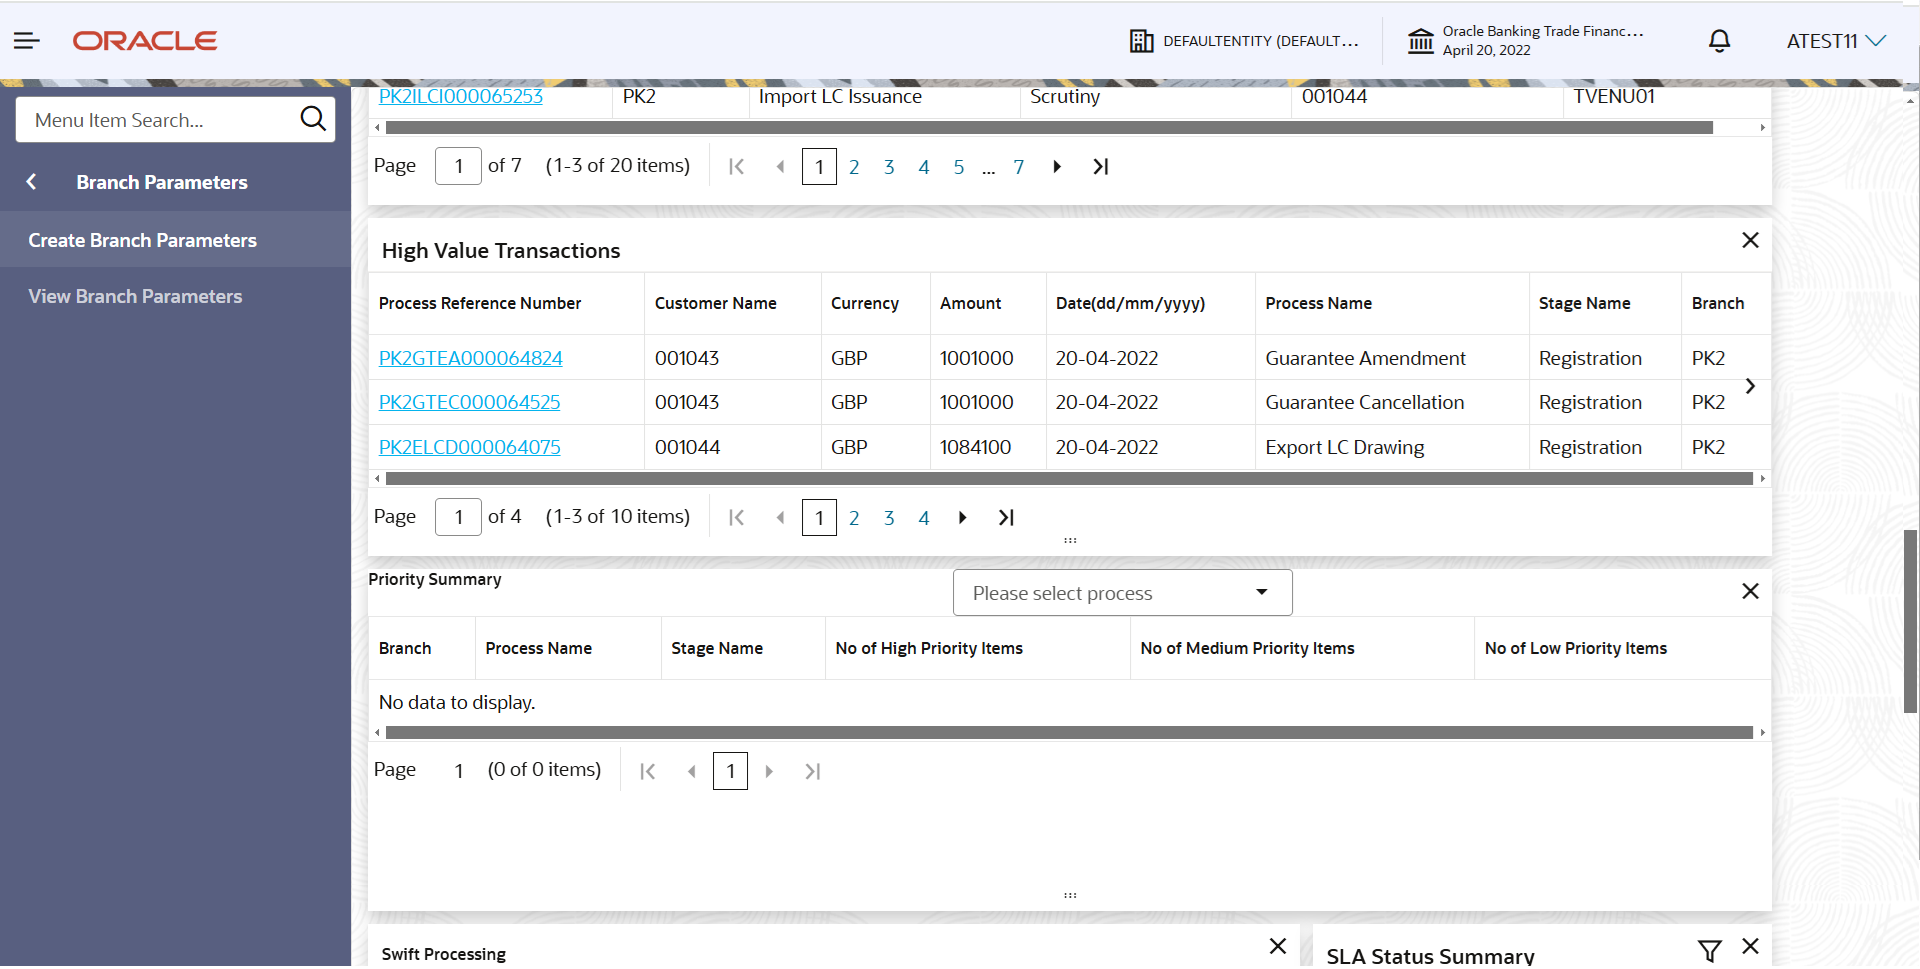
- On Home screen, click Trade Finance. Under Trade Finance, click Administration.
- Under Administration, click Branch
Parameters and then Create Branch
Parameters.
Figure 1-8 Create Branch Parameters - Navigation
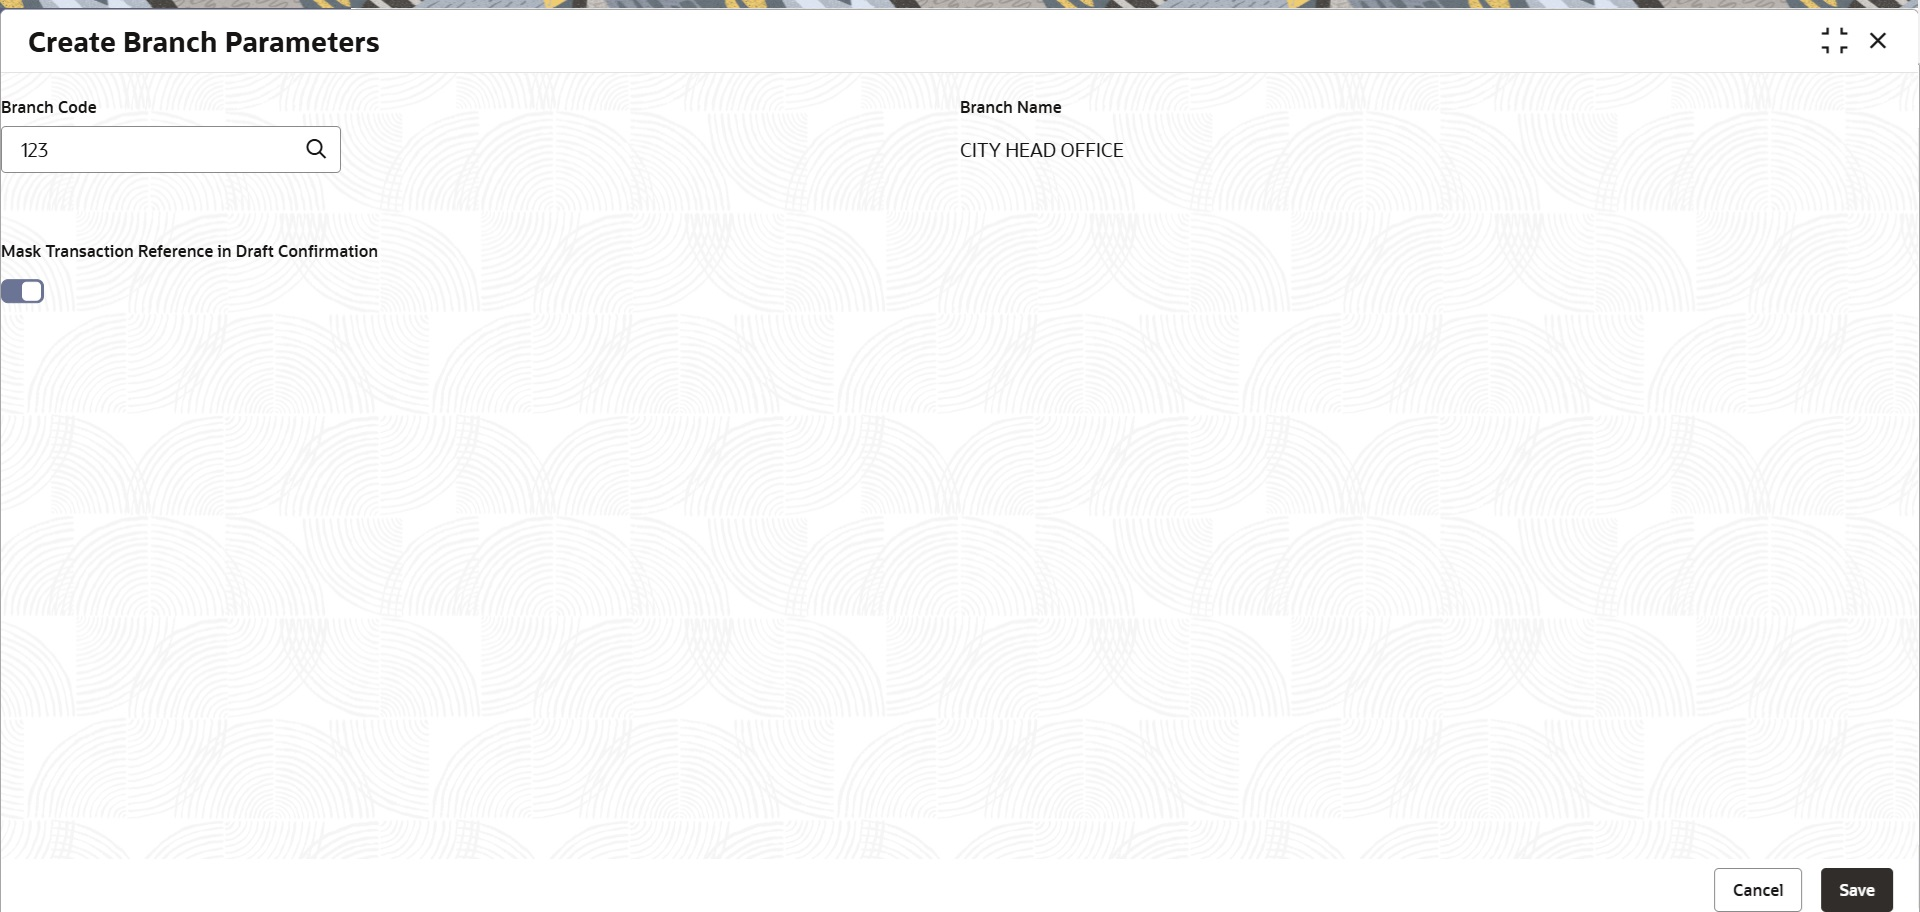
The Create Branch Parameters screen displays. - On Create Branch Parameters screen, specify the
fields.
- Click Search icon to search and select the required branch code from the look up.
- Move the Mask Transaction Reference Draft Confirmation toggle to mask the display of the Transaction Reference in Draft message sent to Customer for Approval.
Note:
The fields which are marked as Required are mandatory.For more information on fields, refer to the field description table below.
Table 1-6 Create Bank Parameters - Field Description
Field Description Branch Code Specify the code of the branch. Branch Name Read only field. Displays the name of the branch depending on the selected branch code.
Mask Transaction Reference in Draft Confirmation Switch to  to mask the display of the Transaction Reference in
draft message sent to customer for Approval.
Switch to
 to enable the display of the Transaction
Reference in draft message sent to customer for
Approval.
- Click Save to save the record.The Branch Parameter gets created. You can view the configured core branch parameter details in the View Branch Parameter screen.
For more information on action buttons, refer to the field description table below.
Table 1-7 Create Bank Parameters - Action Buttons - Field Description
Field Description Save Click the Save button to save the record. Cancel Click the Cancel button to cancel the record.
Parent topic: Branch Parameters


