3.2.3.1 Create Alert Decisioning
This topic describes the systematic instruction to set the delivery mode and frequency of sending alerts to a recipient.
- On Home screen, click Receivables And Payables. Under Receivables And Payables, click Maintenance.
- Under Maintenance, click Alerts. Under Alerts, click Alert Decisioning.
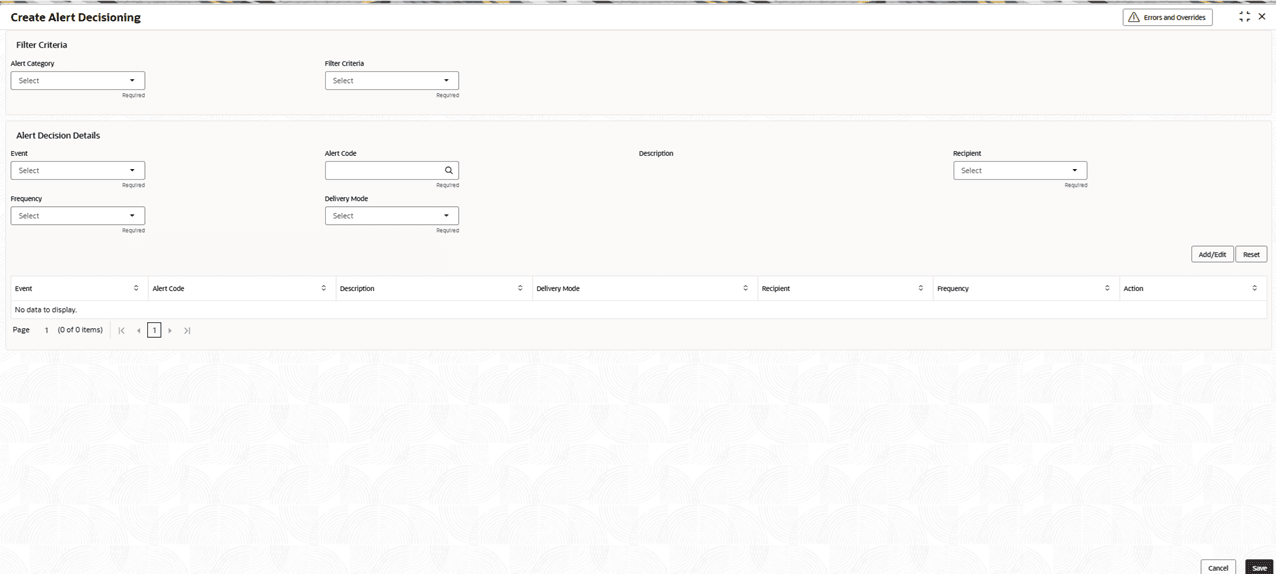
- Under Alert Decisioning, click Create Alert Decisioning.The Create Alert Decisioning screen displays.
- Specify the fields on Create Alert Decisioning screen.For more information on fields, refer to the field description table.
Note:
The fields marked as Required are mandatory.Table 3-8 Create Alert Decisioning - Field Description
Field Description Alert Category Select the category of the event for which the alert needs to be set. The options are:- Counterparty Disassociate
- Credit Note
- File Upload
- Invoice
- Payment
- Purchase Order
Filter Criteria Select the appropriate filter criteria for specific application of alerts. The options are:- Party and Role Based
- Relationship Based
- Default
Event Select the event for which the alert should be used. The list of events are displayed based on the selected category. If the Category is selected as Counterparty Disassociate, the following events are displayed in the drop-down list:- Counterparty Onboard
- Counterparty disassociate
If the Category is selected as Credit Note, the following event is displayed in the drop-down list:- Raise
If the Category is selected as File Upload, the following events are displayed in the drop-down list:- Invoice
- Payment
- Credit Note
- Debit Note
- Purchase Order
If the Category is selected as Invoice, the following events are displayed in the drop-down list:- Raise
- Accept
- Dispute
- Modify
- Cancel
- Raise In Progress
- Accept In Progress
- Dispute In Progress
- Modify In Progress
- Cancel In Progress
If the Category is selected as Payment, the following event is displayed in the drop-down list:- Create Payment
If the Category is selected as Purchase Order, the following events are displayed in the drop-down list:- Raise
- Accept
- Modify
- Cancel
- Invoice Overdue
Alert Code Click the search icon and select from the required alert code. The list of alert codes are displayed as per selected combination of category and event. Description Displays the description of the selected alert code. Recipient Select the recipient to whom the alert should be sent. The available options are: - Buyer
- Supplier
- Bank User
Frequency Select the frequency to send the alerts as follows: - Online - if the alert should be sent only when the event is generated.
- Scheduled - if the alert should be sent one or more times prior to the generation of the event.
Delivery Mode Select the mode through which the alert should be sent. If the Plato Alert Integration toggle is enabled at the System Parameters screen, then the available options are:- Dashboard
- SMS
If the Plato Alert Integration toggle is disabled at the System Parameters screen, then the available options is:Additional Phone Specify the additional phone number to send the alert on. This field is displayed only for the WhatsApp, and SMS modes of delivery.
Additional Email Specify the additional email address to send the alert on. This field is displayed only for the Email delivery mode.
Text Template for Email Click the search icon and select the text template for an email alert. This field is displayed only for Online frequency and Email delivery mode.
Attachment Template for Email Click the search icon and select the attachment template for an email alert. This field is displayed only for Online frequency and Email delivery mode.
Text Template for Whatsapp Click the search icon and select the text template for the WhatsApp alert. This field is displayed only for Online frequency and Whatsapp delivery mode.
Text Template for SMS Click the search icon and select the text template for an SMS alert. This field is displayed only for Online frequency and SMS delivery mode.
Text Template for Dashboard Specify the text template for the Dashboard alert. This field is displayed only for Online frequency and Dashboard delivery mode.
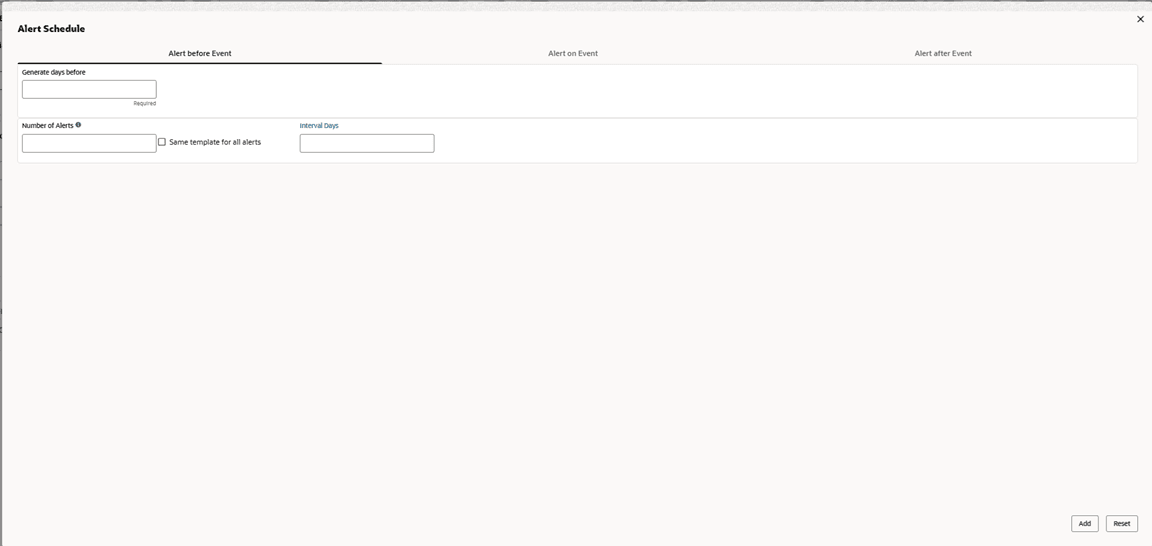
- On selecting the Scheduled option in the Frequency field, click the Alert Calendar icon to select the alert schedule.The Alert Schedule - Alert before Event popup screen displays.
Figure 3-17 Alert Schedule - Alert before Event
- Specify the fields on Alert before Event tab.For more information on fields, refer to the field description table.
Note:
The fields marked as Required are mandatory.Table 3-9 Alert before Event - Field Description
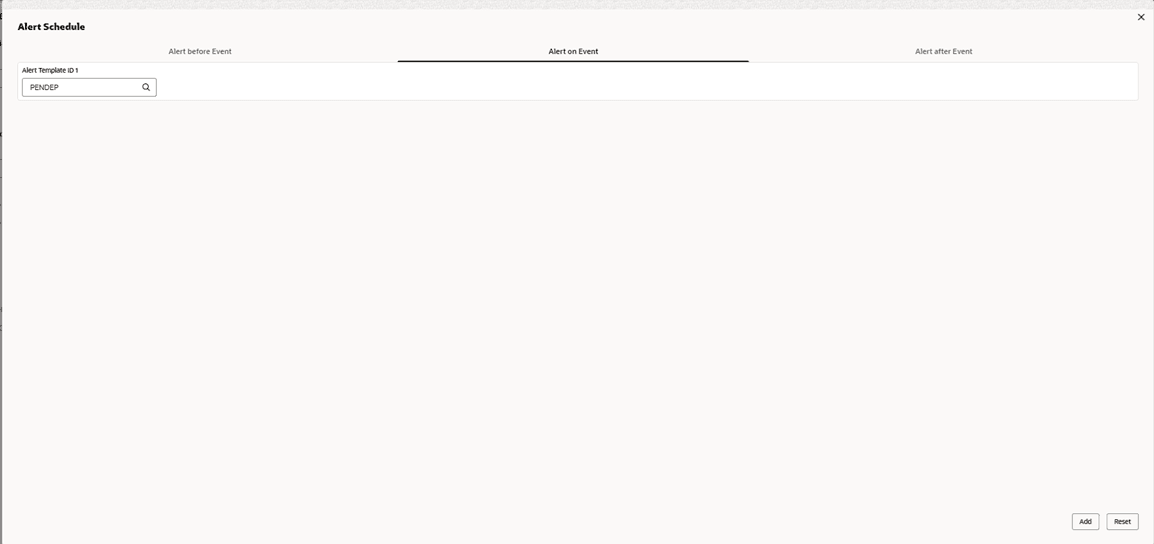
Field Description Generate days before Specify the number of days prior the event the alert to be sent. Number of Alerts Specify the total alerts to be sent. Interval Days Specify the interval in days between each alert. - In Alert Schedule popup screen, select the Alert on Event tab.The Alert Schedule - Alert on Event popup screen displays.
Figure 3-18 Alert Schedule - Alert on Event
- Specify the fields on the Alert on Event tab.For more information on fields, refer to the field description table.
Note:
The fields marked as Required are mandatory.Table 3-10 Alert on Event - Field Description
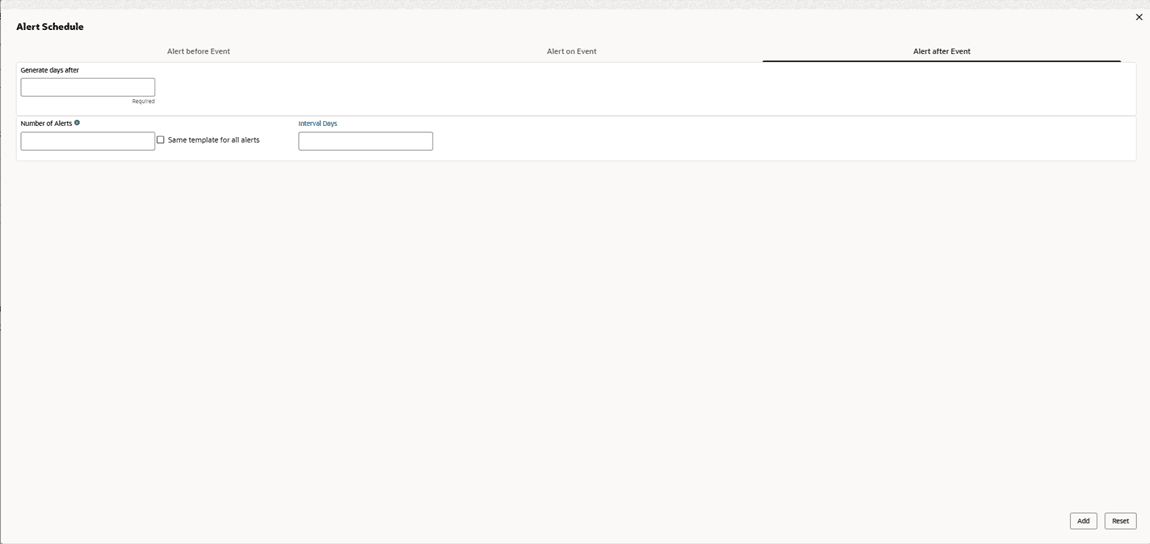
Field Description Alert Template ID 1 Click the search icon to select the template for the email alert. - In Alert Schedule popup screen, select the Alert after Event tab.The Alert Schedule - Alert after Event popup screen displays.
Figure 3-19 Alert Schedule - Alert after Event
- Specify the fields on the Alert after Event tab.For more information on fields, refer to the field description table.
Note:
The fields marked as Required are mandatory.Table 3-11 Alert after Event - Field Description
Field Description Generate days before Specify the number of days after the event the alert to be sent. Number of Alerts Specify the total alerts to be sent. Interval Days Specify the interval in days between each alert. - Click Add/Edit to add alert decision details in the grid or modify a selected records from the grid.
- Perform the following steps to take action on the records in the grid.
- Select the record in the grid and click Options icon under the Action column.
- Click Edit to modify records in the grid.
- Click Delete to remove the record.
- Click Save to save the record and send it for authorization.
Parent topic: Alert Decisioning


