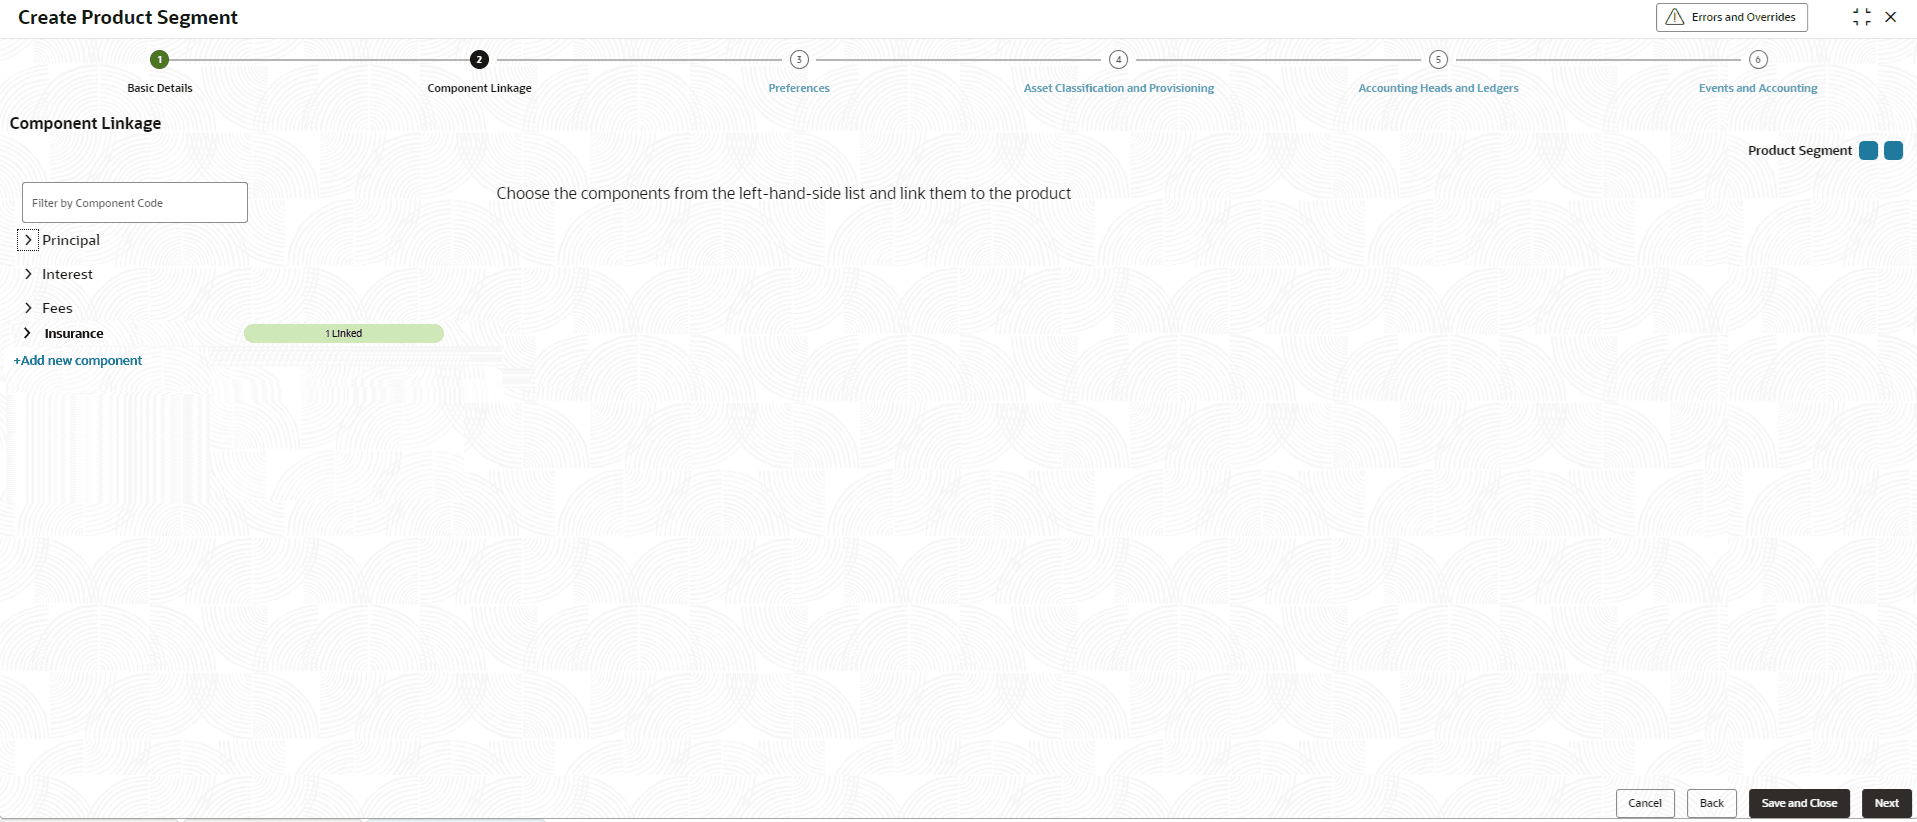
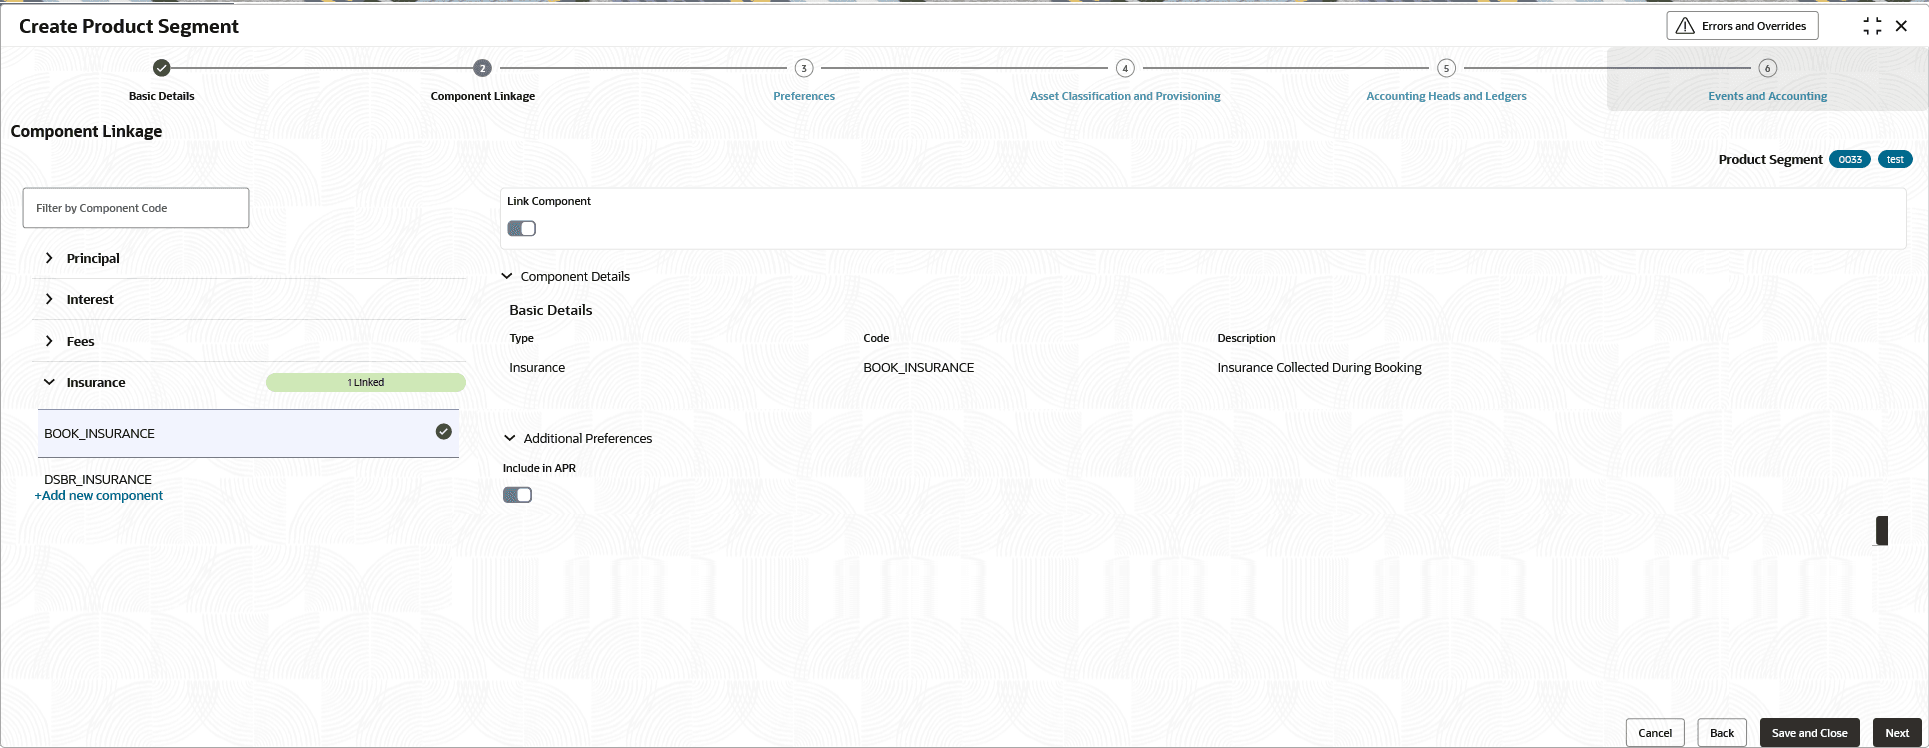
2.6.1.2 Component Linkage
This topic describes about configuring applicable business components to the product segment.
For more information on Business Component, refer to Create Business Component.
- Method 1:
- Type the Business Component Code in filter by Component Code field.
- System lists all the components matching the typed code.
- Select the component from the list shown. Link Component toggle, basic details of the component, and its preferences are displayed on the right.
- Enable the component toggle to link the component.
- Method 2:
- Click on the Expand icon besides Principal.
- Select the principal component from the list shown. Link Component toggle, basic details of the component, and its preferences are displayed on the right.
- Enable the component toggle to link the component.
- Repeat the above steps for linking Interest, Fees, Insurance and any other components.
- To delink the business components, select the component and click on the toggle to disable.
- Click Next in the Basic Details screen to link the components.The Component Linkage screen displays.
Note:
The Components defined in the Component Linkage will be displayed.
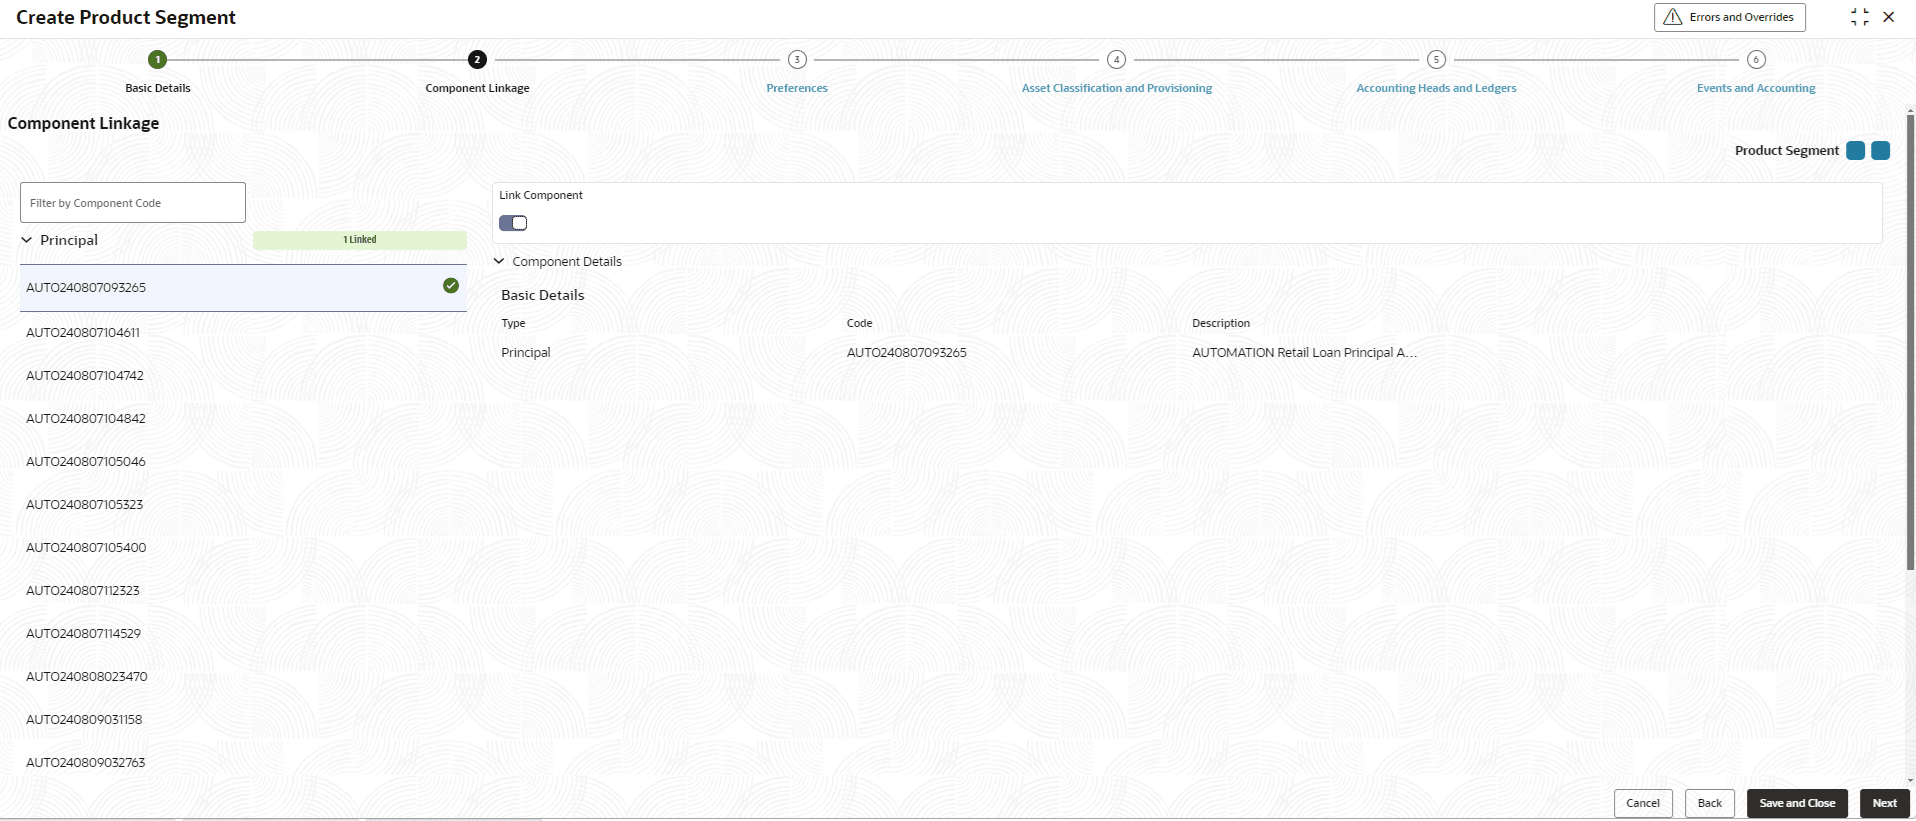
Principal
- Specify the fields on Principal screen.
Refer above to link the Principal component. On linking Principal component, below component details are displayed.
For more information on fields, refer to the field description table.Note:
The fields marked as Required are mandatory.Table 2-15 Principal - Field Description
Field Description Type Displays the type of component as Principal. Code Displays the unique code of principal component . Description Displays the description of the principal component code
Interest
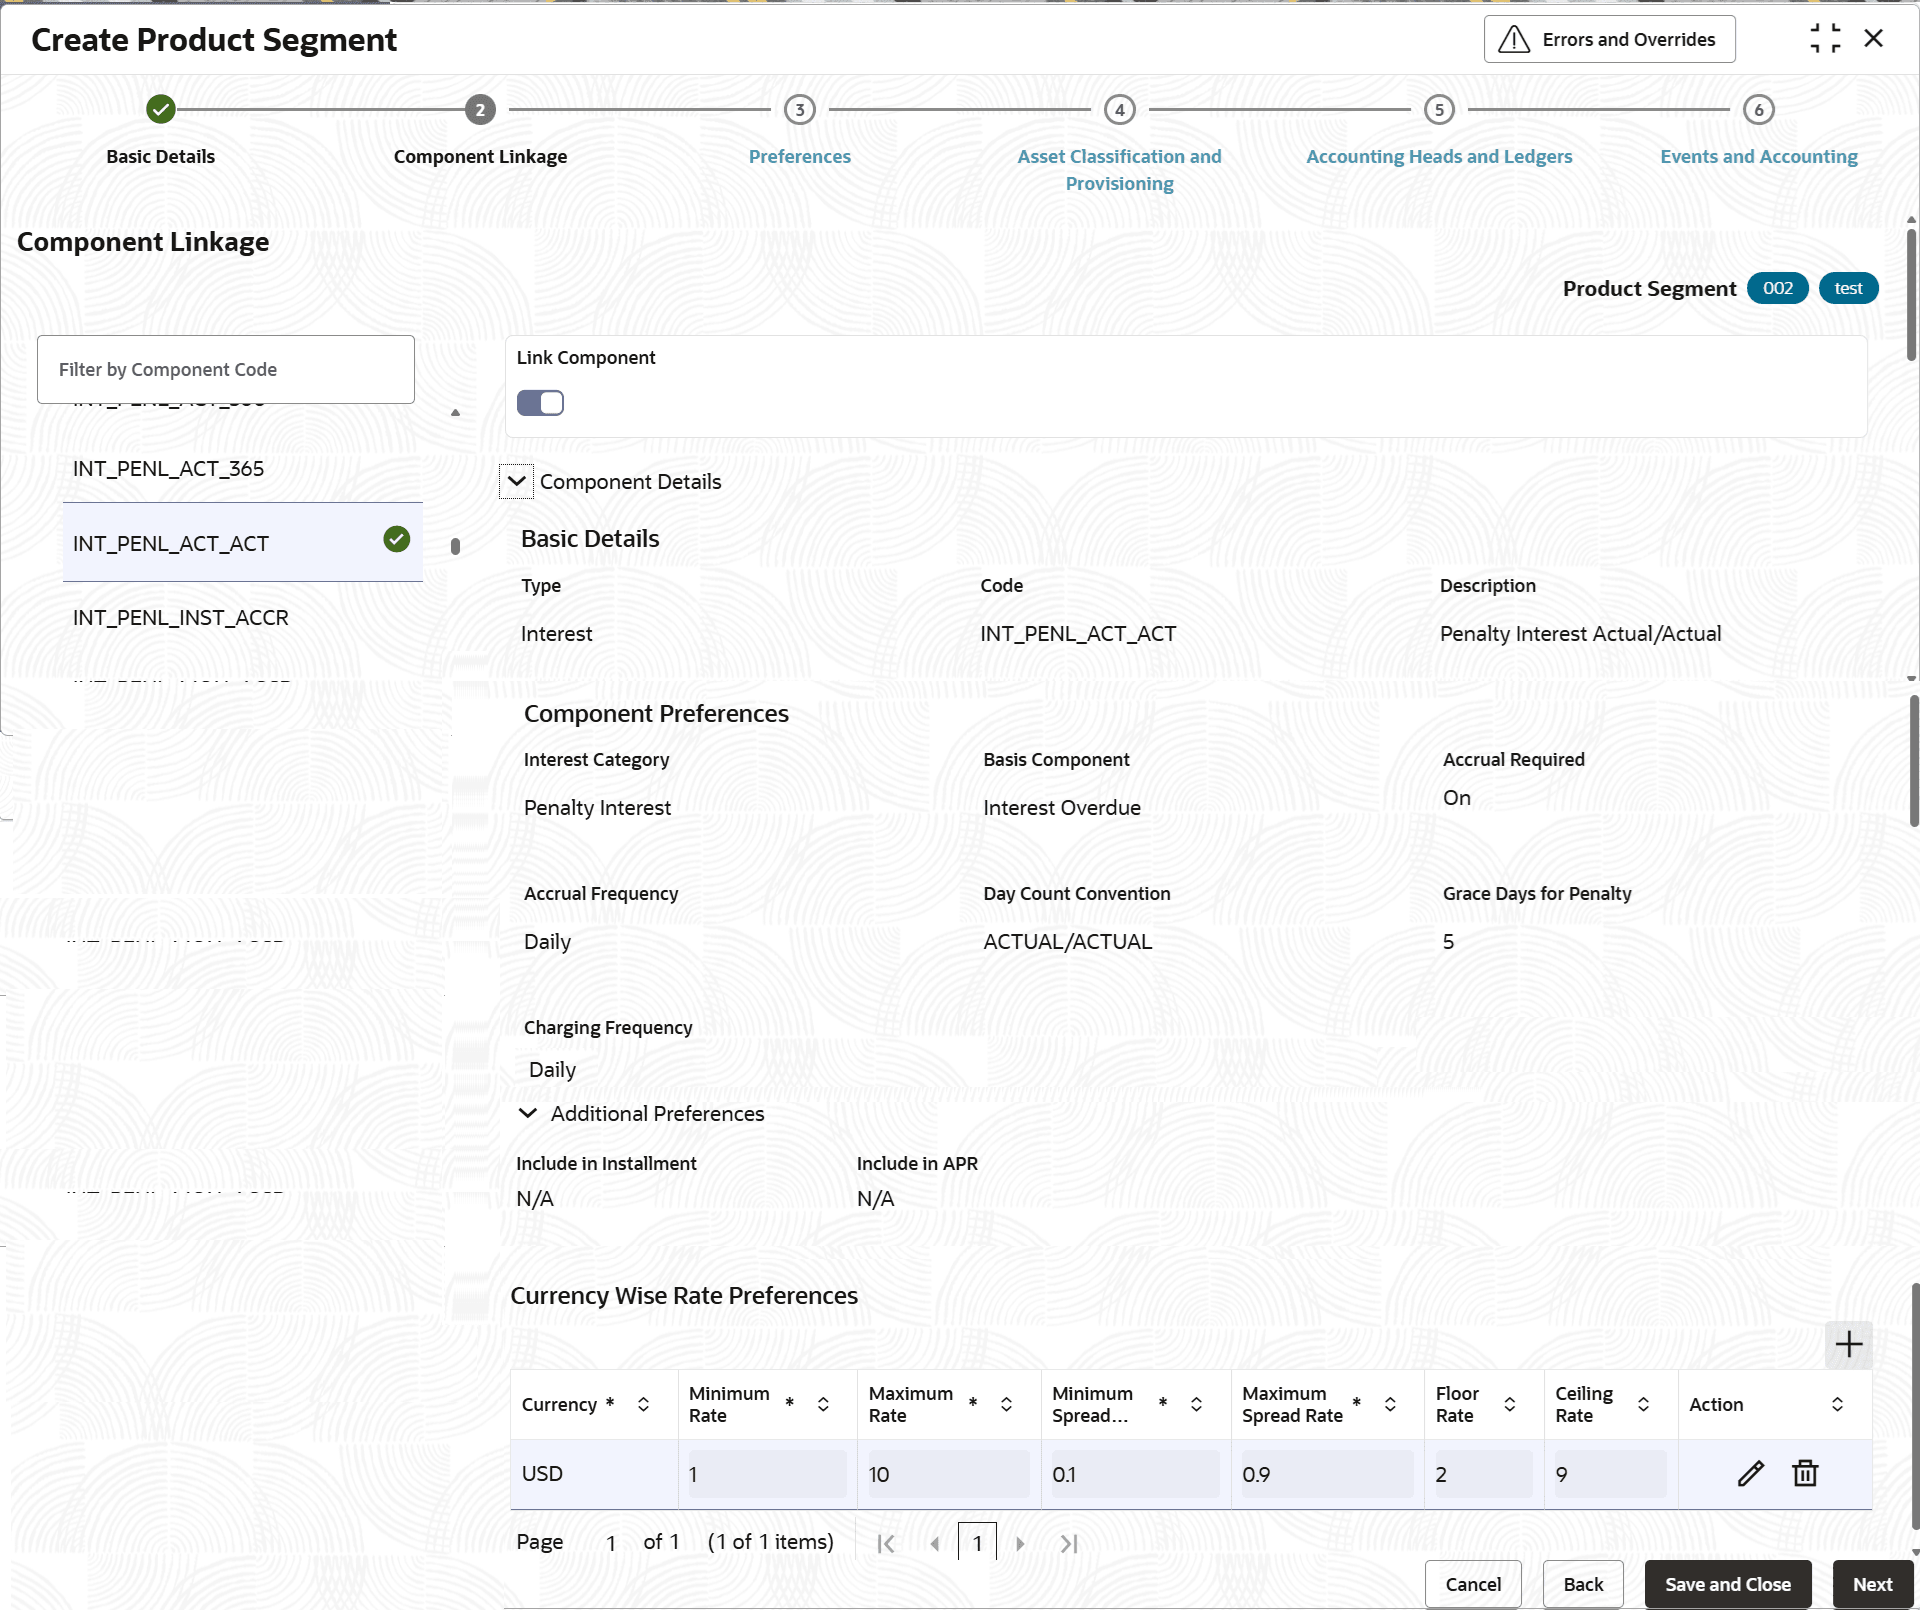
- Specify the fields on Interest screen.
Before enabling the Link toggle, user is required to define Princing Preferences for Interest and Currency wise Interest Rate preferences.
Interest Pricing Preferences refer to attributes based on which Interest Rate and Spread applicable on loan account is determined across the term of the loan.
Currency wise Interest Rate preferences refer to Minimum and Maximum Rate and Spread that can be allowed on the account for each of the allowed product currencies.
Figure 2-17 Interest - Basic Details and Component Preferences
For more information on fields, refer to the field description table.Note:
The fields marked as Required are mandatory.Table 2-16 Interest - Basic Details and Component Preferences
Field Description Type Displays the type of component as Interest. Code Displays the unique code of interest component . Description Displays the description of the interest component code For more information on fields, refer to the field description table.Note:
The fields marked as Required are mandatory.Table 2-17 Interest - Currency Wise Rate Preferences - Field Description
Field Description Currency Click  icon and select the currency from the list.
Note: One currency is to be mandatorily selected.
Minimum Rate This is the minimum interest rate allowed for the interest type component. Specify the minimum rate value up to 6 decimals. Note: While onboarding loan account or during life cycle of loan, an error is displayed if final interest rate of account goes below the specific minimum rate.
Maximum Rate This is the maximum interest rate allowed for the interest type component. Specify the maximum rate value up to 6 decimals. Note: While onboarding loan account or during life cycle of loan, an error is displayed if final interest rate of account exceeds this maximum rate.
Minimum Spread Rate This is the minimum spread rate for the interest type component. Specify the minimum spread rate value up to 6 decimals. Note: While onboarding loan account or during the life cycle of loan, an error is displayed if spread value goes below the minimum spread rate.
Maximum Spread Rate This is the maximum spread rate for the interest type component. Specify the maximum spread rate value up to 6 decimals. Note: While onboarding loan account or during the life cycle of loan, an error is displayed if spread value exceeds the maximum spread rate.
Floor Rate The Floor Rate should be set up greater than the Minimum Rate and less than the Ceiling Rate. Note: The borrower is charged the floor rate if the calculated interest rate (benchmark rate + margin) is lower than the floor rate.
Ceiling Rate The Ceiling Rateshould be set up greater than the Maximum Rate. Note: The borrower is charged the ceiling rate if the calculated interest rate is higher than the ceiling rate.
Action Displays the action. The user can edit or delete the record.
Fees
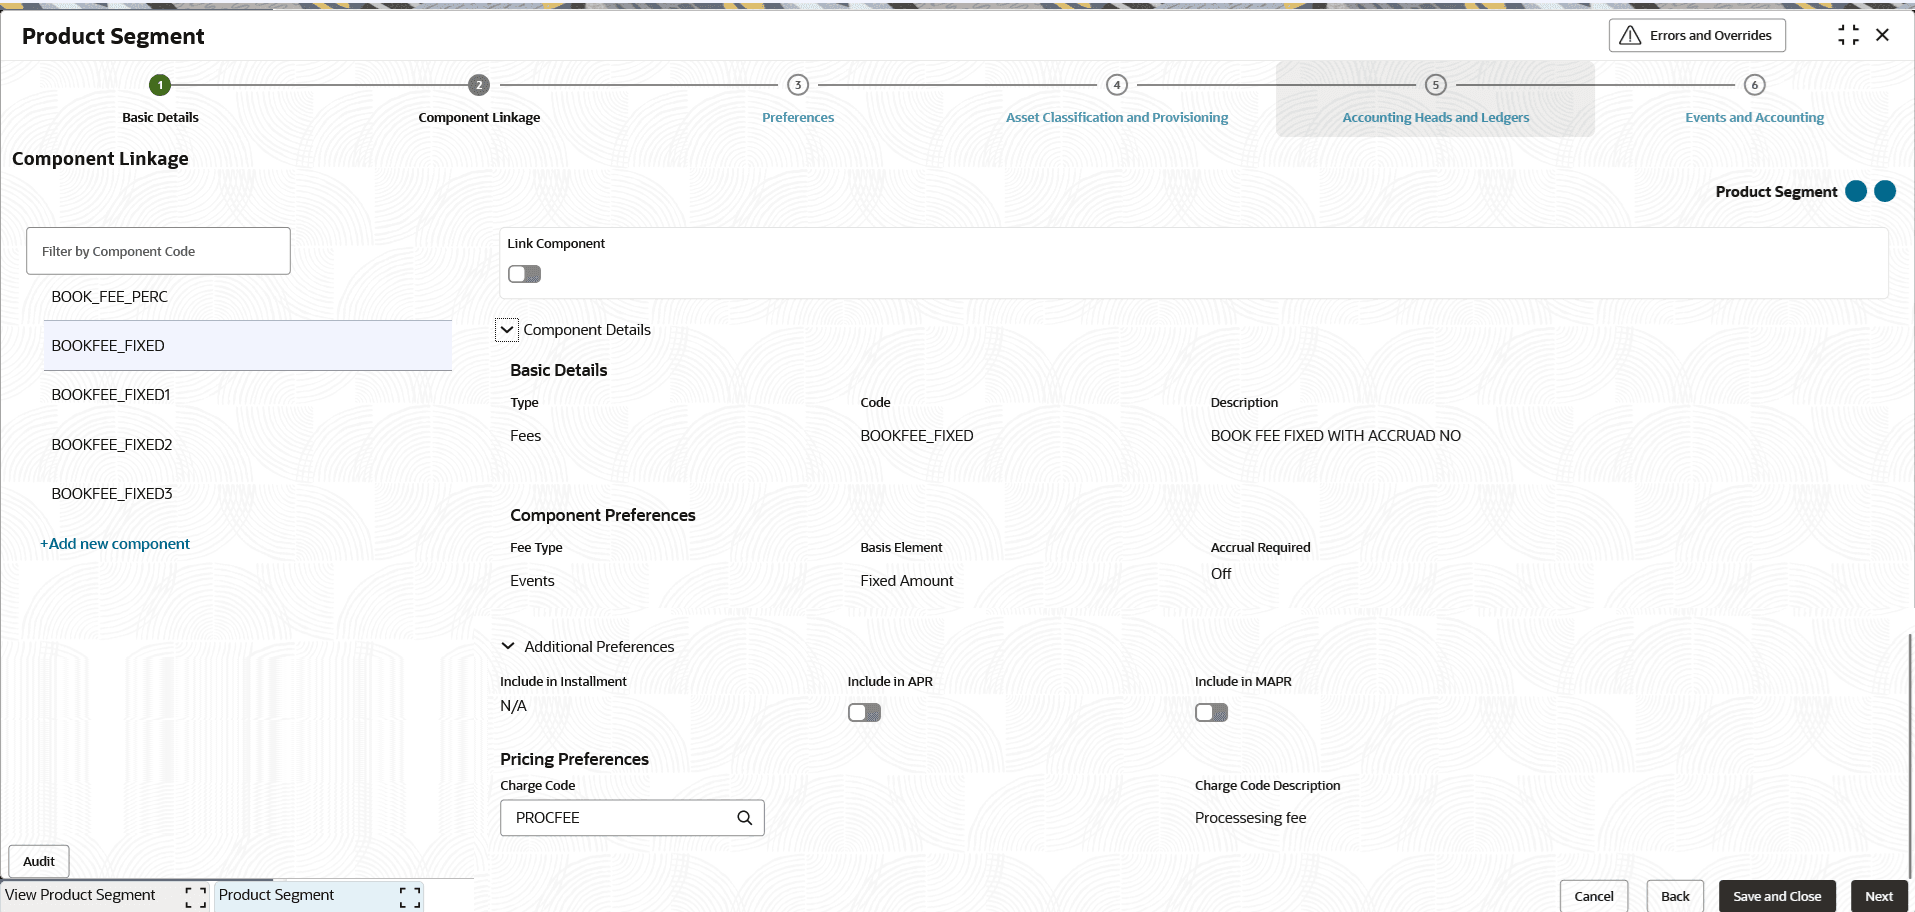
- Specify the fields on Component Linkage - Fees
screen.
Before enabling Link Component toggle, user need to specify charge code of the fees. Below Component Details are displayed.
Note:
The fields marked as Required are mandatory.For more information on fields, refer to the field description table.
Table 2-18 Fee - Basic Details and Component Preferences
Field Description Type Displays the type of component as Fee. Code Displays the unique code of fee component. Description Displays the description of the fee component code Fee Type Displays the type from the drop-down list. Options are:- Events - In case of fee to be charged on specific event everytime the event occurs or periodic/scheduled in nature or to be raised in manually/adhoc application. This allow attaching fees on BOOK event.
- Periodic - The fees are defined for a specific periodicity. The Frequency and periodicity are defined further in linking the Fee in Product Segment. The allowed values are defined by the lookup type FEE_TYPE.
Basic Element Displays the element type from the drop-down list. The available options are:- Fixed Amount
- Sanctioned Amount
- Disbursed Amount
- Prepaid Amount
- Installment Amount
The Basis Element is defaulted to Fixed Amount if the Assessment Method is selected as Adhoc Based at a transaction level.
The allowed values are defined by the lookup type FEE_BASIS_ELEMENT.
Accrual Required Display whether accrual required is enabled or disabled. When accrual is enabled, interest is recognized as income at the accrual frequency mentioned, even before interest is due/received
Table 2-19 Fees - Additional Preferences and Pricing Preferences - Field Description
Field Description Include in Installment Click the toggle status to enable this feature. This toggle should be enabled if the said component is required to be considered in the installment amount. Include in APR Click the toggle status to enable this feature. This toggle to be enabled, if the said component is required to be considered for computation under the Annual Percentage Rate. Include in MAPR Click the toggle status to enable this feature. This toggle to be enabled, if the said component is required to be considered for computation under the Military Annual Percentage Rate. Charge Code Amount of fees or percentage of fees to be applied is decided based on the Charge Code. Click  icon and select the code from the list.
Charge code maintained are displayed in the list.
For more information on charge code, refer Charge Code in Common Core User Guide.
Charge Code Description Displays the description of the charge code selected.
Insurance
This allows linking Insurance Components to Product Segment.
- Specify the fields on Component Linkage - Insurance
screen.
Before enabling Link Component toggle, user need to specify charge code of the fees. Below Component Details are displayed.
Note:
The fields marked as Required are mandatory.For more information on fields, refer to the field description table.
Table 2-20 Insurance - Field Description
Field Description Include in Installment Click the toggle status to enable this feature. This toggle should be enabled if the said component is required to be considered in the installment amount. Include in APR Click the toggle status to enable this feature. This toggle to be enabled, if the said component is required to be considered for computation under the Annual Percentage Rate. Premium Collection Allows user to define whether the Insurance Premium be collected be credited directly to the Insurance Company or via Escrow Account. Force Place Insurance Click the toggle status to enable this feature. This toggle to be enabled, then system will debit the Premium amount from the Customer Loan Account to pay the Insurance Premium in case the Insurance Premium had failed from CASA account. By default value this is disabled.
Note: For the future release.
- Click Cancel to close the details without saving.
- Click Back to navigate to previous screen (Basic Details).
- Click Save and Close to save the details.
- Click Next to save and navigate to the next screen (Preferences).
Parent topic: Create Product Segment
