3.6.1 Account Statement
User can generate loan statement as per the customer's request with the help of available features like date range or preset range definitions using the Account Statement screen.
To view the account statement:
Note:
The fields marked as Required are mandatory.- On the Homepage, from Retail Lending
Services mega menu, under Balances, click
Account Statement. User can also open the screen by
specifying Account Statement in the search icon bar and
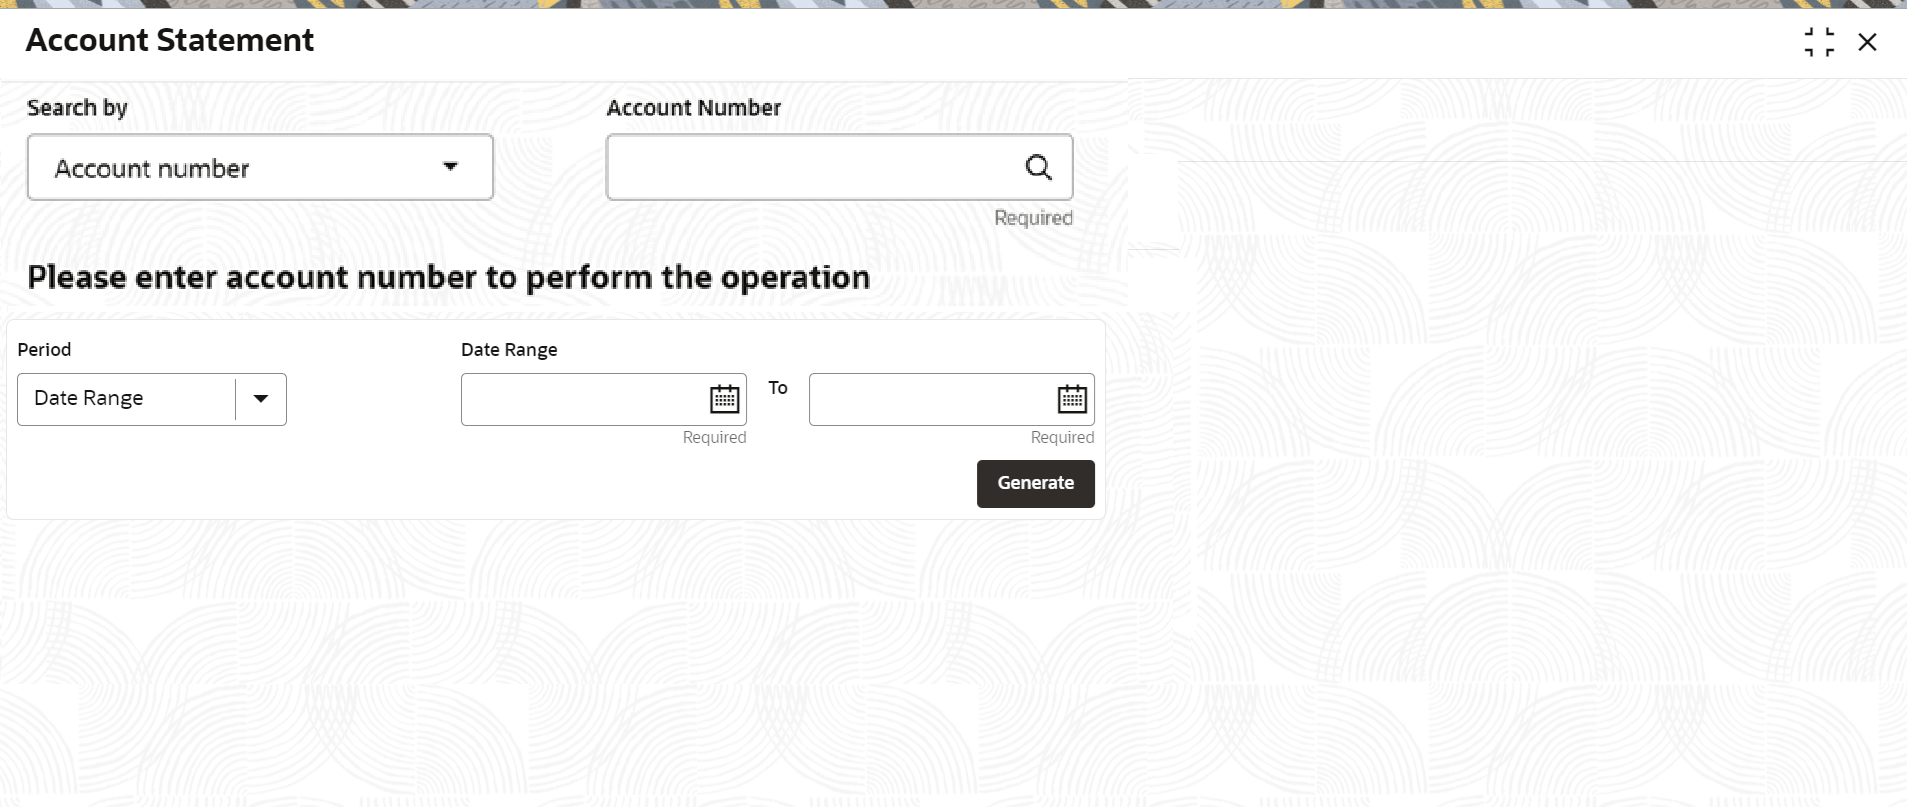
selecting the screen.The Account Statement screen is displayed.
- Select the appropriate option from the Search by field.
- Perform the required action, based on the option selected from the Search by field.
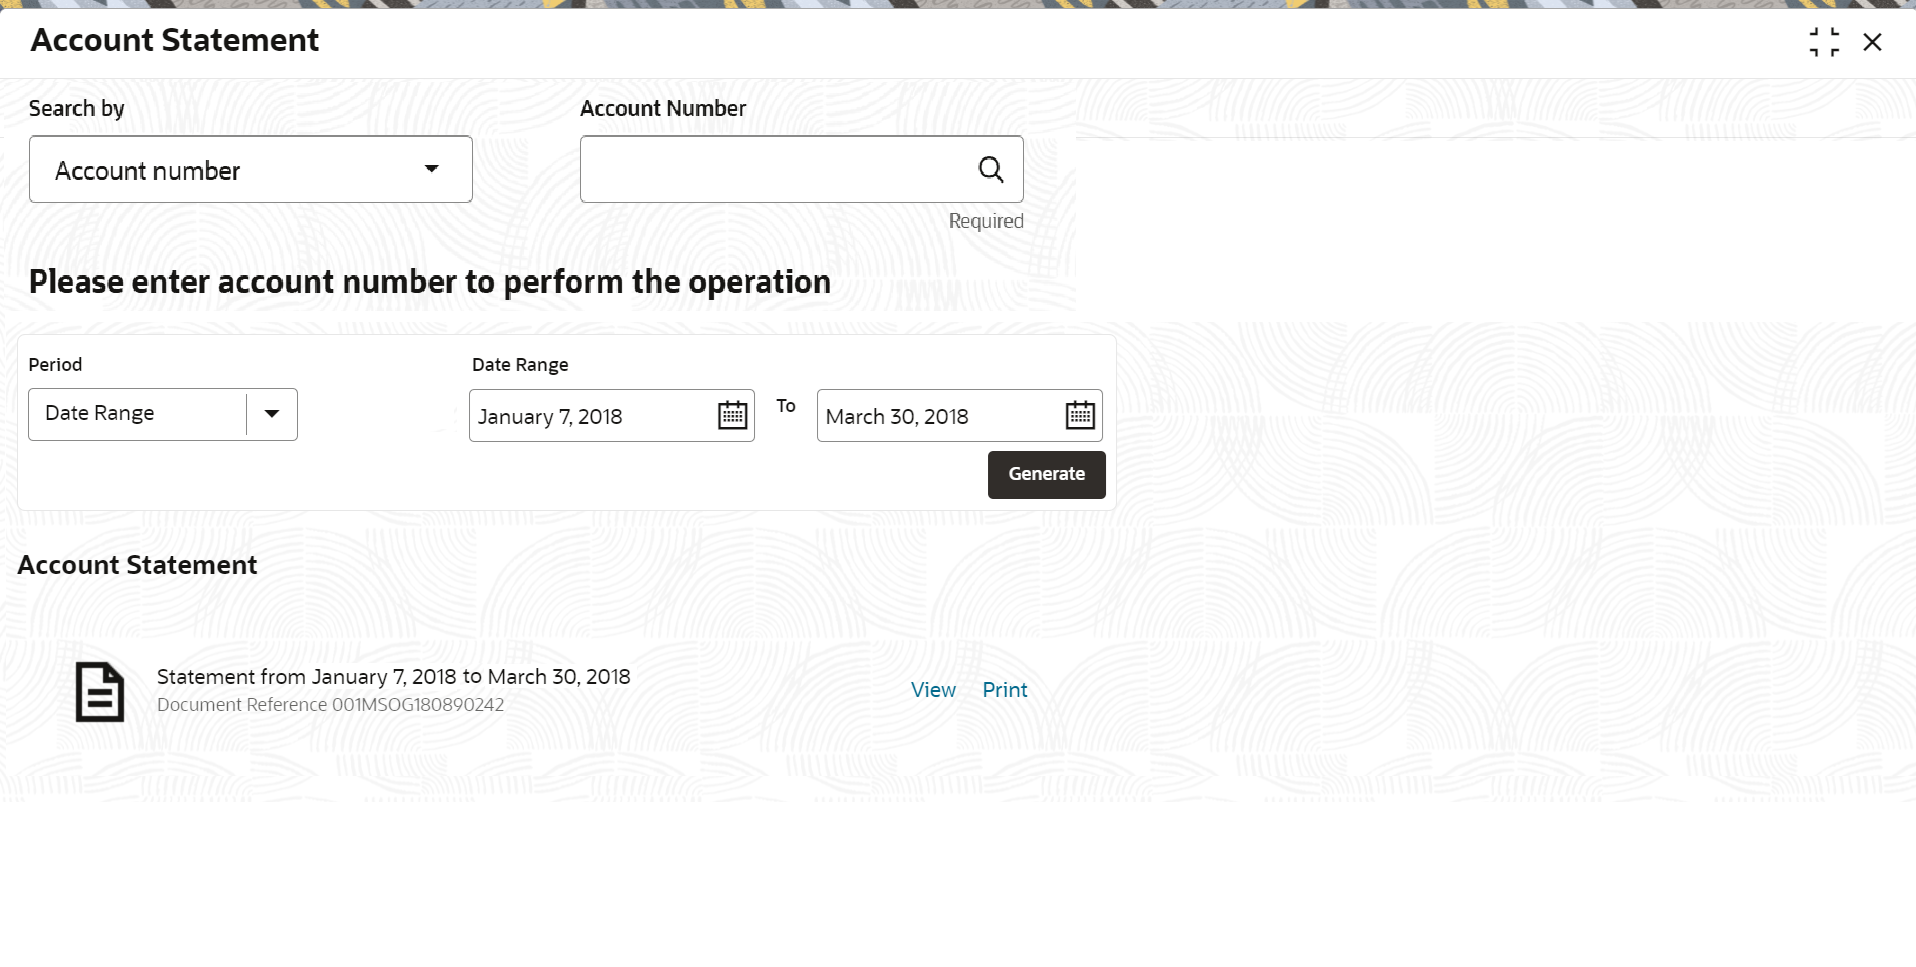
- Click Generate.The Account Statement section is displayed.
The statements are displayed if they are generated for the account number on the given system date.
Figure 3-63 Account Statement for Required Period

Description of "Figure 3-63 Account Statement for Required Period" - On the Account Statement screen, select the required
date to generate statement. For more information on fields, refer to field
description table below:
Table 3-38 Account Statement – Field Description
Field Description Search by Users can search for an account number by using any of the available search criteria. The account number is set as the default search option. Users can specify the account number directly in the adjacent field or search for an account number by clicking the Search icon. Users can also search for the specific account number by providing customer ID, account number, or account name.
Other search options available in the Search by field are Customer ID, SSN, Mobile Number, and Email.
A specific customer ID can be searched by providing the customer name or customer ID. If SSN, mobile, or email IDs are chosen to find an account number, the respective IDs have to be input entirely in the adjacent field for the system to display the account number. For a given search criteria, multiple account numbers may be linked.
For example, two or more account numbers can be linked to a single mobile number. In such cases, the system displays all the account number matches and the user can select the relevant account number on which to perform a servicing operation.Note:
The label of the field adjacent to the Search by field changes dynamically. For example, if the Account number is chosen as the search criteria, the label of the adjacent field is displayed as the Account Number. If SSN is chosen as the search criteria, then the adjacent field would display the label as SSN.Period Select the period for generating the statement. The options are: - Date Range
- Last Month
- Last 2 Months
- Last 3 Months
Date Range Specify or select the date range for generating the statement. Note:
- If user have selected the Date Range option from the Period field, then the start date will default to the loan account creation date if it is later than the financial year start date. Otherwise, it is the financial year start date. user can edit the date provided it is within the loan account creation date and the current system date.
- If user have selected the Last Month, Last 2 Months, or Last 3 Months options from the Period field, then the from and to dates are displayed and the field is not enabled for further edits.
Account Statement This section displays the statements generated based on the period or date range. For information on the links displayed, refer to Step 5. Note:
If user generate the statement more than once on the same system date, then the latest statement generated is displayed first and followed by the earlier generated statements.Statement From <Date> to <Date> Displays the from and to date for which the statement is generated. Generated By Displays the name of the person who generated the statement. Document Reference Displays a document reference number for the generated statement. - From the Account Statement section,
user can perform any of the following actions:
- Click the View link, to view the statement generated.
- Click the Print link, to print the statement generated.
Parent topic: Balances
