Basic Setup using GUI Installer
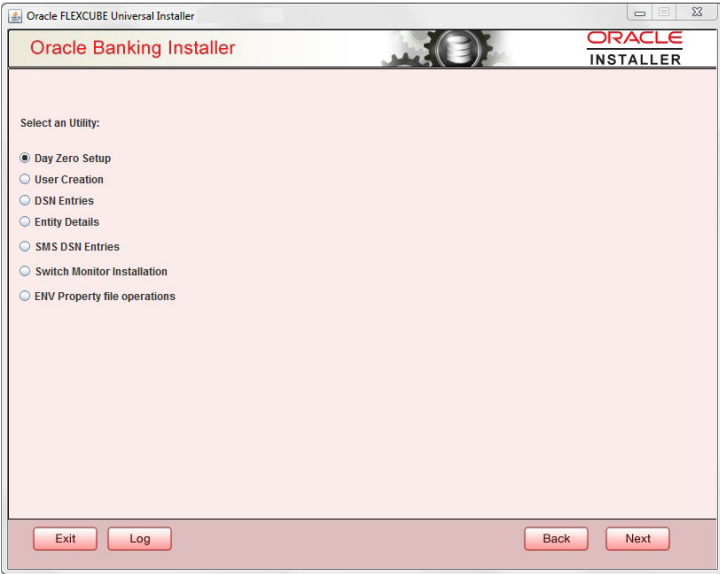
Oracle FLEXCUBE Universal Installer will list the Utilities based on the Configuration mode selected. Utilities – Normal Configuration Mode
- Day Zero Setup
- User Creation
- Reports DSN Entries
- Entity Details
- SMS DSN Entries
- Switch Monitor Installation
- Env Property file operations
- Block Chain
Day zero setup of normal configuration mode will be explained in detail in this document.
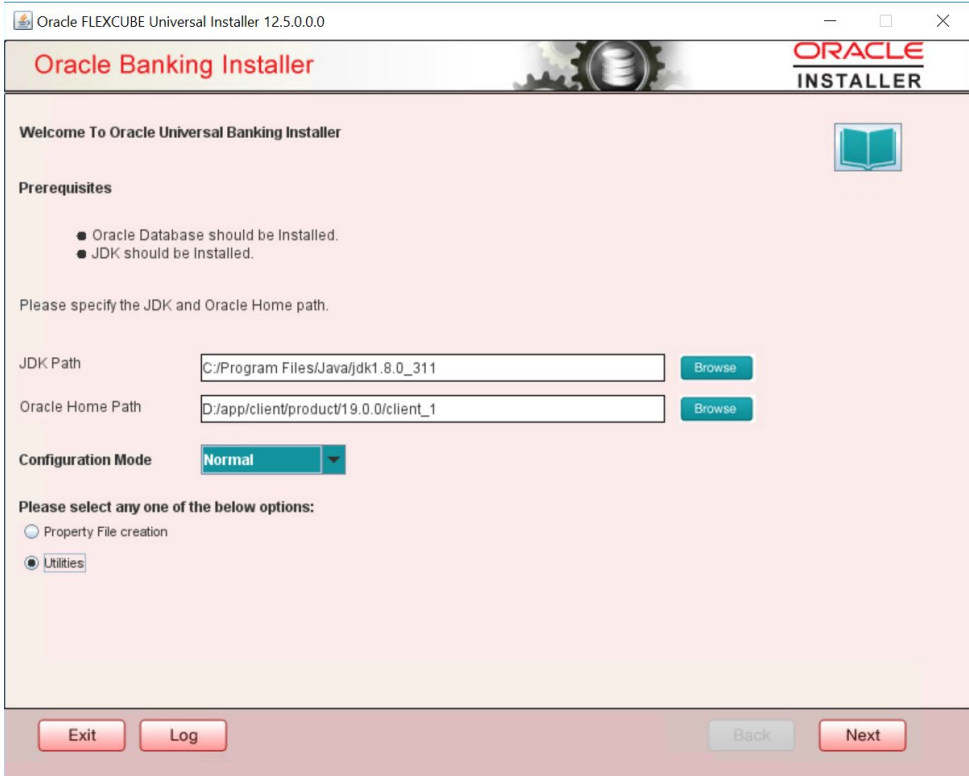
- Double-click ‘FCUBSInstaller.bat’ batch file to launch Oracle Banking Payments Installer. The following screen is displayed. Select Configuration mode as ‘Normal’ and select Utilities option and click ‘Next’ button.
- Select Day Zero Setup in Utility Screen and click Next as shown below.
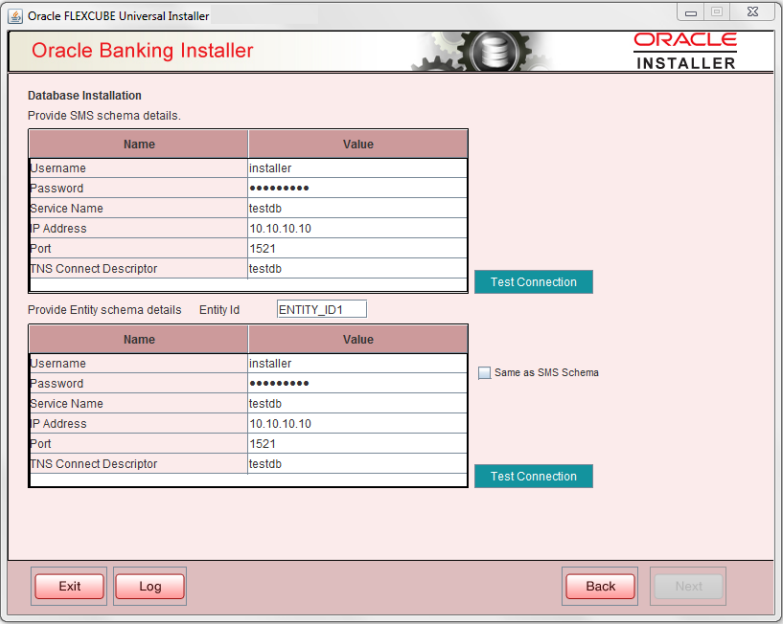
- Click Next and in the below screen. Payments Schema details to be entered.
Specify the following schema details:
User Name Specify the user name to access the schema. Password Enter the schema password. Service Name Provide service name of database. IP Address Specify the IP address of the system where the database schema is installed. Note: IP Address should be same as mentioned in the TNSnames.ora Port Specify the port number. TNS Connect Descriptor Specify the TNS Connect Descriptor. - Here Entity Schema is mandatory, at least minimum one entry should be provided.
- Entity Id value is default i.e. ‘ENTITY_ID1’ for first entry.
- Provide the JNDI Name for the ENTITY_ID1. By default the jndi name is ‘jdbc/fcjdevDS’
- Give the Schema Details for the Entity1.
- Here Compile In All Entities Field is ‘N’. (As using the Single Entity Concept).
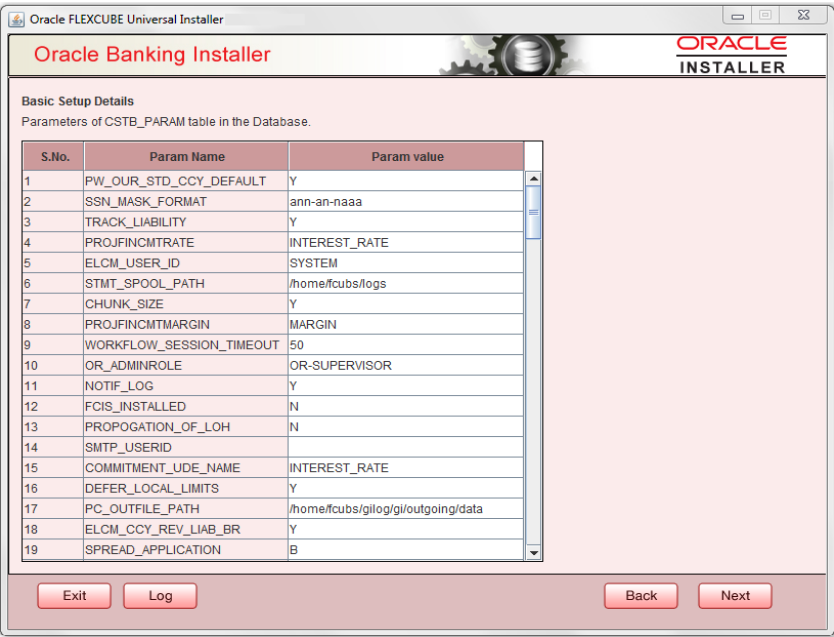
- Click Next and the following screen is displayed:
Screen displays basic setup details for table CSTB_PARAM.
Here Oracle directory name (present in all_directories table in the schema) must be added for WORK_AREA and TRACE_AREA. Oracle directory name must be added for other required parameters also.
Oracle directory creation in the schema can be done as below : Create or replace directory dir_name as 'directory_path’;
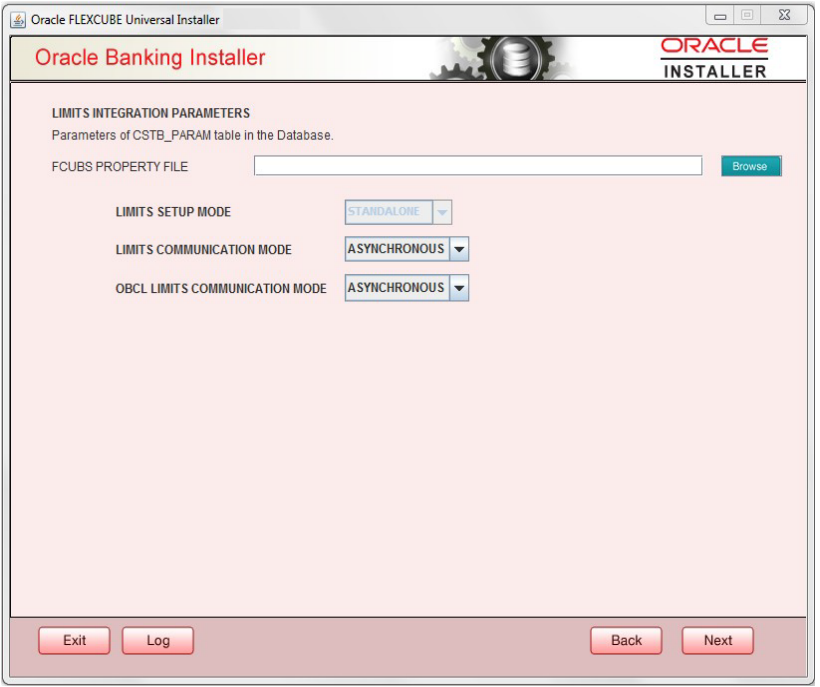
- Click on Next button to display Limits integration Parameters Screen as shown below:
Limits Integration Parameters will be set based on values read from fcubs.properties file browsed.
In case of ELCM Embedded, Limit Communication mode will be Asynchronous by default. These parameters will be updated in CSTB_PARAM table.
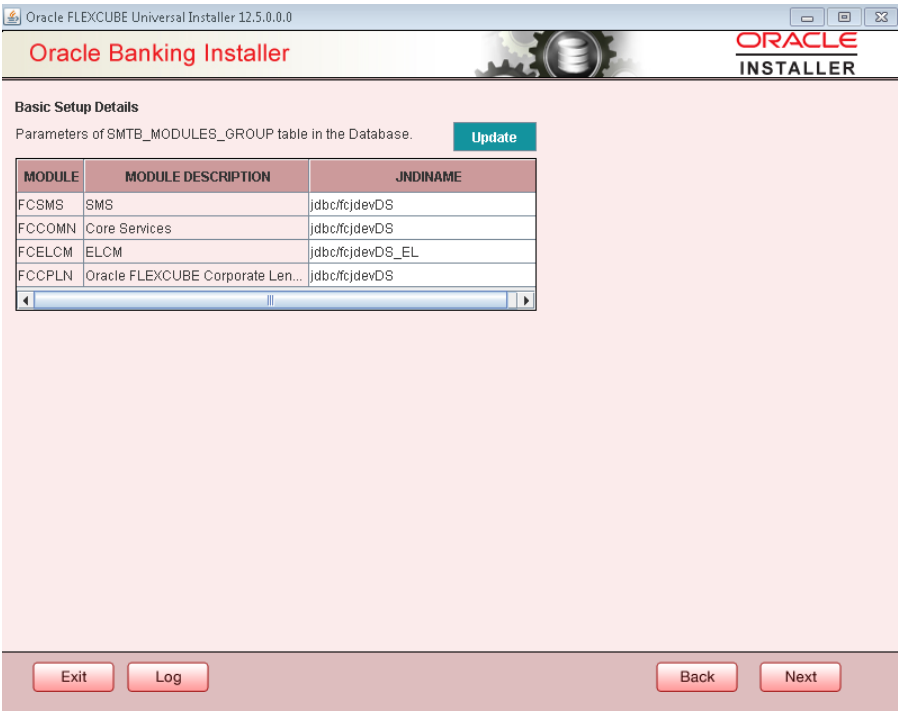
- Click on Next button . Screen displays parameters for table SMTB_MODULES_GROUP If any change is required in the JNDI name, edit the same and click on Update.
Note:
SMTB_MODULES_GROUP for FCELCM (Oracle ELCM) with the JNDI name ‘<ENTITY_ID JNDI name>_EL’. For example, if the ENTITY_ID JNDI name is ‘jdbc/fcjdevDS’, then you need to update JNDI name ‘jdbc/fcjdevDS_EL’. - Click Next. The following screen is displayed.
Figure 2-7 Oracle Banking Payments Installer
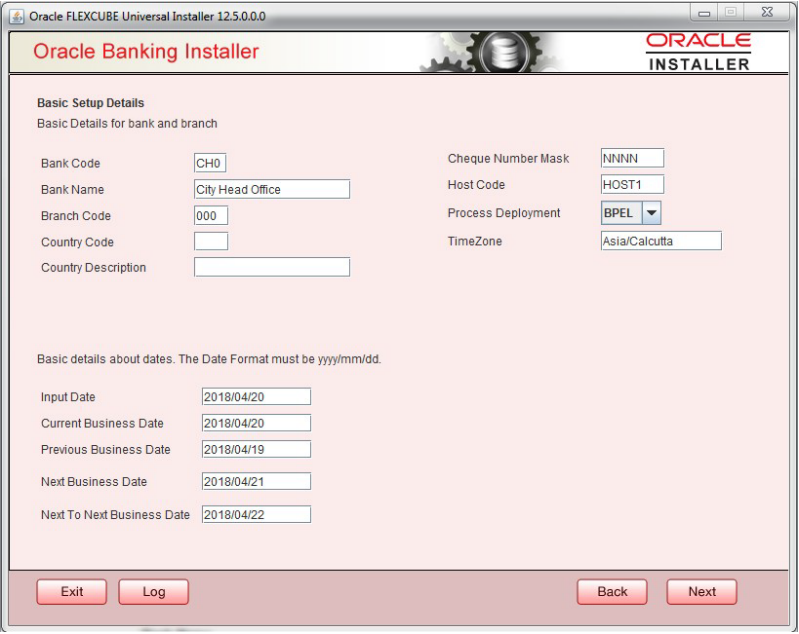
Screen displays basic setup details for bank and branchBank Code Enter the bank code. Bank Name Enter the bank name. Branch Code Enter the branch code. Country Code Enter the Country code. Country Description Enter the Country Description. Cheque Number Mask Enter the Cheque Number Mask Process Deployment Choose mode of process deployment between BPEL and BPMN Screen also displays basic setup details for dates.Input Date Enter the input date. Current Business Date Enter the current business date. Previous Business Date Enter the previous business date. Next Business Date Enter the next business date. Next to Next Business Date Enter the next to next business date. - Click Next. The following screen is displayed.
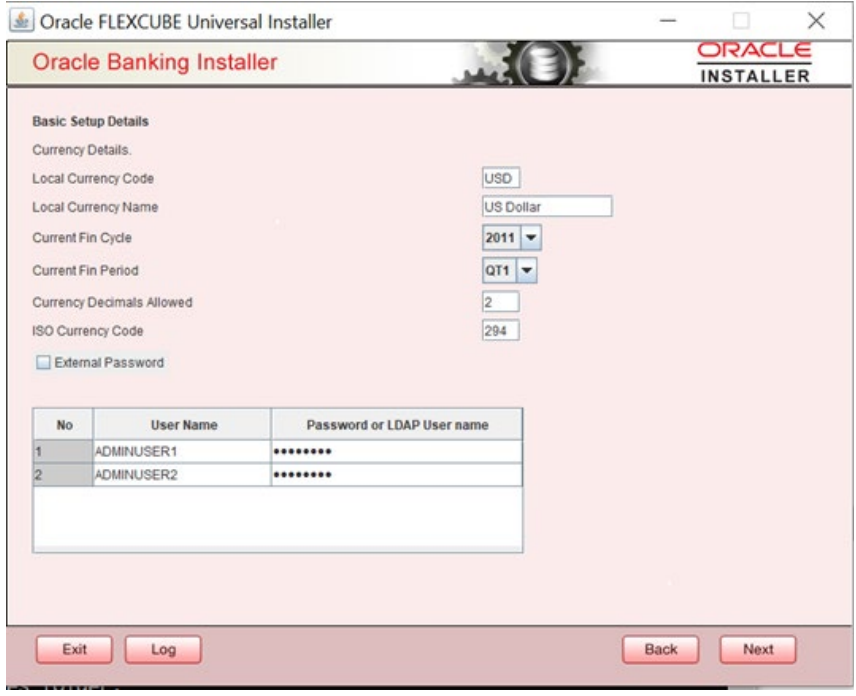
Screen displays basic setup details for currency, User can change them.
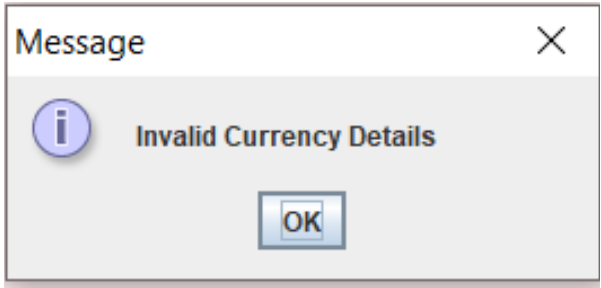
Local Currency Code Enter Local Currency Code Local Currency Name Enter Local Currency Name Current Fin Cycle Enter Current Financial Cycle (any year from 2011 to 2050) Current Fin Period Enter Current Financial Period (QT1 to QT4, M01 to M12) Currency Decimals Allowed Enter the number of decimals allowed for the currency. The value should be an input between 0 and 3 (inclusive). Else below error alert is shown Figure 2-9 Message
ISO Currency Code Enter ISO Currency Code. Screen also displays basic setup details for the creating a user in FLEXCUBE.
Creation of ‘SYSTEM’ user is mandatory for payments processing, it needs to be created as part of static data setup.
External Password Check this box to specify the external password. User Name Displays the user name. Change the user name if required. Password or LDAP User Name Specify the password and it is mandatory. You can use the following characters in the password: - Alphabets in uppercase
- Alphabets in lowercase
- Numerals
Note:
You cannot use ‘_’ (underscore) in the password. - Click Next and the following screen is displayed:
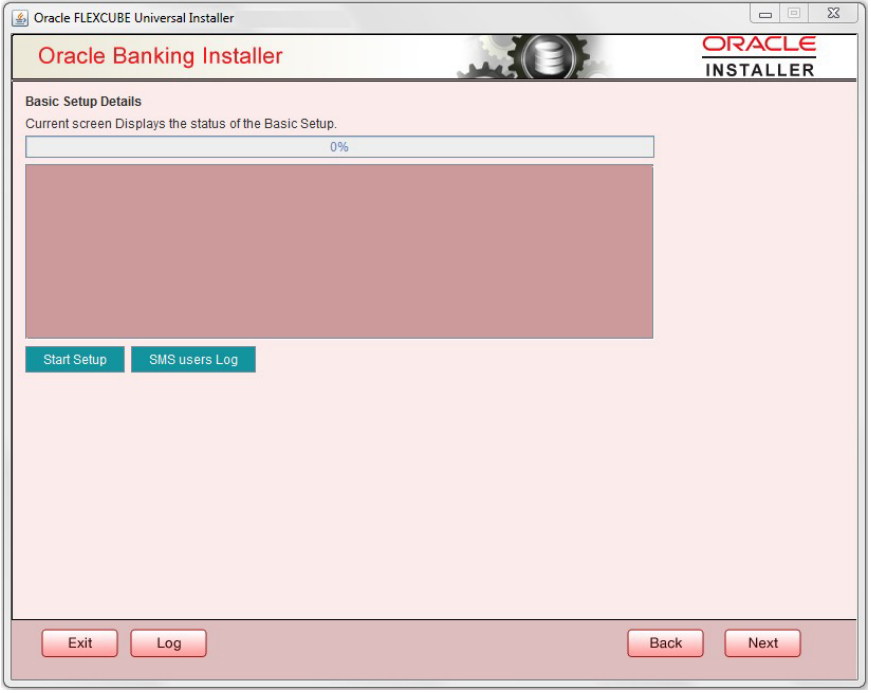
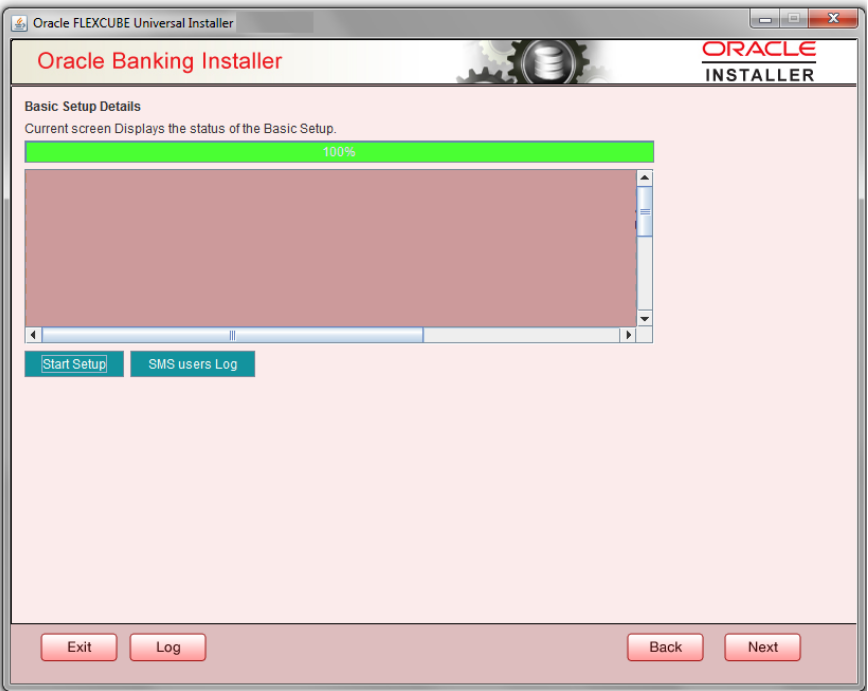
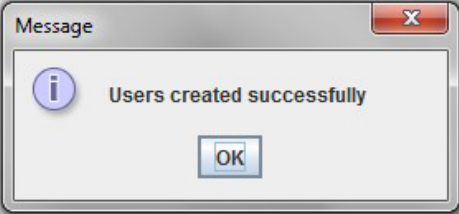
- Click Start Setup button to compile the entries. On completion the below Screen will be seen. User created logs can be viewed by clicking SMS users Log button.
JNDI name in Smtb_Modules_group table need to be updated manually.
This completes the basic setup process.
Parent topic: Creating Schema from Shipment Media
