- GATEWAY Property File Creation
- Creating Property File for Gateway Applications
- Create Property File
- Gateway HTTP Servlet Application
Gateway HTTP Servlet Application
- Start Oracle Universal Banking Solution Installer.
- Select Gateway MDB application type, and click
Next.
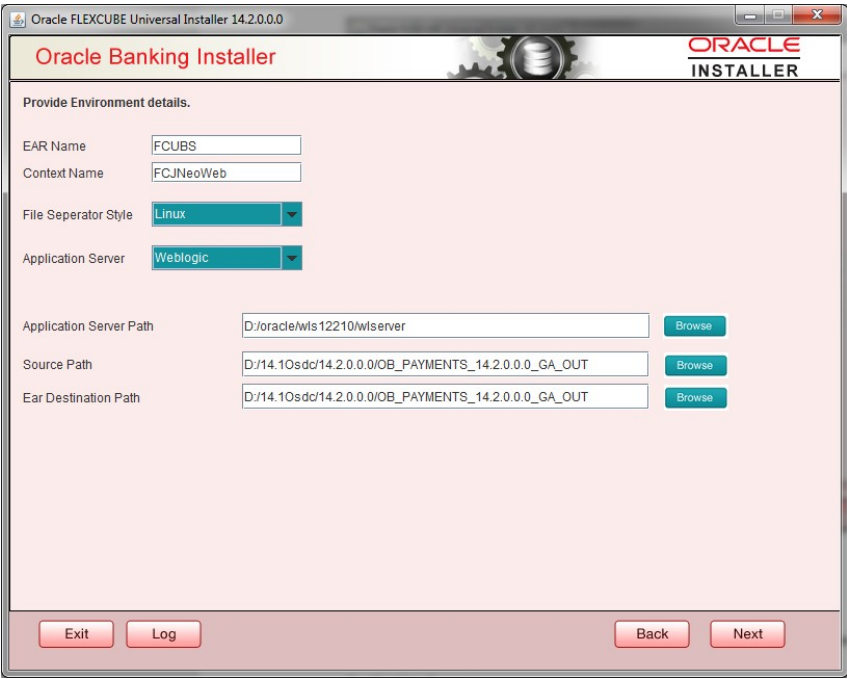
- Specify the EAR name, valid Application Server Path, Source, and EAR destination path and click Next button.
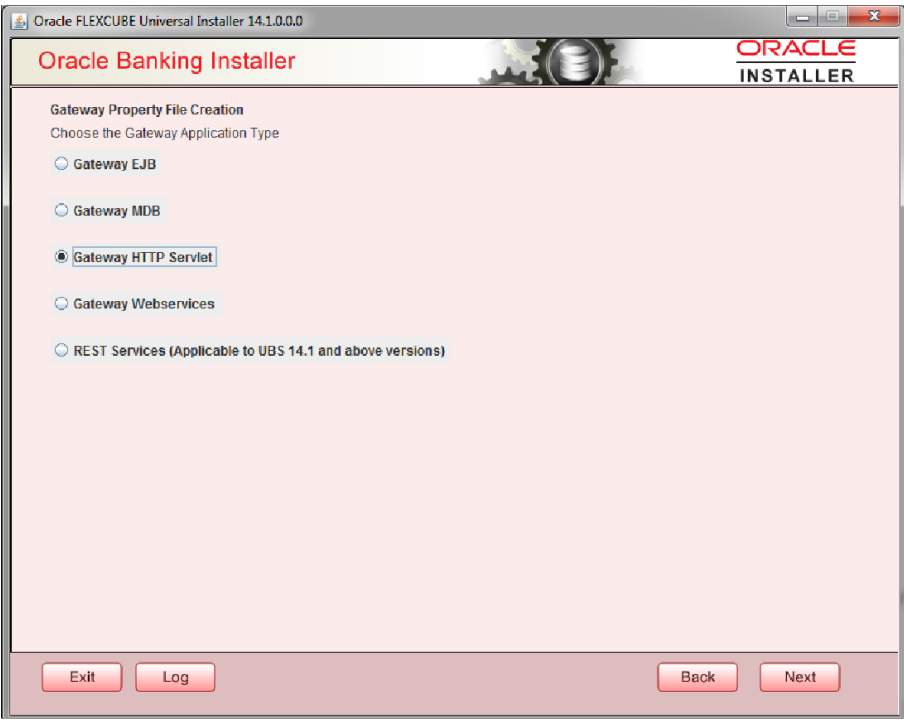
- Select Gateway HTTP Servlet to create configuration
files for the application, and click Next.
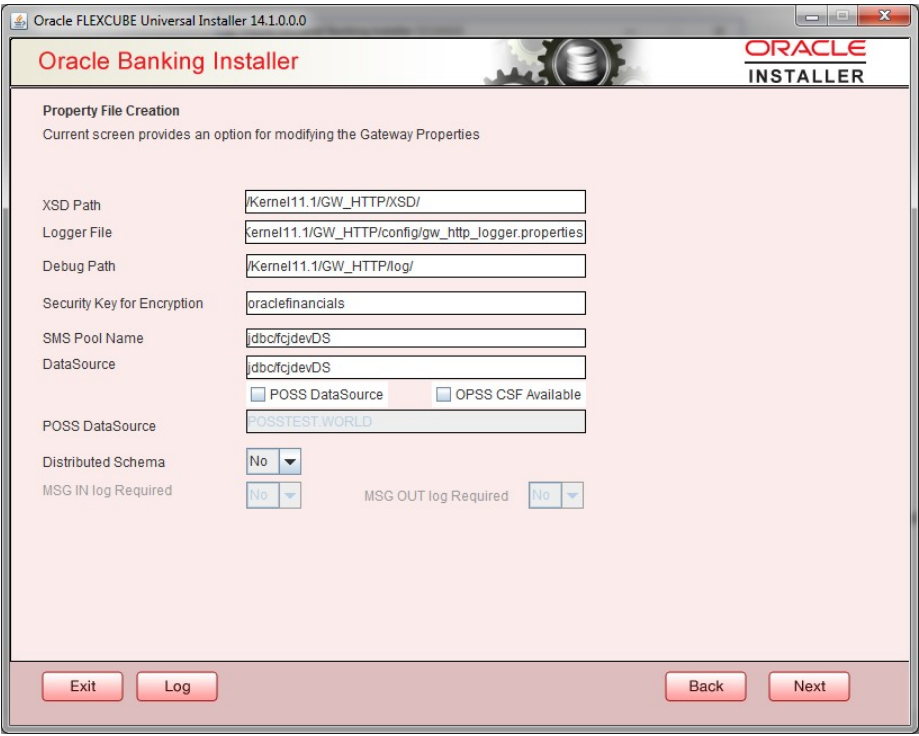
Figure 2-25 Gateway Property File Creation
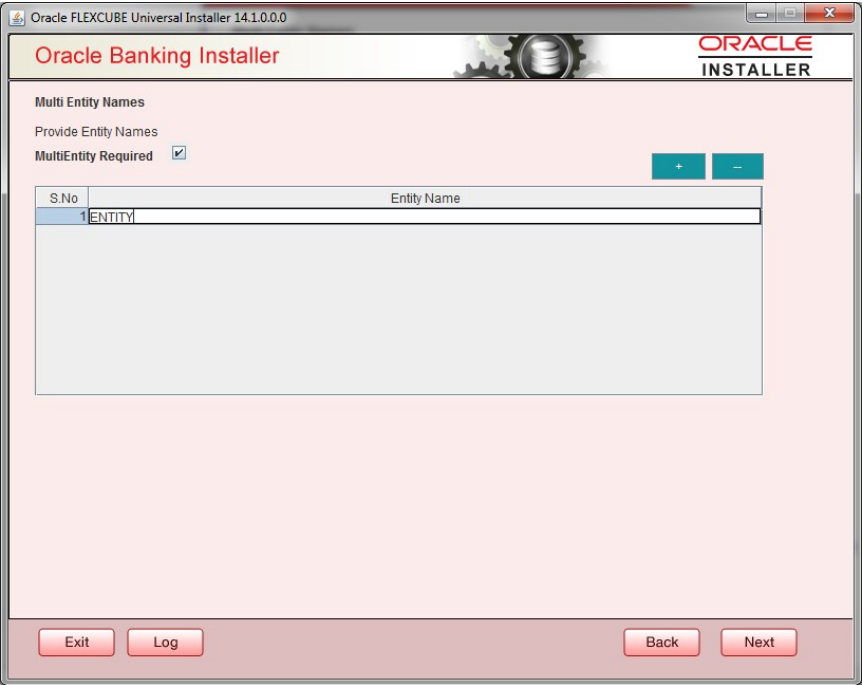
- Click Next, the installer displays the Multi
Entity screen.
- On the Multi Entity Names screen, specify the fields.
Table 2-12 Multi Entity Names - Field Description
Field Description MultiEntity Required Select the MultiEntity Required check box for enabling the multi-entity deployment. This will enable + and - for capturing the entity name. + Click + to add a new row for capturing the new entity name. - Select the entity name and click -, the deletion of the existing entity name will be done. Entity Name Enter the entity name as a single word. For example, ENTITY1 - On the Multi Entity Names screen, click Next.
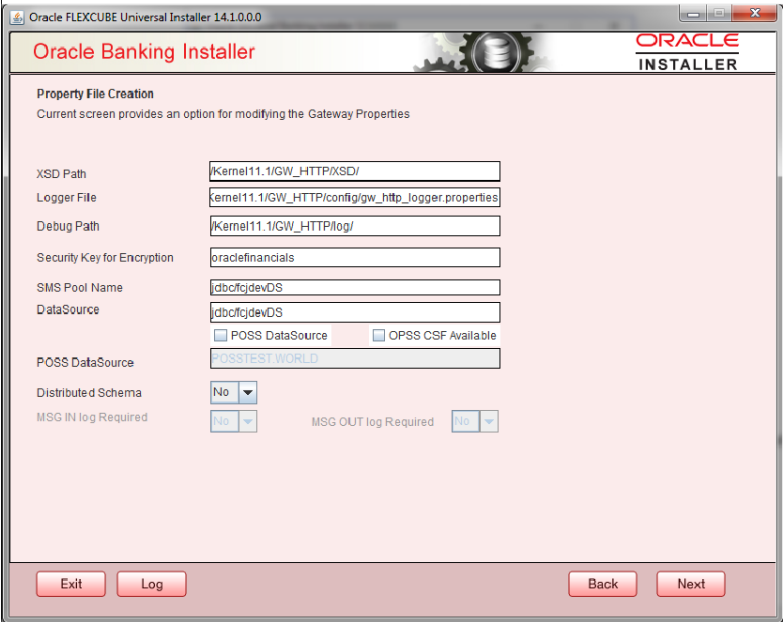
- On the Property File Creation screen, specify the fields.
Field Description XSD Path Specify the path to the XSD file. The file name is not required. File separator must be /. There must be a / at the end. All the relevant XSD files must be manually copied to this location. For example,- For Windows - D:\Kernel11.1\GW_HTTP\XSD\
- For Linux - /Kernel11.1/GW_HTTP/XSD/
Logger File Specify the path to the gw_ejb_logger.properties file with the file name. The file must be manually copied to the specified location. For example,- For Windows - D:\Kernel11.1\GW_HTTP\config\gw_http_logger.properties
- For Linux - /Kernel11.1/GW_HTTP/config/gw_http_logger.properties
Debug Path Specify the path to the folder where the application creates the logs. There must be a / at the end. You need to manually create the folder structure. For example,- For Windows - D:\Kernel11.1\GW_HTTP\log\
- For Linux - /Kernel11.1/GW_HTTP/log/
- Click Next.
Note:
The Installer creates two files viz. gw_http_logger.properties and GW_HTTP_Prop.properties in the path provided to save the files.Table 2-13 Property File Creation - Field Description
Field Description DataSource The JDBC data source is an object bound to the JNDI tree and provides database connectivity through a pool of JDBC connections. POSS Datasource Check this box if POSS is required. If you check this box, specify the POSS Datasource name in the field below this. OPSS CSF Available Indicates whether OPSS-CSF is installed or not. Note:
Select this only if Oracle Platform Security Services - Credential Store Framework (CSF) is installed as per the guidelines in the pre-requisite document. It is recommended that you install CSF for safeguarding application-specific security credentials.Distributed Schema If the schema is distributed, select Yes. If the schema is not distributed, select No. Note:
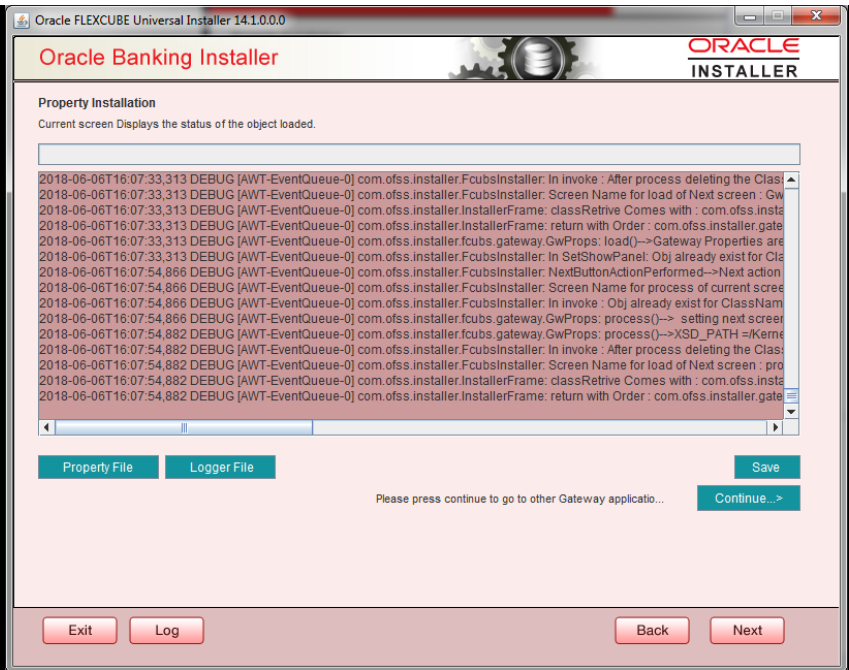
The Installer creates two files viz. gw_ejb_logger.properties and GW_EJB_Prop.propertie in the path provided to save the files.Security Key for Encryption Specify the security key for the encryption. Here, in this case, it is Oraclefinancialsolutions. RTT plugin Required Chose the check box if rtt plugin is required - Click Next.The property file will be created in a temporary folder.
- Click Property File to view the created property file.
- Click Save to save the created property file in the desired location.
- Click Continue to continue the installation process with gateway application type.
- Click Next to navigate to the installer home
screen.The property file will be created in the specified folder.
Parent topic: Create Property File
