2.1.2 Relationship
This topics describes the systematic instructions to add relationship details of the applicant that are involved in account opening application.
- Service Member - If related party is served in military services.
- Related to Insider – If related party is an insider
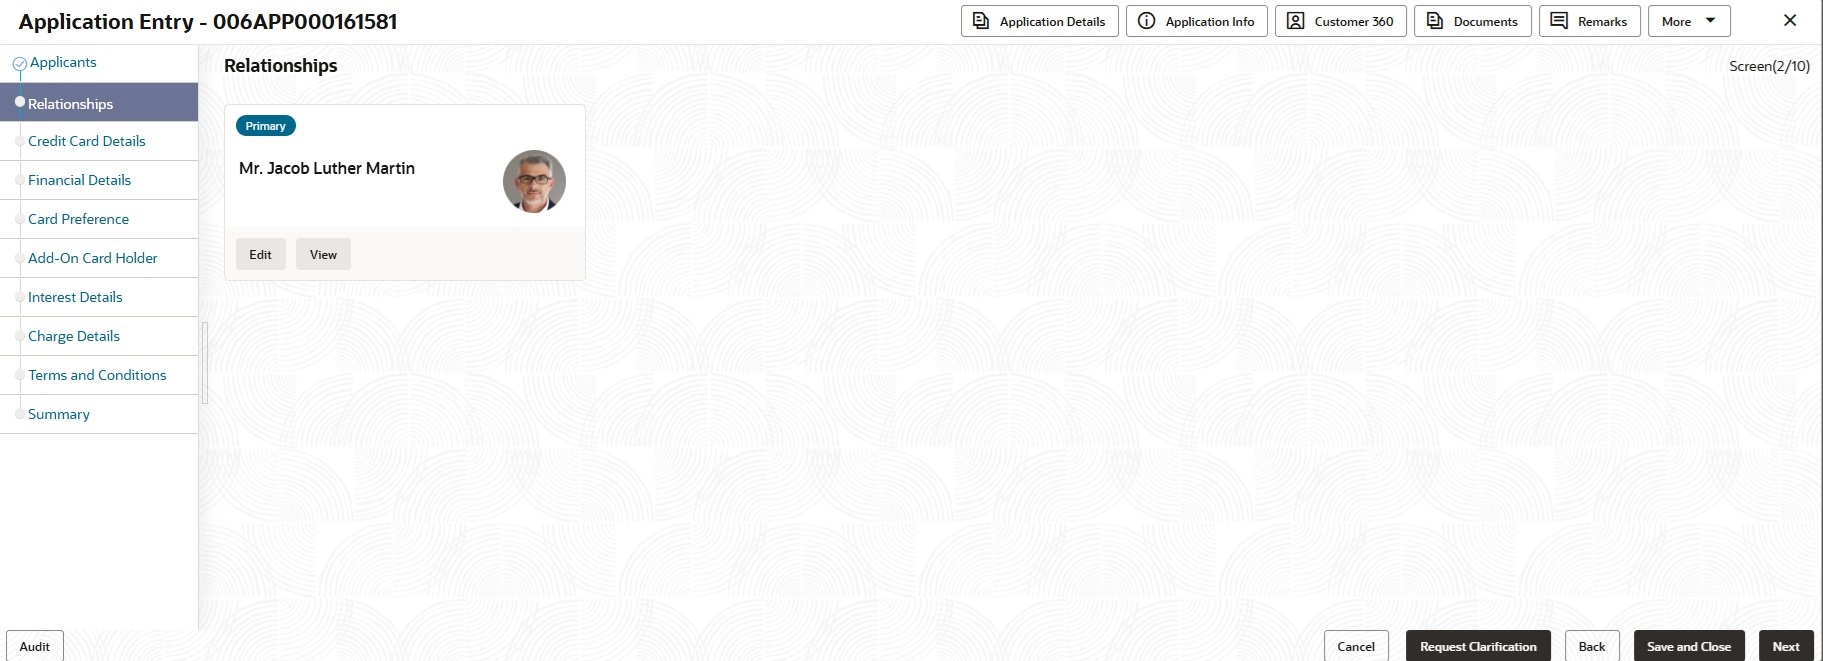
- Click Next in the previous data segment to proceed with the next data segment, after successfully capturing the data.The Relationships screen displays.
- Click Edit on the applicant tile to add relation of the applicant.
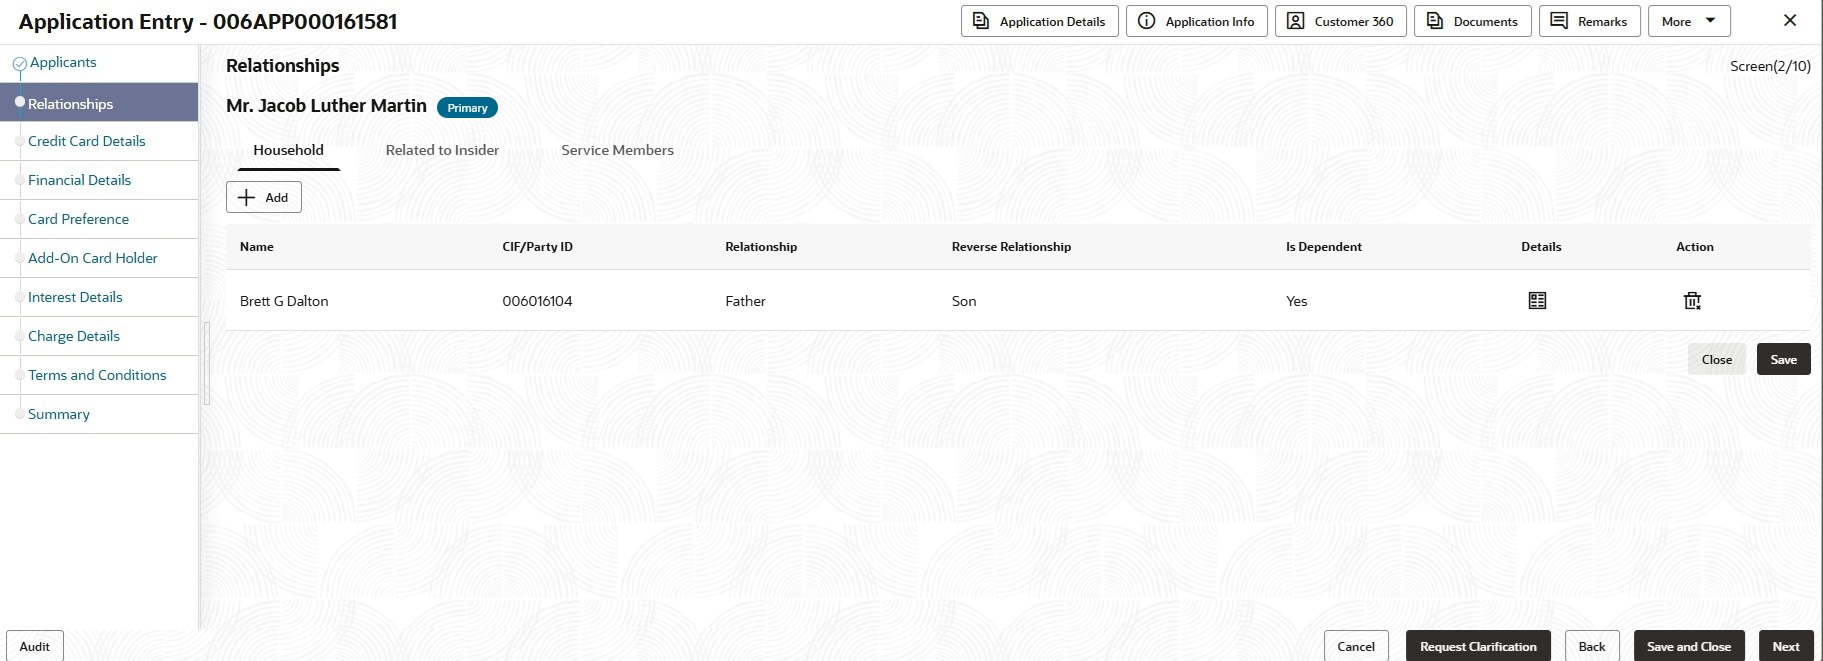
The Relationships screen displays with the household tab.
Note:
Capturing household relationships is optional. It is used to capture the relationship between applicants. - Click + Add icon to add the relationship details.
- Specify the fields on Relationships - Household tab.
For more information on fields, refer to the field description table.
Table 2-4 Household tab – Field Description
Field Description Name Click search and select the other existing applicants from the list associated with the application. User can also specify the name of the new applicant which not listed in the customer record.
CIF/Party ID Specify the CIF/Party ID of the applicant's relation. Relationship Select the relationship of the applicant from the drop-down list. The available options are: - Spouse
- Father
- Mother
- Daughter
- Son
- Guardian
- Ward
- Grand Parent
- Grand Child
- Other
Reverse Relationship Select the reverse relationship of the applicant from the drop-down list. The options of this field displays based on selected relationship. Is Dependent Select the dependency with the applicant. - Yes
- No
Details Click  to view the following details in the pop-up list.
- Unique ID
- Mobile Number
- Household Added on
Action Click
 to add the record.
Click
 to delete the added record.
Click
 to delete the saved record.
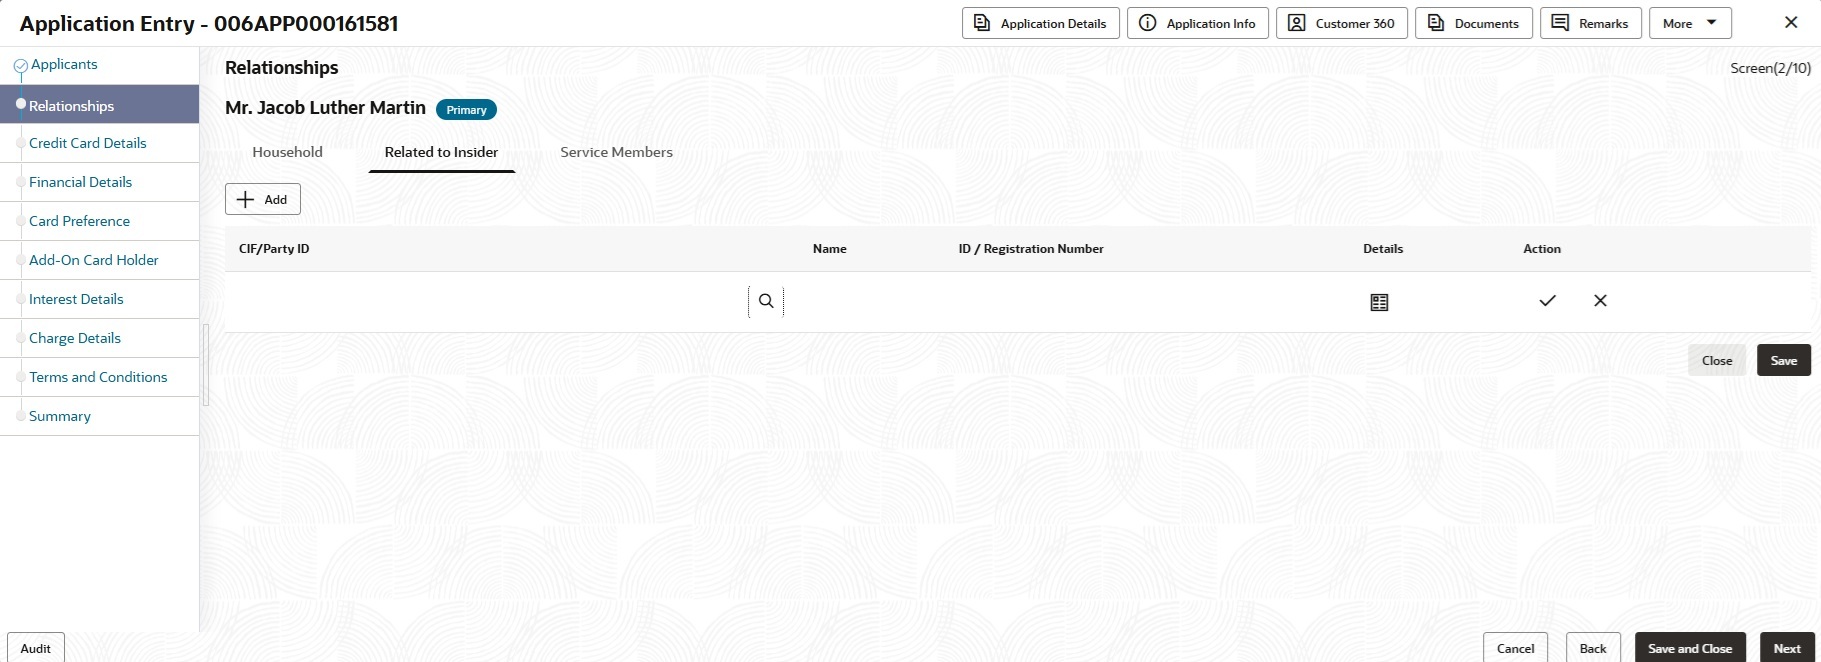
- Click Related to Insider tab.The Related to Insider tab displays.
Figure 2-9 Relationships - Related to Insider
Specify the fields on Relationships - Related to Insider tab.
For more information on fields, refer to the field description table.
Table 2-5 Related to Insider tab – Field Description
Field Description CIF/Party ID Specify the CIF/Party ID of the applicant's relation. Name Specify the name of the applicant's relation. ID/Registration Number Specify the ID/Registration number of the applicant's relation. Details Click  to view the following details in the pop-up list.
- Mobile Number
- Relationship
- Reverse Relationship
- Insider Added on
Action Click
 to add the record.
Click
 to delete the added record.
Click
 to delete the saved record.
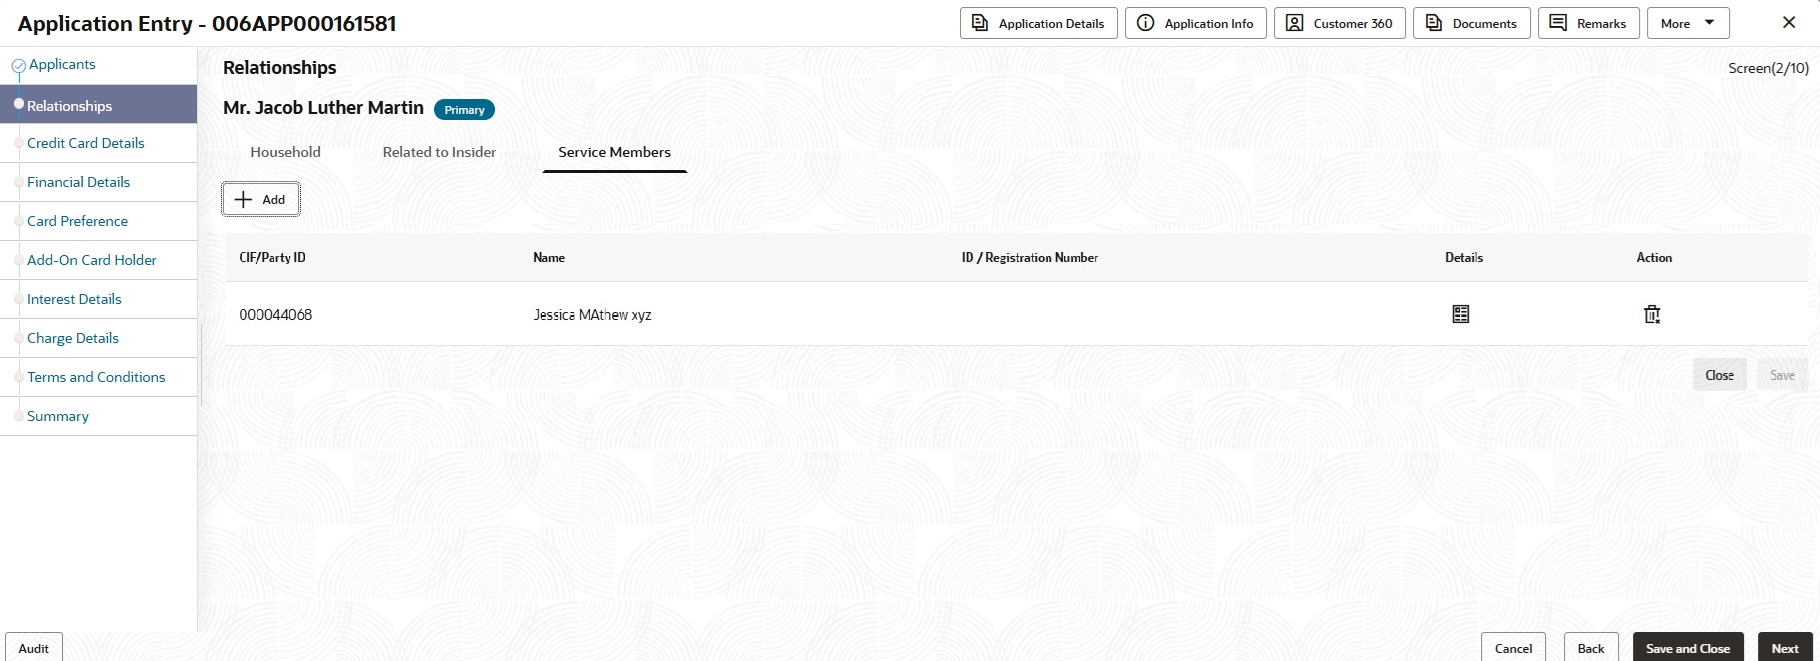
- Click Service Member tabThe Service Member tab displays.
Figure 2-10 Relationships - Related to Service Members
Specify the fields on Relationships - Related to Service Members tab.
For more information on fields, refer to the field description table.
Table 2-6 Service Members tab – Field Description
Field Description CIF/Party ID Specify the CIF/Party ID of the applicant's relation. Name Specify the name of the applicant's relation. ID/Registration Number Specify the ID/Registration number of the applicant's relation. Details Click  to display the following details in the pop-up list.
- Mobile Number
- Relationship
- Reverse Relationship
- Service Member Added on
Action Click
 to add the record.
Click
 to delete the added record.
Click
 to delete the saved record.
- Click Save to save all details.
- Click Next to navigate to the next data segment, after successfully capturing the data. The system will validate all mandatory data segments and data fields. If mandatory details are not provided, the system displays an error message for the user to take action. User will not be able to proceed to the next data segment, without capturing the mandatory data.
Parent topic: Credit Card Application Entry Stage


