6.2 Summary

This topic provides the systematic instructions to view the tiles for all the data segments of the Savings Account Origination Process.

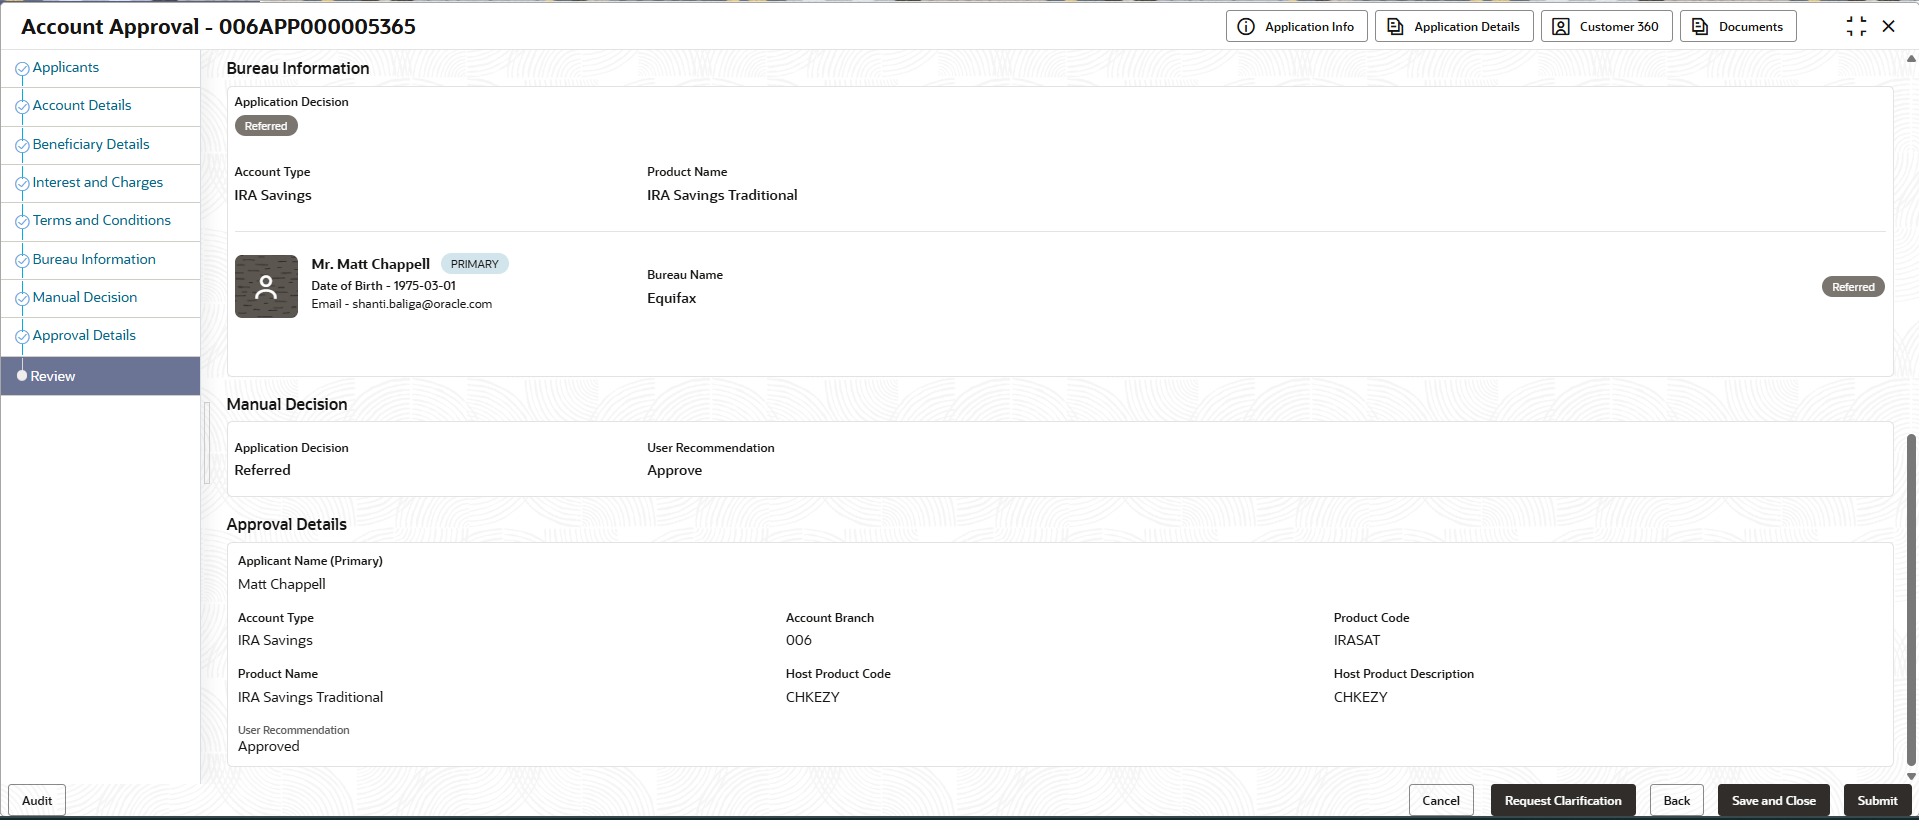
The Summary displays the tiles for all the data segments of the Savings Account Origination Process. The Tiles displays the important details captured in the specified data segment. It further allows to click on the specific tile to view the data segment and the details captured. You can additionally click on the data segment from the train on the left hand side to view the details of the data segment.

  1. Click Next in previous data segment to proceed with the next data segment, after successfully capturing the data.

    The Summary screen displays.

    Figure 6-2 Summary-Account Approval


    Each of these summary tiles are clickable and the user will have the option to view all the details captured under the given data segment.

    For more information on fields, refer to the field description table.

    Table 6-2 Summary - Account Approval - Field Description

    Data Segment Description
    Applicants Displays the applicant details.
    Account Details Displays the account details
    Beneficiary Details Displays the beneficiarydetails.
    Interest and Charges Details Displays the interest and charges details.
    Terms and Conditions Displays the initial funding details.
    Bureau Information Displays the bureau information details.
    Manual Decision Displays the manual decision details.
    Approval Details Displays the approval details.

    Supervisor can verify the KYC Verification status of the Customer from the Customer 360 in the Header. Only if the KYC Status is ‘Success’ will the application be allowed to proceed further. Click Submit to submit the Account Approval stage and proceed to submit the Account Opening request to Host.

  2. Click Submit to reach the OUTCOME, where the overrides, checklist and documents for this stage can be validated or verified. The Overrides screen is displayed.
    Overrides are basically warnings that are raised during the business validations. User has to accept the overrides to proceed further. Alternatively, the user can go back and correct the data to ensure overrides do not arise.
  3. Click Proceed Next. The Checklist screen is displayed.

    Checklist configured in the business process for the business product is displayed here. Checklist are the check points that the user has to accept having confirmed.

  4. Select the checkbox to accept the checklist.
  5. Click Save & Proceed. The Outcome screen is displayed.
  6. In the Outcome screen, select appropriate option from the Select to Proceed field.
  7. Click Submit. The Confirmation screen is displayed.

    On submission of this stage, the Workflow Orchestrator will automatically move this application to the next processing stage, Account Create on Host which has been automated. The account will be successfully created in Product Processer, if all the required validation is successful.

    In case due to any error the account creation is rejected on Product Processer side, the application moves to the Manual Retry Stage