2.18.9 Clarification Details
In this section you can request for clarifications.
To add the clarification details:
- Click Clarification Details to raise a new customer clarification request or view the existing request. The Clariification screen appears.
- Click Add Request Clarification button to request new
clarification.
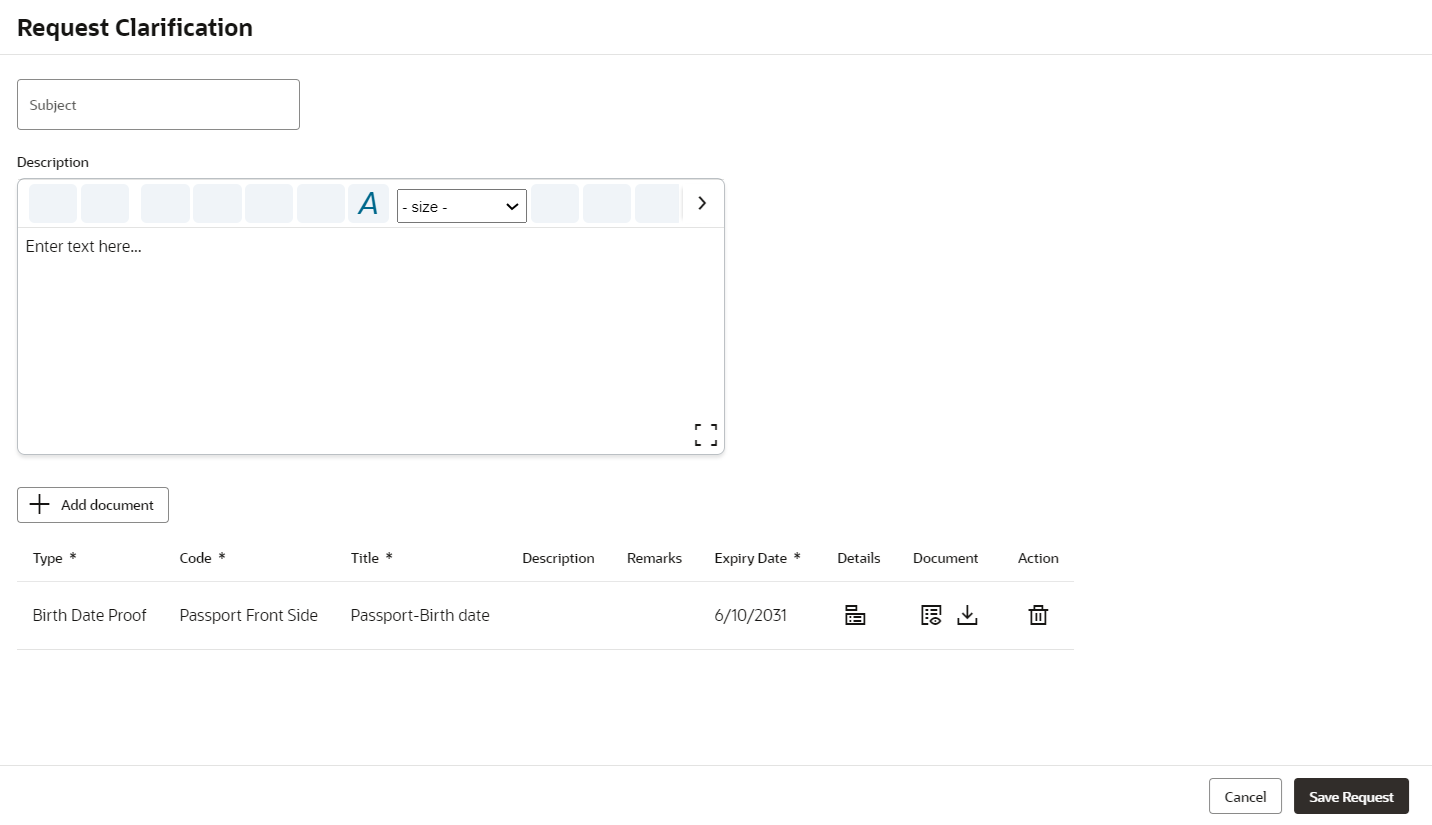
The Request Clarification screen appears.
- In the Request Clarifiication screen enter the subject and description.
- Click Add Documentbutton to upload the document which supports the clariifcation request.
- Specify the details in the relevant data fields while adding documents. For
more information on fields, refer to the field description table.
Table 2-58 Upload Document – Field Description
Field Description Document Type Select the document type. Document Code Select the document code. Document Title Specify the document title. Document Description Specify the description for the document. Remarks Specify the remarks for the document. Expiry Date Select the document expiry date. Details Click the details icon to view below details of the documents: - Uploaded Time: Displays the uploaded date and time of the document in hours and mins.
- Uploaded By: Displays the user name who uploaded the document .
- Stage Uploaded: Displays the stage name on which the document is uploaded.
Document Clickto select the document from machine to upload.
You can remove the uploaded document before saving the record from the Action column. Post saving the record you must delete the record to remove the document.
Below actions are perfrom on the uploaded document- You can preview already uploaded document.
- You can download already uploaded document.
Actions You can perfrom below actions on the added record: - Click
 to save the record.
- Click
 to delete the record.
- Once the details are updated, click Save. Clarification Request once
raised moves the application to ‘Awaiting Customer Clarification’ state. The
application continues to be assigned to the user who had raised the request. All
the applications for which the specified user has requested clarification can be
viewed and actioned from the Awaiting Customer Clarification sub-menu
available under Task menu.
Select the Application from the Awaiting Customer Clarification sub-menu available under the Task menu. Click on the Clarification Details from the header.
- Select the specific clarification to take action on it. Allowed actions are as following:
- Adding New Conversation
- Withdraw Clarification
- Accept Clarification
Once the Clarification is either withdrawn or accepted, the application moves back to the My Task sub-menu available under Task menu, post which the user can edit the application and submit the specified stage. Clarification once raised and actioned are available throughout the application processing by the other users working on the other stages of the application by clicking on Clarification Details from the header.
Parent topic: Global Actions
