2.2.1 Create Conditions Linkage
This topic describes the systematic instructions to create the condition Linkage.
- On Home screen Menu, click Covenants and
Conditions. Under Covenants and Conditions, click on
Condition Linkage. Under Condition Linkage, click
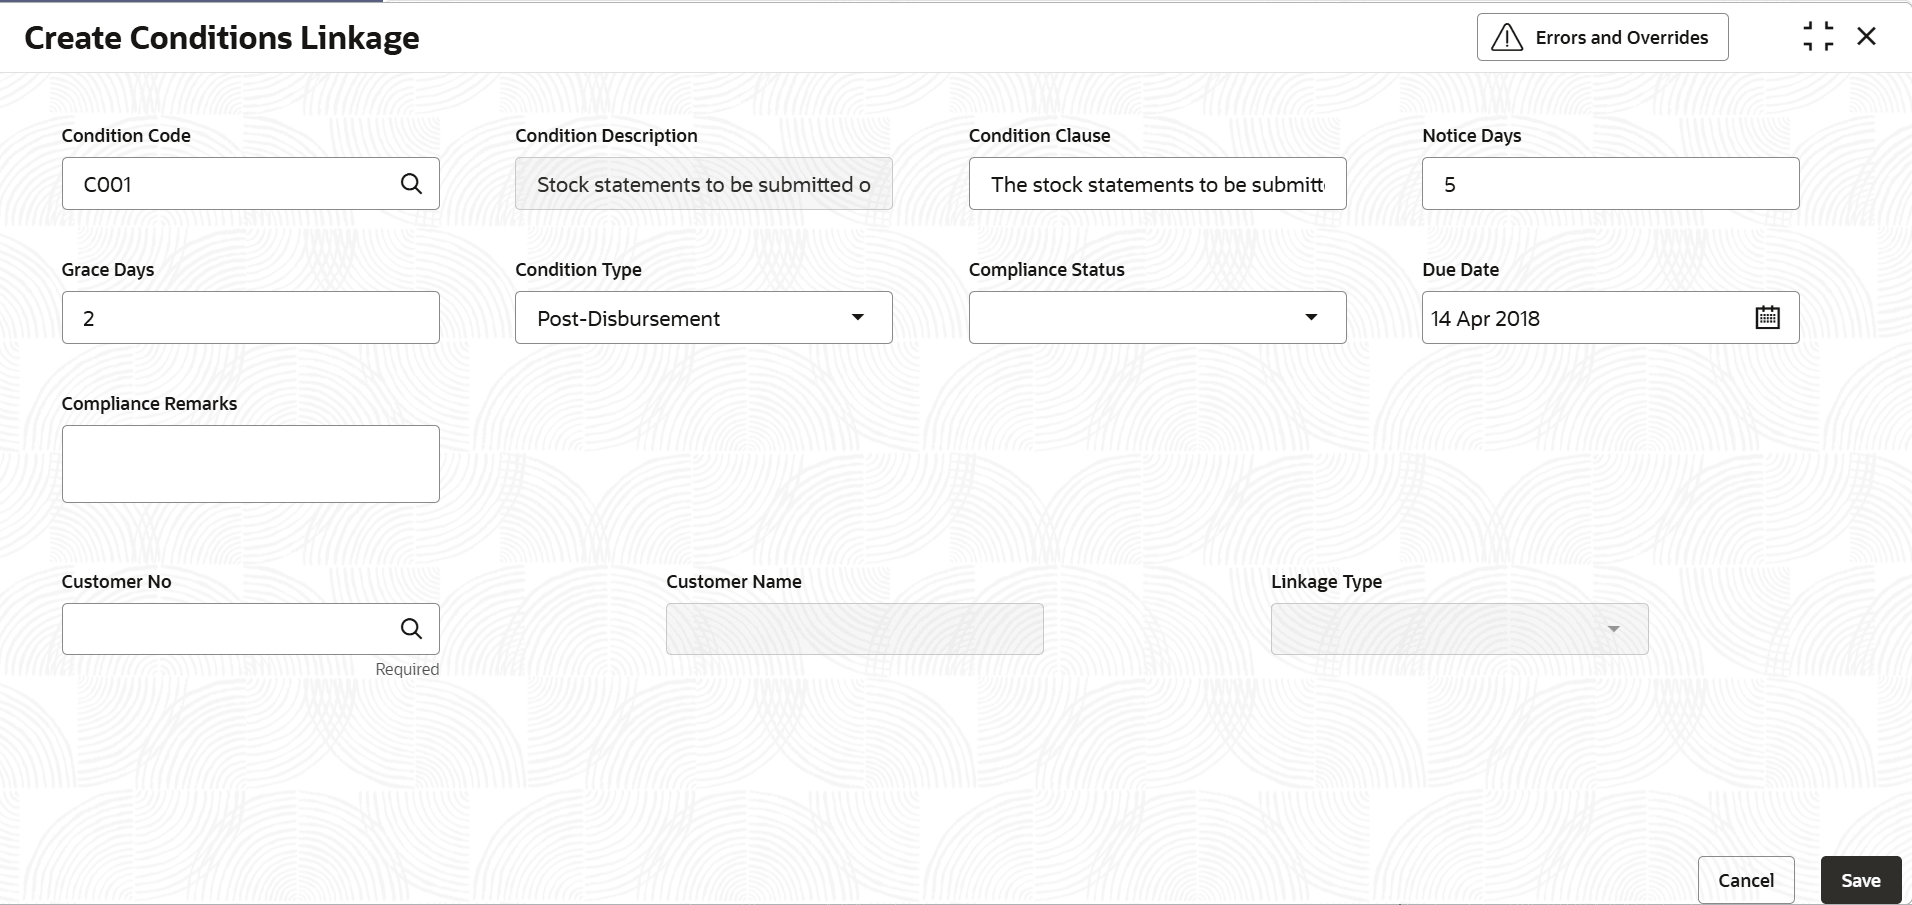
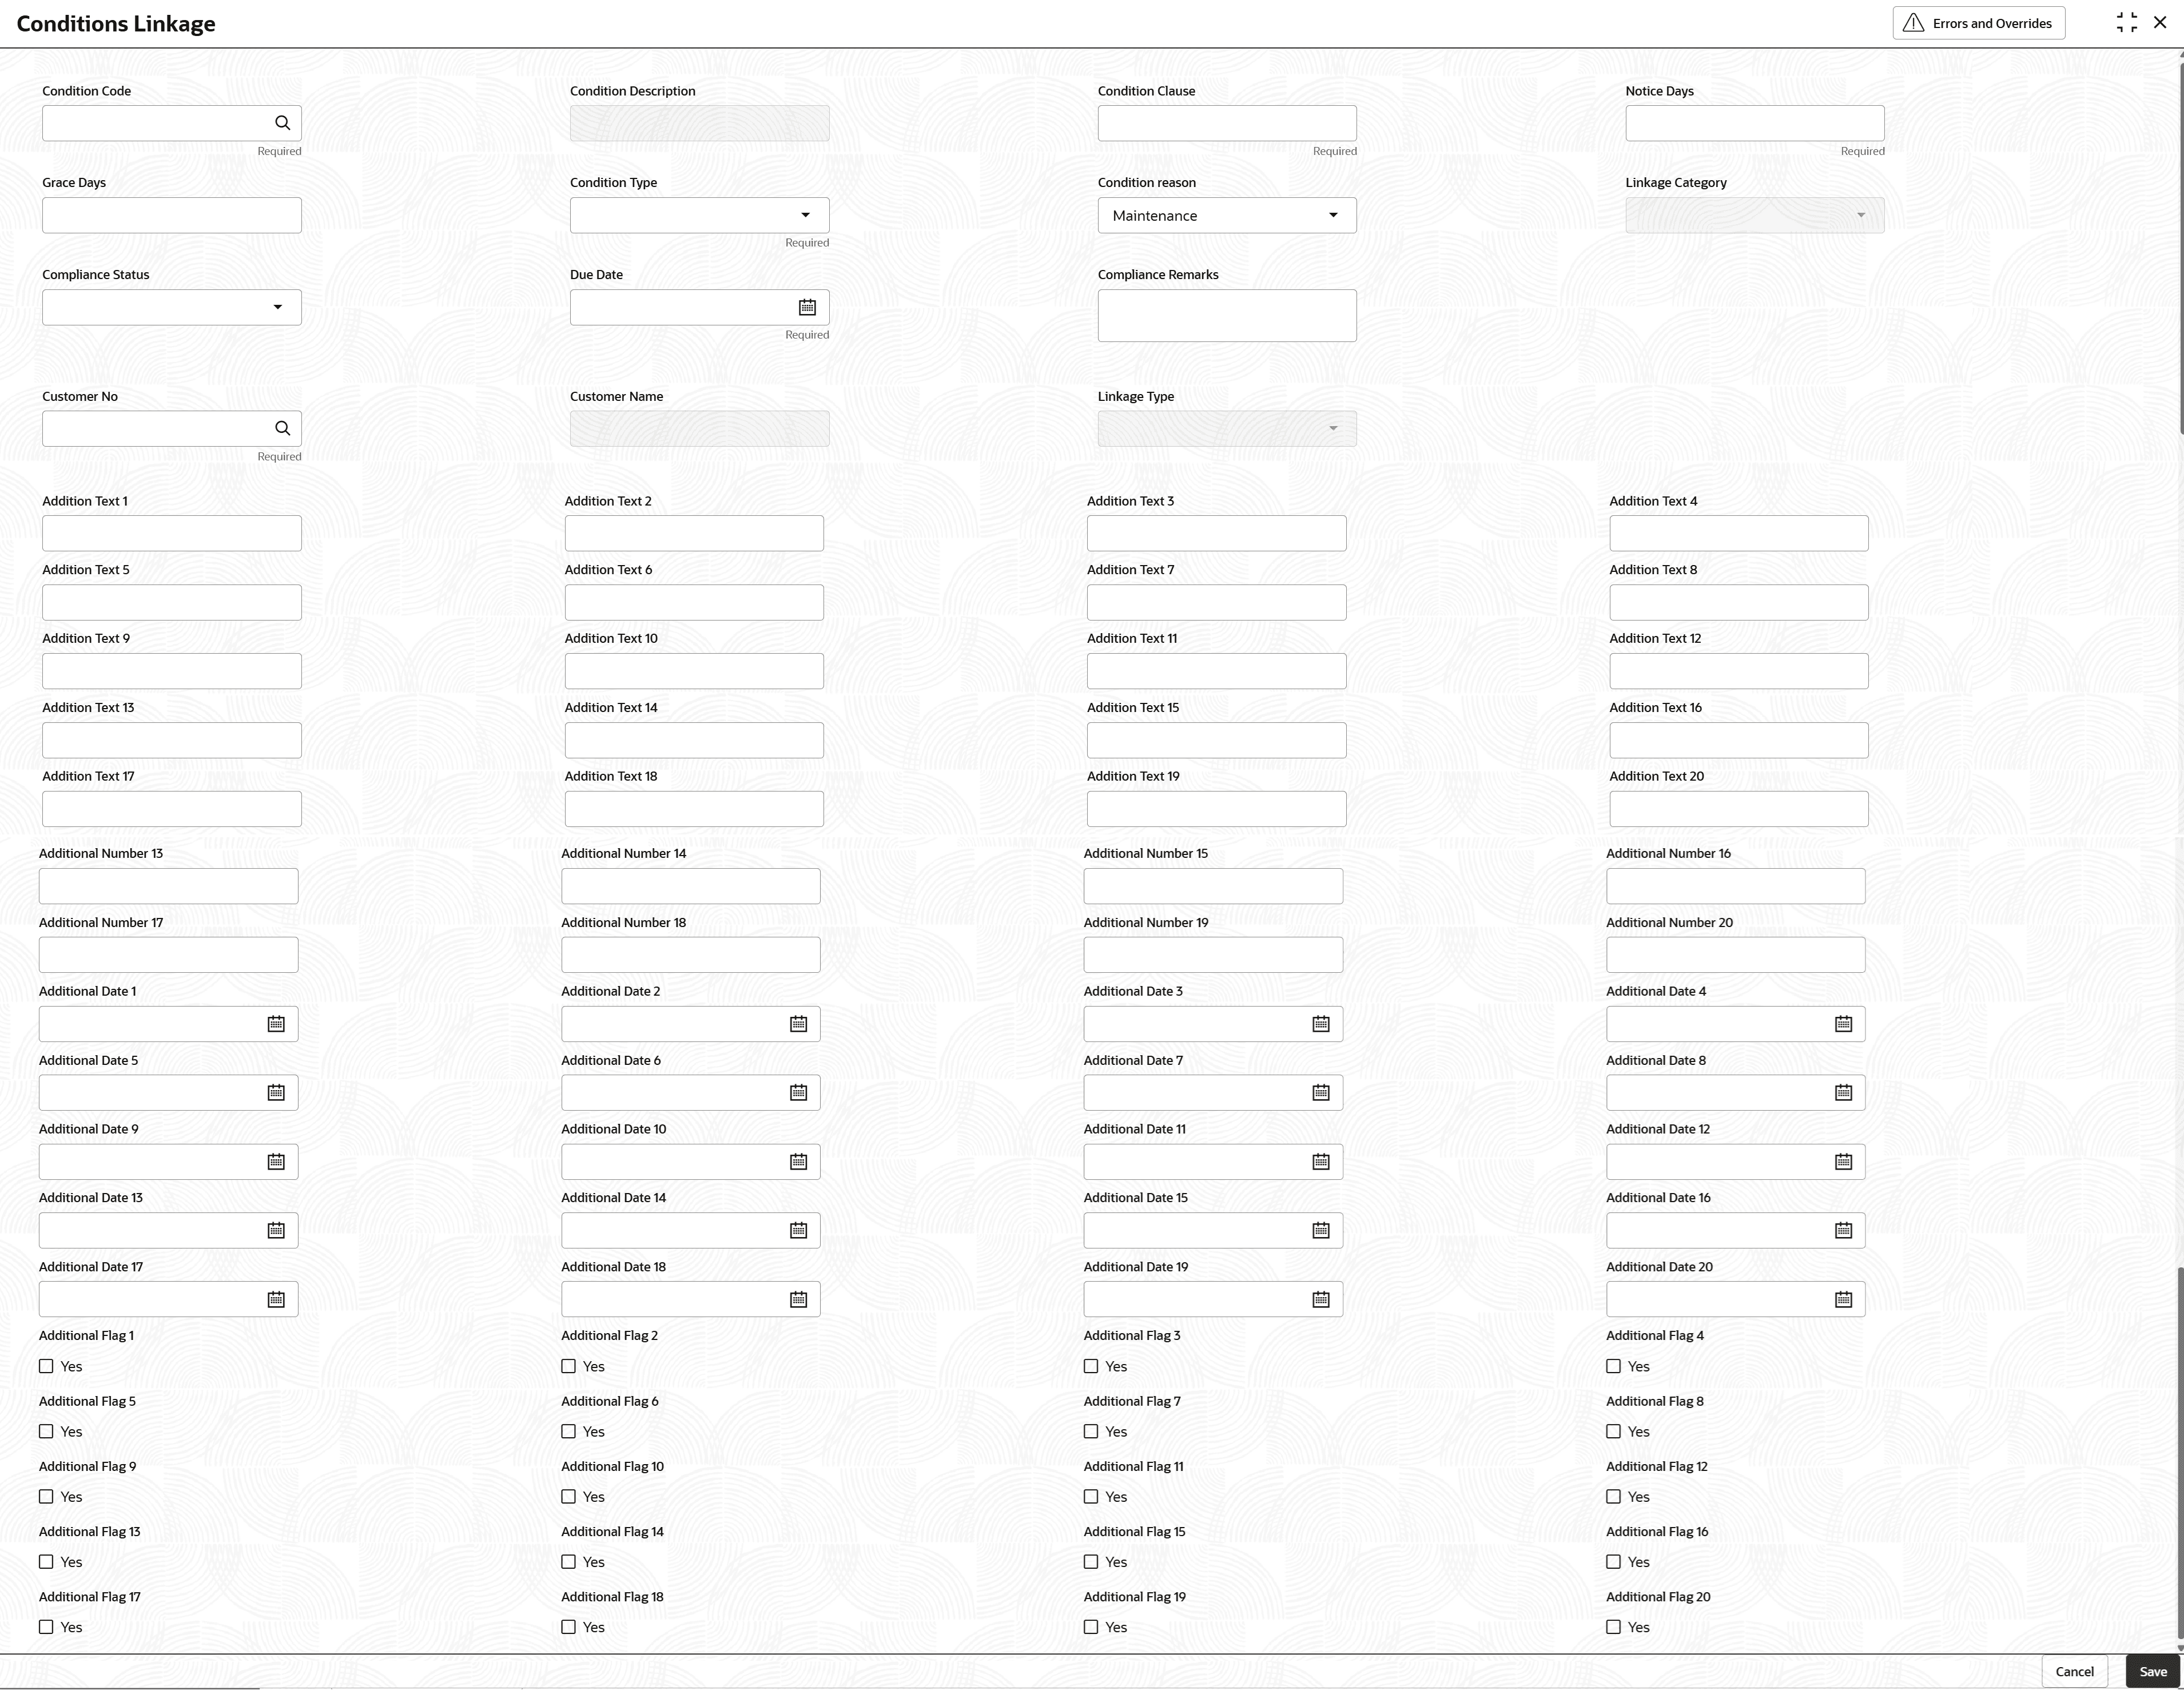
Create Conditions Linkage.The Create Conditions Linkage screen displays.For RSO Conditions Details, additional placeholder fields can be configured in Maintenance screen. For more information on managing these placeholders, refer to the Maintenance User Manual. The system supports configuration of up to 20 fields each for the following data types:
- Text
- Numeric
- Boolean
- Date
Each field type allows a minimum of 0 and a maximum of 20 fields per conditions details, based on the requirements. These fields displays in the conditions Details screen only if they are configured. If no additional fields are defined, the screen will display only the standard condition details fields.For example, we maintained 20 additional fields each for text, numeric, boolean, and date.
The Create Conditions Linkage screen displays.Figure 2-13 Conditions Linkage
Note:
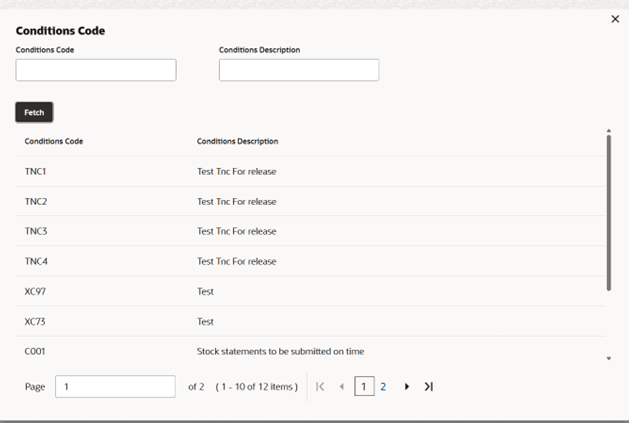
Additional fields are application if flag: isCreditDataRequired is set to 'Y' - Click Search icon on the conditions code field to select
the condition code from the LOV. Only open and authorized conditions codes
maintained at the conditions code maintenance screen will be populated here. By
clicking fetch button on the lov screen, user can view the available conditions
codes to link.The Conditions Code screen displays.
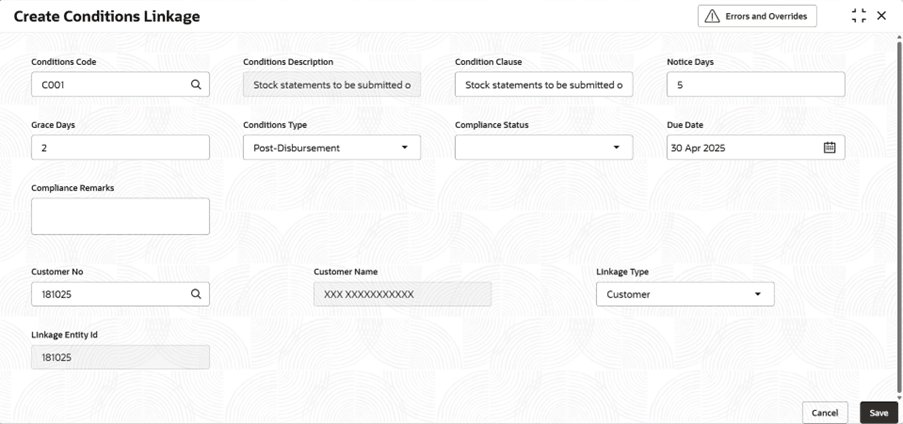
- If Linkage Type is selected as
Customer, and the customer ID is selected from
customer LOV Create Conditions Linkage screen
displays.
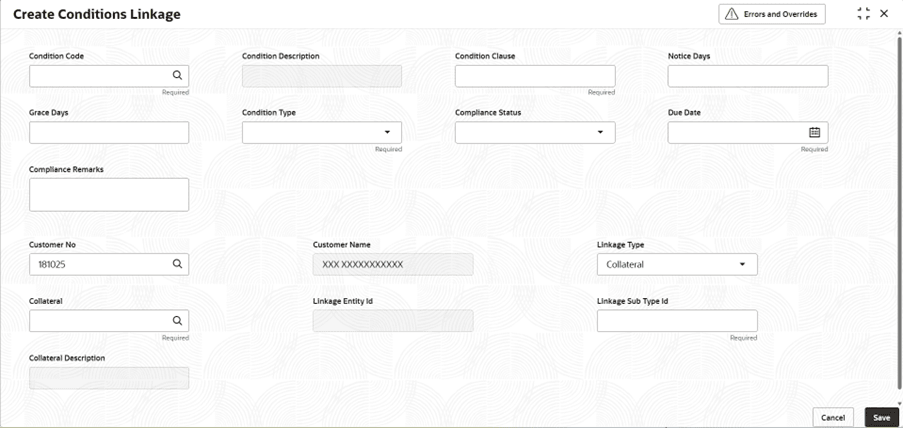
Figure 2-15 Customer - Create Conditions Linkage

Figure 2-16 Customer - Create Conditions Linkage
Note:
Enter the customer number, linkage details, and other conditions information.The linkage type drop-down will be enabled after selecting the customer number. - If Linkage Type is selected as
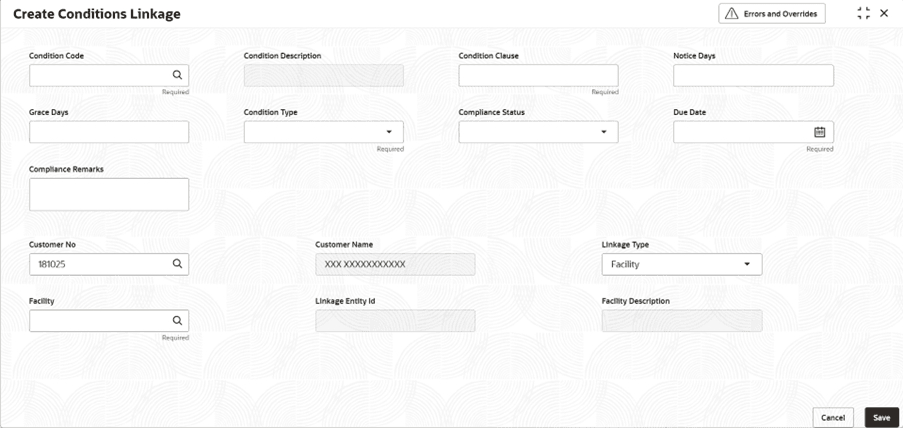
Facility and the facilities is selected from Facility
LOV Create Conditions Linkage screen displays.
Figure 2-17 Facility - Create Conditions Linkage
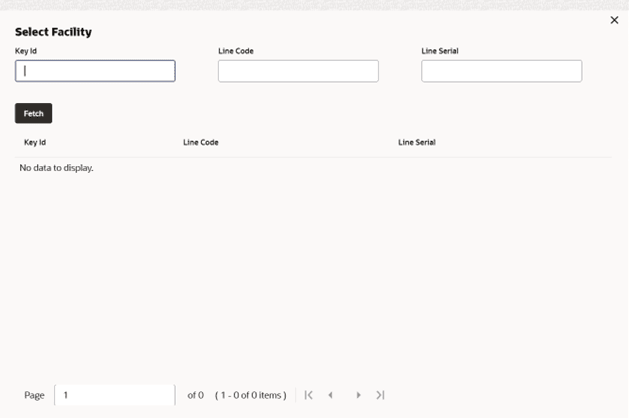
Click Search in facility field, the Select Facility screen displays.Note:
The list of available facilities for the selected Customer Number will be displayed in the LOV details screen. - If Linkage Type is selected as
Collateral the collateral is selected from collateral
LOV, Create Conditions Linkage screen displays.
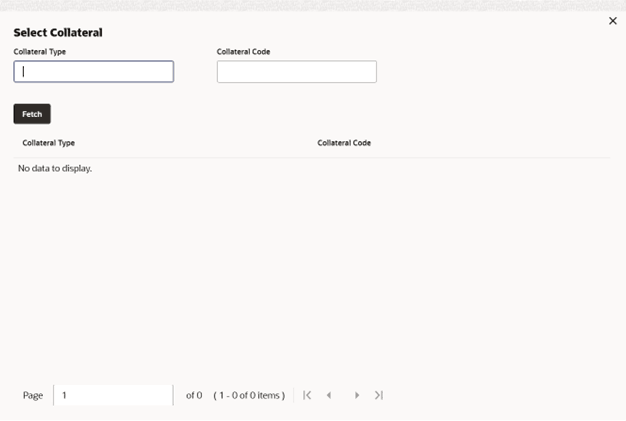
Figure 2-19 Collateral - Create Conditions Linkage
Click Search in collateral field, the Select Collateral screen displays.For more information on fields, refer to the field description table.Table 2-9 Create Condition Linkage
Field Description Condition Code Specify the condition code will be fetched from condition code maintenance, with only open and authorized records available for the customer to select. Condition Description Display the condition description.The condition description will be defaulted from condition maintenance based on the selected Condition Code and cannot be modified. Condition Clause Specify the condition clause.This field defaulted based on the selected condition code. The user can input up to 250 characters. Notice Days Specify the number of notice days are the number of days before the Due date of a Condition for the Condition tracking. Grace Days Specify the grace days.The user must update the compliance status within grace days after the due date. If not complied, the status will be marked as breached and the compliance date will be updated to the current date during the end-of-day process using the batch “tncTrackingOverdueBreachJob”. Conditions Type Select the compliance status from the drop-down list. The available options are: - Post-Disbursement
- Pre-Disbursement
- Pre-Sanction
Compliance Status Select the compliance status from the drop-down list. The available options are: - Breached
- Met
Due Date Select the due date. Compliance Remarks Specify the additional information to be inputted for the condition in remarks field. Customer Name Select the customer name. By default the customers full name will be populated on this field by selecting the customer Number from the Lov. Customer Number Dispalys the existing customers number will listed on customer number Lov. Linkage Type Select the linkage type from the drop-down list. The available options are: - Customer
- Facility
- Collateral
The conditions are linked to the selected entity.
Linkage Entity ID Displays the linkage entity ID. By default, the Collateral Code is set when a collateral is selected from the Collateral Lov.
For the linkage type Facility, the key Id from Facility LOV will be defaulted.
For linkage type collateral, Collateral code will be defaulted on selecting the collateral from the collateral Lov.
Facility Lov Specify the facility Lov. The available facilities for the customer, and the Linkage Entity ID will be auto-filled. Collateral Lov Specify the Lov available in Collaterals for the customer will be displayed. On selecting the collateral code, the linkage Entity Id is defaulted. Facility Description Displays the facility description. Line Description will be defaulted on selecting the facility from facility LOV. This is read only field and applicable only for Facility linkage type. Collateral Sub type Id Specify the user needs to capture the collateral sub type id for the collateral linkage type Collateral Description Displays collateral description.This field is auto-populated on selecting the collateral from the Collateral LOV. - Click Save to update the modified fields and click Cancel to cancel the modified fields.
Parent topic: Conditions Linkage
