13 Configure Weblogic Console

This topic provides the systematic instructions to configure the WebLogic Console.

After domain creation, follow the below steps to enable SSL in WebLogic Admin server.
Login to the Oracle Weblogic Server Admin Console.
  1. Select Admin Server to enable SSL options.
  2. Click General tab.
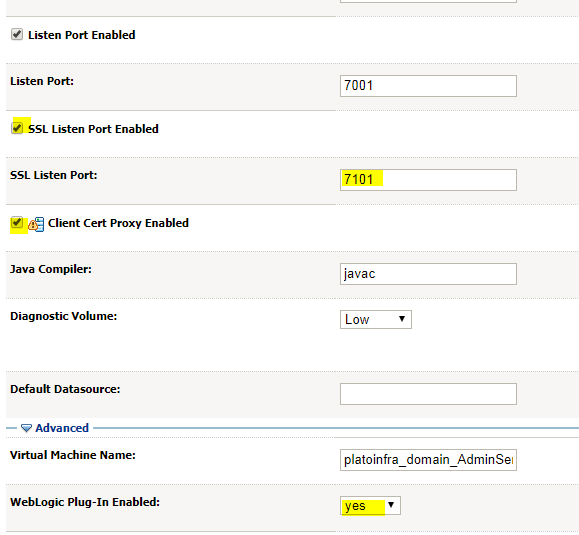
  3. Select SSL Listen Port Enabled, Client Cert Proxy Enabled, and Weblogic Plug-In Enabled.
  4. Click Save.

    Figure 13-3 Settings for AdminServer


  5. Click Keystores tab.
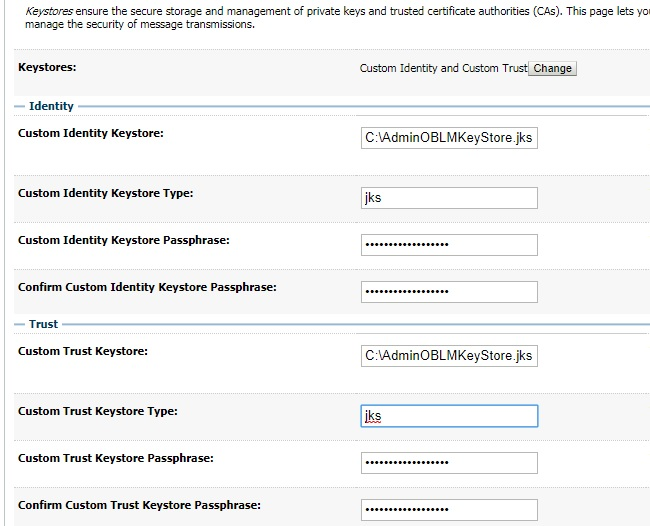
  6. Specify Custom Identity Keystore and Custom Trust Keystore same as the Keystore Name created in above steps with full path.
  7. Specify Custom Identity Keystore Type and Custom Trust Keystore Type as jks.
  8. Specify Custom Identity Keystore Passphrase, Confirm Custom Identity Keystore Passphrase, Custom Trust Keystore Passphrase and Confirm Custom Trust Keystore Passphrase same as the Store Password entered in above steps.
  9. Click Save.
  10. Click SSL tab.
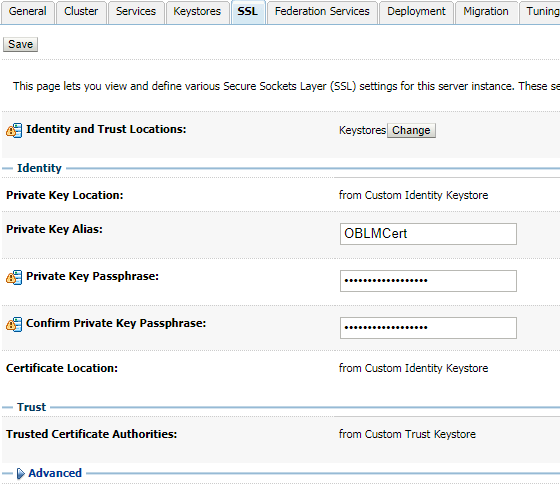
  11. Specify Private Key Alias as same as the alias name entered in above steps.
  12. Specify Private Key Passphrase and Confirm Private Key Passphrase as same as the Private Key Password entered in above steps.
  13. Change the Hostname Verification to None.
  14. Click Save.
    Repeat the same steps for all the managed servers as well. The admin server and managed servers are SSL enabled.
  15. Restart all the servers.