11 OBDX-OBO Kafka consumer configuration
This topic provides information on OBDX-OBO Kafka consumer configuration.
Below script use for verifying database based kafka consumer properties
Select * from DIGX_FW_CONFIG_ALL_B where PROP_ID like ‘externalSystermAlertMessage%’
For more information on fields, refer to the field description table.
Table 11-1 Origination related database entries
| PROP_ID | PROP_VALUE | Description |
|---|---|---|
| externalSystemAlertMessage@auto.commit.interval.ms | 1000 | A commit is triggered after 1,000 messages |
| externalSystemAlertMessage@auto.offset.reset | earliest / latest | Is it always going to start consuming from start or last checkpoint |
| externalSystemAlertMessage@bootstrap.servers | List of host/port pairs to use for establishing the initial connection to the Kafka cluster. | |
| externalSystemAlertMessage@enable.auto.commit | false | If set to |
| externalSystemAlertMessage@group.id | obdx-obo-consumer | Name of the group that the consumer joins to read messages from a given topic or topics. |
| externalSystemAlertMessage@sasl.jaas.config | org.apache.kafka.common.security.scram.ScramLoginModule required username="xxx" password="xxx"; | This configuration property used to specify the Java Authentication and Authorization Service (JAAS) configuration for SASL authentication in Kafka |
| externalSystemAlertMessage@sasl.mechanism | SCRAM-SHA-256 | This configuration property used to specify the Java Authentication and Authorization Service (JAAS) configuration for SASL authentication in Kafka |
| externalSystemAlertMessage@security.protocol | SASL_SSL | Type of Security protocol |
| externalSystemAlertMessage@session.timeout.ms | 30000 | Session timeout in milliseconds |
| externalSystemAlertMessage@ssl.endpoint.identification.algorithm | SSL Algorithm | |
| externalSystemAlertMessage@ssl.truststore.location | /scratch/app/domain/obdx_domain/KafkaServerKeystore.jks | SSL Location |
| externalSystemAlertMessage@ssl.truststore.password | SSL password | |
| externalSystemAlertMessage@target.unit | OBDX_BU | Entity name |
Please follow following steps
- Login into Weblogicconsole.
- Click onDeployments.
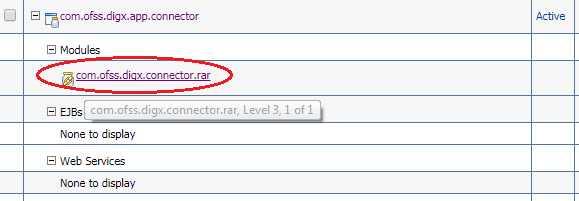
- Expand by clicking ‘+’ icon present in front of
com.ofss.digx.app.connectorapplication as shown below.
- Click com.ofss.digx.connector.rar as shown below.
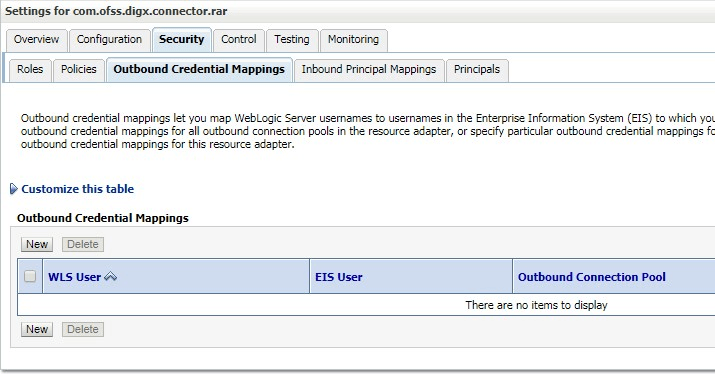
- Click ‘Security’ tab and then click ‘Outbound Credential
Mappings’ sub tab as shown below.
- Click on ‘New’ button. Following screen will be appearing.
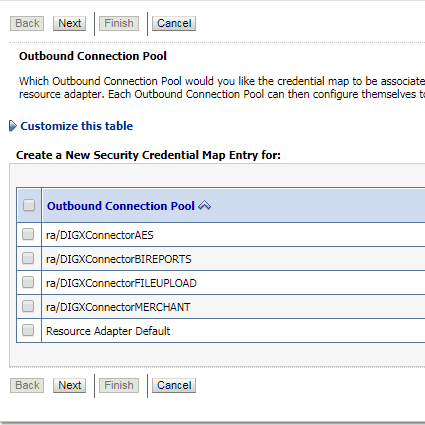
- Select ‘ra/DIGXConnectorAES’ .
- Click ‘Next’ button. Following screen will be appearing.
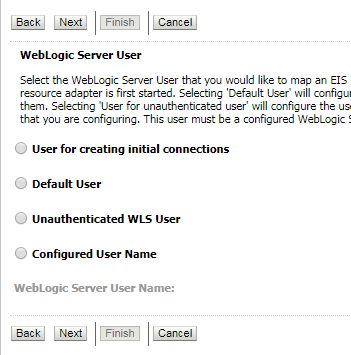
- Select ‘Default User’ .
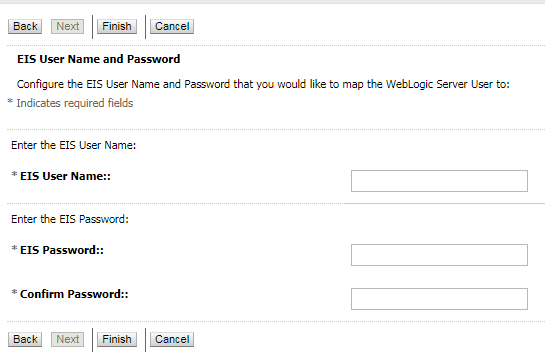
- Click ‘Next’ button. Following screen will be appearing.
- Enter following details and then click ‘Finish’ button.
- EISUser Name → AES_KEY
- EISPassword →“Desired password”
- Confirm Password → “Desired password”
- Restart the manage server to activate the changes.

