3.1 Open Investments Account
This topic describes the systematic instruction to Open Investments Account screen.
Investment Accounts are the placeholders for mutual fund investments of a bank customer. They are internal to the bank and unlike current & savings accounts have no real significance outside the bank Opening of the investment account is a mandatory for user to start transacting in mutual funds in OBDX. Currently OBDX supports opening of investment accounts in Single holding mode only.
The investment account involves transaction of financial assets, mutual funds etc.
Following are the steps involved as part of opening of investment account:
- Personal details of the user
- Contact details of the user
- Specifying the nominations for mutual fund investments made through the investment account.
- Specifying the Foreign Account Tax Compliance Act (FATCA) related details
- Additional Details
Note:
The maximum number of investment accounts a user can open is configurable. If user tries to open investment account beyond the maximum allowed limit he will get a message "You already have the maximum number of investment account allowed. Please visit our branch or talk to your relationship manager for further queries." on the Open Investment Account screen.Pre-requisites
- Transaction access is provided to the Retail User.
To open an investment account:
Personal Details
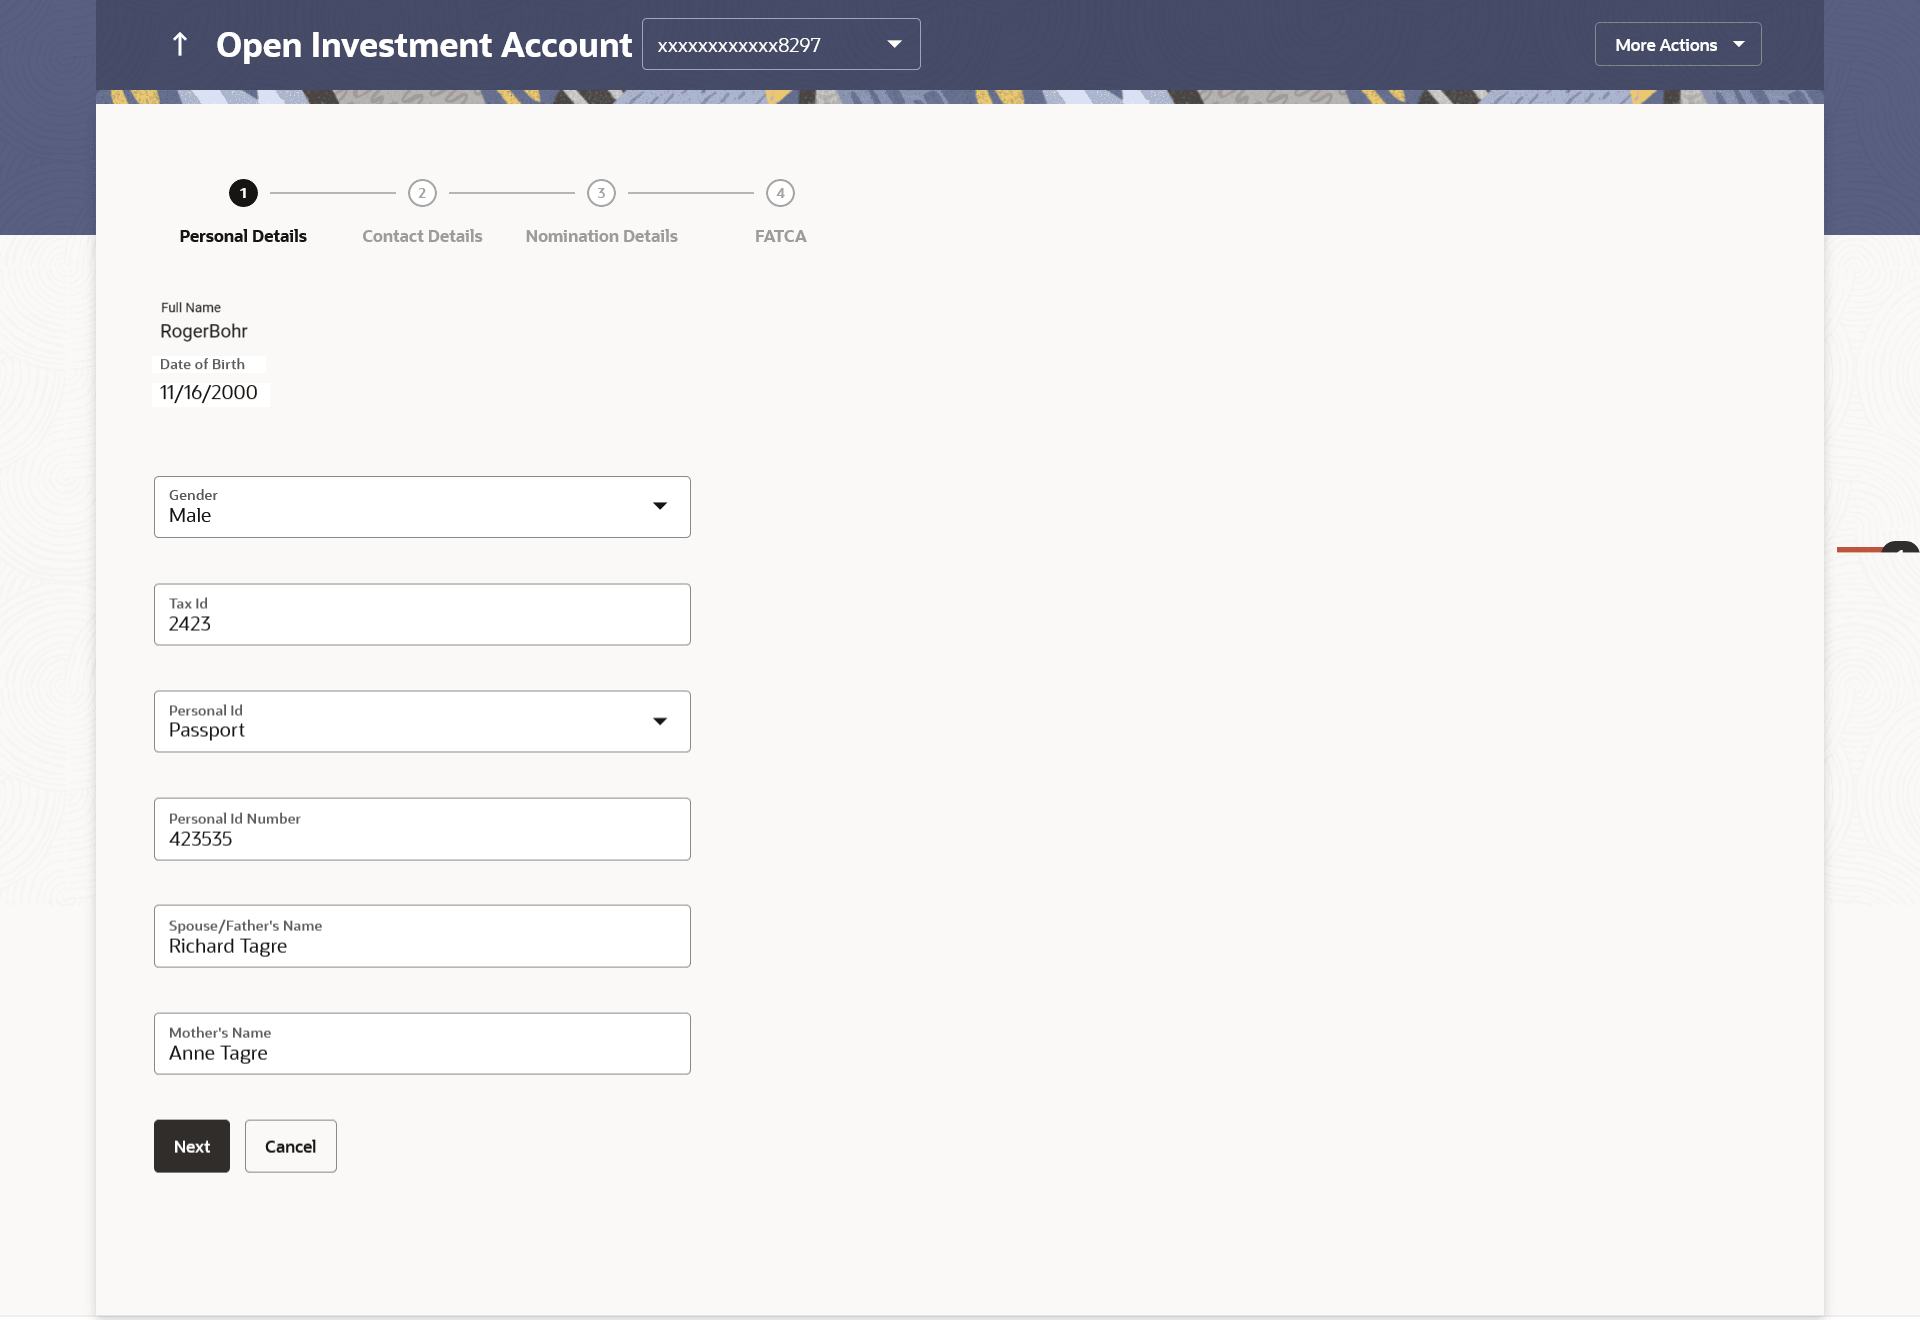
In this section, the basic personal details that includes full name, date of birth, gender, Tax ID etc. Name, Date of Birth details are fetched from bank host and pre-populated, while remaining information is to be entered by the user.
Figure 3-2 Open Investments Account - Personal Details
Note:
The fields which are marked as Required are mandatory.For more information on fields, refer to the field description table.
Table 3-1 Open Investments Account - Personal Details - Field Description
| Field Name | Description |
|---|---|
| Full Name | First, Middle and Last name of the logged in user is displayed. |
| Date of Birth | Date of birth of the logged in user is displayed. |
| Gender | Gender of the user is displayed and can be edited.
The options are:
|
| Tax ID | Tax identification number of the user. |
| Personal ID Type | Personal identification document that the user wants to provide as proof of identity
The options are:
|
| Personal ID Number | The personal identification number corresponding to the identification type. |
| Spouse/ Father's Name | Spouse/ Father's name of the user. |
Contact Details
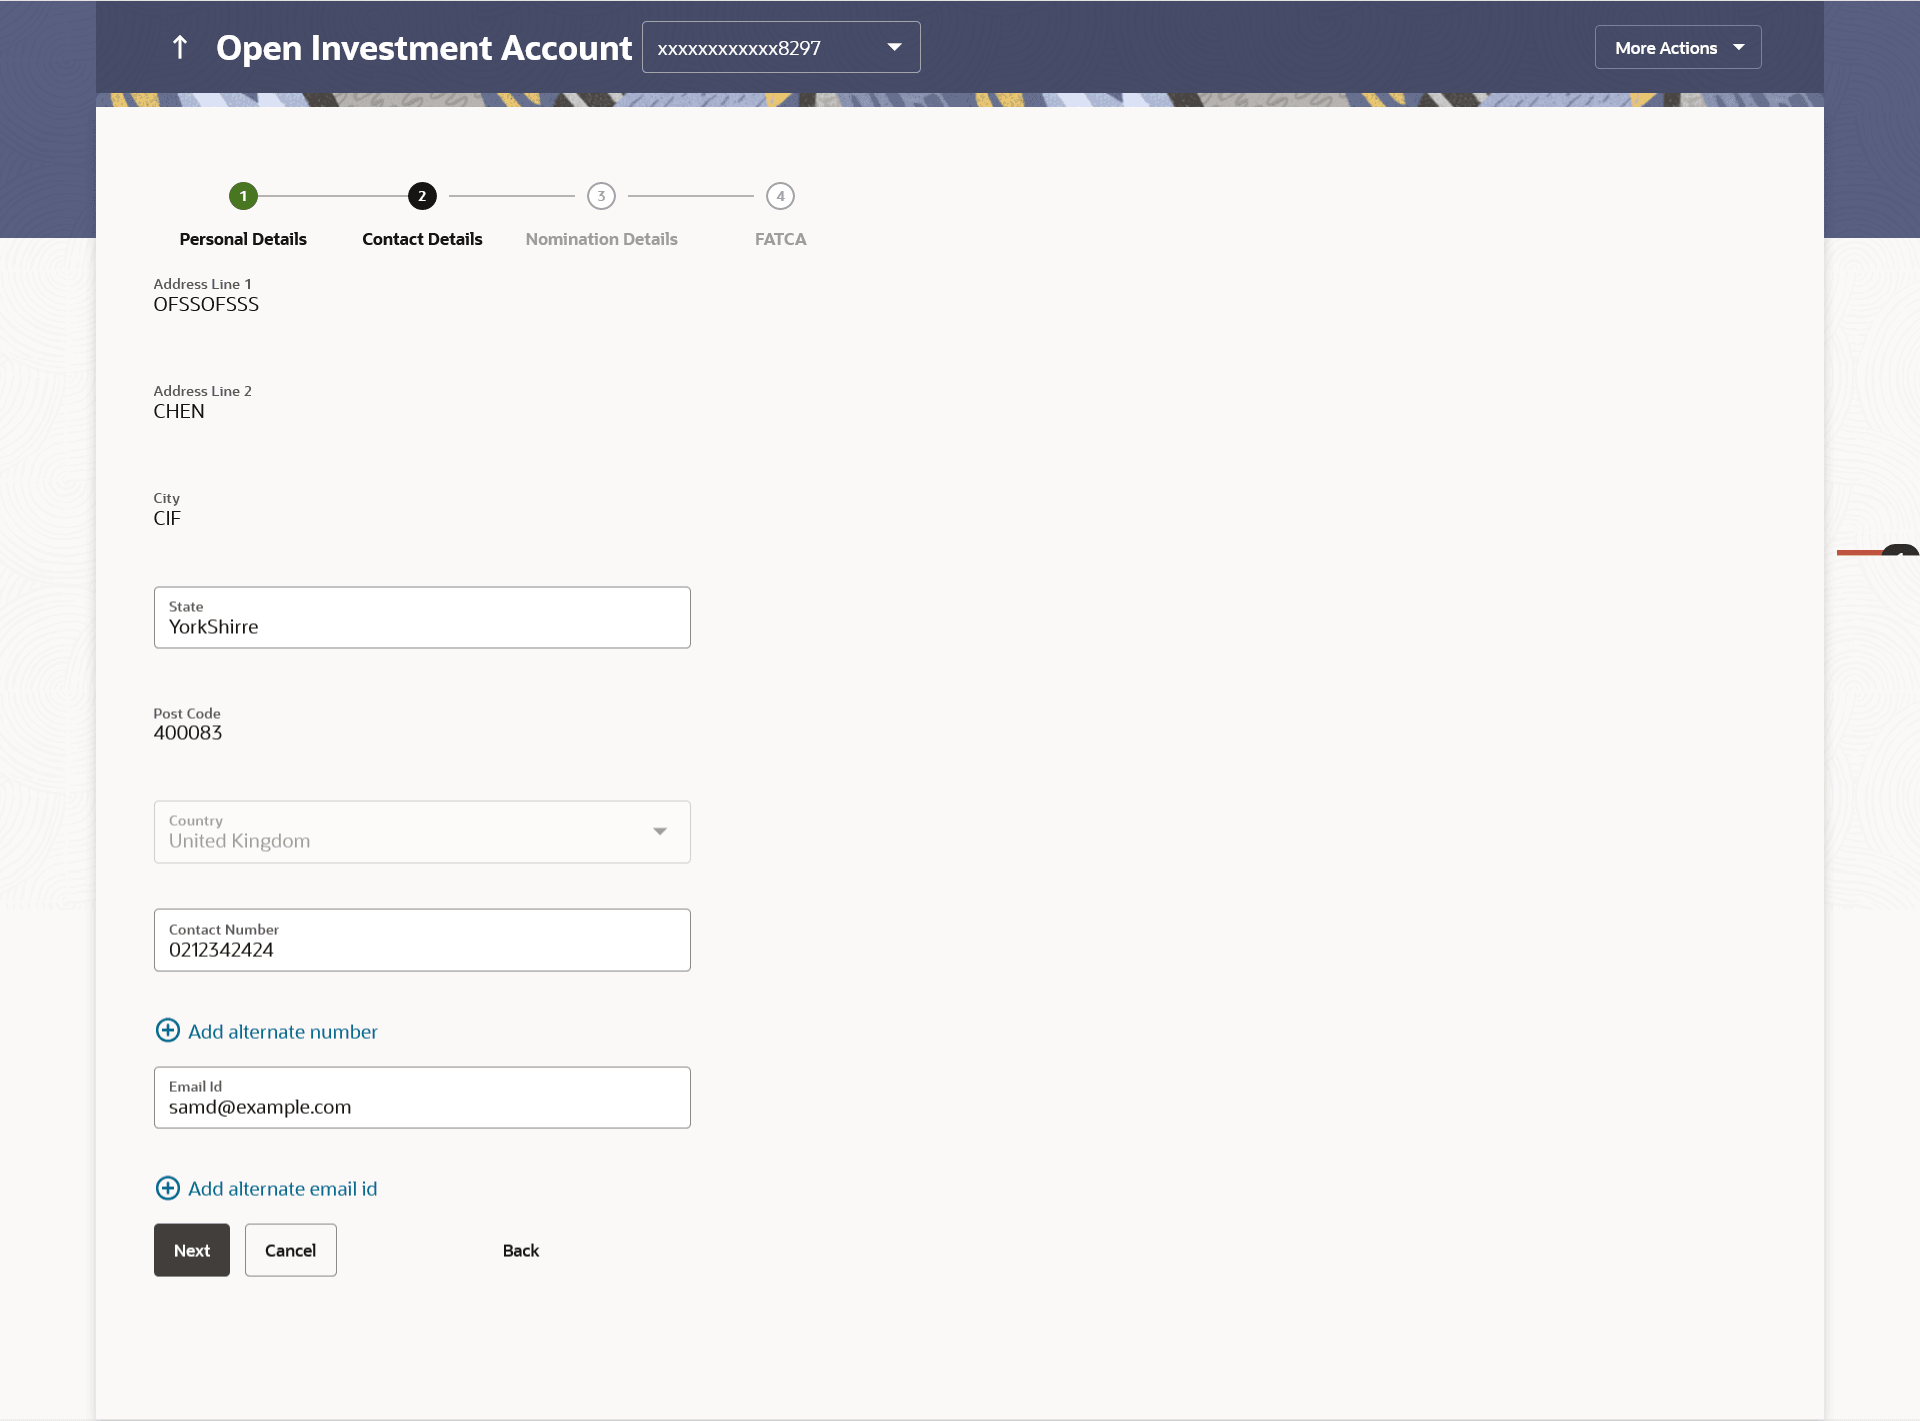
This section allows the user to key in his contact details such as current address, email and phone numbers with the bank. Current contact address is fetched from bank host and pre-populated. However, the user can edit it.
Figure 3-3 Open Investments Account - Contact Details
Note:
The fields which are marked as Required are mandatory.For more information on fields, refer to the field description table.
Table 3-2 Open Investments Account - Contact Details - Field Description
| Field Name | Description |
|---|---|
| Address Line 1, 2 | Details of the permanent address of the user is displayed. |
| City | City of the user is displayed. |
| State | State of the user is displayed. |
| Post Code | Postal code of the permanent address of the user is displayed. |
| Country | Country of the user is displayed. |
| Contact Number | Contact number of the user. |
| Email ID | Email ID of the user. |
Nomination Details
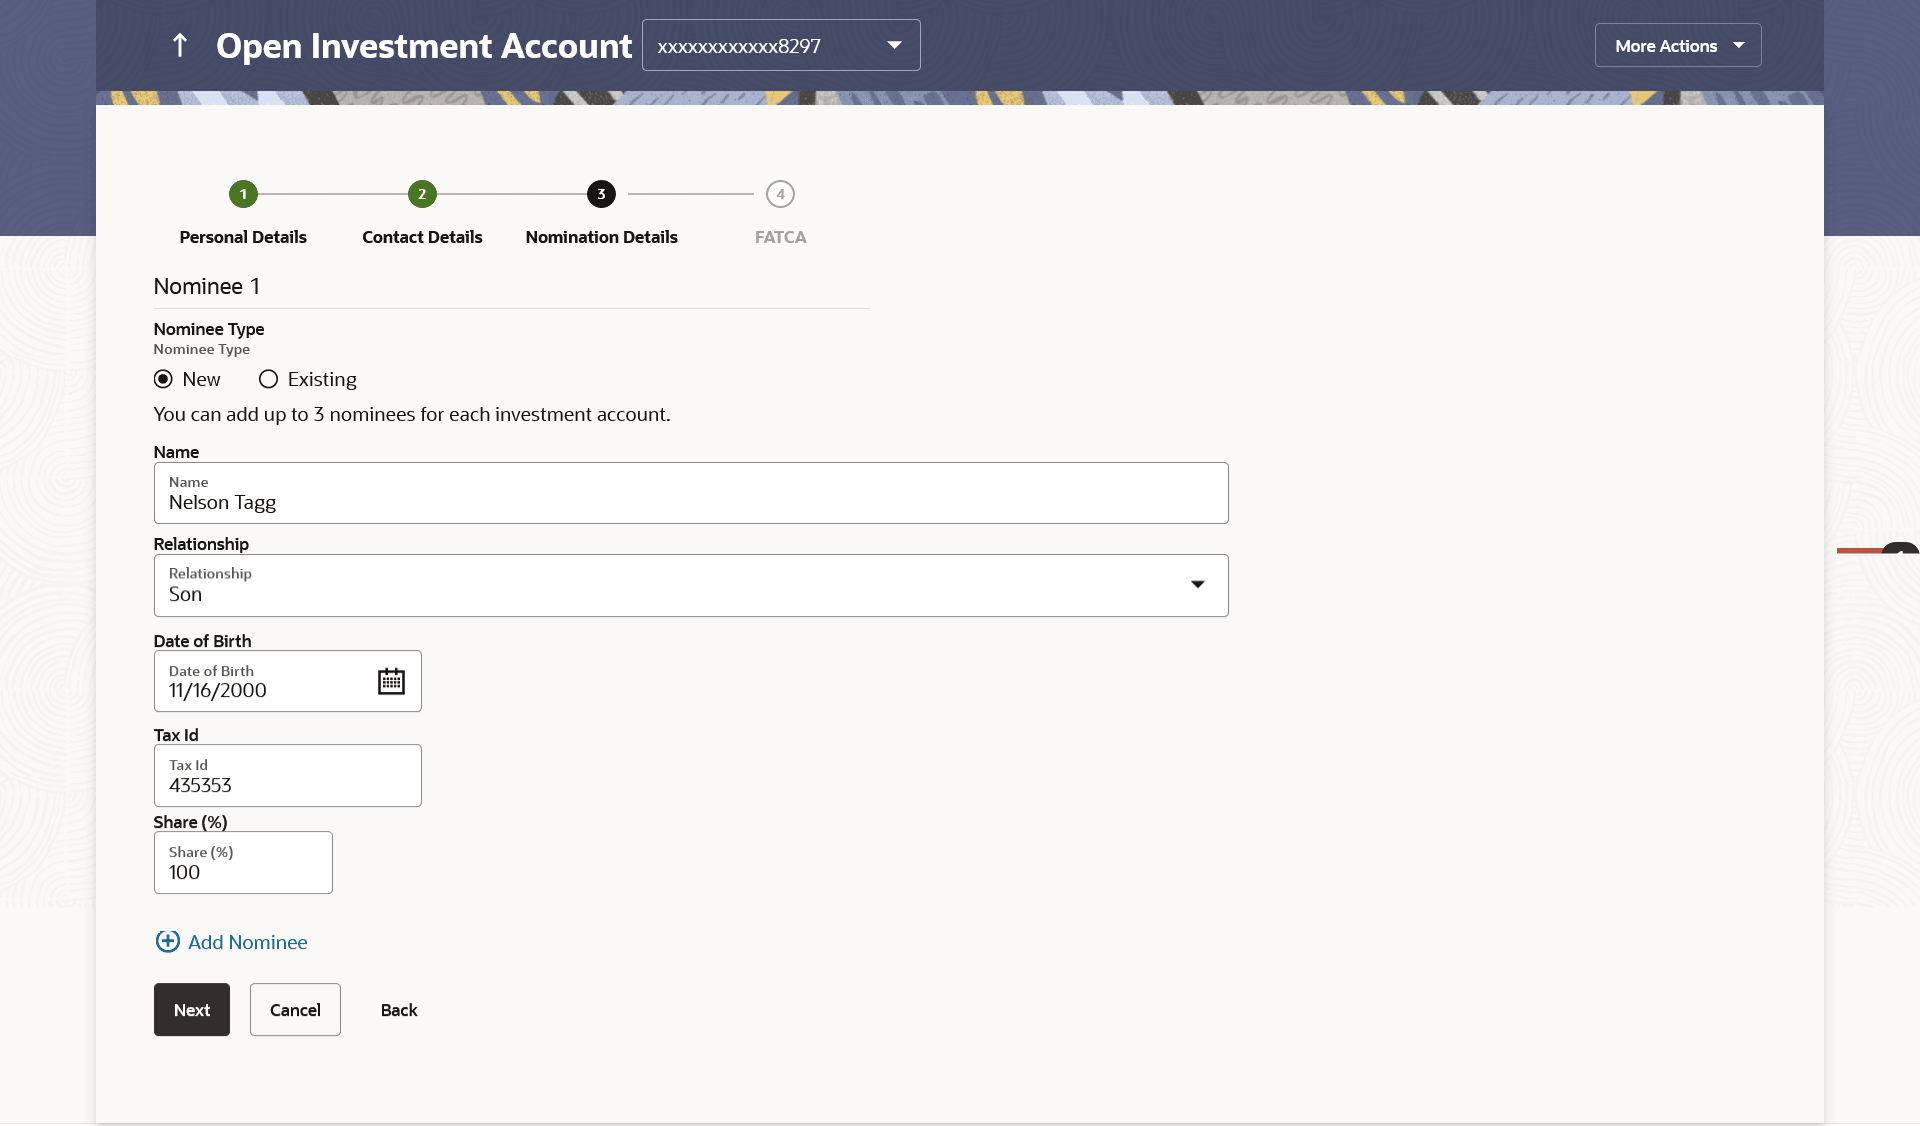
This section allows the user to add the nominees for the investment account. The user can either add a new nominee or fetch the details of the existing Current and Savings account and select any one of them as a nominee. Apart from adding the nominee, the % share of each nominee is specified by the user. The sum of % share of nominees (one or multiple) should add up to 100%.
The maximum up to three nominees can be added in an investment account.
Figure 3-4 Open Investments Account - Nomination Details
Note:
The fields which are marked as Required are mandatory.For more information on fields, refer to the field description table.
Table 3-3 Open Investments Account - Nomination Details - Field Description
| Field Name | Description |
|---|---|
| Nominee Type | The option to select a new nominee or existing nominee to the investment account.
The options are:
|
| Name | The name of the nominee.
This is an input field, if the user selects New option, from the Nominee Type field. This is a drop-down, allowing user to select his existing CASA nominees, if the user selects Existing option, from the Nominee Type field. |
| Relationship | The relationship of the user with the selected nominee.
The options are:
|
| Date of Birth | The nominee’s date of birth. |
| Guardian Name | The full name of the nominee’s guardian, if the age of the nominee is below 18 years. |
| Guardian Relationship | Guardian’s relationship with the minor nominee. |
| Tax ID | Tax Identification number of the nominee. |
| Share (% ) | The percentage share of the nominee.
The sum of percentage share of nominees (either one or multiple) should always be 100. |
FATCA
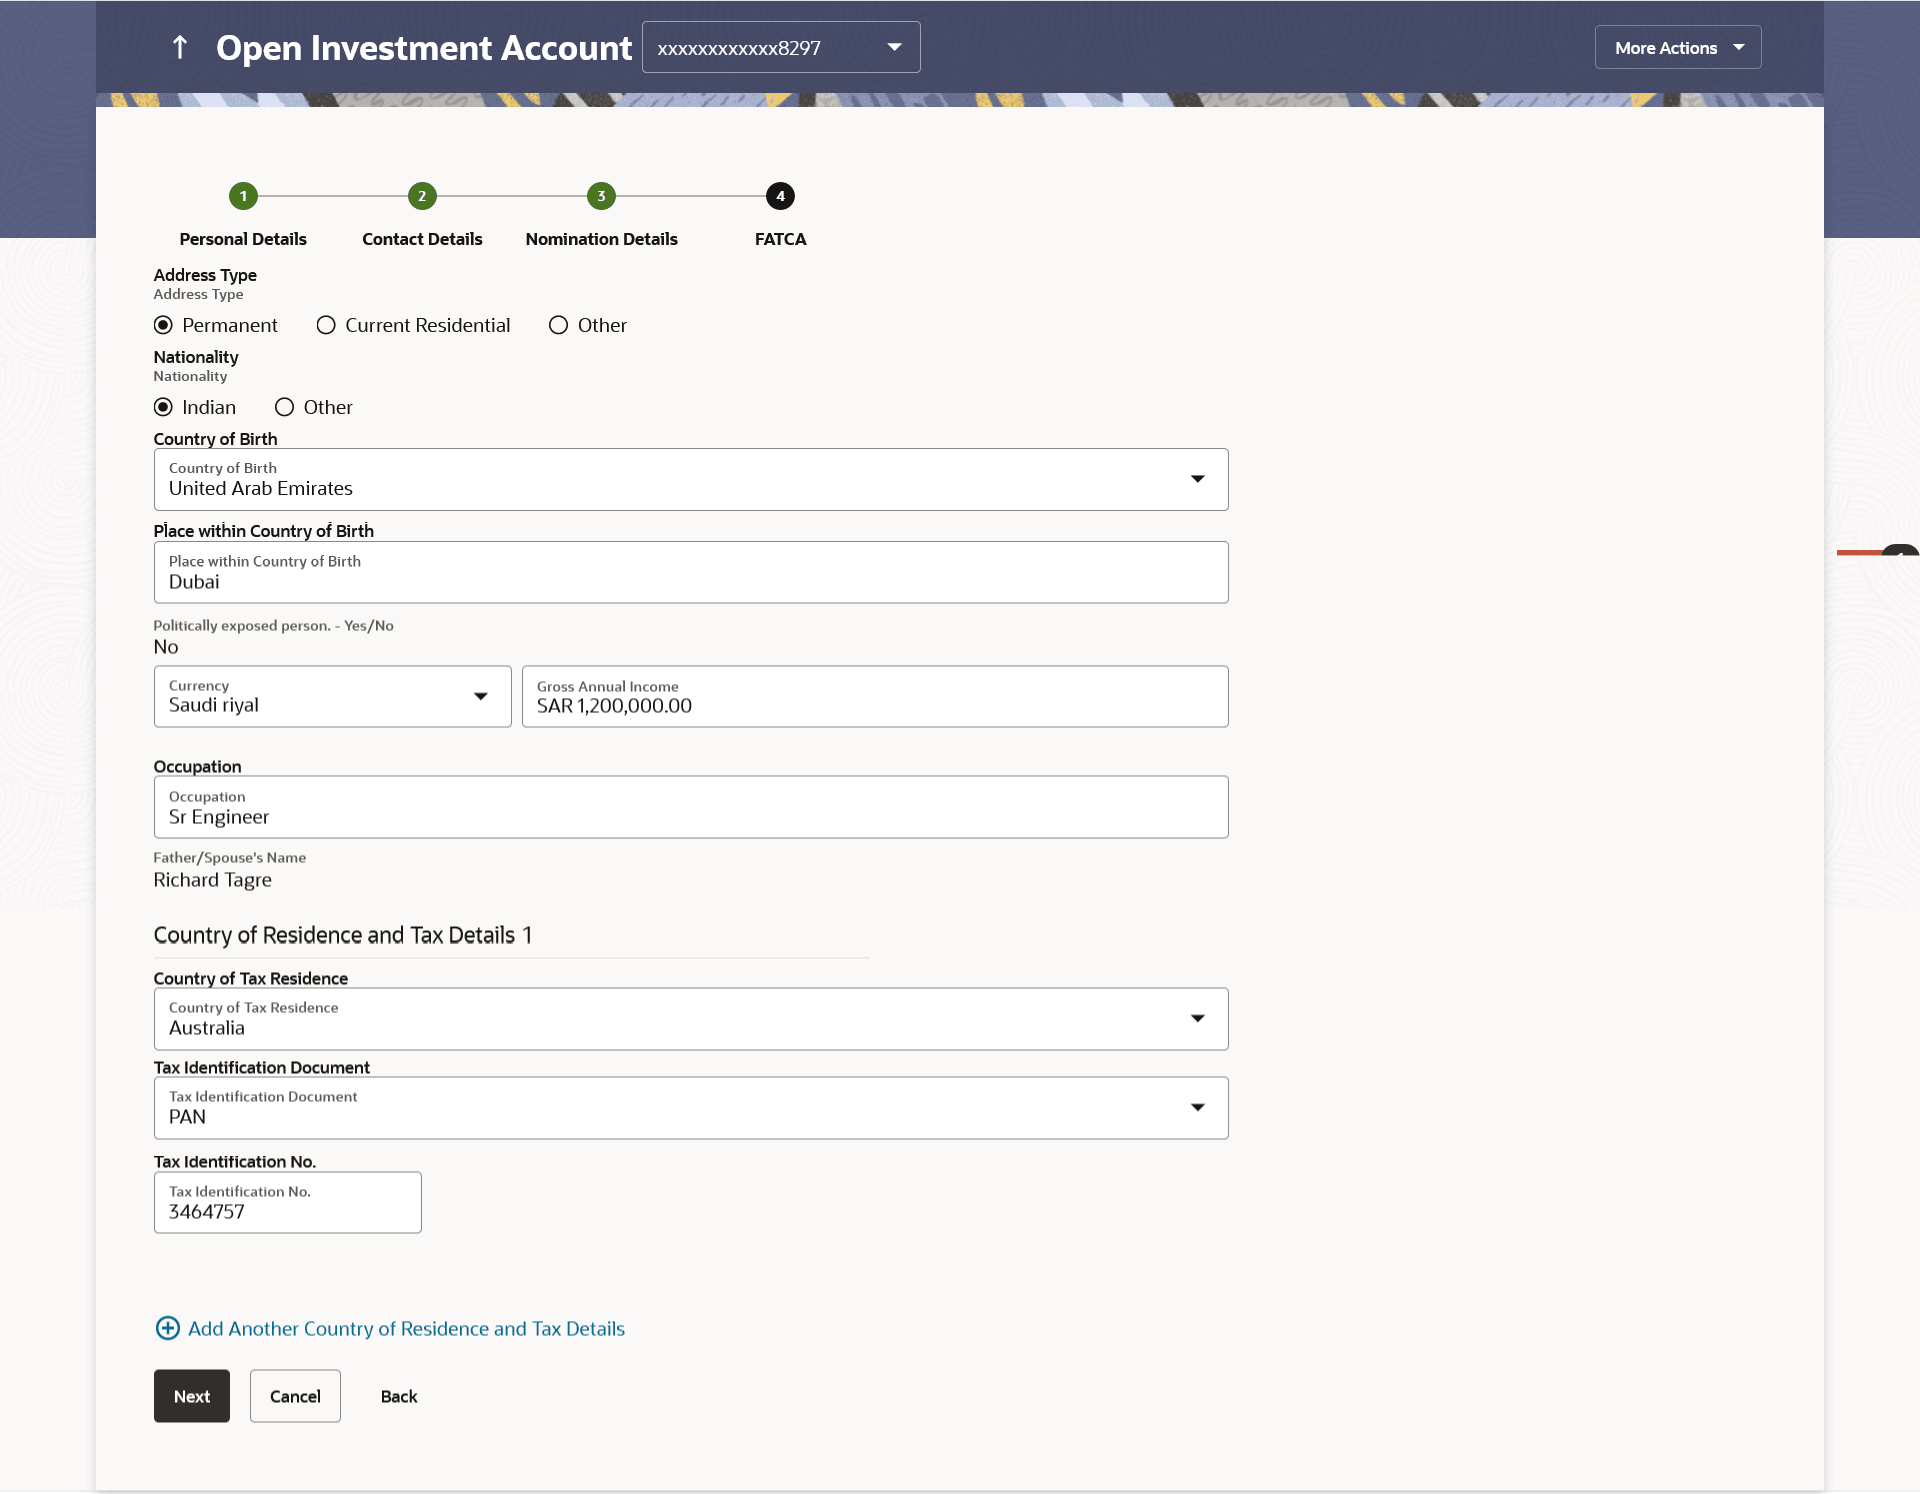
This section allows the user to specify the FATCA related details such as Address Type, nationality, country and place of birth, PEP status, gross annual income, occupation and tax details.
Note:
FATCA is mandatory only if the customer has not already done the FATCA check.Figure 3-5 Open Investments Account - FATCA
Note:
The fields which are marked as Required are mandatory.For more information on fields, refer to the field description table.
Table 3-4 Open Investments Account - FATCA - Field Description
| Field Name | Description |
|---|---|
| Address Type | The type of address that the user wants to provide.
The address types are:
|
| Nationality | The country of which the user is national.
The options are:
|
| Country of Birth | The country in which the user was born. |
| Place within Country of Birth | The name of the city in which the user was born. |
| PEP Status | The status with regards to being a politically exposed person or being related to a politically exposed person. |
| Gross Annual Income | The gross annual income that user can earn from all sources. |
| Occupation | The type of occupation that best describes the user's current or most recent job. |
| Father/ Spouse's Name | Father’s/ spouse name of the user. |
| Country of Tax Residence | The country in which the user is considered a tax resident. |
| Tax Identification Document | The user can select the Tax Identification Document type from the list. The values in this list are populated based on the Identification documents that are accepted as TINs in the country that you have selected as Country of Tax Residence.
The options are:
|
| Tax Identification Number | The taxpayer identification number. |
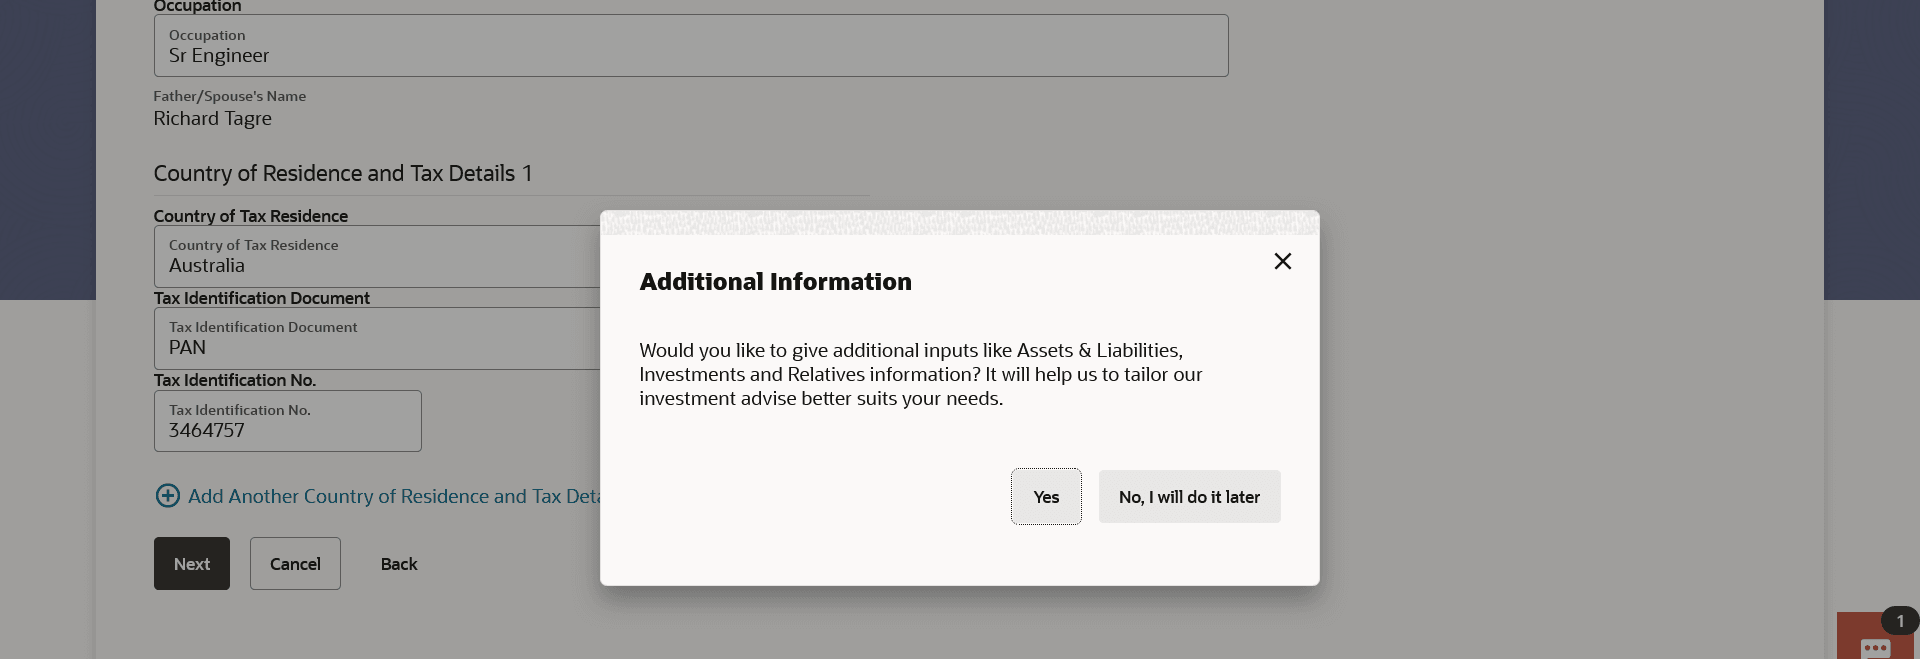
Additional Details
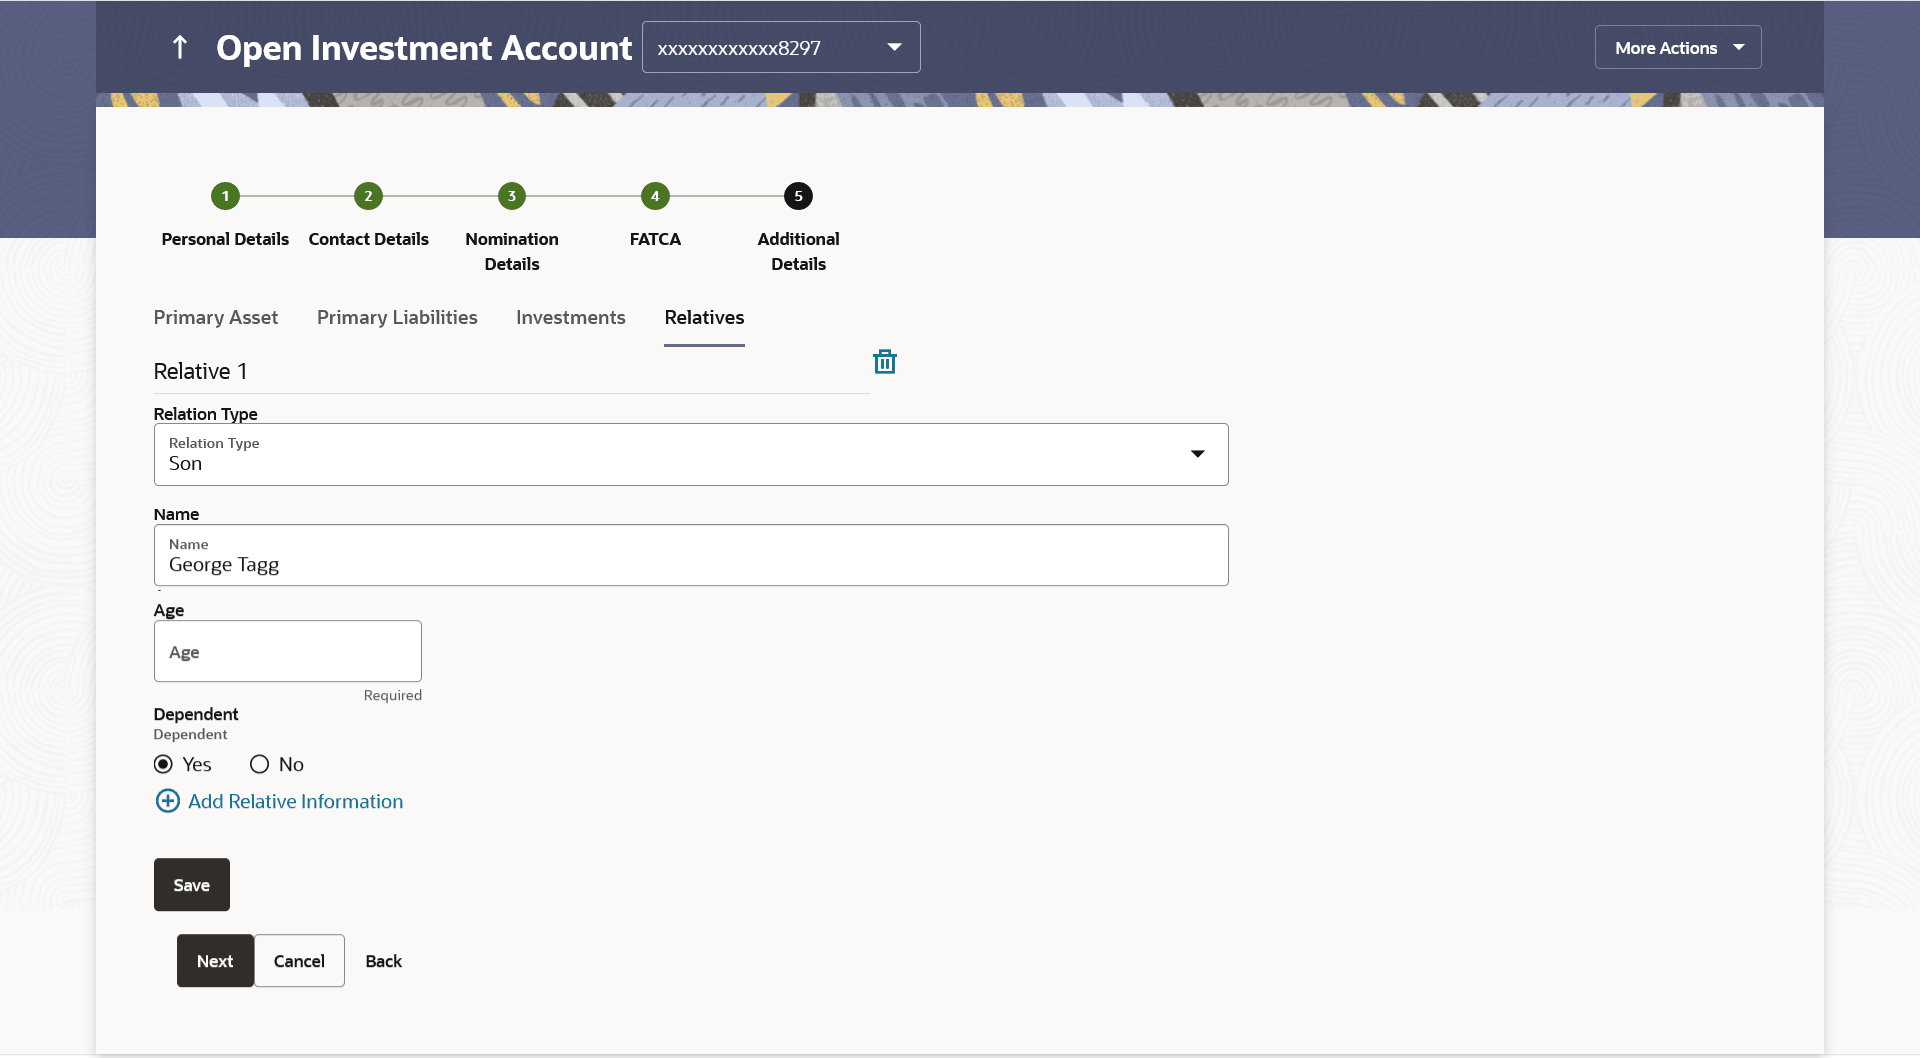
This section allows the user to specify the additional information like net asset values owned by the user, Liabilities and their current value, financial investments and their current value and immediate family/ relatives’ details. Entering of this information is not mandatory for investment account opening.
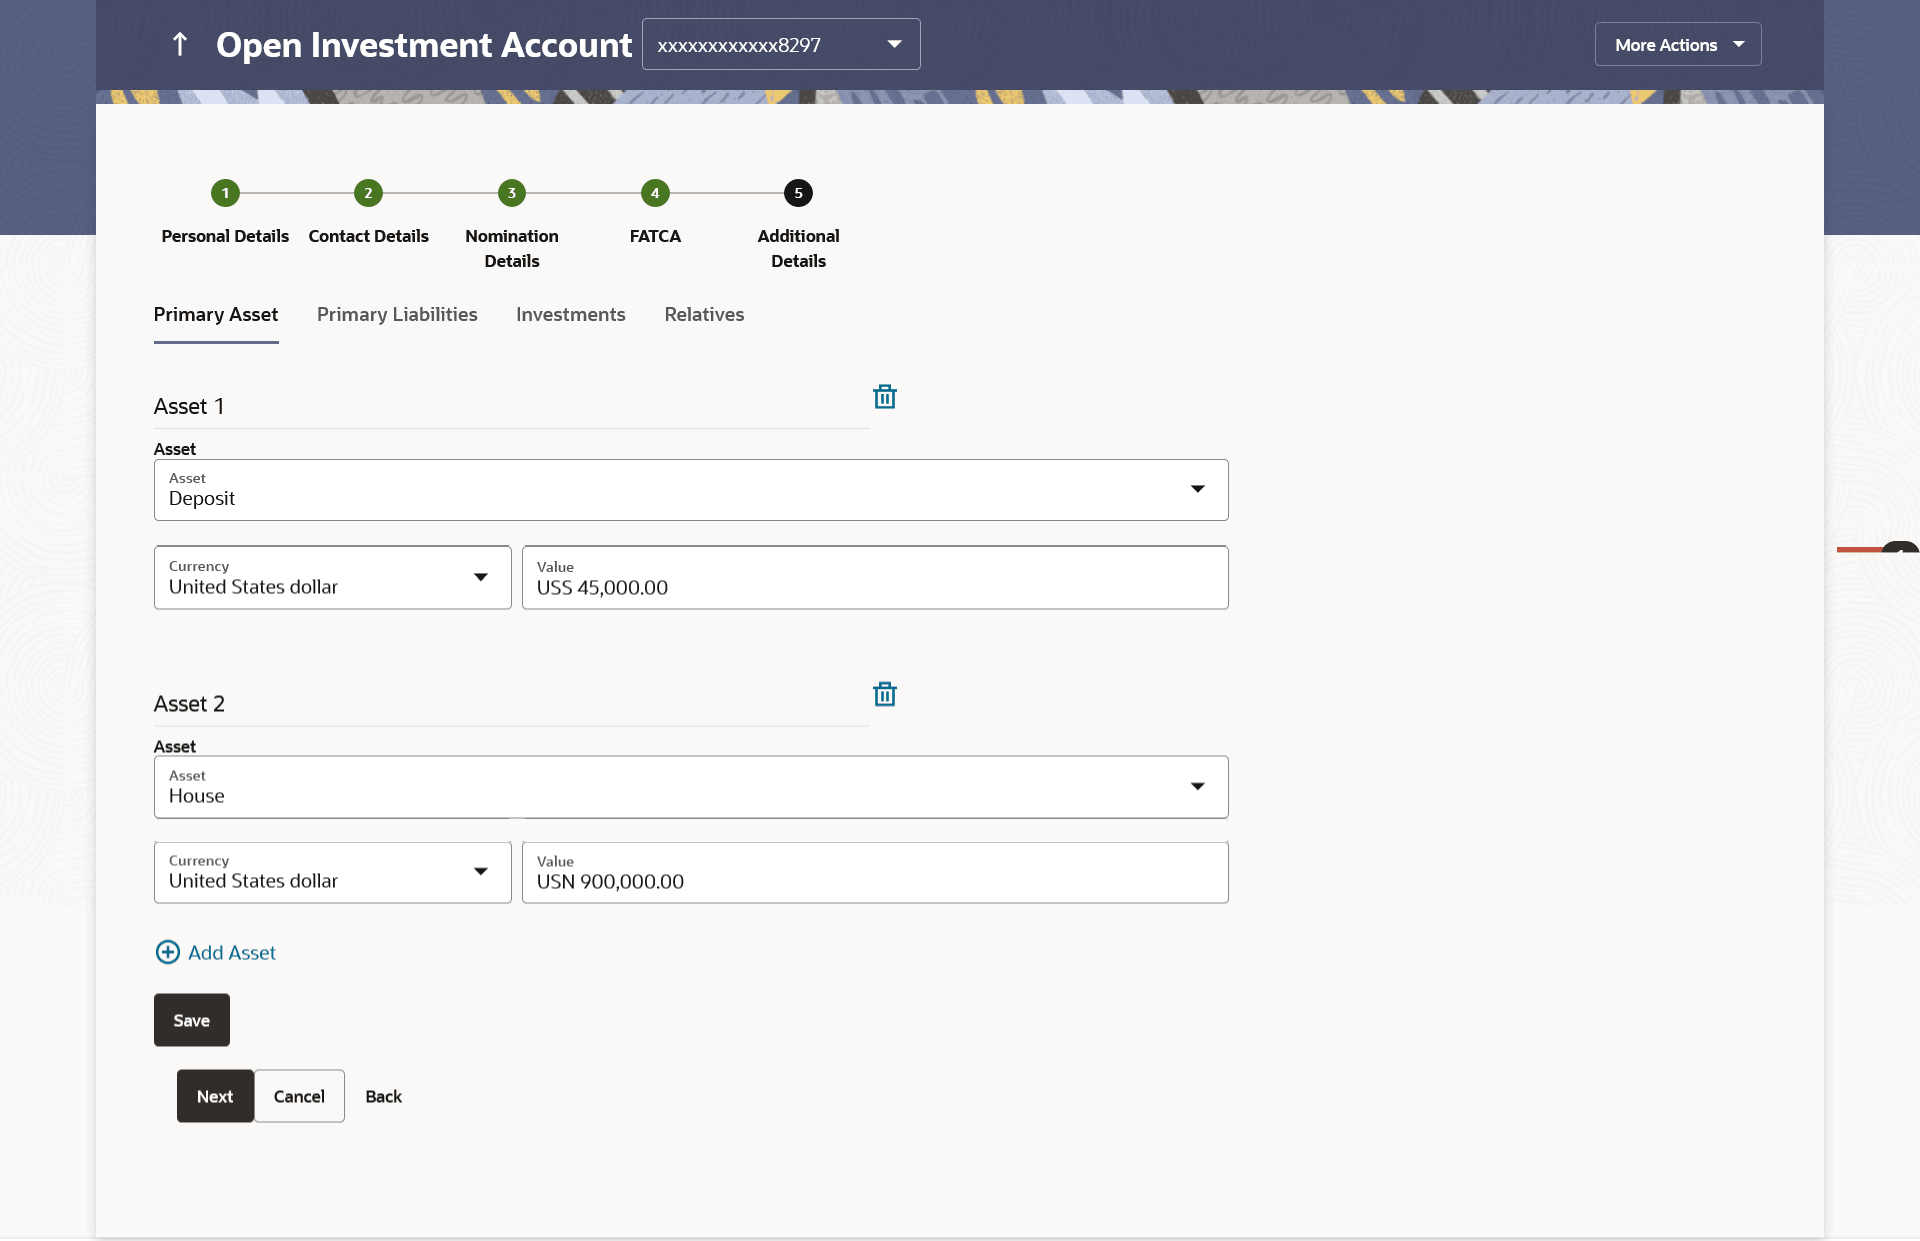
Figure 3-7 Open Investments Account - Additional Details - Primary Assets
Note:
The fields which are marked as Required are mandatory.For more information on fields, refer to the field description table.
Table 3-5 Open Investments Account - Additional Details - Primary Assets - Field Description
| Field Name | Description |
|---|---|
| Primary Asset | Perform any one of the following navigation to access the Primary Asset screen. |
| Asset | The option to select the asset type for which the user wants to capture the value of asset.
The options are:
|
| Value | Value of the asset. |
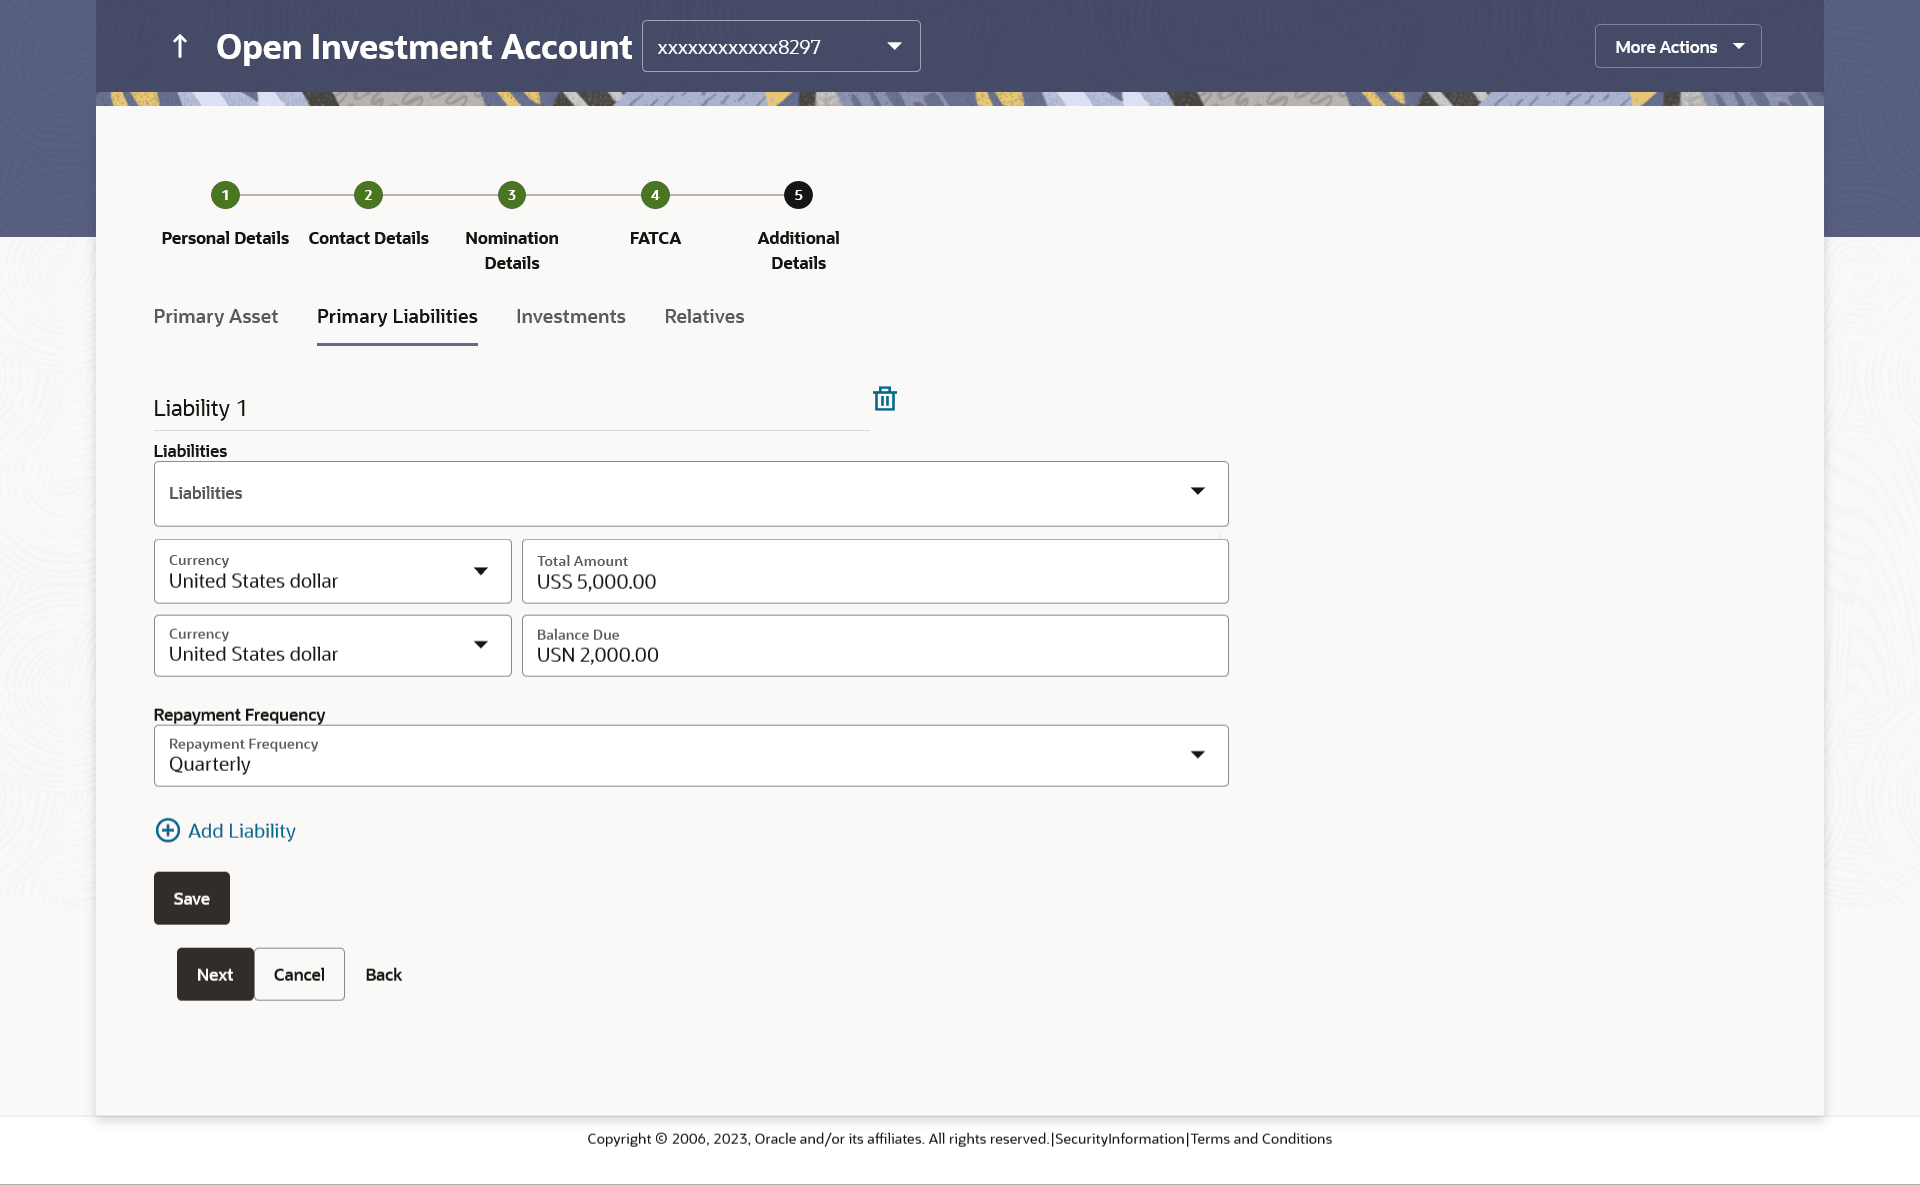
Figure 3-8 Open Investments Account - Additional Details - Primary Liabilities Note:
For more information on fields, refer to the field description table.
Table 3-6 Open Investments Account - Additional Details - Primary Liabilities - Field Description
| Field Name | Description |
|---|---|
| Liabilities | The option to select the liability type for which the user wants to capture the value of liability.
The options are:
|
| Total Amount | Total amount outstanding of the liability/ loan. |
| Balance Due | Balance amount outstanding of the liability/ loan. |
| Repayment Frequency | The option to select the frequency of the loan repayment.
The options are:
|
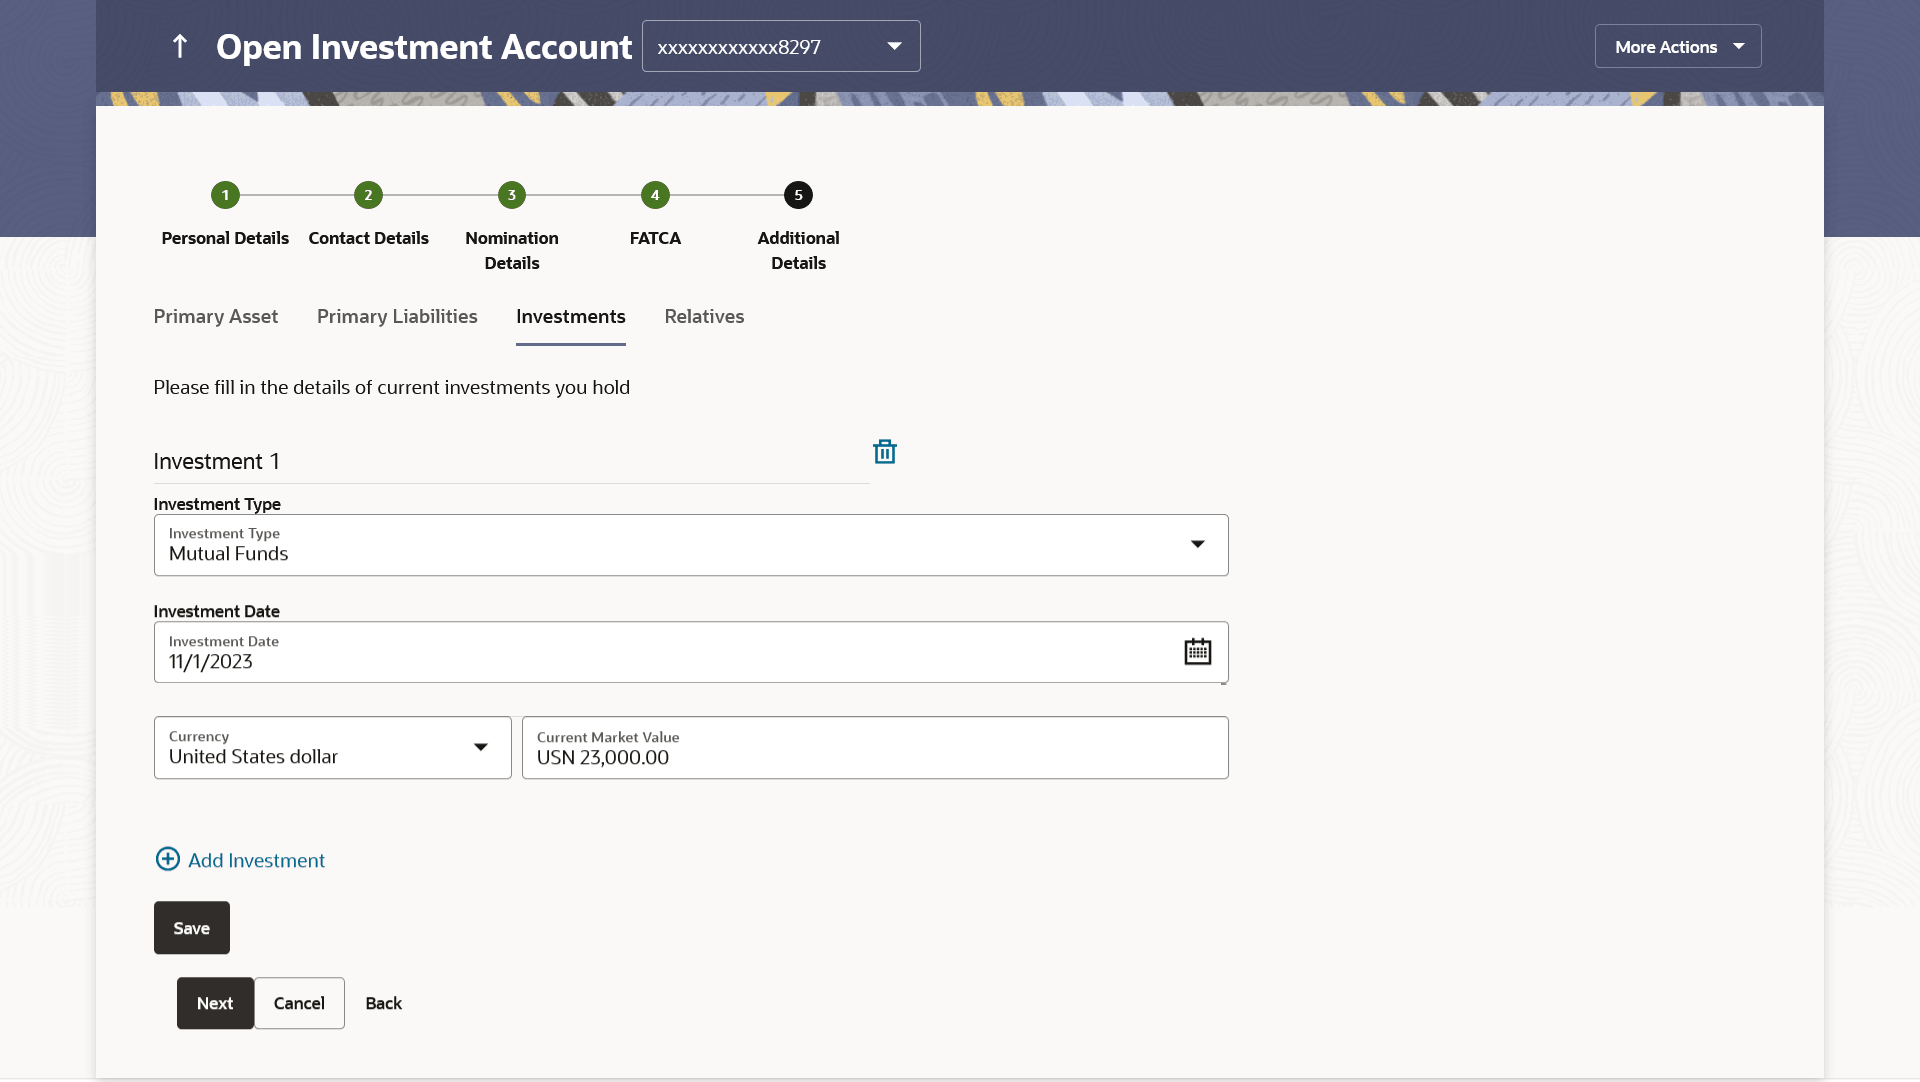
Figure 3-9 Open Investments Account - Additional Details - Investments Note:
For more information on fields, refer to the field description table.
Table 3-7 Open Investments Account - Additional Details - Investments - Field Description
| Field Name | Description |
|---|---|
| Investment Type | The option for the user to select the investment type for which he wants to capture the value of investments.
The options are:
|
| Investment Date | Date on which investment was made. |
| Current Market Value | Current market value of the investment. |
Figure 3-10 Open Investments Account - Additional Details - Relatives Note:
For more information on fields, refer to the field description table.
Table 3-8 Open Investments Account - Additional Details - Relatives - Field Description
| Field Name | Description |
|---|---|
| Relation Type | The relationship of the user with the selected relative.
The options are:
|
| Name | The name of the relative. |
| Age | The age of the relative. |
| Dependent | The option to indicate whether the relative is a dependent or not.
The options are:
|
Parent topic: Start Investing

