6 Transactions

This topic provides the systematic instructions to user to view details of all transactions initiated on the card are displayed in chronological order of spending.

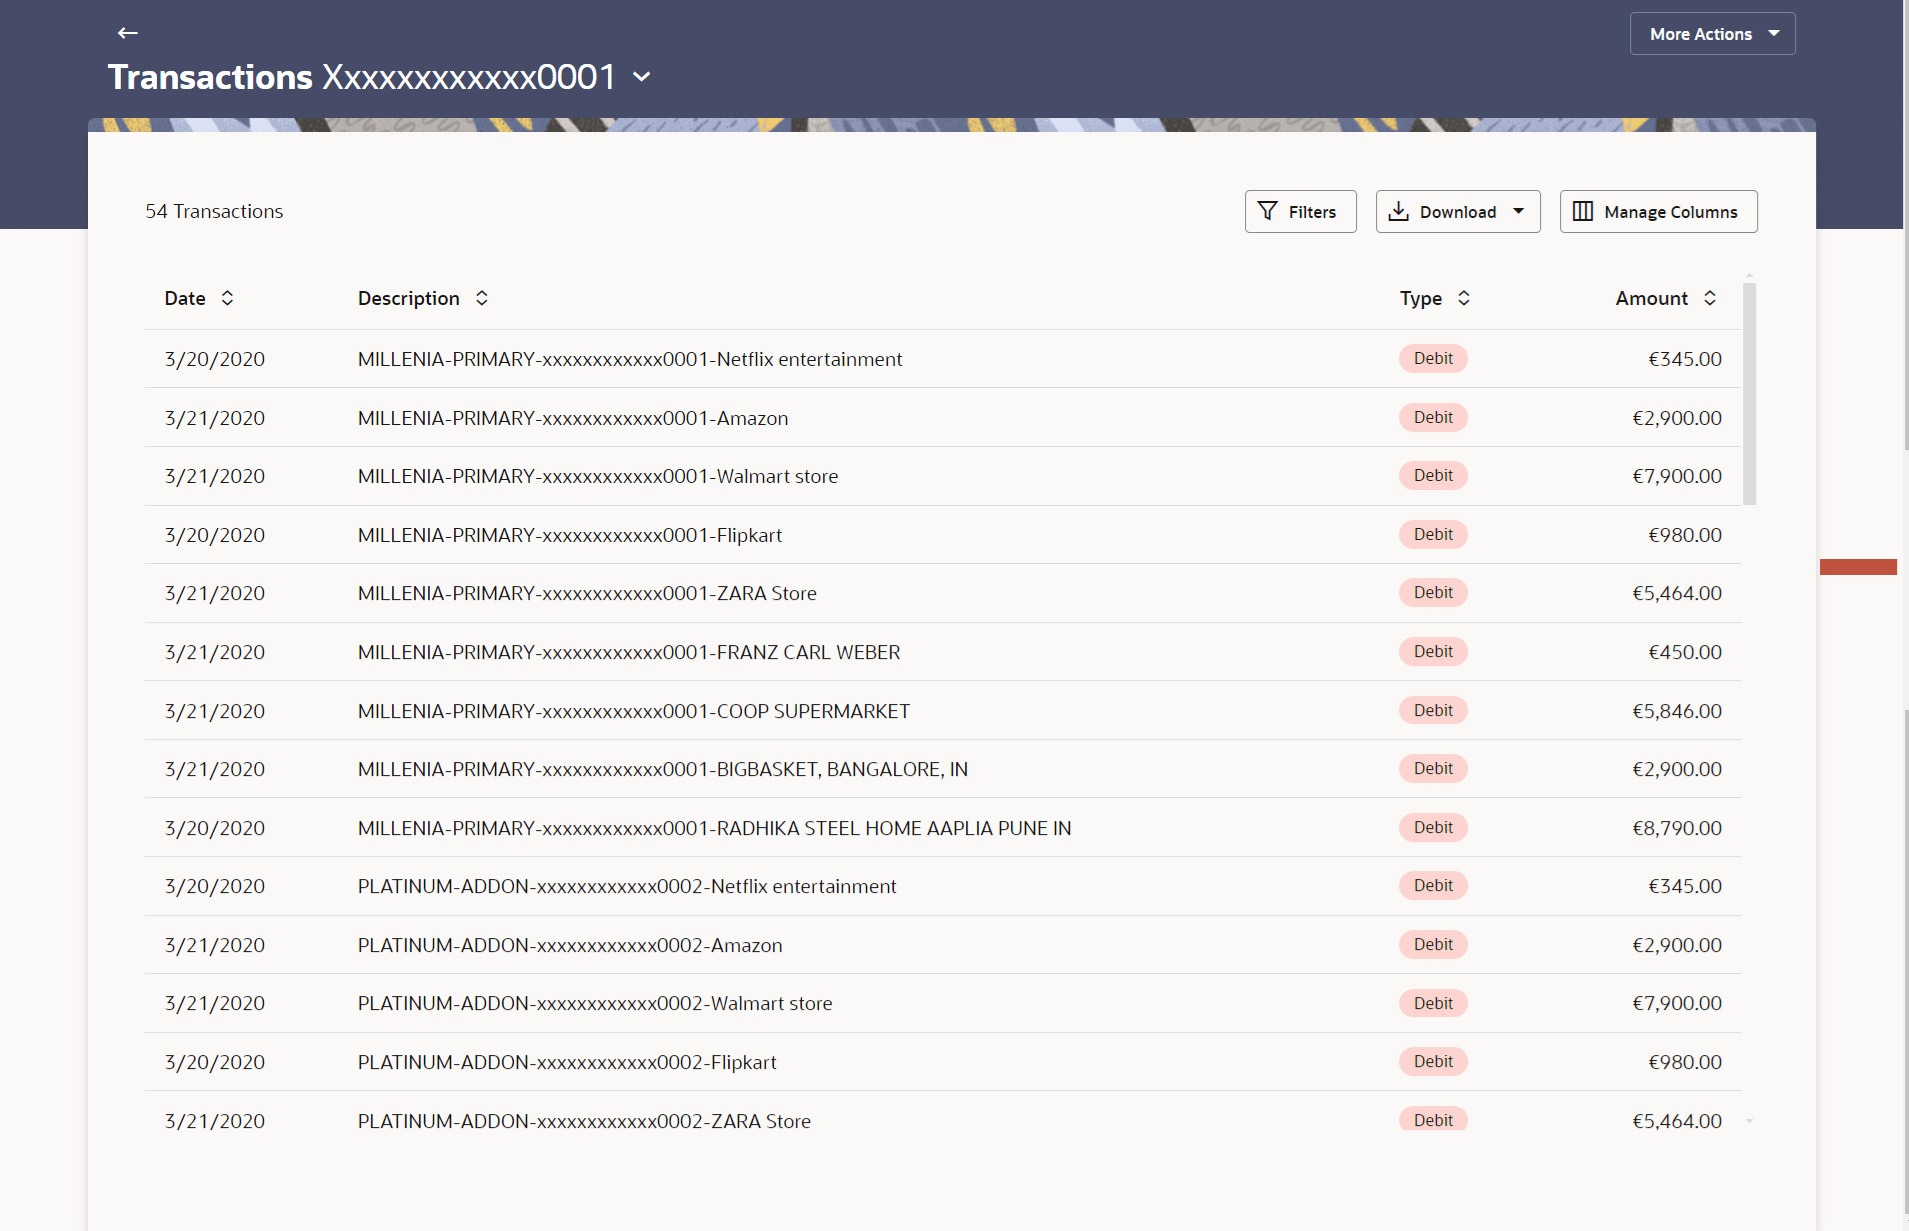
The Transactions feature enables users to view details of all purchases, payments and any other debits and credits made on their credit card accounts. Users can select any card to view transactions initiated using that card. The transactions which is latestwill be displayed first. Only primary cards are available for selection. On selecting a primary card, if any Add-On cards are linked to it, the transactions initiated on the Add-On card are also listed.

In addition to being able to select a specific card of which to view the statement details, users can also filter transactions based on billed or unbilled transactions. On selecting the option ‘billed’ the user can select the billing month to view the statement of that month.

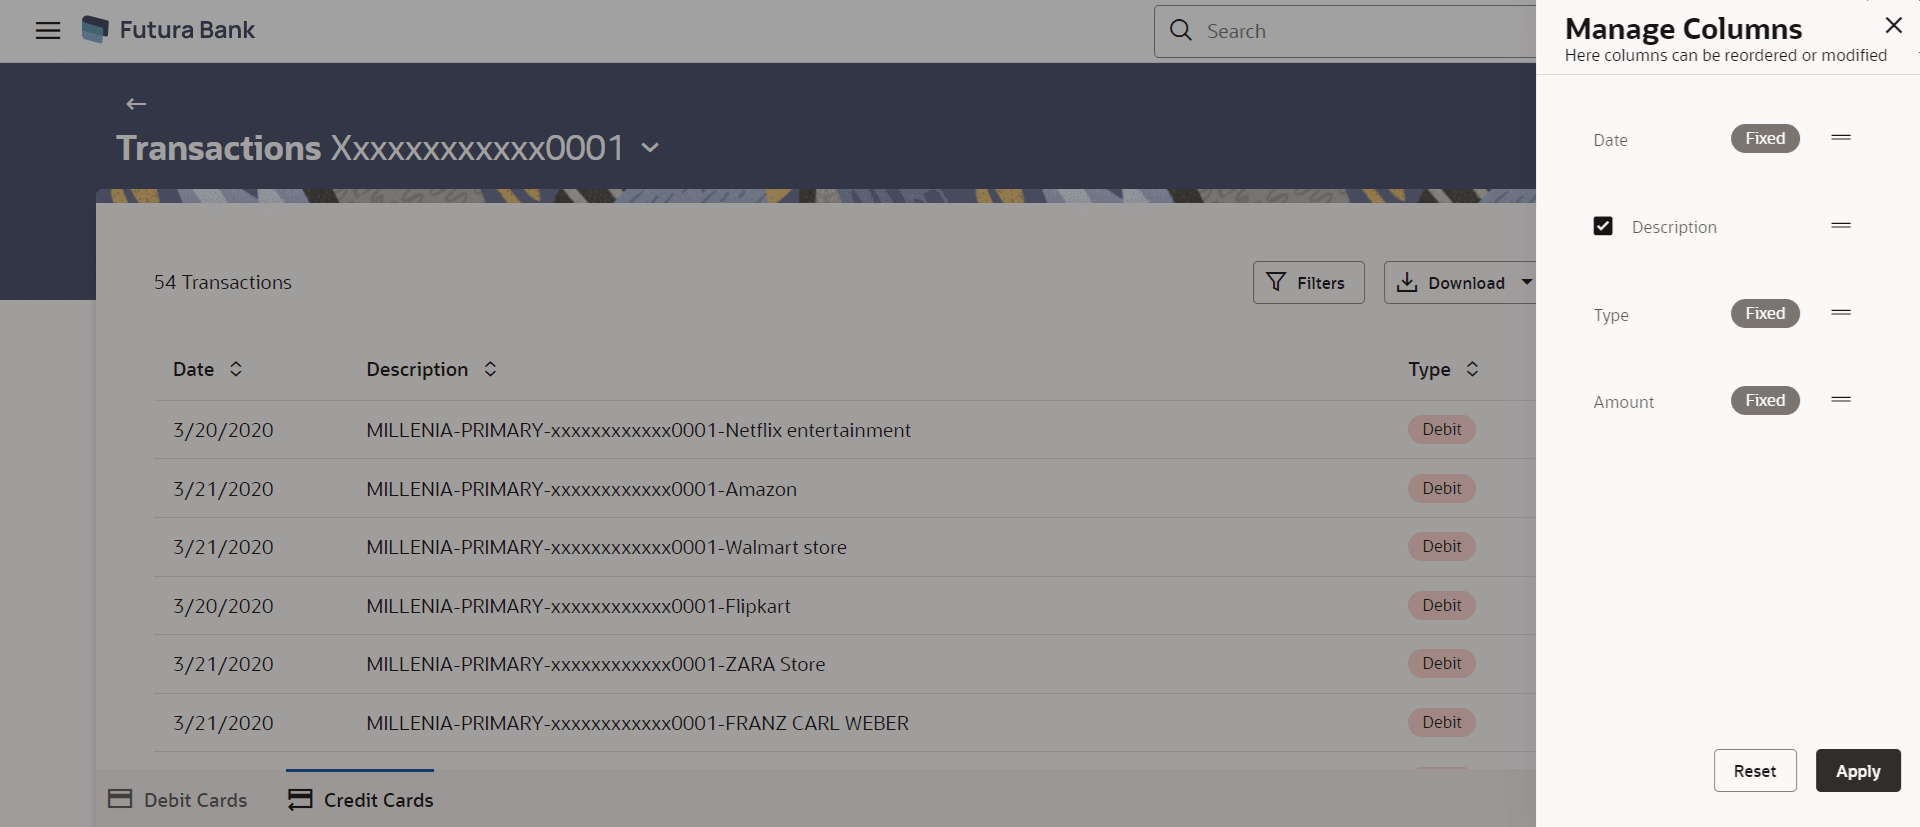
Using the Manage Columns feature, bank can configure and enable customizable UI display/download option for the end users. Using this feature, users can personalize the information to be displayed/downloaded from search grid displayed on the screen.

By clicking on ‘Manage Columns’ option available on the screen, user can

  • Rearrange columns
  • Remove specific columns.

Note:

  1. The downloaded report will have the same columns as displayed on the UI as per user preference as well as there will also be an option to modify the column selection while downloading.
  2. The column preferences setup by the user will be saved for future reference i.e. in case the user revisits this screen, the preferred columns will only be displayed in the table.

The user can also navigate to other Credit card statement related screens from the More Actions menu provided on the screen.

Customers can also undertake the following from this screen:

  • Download Pre-Generated Statements – The customer can select the Pre-Generated Statement option from the More Actions on this page, in order to be provided with the facility to define the period for which he/she would like to download pre-generated statements.
  • Subscribe for E-Statements – By selecting the E-Statement option from the More Actions , the user will be able to either subscribe or unsubscribe (if subscription is active) for e-statements for the specific account. If the user opts to subscribe for e-statements, he/she will receive monthly e-statements on his/her registered email address.

To view transactions:

  1. Perform anyone of the following navigation to access the Transactions screen.
    • From the Dashboard, click Toggle menu, then click Menu, and then click Cards , and then click Credit Cards . From the Credit Card List , click on the credit card, from the Credit Card Details page, click on the Search History card.
    • From the Search bar, type Credit Cards – Credit Card Detailsand press Enter, click on the Search History card.
    • From the Search bar, type Credit Cards – Transactions and press Enter.
    • From the Overview widget, click on the Credit Cards card. From the Credit Card List , click on the credit card, from the Credit Card Details page, click on the Search History card.

    The Transactions screen appears.

  2. From the Credit Card Number list, select the credit card to view transactions initiated through that card.
    The list of transactions appears.

    Figure 6-1 Transactions – View Transactions


    Figure 6-2 Transactions – Manage Columns


    Note:

    The fields which are marked as Required are mandatory.

    For more information on fields, refer to the field description table.

    Table 6-1 Field Description

    Field Name Description
    Card Number Select the credit card to view transactions initiated using that card.
    Count of Transactions Displays the total number of transactions initiated using the card.
    Date The date on which the transaction took place.
    Description Displays the name of the credit card associated with the transaction along with the description of the transaction.
    Type The type of transaction performed, i.e. if it was a debit or credit transaction.
    Amount The transaction amount.
  3. Perform one of the following actions:
    • Click the filter criteria change filter criteria.

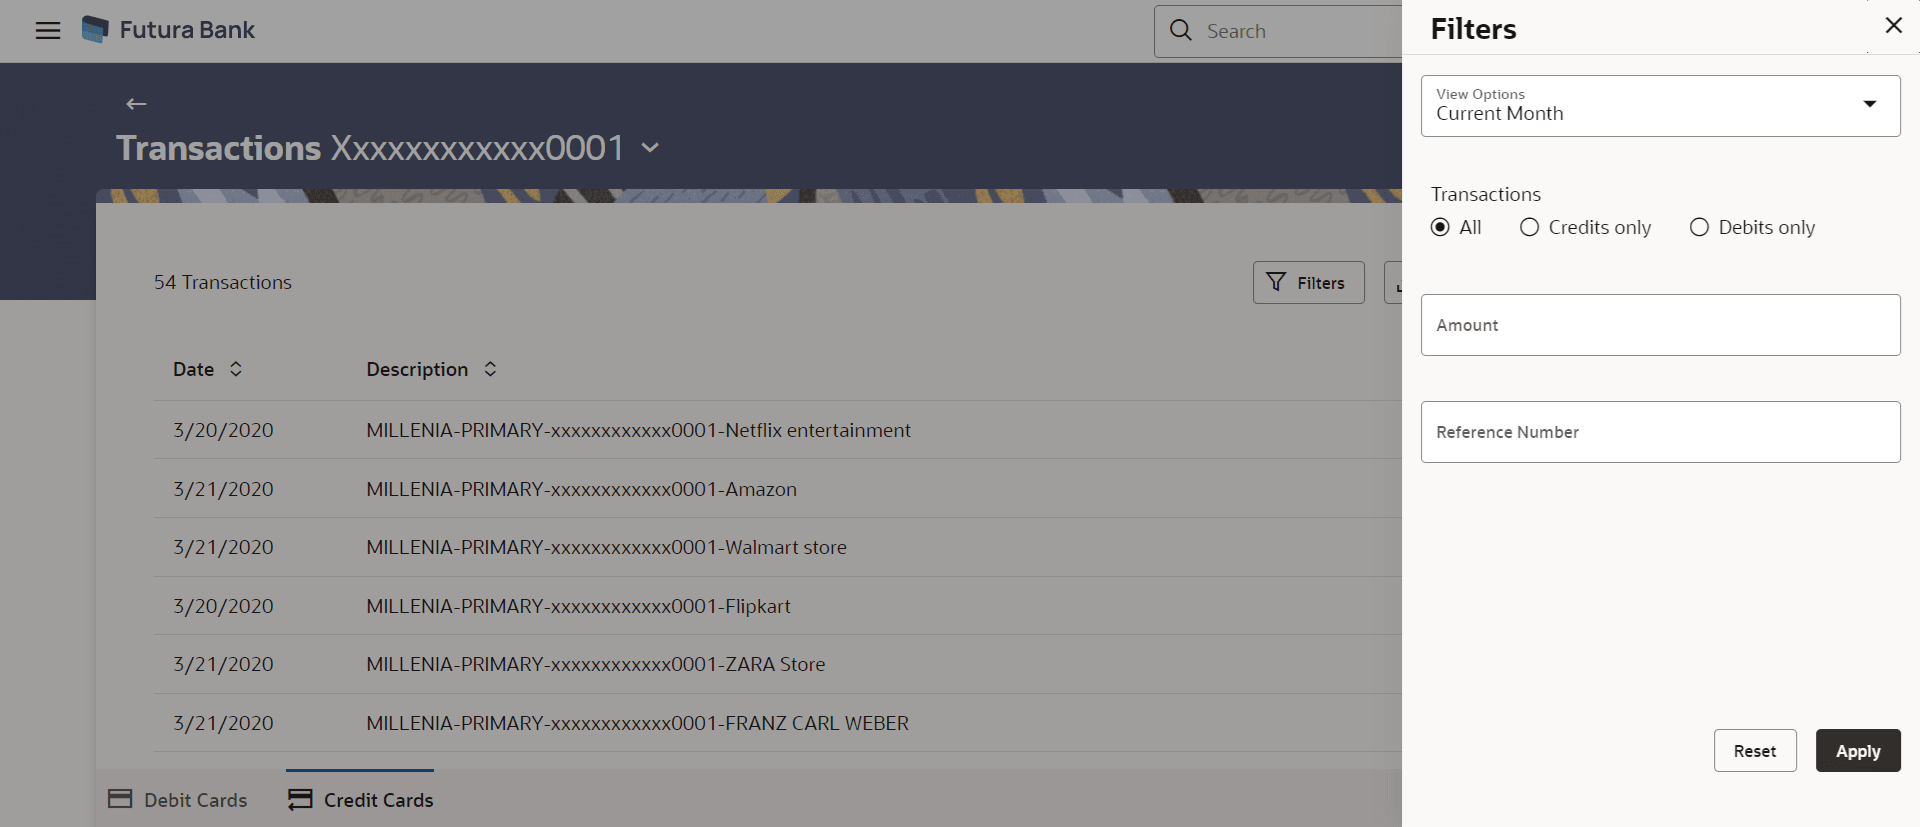
      The Filter overlay screen appears. Based on the defined criteria you can view transactions.

      Figure 6-3 Transactions – Filter Criteria


      Note:

      The fields which are marked as Required are mandatory.

      For more information on fields, refer to the field description table.

      Table 6-2 Field Description

      Field Name Description
      Filter Criteria  
      View Options Filters to view the transactions of a specific period.

      The options are:

      • Current Month
      • Current Day
      • Previous Day
      • Previous Month
      • Current Month &Previous Month
      • Previous Quarter
      • Date Range
      • Last 10 Transactions
      From Date –To Date Specify the period for which you wish to view transactions. Search will be based on the transaction date range.

      These fields will be displayed only if you have selected the option Date Range from the View Options list.

      Transaction Filters to view the transactions based on description.

      The options are:

      • All
      • Credits Only
      • Debits Only
      Amount The specific transaction amount matching to which you wish to view transactions.
      Reference Number Reference number of the transaction.
      Download Click the link to download the statement.
      1. From the View Options list, select the desired transaction period.
        1. If the option Date Range has been selected in the View Options list, specify the date range in the From Date and To Date fields.
      2. From the Transaction list, select the types of transactions to be displayed i.e. either debit or credit or all transactions.
      3. In the Amount field, enter the specific transaction amount matching to which you wish to view transactions.
      4. In the Reference Number field, enter a transaction reference number if you wish to view a specific transaction record.
      5. Perform one of the following actions:
        • Click Apply to view transactions based on the defined criteria.
        • Click Reset to clear the details entered.
    • Click the download . The statement gets downloaded in PDF format.
    • Click the manage columns icon to setup a column preference by rearranging or removing columns.
    • Click on the More Actions menu to access other Current and Savings account statement related transactions.

      The following actions can also be performed from More Actions in the screen: