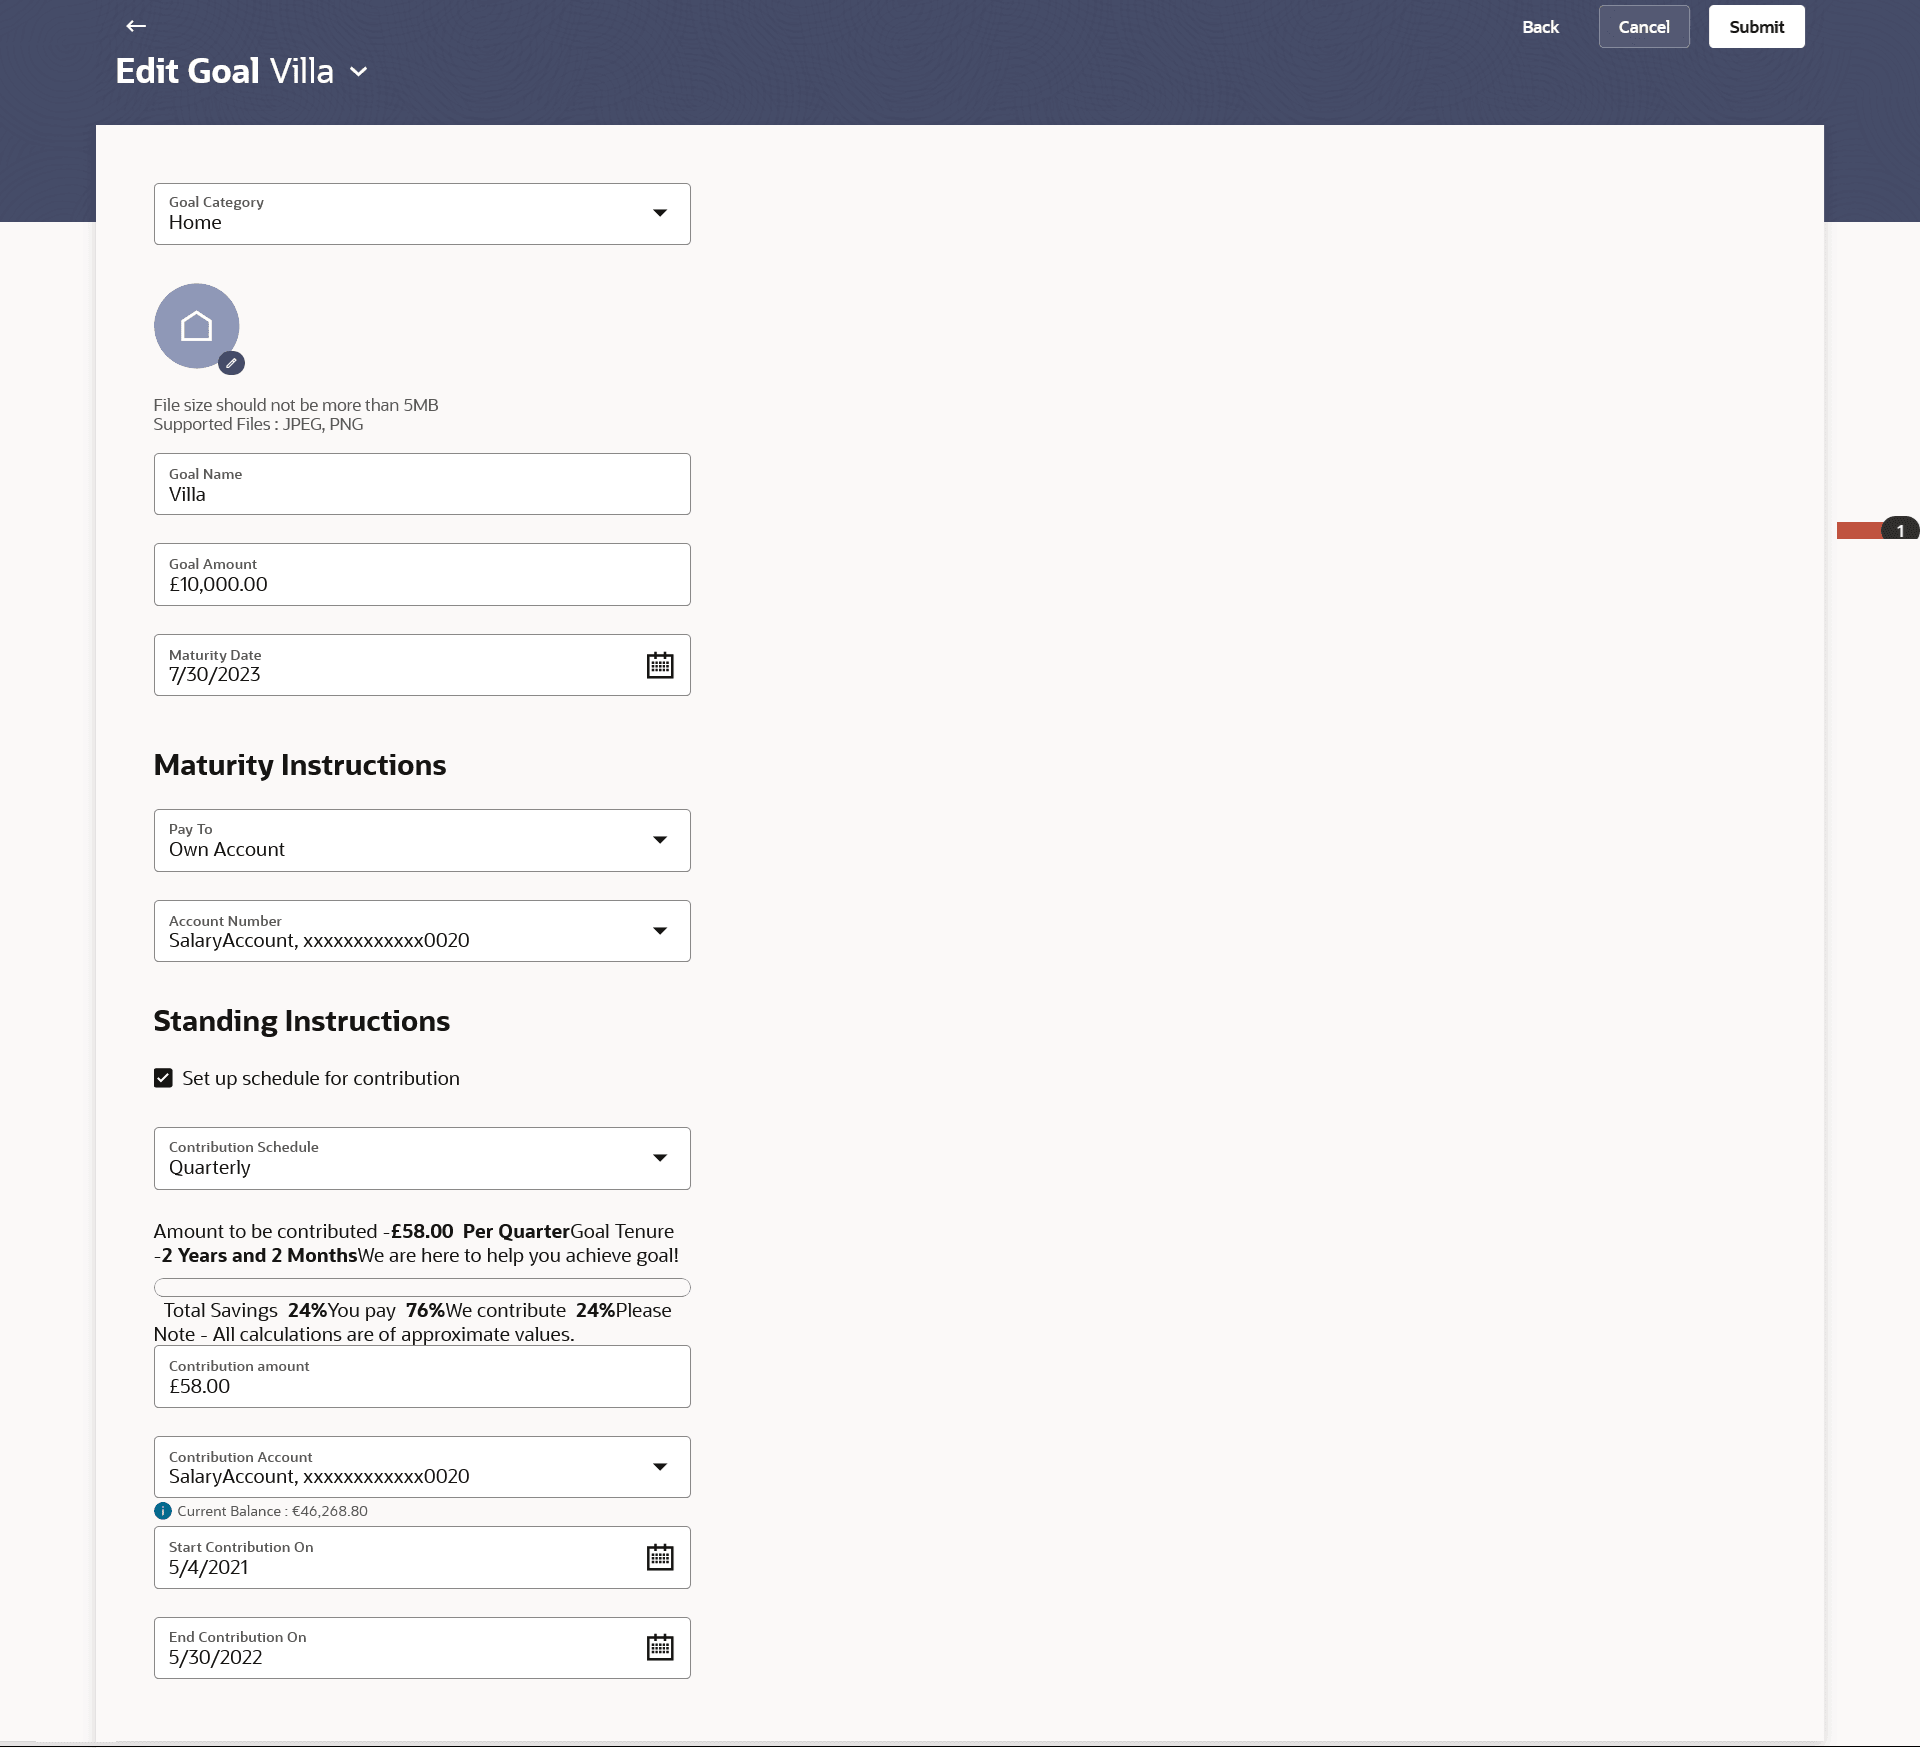
6.4 Edit Goal
This topic describes the systematic instruction to Edit Goal screen. Using this option, the user can edit details of a goal.
To edit the goal details:
- Perform anyone of the following navigation to access the Current & Savings Account Details screen.
- From the Dashboard, click Toggle menu, and then click Menu. From the Menu, click Personal Finance Management, and the click Goals widget. From the Goals, click on the goal record link, and then from Goal Overview, click on Edit Goal.
- In Search bar, type Personal Finance Management - Edit Goal, and press Enter.
- Navigate to one of the above paths.The Edit Goal screen appears in editable form.
- From the Goal list, select the goal whose details you wish to
modify. The details of the selected goal are populated on the screen.
- Edit the required goal details.
Note:
The fields which are marked as Required are mandatory.For more information on fields, refer to the field description table.
Table 6-4 Edit Goal - Field Description
Field Name Description Choose Goal Select a goal whose details you wish to update. Goal Category Select a goal category under which the goal is to be set. This field is editable.
Goal Image/Avatar The image associated with the goal. Click on the
 icon, then browse from your device or choose an avatar or use the camera to upload an image to be set as the goal image.
This field is editable.
Note:- You can browse from your device or choose an avatar or use the camera to upload an image to be set as the goal image.
- The maximum allowable image size is 5MB, and the accepted formats are limited to JPG and PNG.
Goal Name The name of the goal. This field is editable.
Goal Amount The target amount of the goal. This field is editable.
Maturity Date The date on which the goal will be completed. This field is editable.
Maturity Instructions This section is editable. Pay To The account transfer option for receiving the goal amount on completion of tenure. The options are:
- Own Account
- Internal Account
Own Account - Pay To The following field is displayed if the user has selected, Own Account option from the Pay To list while creating the goal. Account Number The account number to which the amount is to be transferred after completion of goal. Internal Account - Pay To The following fields are displayed if the user has selected, Internal Account option from the Pay To list while creating the goal. Account Number The account number to which the amount has to be transferred after completion of goal. Standing Instructions This section is editable. Set-up schedule for contribution The option to enable the Set-up schedule for contribution. Frequency of Contribution The frequency of the regular contributions. The options are:
- Quarterly
- Monthly
- Weekly
Contribute to Goal The amount to be contributed towards the goal. Contribution Start Date The start date from which the regular contributions will be executed. Contribution End Date The end date until which the regular contributions will be executed. Funding Account Number The account number from which funds will be credited to the goal. Balance The balance amount in the account from which funds will be credited to the goal. - Edit the required goal details.
- Click Start Transfer to start contributing to the goal.
- Click Submit to update the changes.
- Click Cancel to cancel the transaction.
- Click the Back to navigate back to previous screen.
The success message appears along with the reference number.
- Perform any one of the following action:
- Click Home to navigate back to dashboard.
- Click Goals to redirect to Goals screen to view the list of goals already created.
- Click OK.
Parent topic: Goals
