1.1 Upload a File
This topic provides the systematic instructions about to upload the file.
- Perform anyone of the following navigation to access the File
Upload screen.
- From the Corporate Dashboard, click Toggle Menu, then click File Upload, and then click File Upload.
- From the Corporate Dashboard, click Quick Links, and then click File Upload.
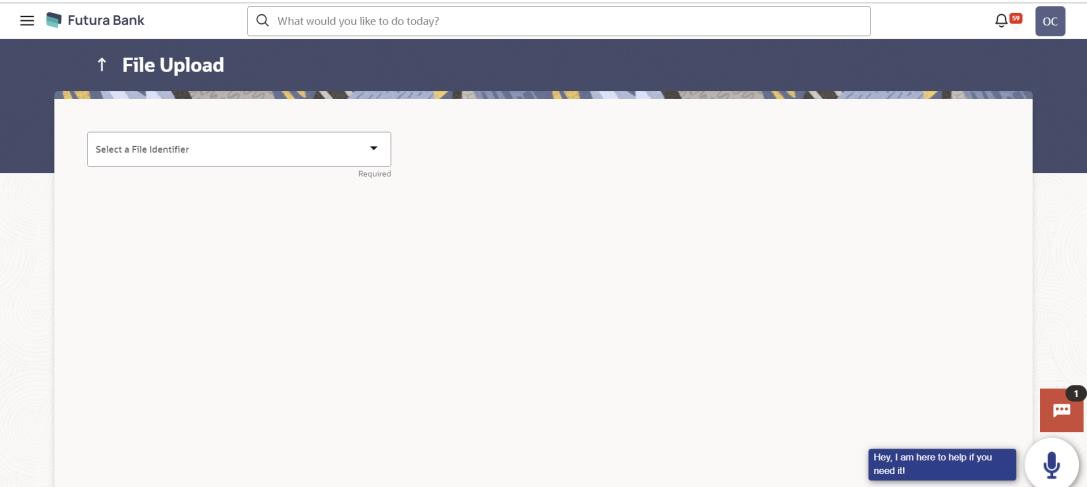
The File Upload screen appears. - On File Upload screen, specify the fields.For more information refer to the field description table below:
Table 1-1 File Upload
Field Name Description File Identifier File identifier created earlier, in order to identify the file.
This will list the file identifiers assigned by the administrator user to the logged in user for handling of file uploads.
File Name Browse and select the file to be uploaded.
To upload a file:
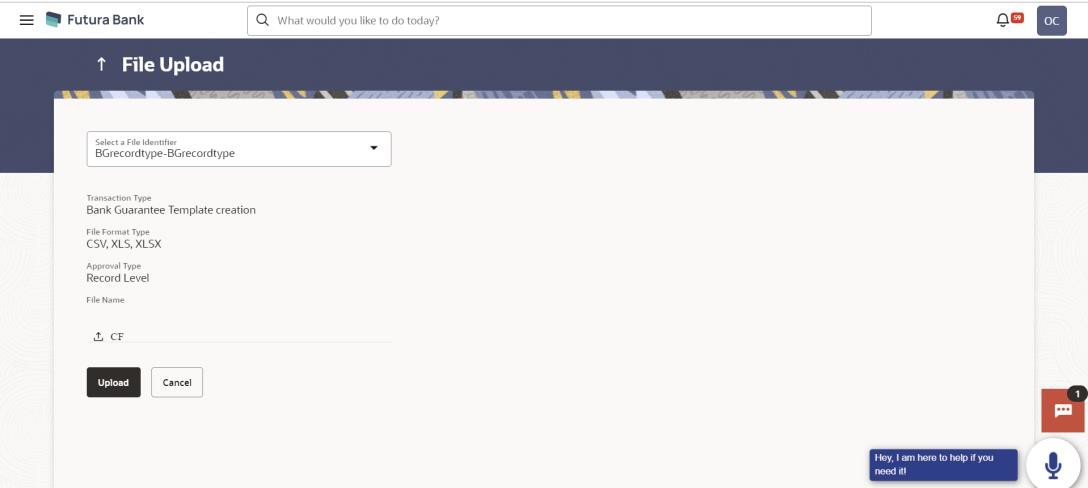
- From the File Identifier list, select the file identifier.The file identifier details appears.
- In the File Name field, select the file to be uploaded.For more information refer to the field description table below:
Table 1-2 File Upload
Field Name Description File Identifier Select the File identifier created earlier and mapped to the user in order to identify the file. Transaction Type Displays the transaction type of the file upload. It can either be a payment type or a non-payment transaction type.
Information is displayed based on the parameters defined at the file identifier selected by the user.
File Format Type Displays the format in which the file can be uploaded.
The file formats could be:- CSV
- XLS
- XLSX
- Fixed Length
Information is displayed based on the parameters defined at the file identifier selected by the user.
Approval Type Displays approval level of the file.
The approval could be:- Record Level: In record type approval, the approver has the ability to approve certain records (within a file) while rejecting others. Only the records that are approved will be processed.
- File Level: In a file type approval, the approver either accepts or rejects the whole file, and all records are either processed or turned down.
Information is displayed based on the parameters defined at the file identifier selected by the user.
Accounting Type Displays accounting type of the file.
This field is displayed for the files which are financial in nature.
File Name Choose the file from the local machine for upload.
Post choosing the file, displays the file name.
- Click Upload or Click Cancel to abort the file uploading
process.The success message along with the file reference ID and status of the transaction appears.
- Click OK to complete the file upload or Click the File Reference
ID to inquire about the uploaded file status.The Uploaded File Inquiry screen appears.FAQ1. What are the different file formats that can be uploaded?
The file upload formats supported are:
Delimited (CSV, XLS, XLSX) / Fixed Length
2. Can a file upload fail, before generating a File Reference Number?Yes, the system checks the uploaded file for errors before creating a file reference number. If any validations do not pass, an error message will appear on the screen, and the file reference number will not be created.
Validations involve checking the maximum size, ensuring the file is not harmful; confirming it is not a duplicate, verifying it has the right extension, and checking that it is not empty, among other things.
Parent topic: File Upload

