3.6.3 User Management - Create
This topic provides the systematic instructions for corporate administrators to create internal and external users.
Note:
In case of multi entity implementation, if the Corporateadministrator has access to multiple entities, then the administrator can select the entity from the entity switcher on which the user needs to be onboarded. The selected entity of the user as part of onboarding will be the default/home entity of the user being created.To onboard a user:
- Navigate to the User Onboarding screen.
- In the User Management screen, click Create.
- Select the option to create a new or by copying an existing user.
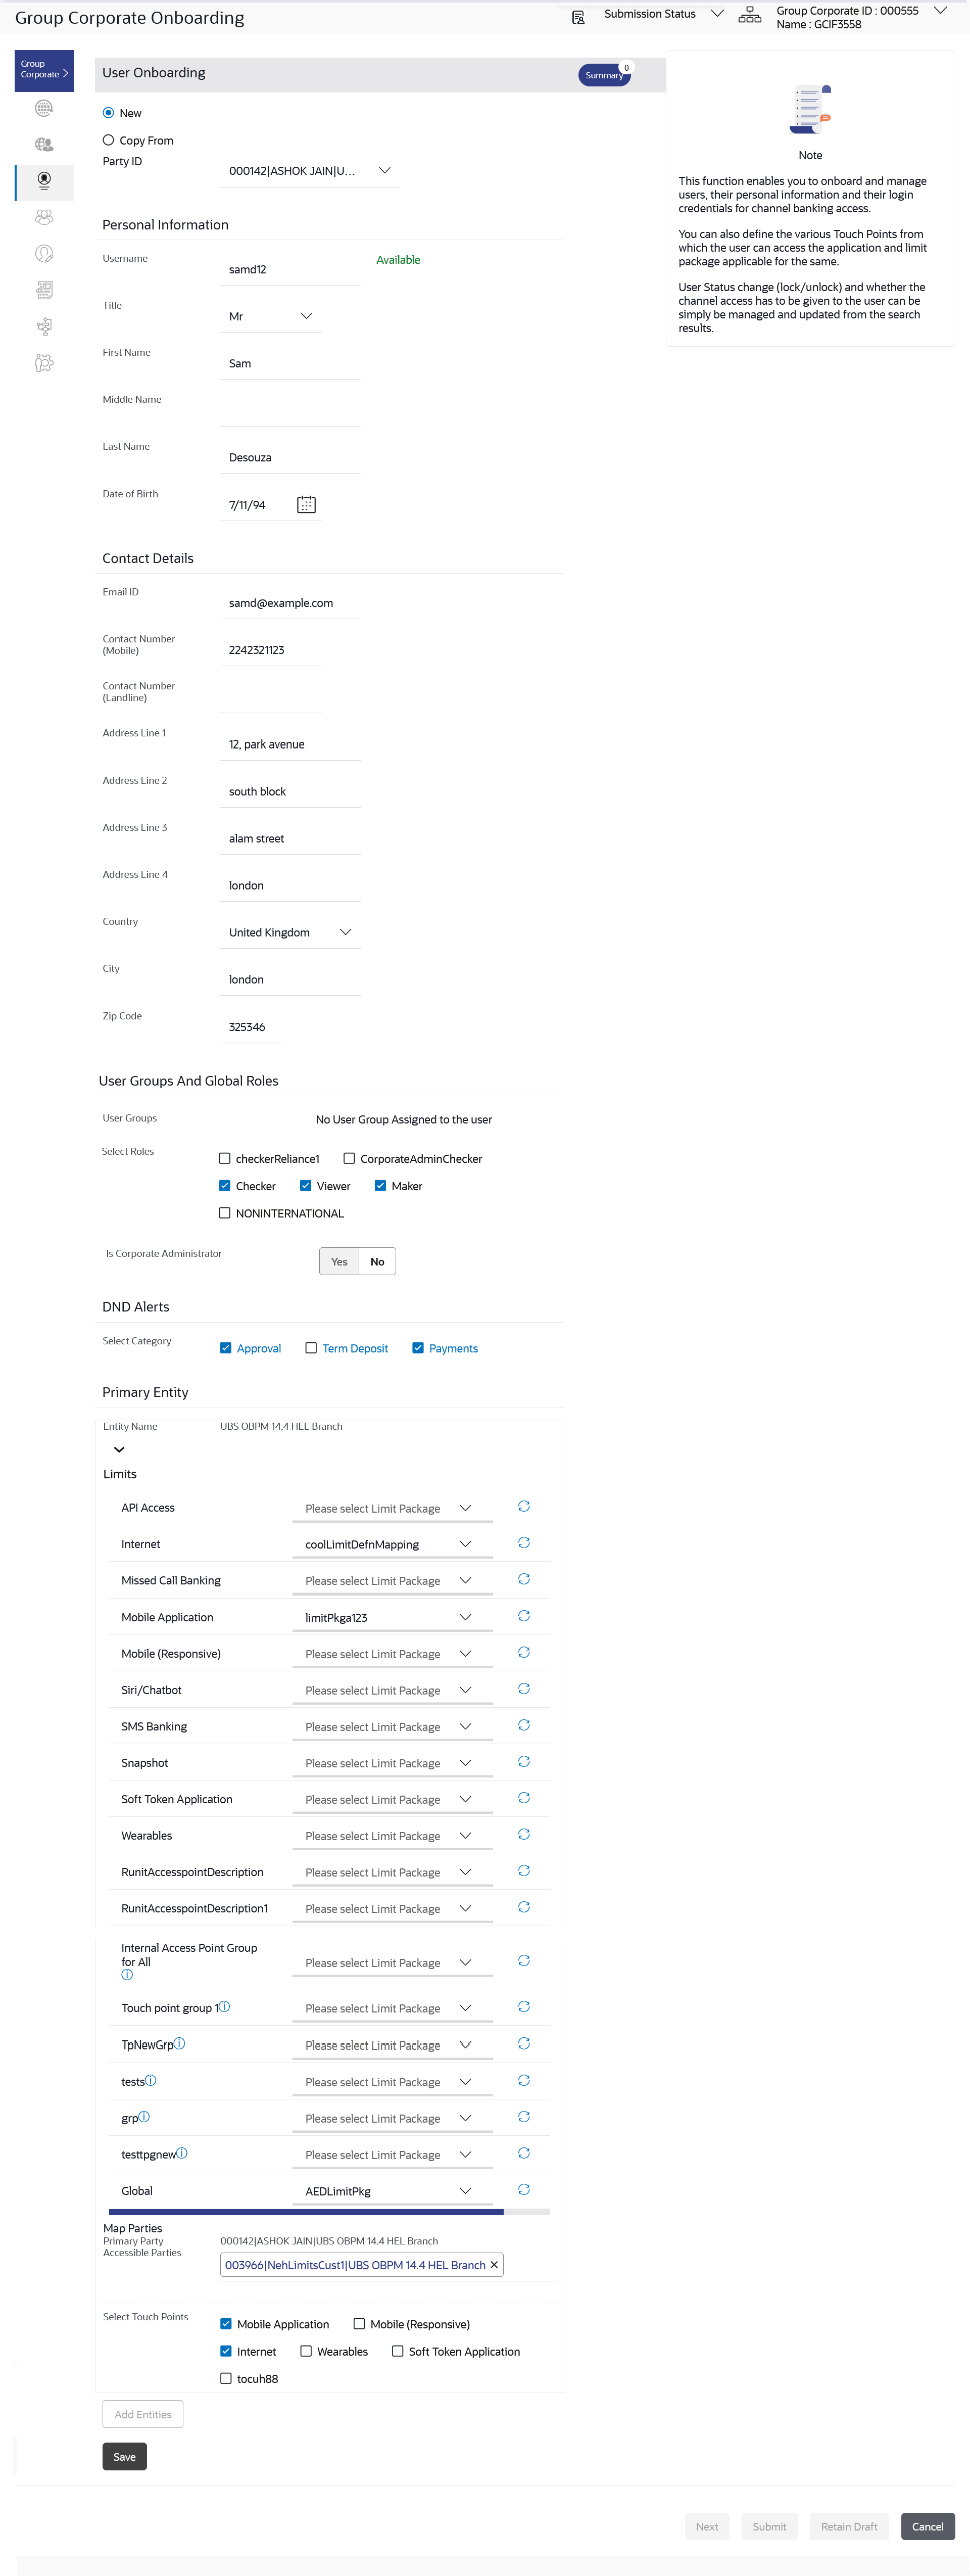
Figure 3-24 Group corporate Onboarding - User Onboarding
Note:
The fields which are marked as Required are mandatory.For more information on fields, refer to the field description table.
Table 3-14 Group corporate Onboarding - User Onboarding- Field Discription
Field Name Description New Allows selecting a Parent Party ID of the user. Copy From Allows to select an already created user (user created under the same Group Corporate) and screen will display the copied data for all the sections except Personal and Contact information. Corporate Administrator would require to fill Personal and Contact information and he can make the changes in the copied data as well. Party ID Parent Party ID of the user for mapping it to the user. - Perform one of the following actions:
- If you select New option;
- From the Party ID list, select a Parent
Party ID of the
user.
The Personal Information, Contact Details, Touch Points, Roles, Limits and Accessible Entity sections appear.
- From the Party ID list, select a Parent
Party ID of the
user.
- If you select the Copy From
option;
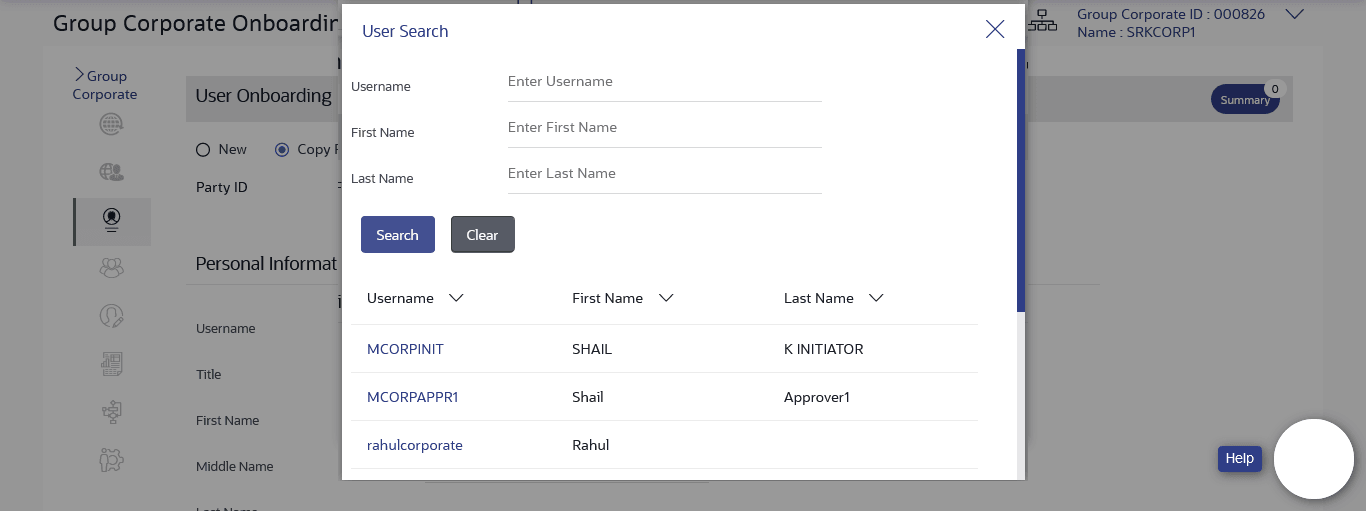
The User Search popup window appears.
- Enter the search criteria, and click
Search.
The search results appear on the Search User screen based on the search parameters.
Perform the following action:
- Click Clear if you
want to reset the search parameters.
Note:
Click icon to refresh the detail entered in
select user field.
Note:
The fields which are marked as Required are mandatory.For more information on fields, refer to the field description table.
Table 3-15 Field Description
Field Name Description Search User Name To search the user with the user name. Partial search is allowed. First Name Allows to search based on first name or given name of the user. Last Name Allows to search based on last name/ surname of the user. Search Results User ID User ID of the user. First Name First Name of the user. Last Name Last Name of the user.
- Click Clear if you
want to reset the search parameters.
- Click the User ID link of
the record for which you want to
onboard.
The Personal Information, Contact Details, Touch Points, Roles, Limits and Accessible Entity sections appear.
Note:
The fields which are marked as Required are mandatory.For more information on fields, refer to the field description table.
Table 3-16 User Onboarding- Field Discription
Field Name Description Create Party ID Select Party ID for which the user is to be created. Personal Information User Name Name of the user (login ID) of the user. Title Title of the user. The options are:
- Mr
- Mrs
- Miss
- Ms
- Dr
- Master
First Name First name of the user. Middle Name Middle name of the user. Last Name Last name/ surname of the user. Date of Birth Date of birth of the user. Contact Details Email ID Email id of the user. Contact Number (Mobile) Mobile number of the user. Contact Number (Land Line) Phone number (land line) number of the user. Address Line 1-4 Address of the user. Country Country of the user. City City in which the user resides. Zip Code The postal code of the city in which the user resided. Roles Application roles mapped to the user. In case of multi entity setup, these roles will be for the default/home entity of the user.
User Groups And Global Roles User Groups The list of all user groups to which the selected user belongs. Note:
- This information is read-only and hence cannot be modified.
- If a particular user needs to be removed from a user group, then the administrator must manually go to the particular user group screen and remove the user.
Roles The global roles which are mapped to the users. DND Alerts Select Category The list of categories for which DND is configured can be enabled or disabled using this option. Primary Entity Entity Name Name of the primary entity. Map Parties Primary Party Name of the primary party along with the group corporate code and entity name. Accessible Parties Accessible parties along with the group corporate code and entity name associated to the user. Limits Limits package associated to the user. Touch Points Name of touch points/ groups maintained under a specific entity for which the limit packages are mapped. Map Roles The roles to which the entities are mapped. Accessible Entity Details Entity Name Accessible Entity name associated to the user. Map Parties Primary Party Primary Party ID details of the user is associated with the New Entity. Accessible Parties Name Accessible Party Details that user has access. Limits - Touch Point/Groups Limits package associated to the user for the accessible entity. Touch Points/ Group Name of touch points/ groups maintained under a specific entity for which the limit packages are mapped. Map Roles The roles to which the entities are mapped.
- Enter the search criteria, and click
Search.
- If you select New option;
- In the User Name field, enter the required details. Click Check Availability to check the uniqueness of the user ID. If the user ID is already used, then enter a unique valid username.
- In the rest of the Personal Information section, enter the required details.
- In the Contact Details section, enter the required details.
- In the Roles section, select the checkbox (s) against the Roles to map to the user.
- In the Touch Points section, select the touch points to be mapped to user.
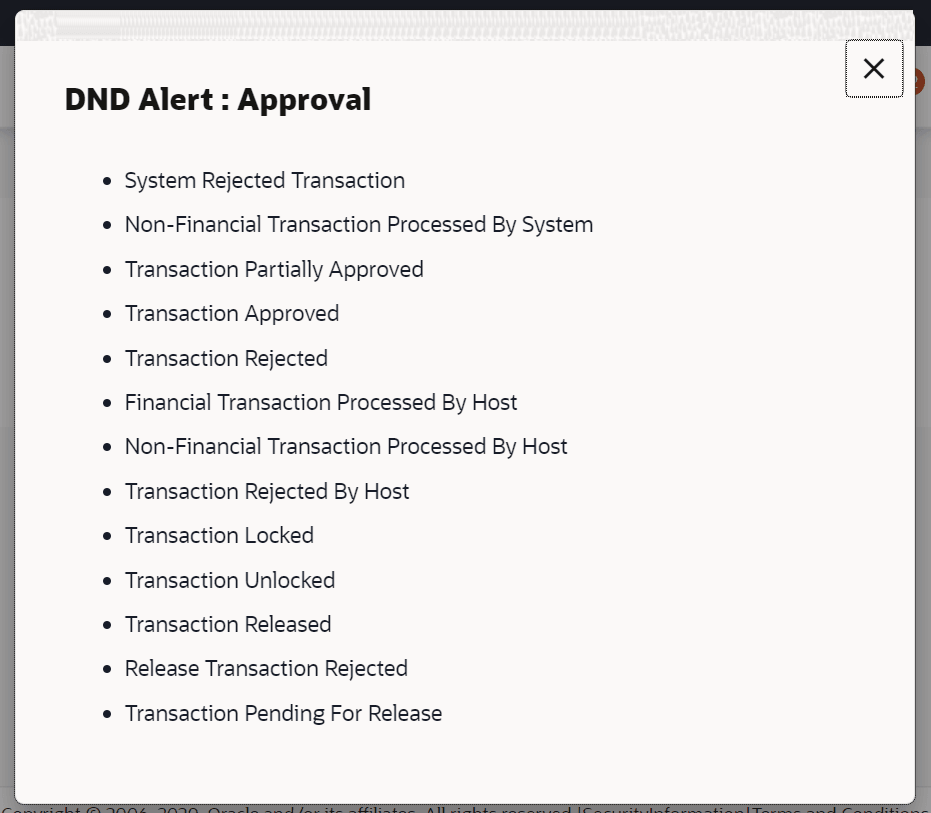
- In Select Category field under DND Alerts
section, select the desired categories for which DND needs to be enabled. The field under DND Alerts section, select the desired categories for which DND need to be configured.
- In the Accessible Entity Details section, add the
accessible entities for the user and select the party and limits for that entity
(applicable only if Bank has Multi Entity setup).
- Click Add Entity button, to add accessible entity to a user.
- In the Limits section, select the appropriate limit package under the Package for each touch point column.
- In the Primary Party ID field, Select the Primary Party ID details of the user is associated with the New Entity
- From the Accessible Party Details, select the parties to map with user.
This pop-up screen appears on clicking beside a touch point group in the Limits section, which appears when onboarding corporate user types.Figure 3-28 Touch Points Group - View Details
Note:
The fields which are marked as Required are mandatory.For more information on fields, refer to the field description table.
Table 3-17 Touch Points Group - View Details- Field Description
Field Name Description Group Code Group code defined for touch point group. Group Description Group description defined for touch point groups. Group Type Type of touch point i.e. whether touch point is of type internal or external. Touch Points List of the internal or external touch points. - Perform one of the following actions:
- Click Save to save the
maintenance.
The Review screen appears.
- Click Next to proceed to the next logical step
- Click Submit to submit the steps performed so far for approval.
- Click Retain Draft to save the details entered as draft.
- Click Cancel to cancel the transaction.
Note:
Admin can submit the maintenance after any step. Maintenances saved so far will be sent for approval in one flow. Admin would not be able to make any changes or maintain another step for the same Group Corporate till the time the approval of the wizard is not done.
- Click Save to save the
maintenance.
- Perform one of the following actions from the Review
screen:
- Verify the details, and click
Submit.
The success message of user creation appears along with the transaction reference number.
- Click Add Another to add another maintenance of the same step.
- Click Edit to modify the details entered.
- Click Next to proceed to next step.
- Click Retain Draft to save all the steps completed so far, and allow Admin resume the same application.
- Click Cancel to cancel the transaction.
- Verify the details, and click
Submit.
Parent topic: Step 3: User Onboarding


