3.4.1 Group Corporate Profiling - View
This topic provides the systematic instructions of viewing profiling details of existing group corporations.
To view Profiling details of the Group Corporate:
- Navigate to the Group Corporate Profiling screen.
- Perform one of the following actions:
- Click on Onboarding Status link to
view/update the corporate admin facilities maintained for corporate
administrator.
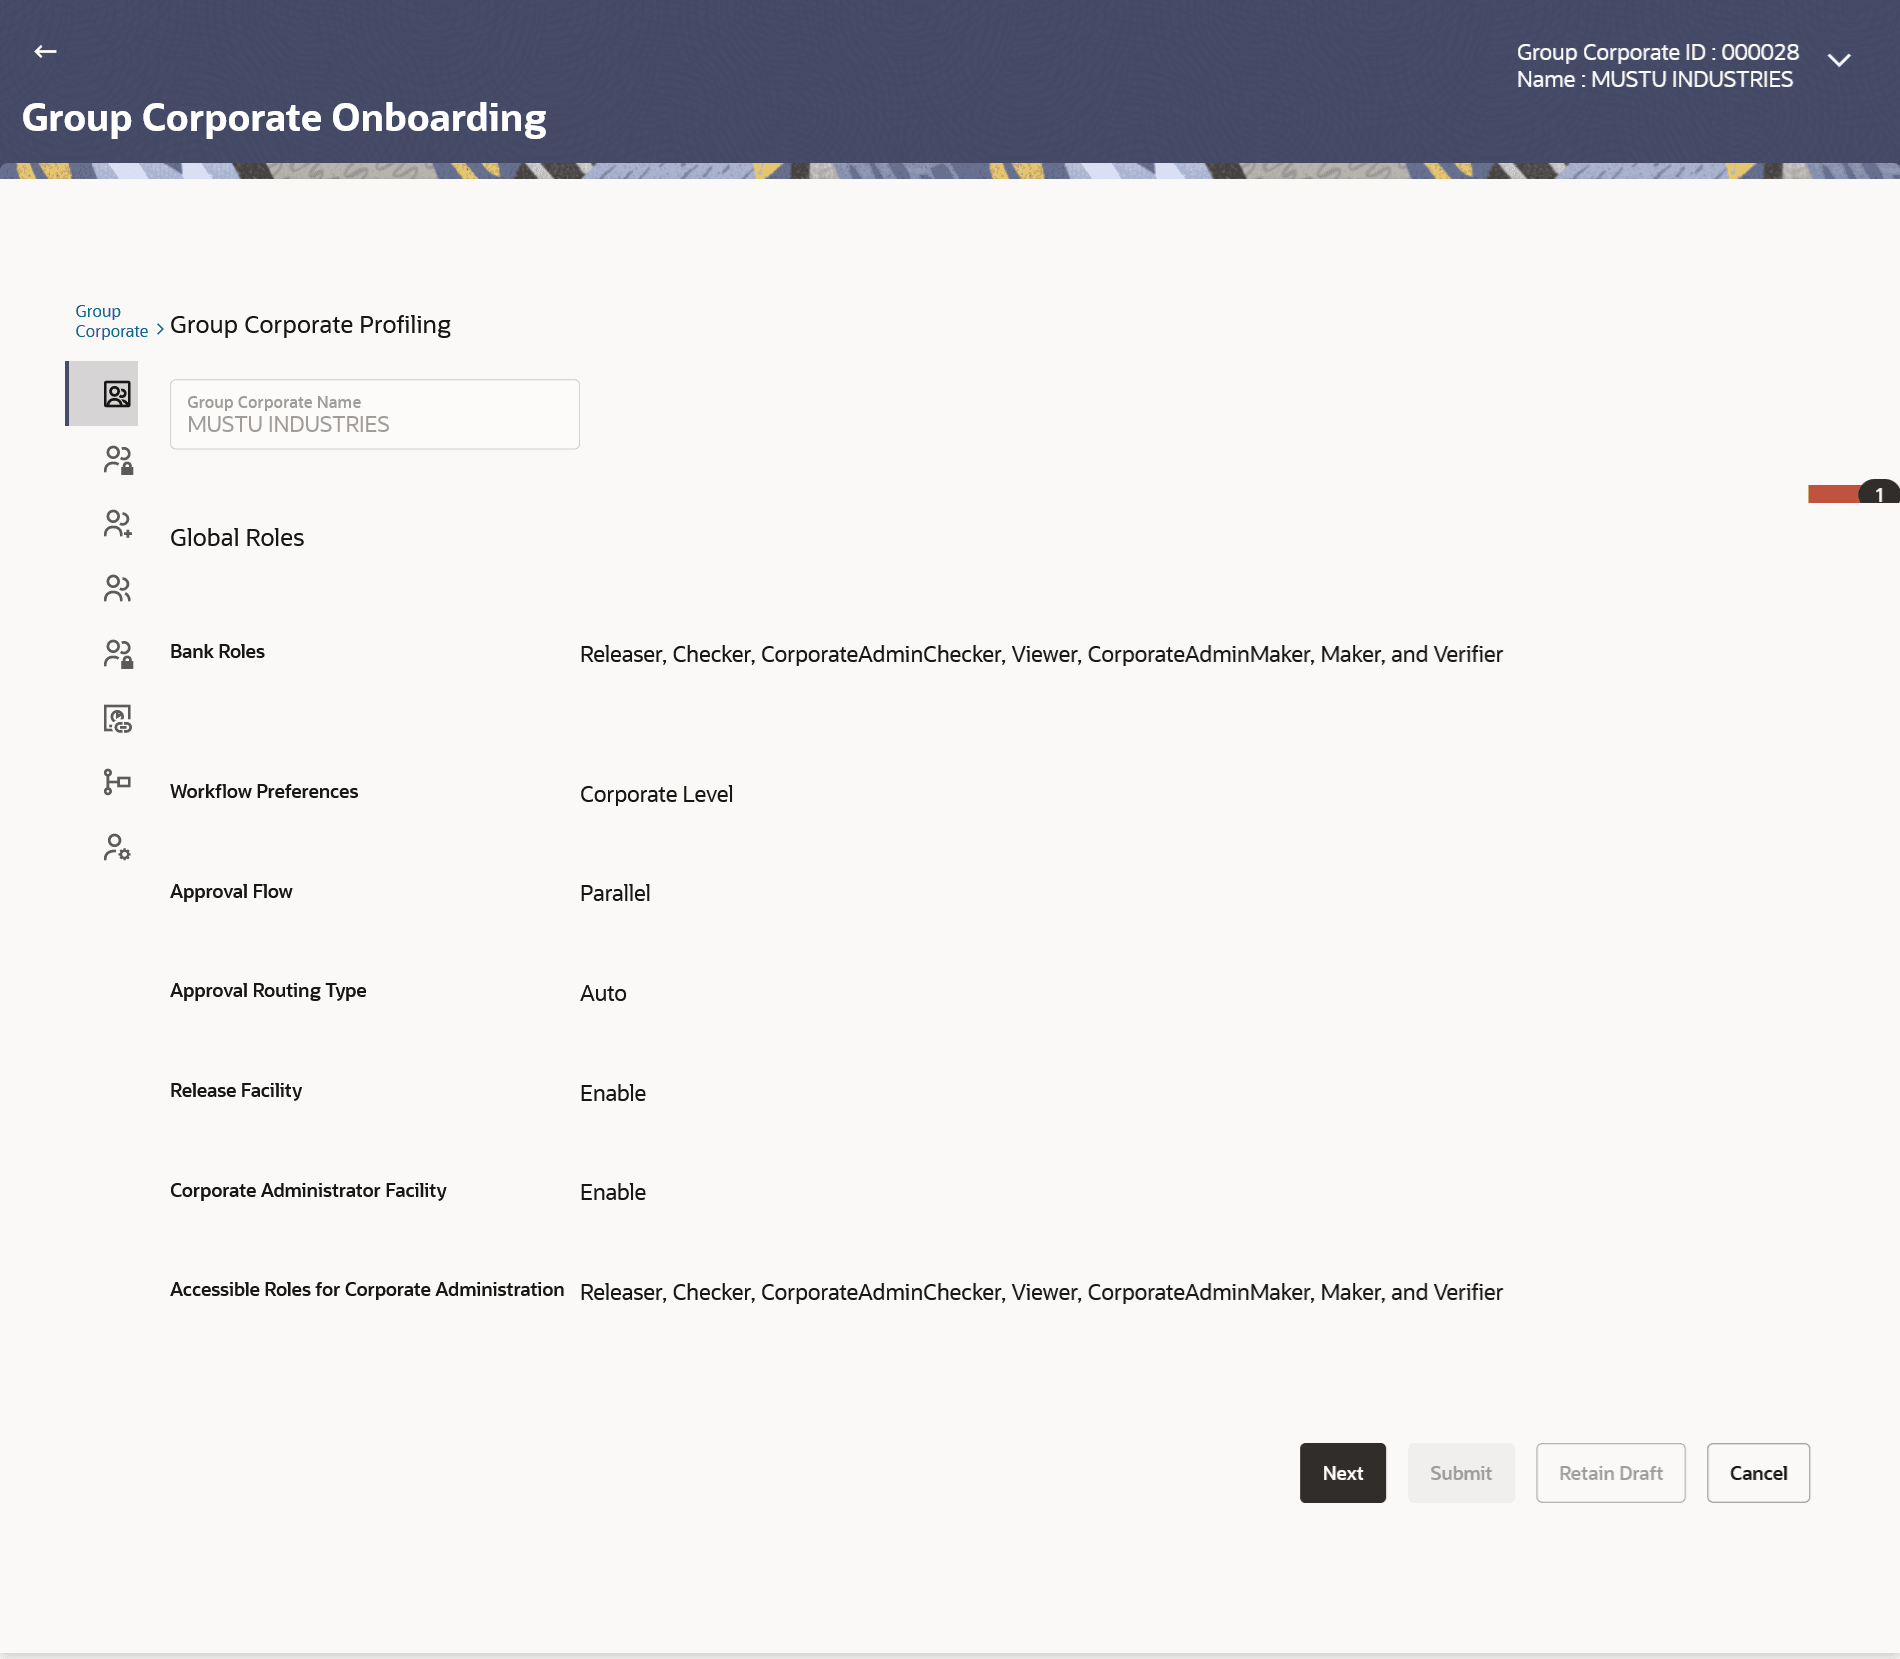
The Group Corporate Onboarding – Group Corporate Profiling screen appears.
Figure 3-7 Group Corporate Profiling – View
Note:
The fields which are marked as Required are mandatory.For more information on fields, refer to the field description table.
Table 3-3 Field Description
Field Name Description Group Corporate Name Name of the group corporate. Global Role Bank Roles Display all the roles mapped at Group Corporate level. Workflow Preferences Display the workflow preference set up to implement the workflow. Possible values will be
- Corporate Level
- Rule Level
Approval Flow Display the Approval workflow type, Possible values will be
- Sequential
- Parallel
- No Approval
This field is enabled if Corporate Level option is selected in Workflow Preferences field.
Approval Routing Type Displays the approval routing type. Possible value will be - Auto
- Manual
Note:
In case system resolves multiple rules with different min-max slabs, then as per rule resolution logic, it will resolve the rule which has the nearest ‘max’ value in the defined slab.Release Facility Displays the whether the release functionality is enabled or disabled at Group Corporate level. Corporate Administrator Facility Displays the flag if Corporate Administration facility is maintained for the Group Corporate. Accessible Roles for Corporate Administrator Displays the Roles that made available to Corporate admin for onboarding new users - Click Cancel to cancel the transaction.
- Click on Onboarding Status link to
view/update the corporate admin facilities maintained for corporate
administrator.
- Perform one of the following actions:
- Click Next to proceed to the next logical step.
- Click Cancel to cancel the transaction.
Parent topic: Step 1: Group Corporate Profiling
