5.3.1 Create Cash Withdrawal
This topic describes about the Create Cash Withdrawal in Oracle Banking Digital Experience.
To create a cash withdrawal request:
- Perform the following navigation to access the Create Cash Withdrawal
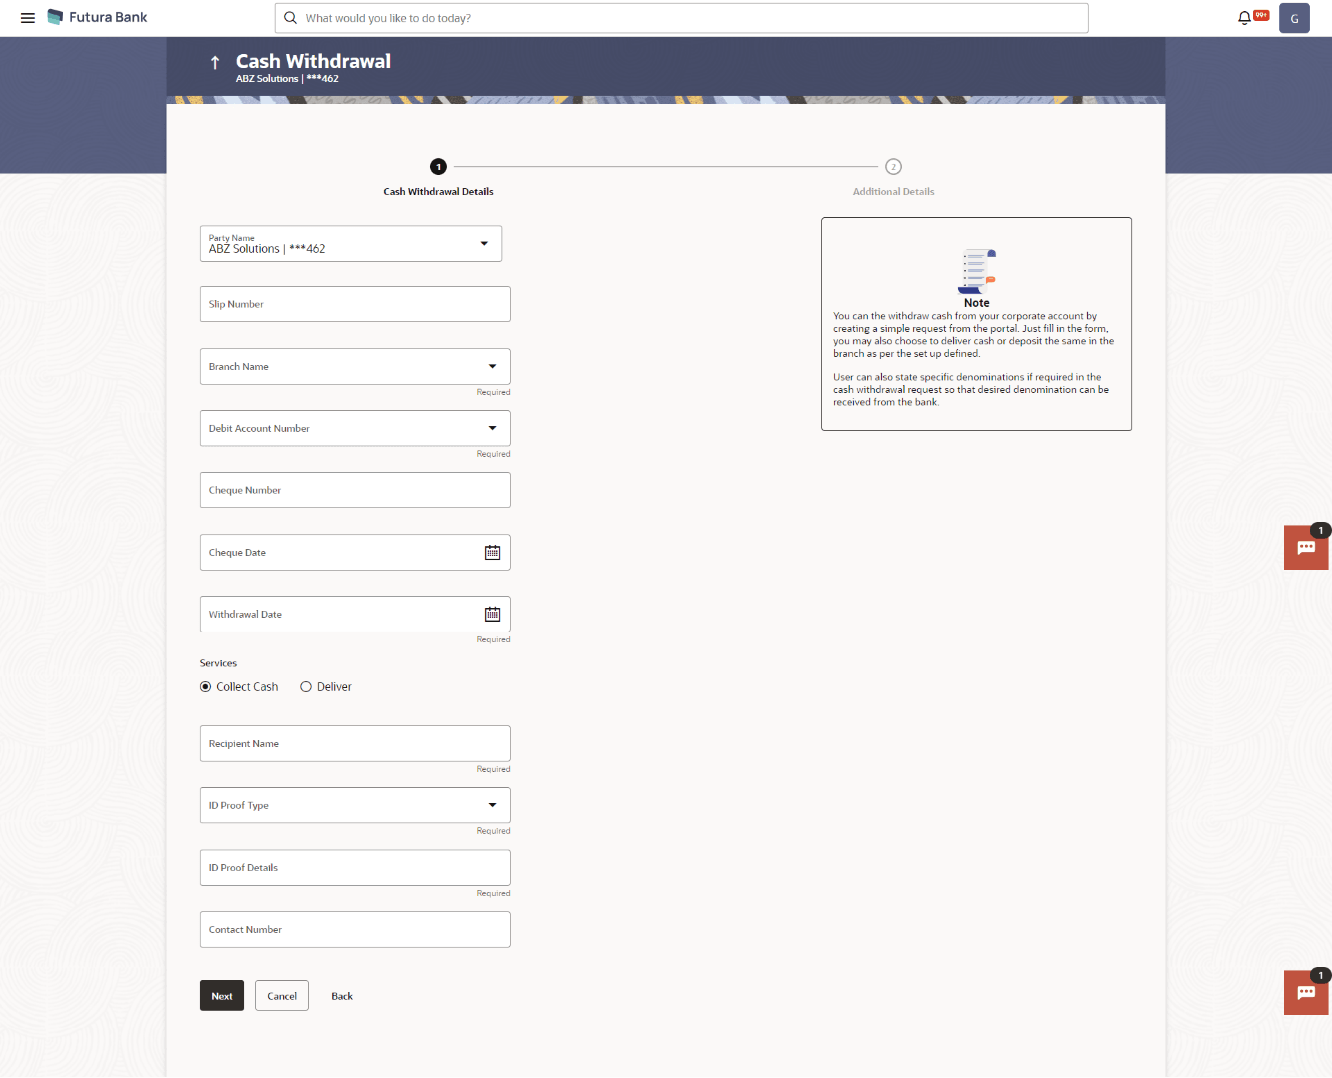
screen: From the Dashboard, click the Toggle Menu, then click Cash Management, Collections, and Create Cash Withdrawal.The Cash Withdrawal Details step screen displays.
Note:
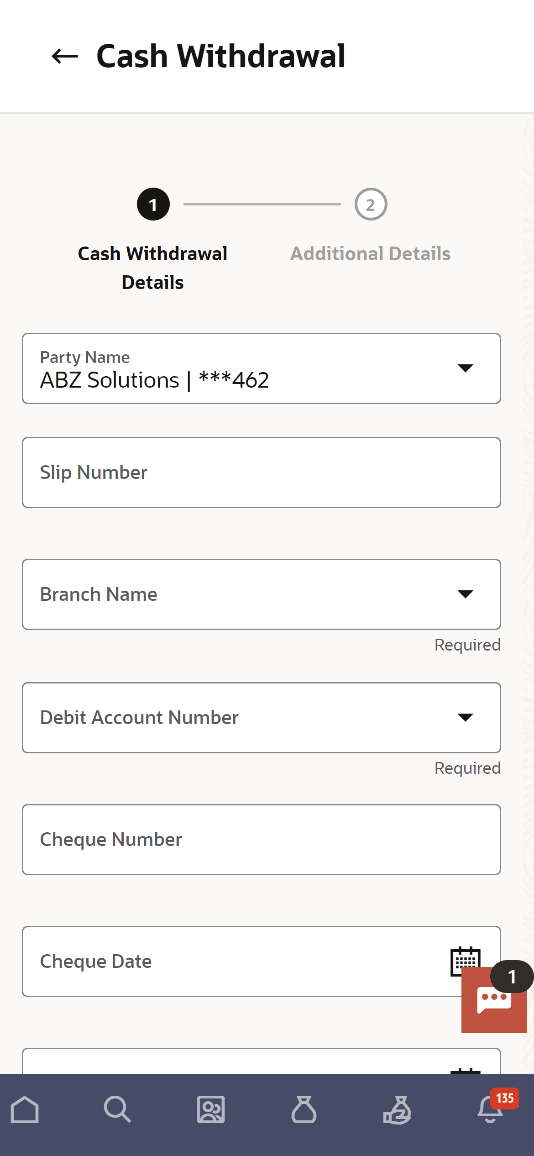
The Create Cash Withdrawal transaction is also available on a mobile device. The features, validations, links, steps, and transaction aspects available on web browsers on desktop computers are also available on the mobile device.Figure 5-28 Cash Withdrawal (on mobile device)
For more information on fields, refer to the field description table:
Table 5-13 Cash Withdrawal - Field and Description
Field Description Party Name Select the party name from the dropdown list in which the Cash Withdrawal must be created. By default, the primary party/gcif of the logged-in user is selected. Note:
Only accessible parties are displayed to the user.
Slip Number Enter the withdrawal slip number. Branch Name Select the branch to withdraw cash from. Debit Account Number Select the account to withdraw the cash from. The dropdown list either displays the real account numbers or the International Bank Account Number (IBAN), based on the configuration set by the bank. Once you select an account number, the Balance field appears along with the currency and the balance amount. Cheque Number Enter the cheque number if a cheque is being issued to withdraw cash. Cheque Date Click the calendar icon and select the date of issue of the cheque. Withdrawal Amount Select the currency and enter the amount to withdraw. Debit Amount Displays the currency and amount that is being debited from the account selected in the Debit Account Number field. It also displays the exchange rate between the withdrawal amount currency and debit account currency. Withdrawal Date Click the calendar icon and select the date of cash withdrawal. Services Select whether the cash is to be collected from the branch or delivered to the party. If you select the Collect Cash option then you must enter the recipient’s details in the fields that follow. If you select the Deliver option, then you must select the delivery location in the field that follows. Recipient Name Enter the name of the recipient who is to collect the cash from the branch. This field appears if you select the Collect Cash option from the Services field. ID Proof Type Select the type of ID proof document that the recipient is to produce when collecting the cash from the branch. This field appears if you select the Collect Cash option from the Services field. ID Proof Details Enter the unique identifier number of the selected ID proof document. This field appears if you select the Collect Cash option from the Services field. Contact Number Enter the contact number of the recipient. This field appears if you select the Collect Cash option from the Services field. Delivery Point Select the location to deliver the cash. This field appears if you select the Deliver option from the Services field. - In the Cash Withdrawal screen, enter the required withdrawal details in the Cash Withdrawal Details step.
- Perform one of the following actions:
- Click Next to go to the Additional Details step.
- Click Cancel to cancel the transaction.
- Click Back to go to the dashboard.
For more information on fields, refer to the field description table:
Table 5-14 Additional Details step - Field and Description
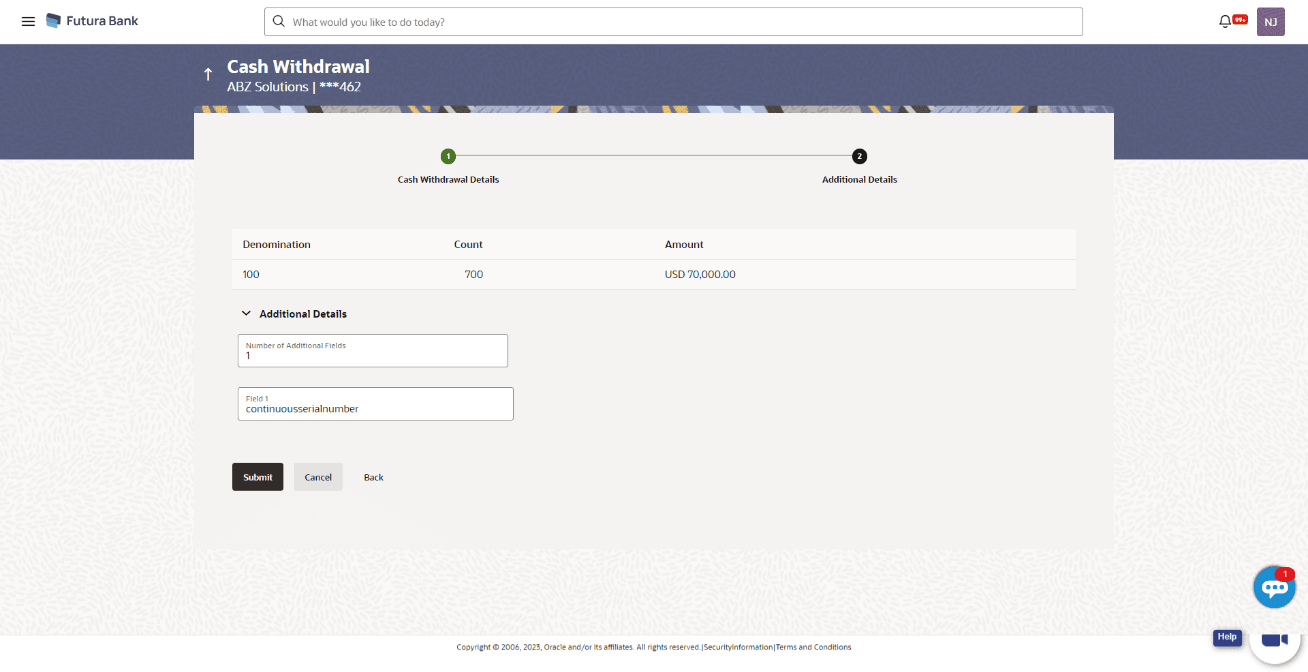
Field Description Party Name & ID Displays the name and ID of the logged-in corporate party. Denomination Displays the available denomination for withdrawal. Count Enter the number of leaves of the denomination that are required. Amount Displays the total amount for each denomination. This field is automatically updated when you enter the count. Number of Additional Fields Enter the number of fields required for adding details. Once you add a number, those many data entry fields appear. The maximum value that is allowed in this field is 10. Field 1 – Field 10 Enter the additional details in the data entry fields. A maximum of 10 fields can be present. - Once you enter the required details in the Additional Details step,
click Submit to submit the transaction. The Review screen
appears.Perform one of the following actions:
- Click Cancel to cancel the transaction.
- Click Back to go to the dashboard.
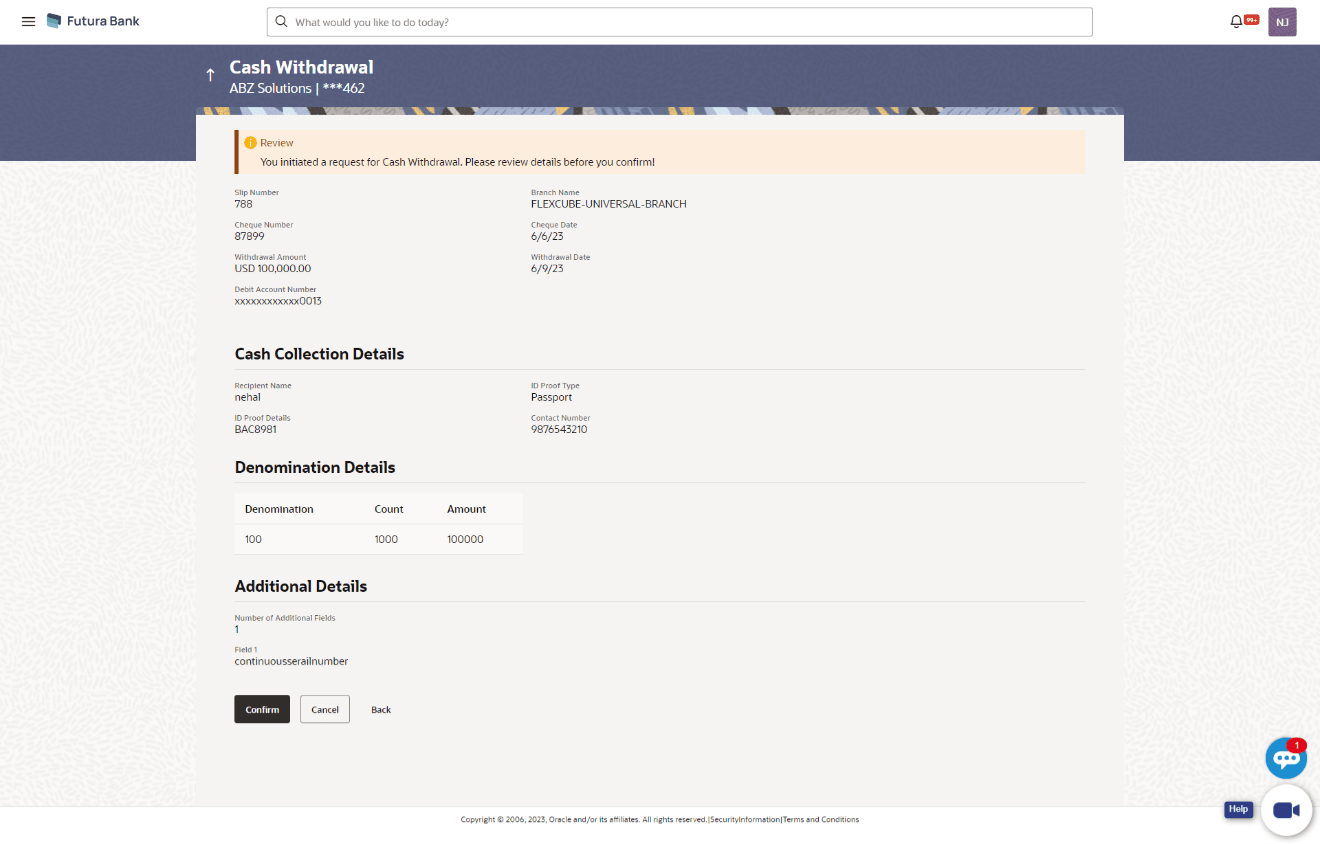
The Cash Withdrawal - Review screen displays.
- Review the details in the Review screen and click
Confirm. A confirmation message appears with the
transaction reference number and status. Perform one of the following actions:
- Click Cancel to cancel the transaction.
- Click Back to go to the dashboard.
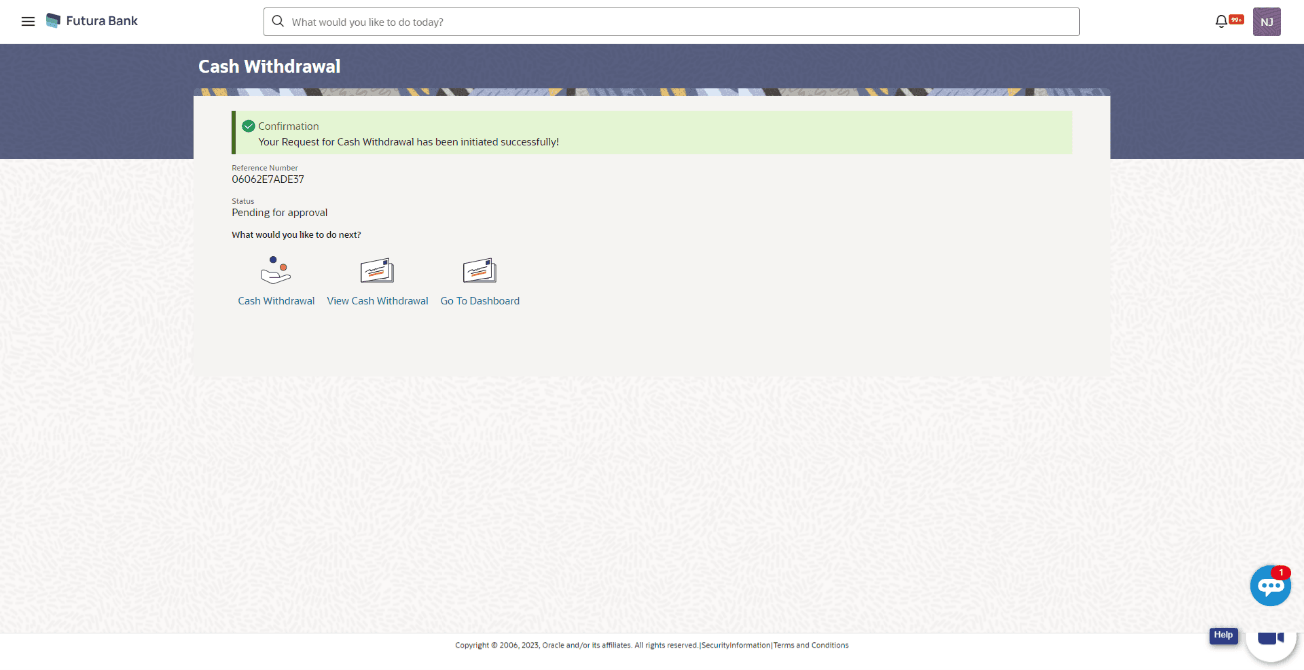
The Cash Withdrawal - Confirmation screen displays.Figure 5-31 Cash Withdrawal - Confirmation
- In the Confirmation screen,Perform one of the following actions:
- Click the Click to view cash withdrawal receipt link to view the transaction details.
- Click Cash Withdrawal to create another cash withdrawal request.
- Click View Cash Withdrawal to view the existing cash withdrawal requests.
- Click Go To Dashboard to go to the main dashboard.
Parent topic: Cash Withdrawal
