10.2 Value
Description: This attribute is used to store the value of an element. This value can be displayed on the screen or used for further processing, such as sending to server.
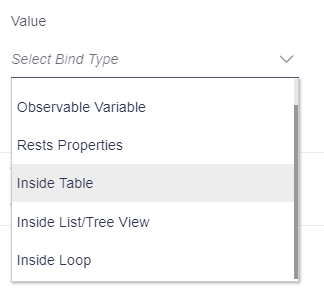
Components to accept the input: Select Box
- Observable variable
- Rest properties
- Inside table
- Inside List/tree view
- Inside loop
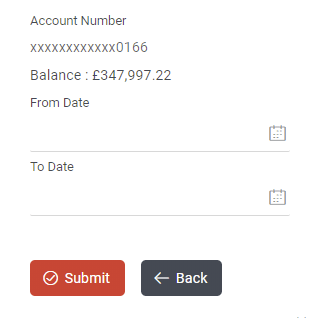
Example: In the example below,User has a form to request a statement account for a given time period. In the form, account number component and two date pickers, From date and To date are available. User will send the values of From date and To date field to the server to fetch the details.
Usage:
- Observable variable
In some scenarios, the data fetched from the REST API cannot be directly shown on the screen. Similarly the data submitted by the user cannot be directly saved on the server. It needs processing. To process this data, sometimes the user needs to store it in another variable. Therefore, if user wants to store the value of an element into a variable, which is defined by you, this option should be selected.
In the example below, user has a variable From Date, storing the value of From Date field.
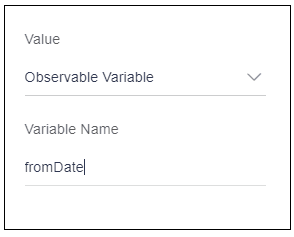
Select the option as “Observable variable”. After selection, it will display an input field named as variable name.
Enter this variable name (fromDate) into “variable name” field as displayed in the image below.
- Rest properties:
Rest API can be used for multiple requirements.
- GET: To fetch data from the server.
- POST: To save data on the server.
- PUT: To modify data on the server
- DELETE: To delete data from the server.
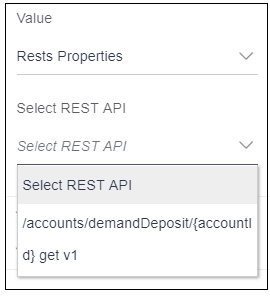
When user selects the option “Rest properties”, it will display a select box named as “Select REST API”.
Select REST API: This select box displays all the REST APIs that user has selected in Step 3 i.e. REST API Selection as shown in the below image.
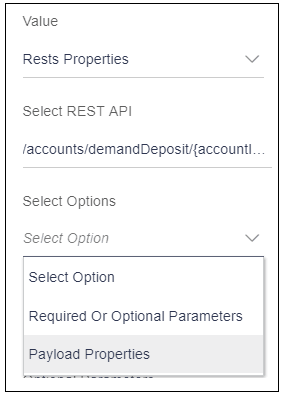
When user selects a REST API from this select box, it will display another select box named as “Select Options”.
Select Options: This select box has two options as shown in the below image.- Required and Optional Parameters:
To understand what is “Required or Optional Parameters” refer to Required and optional parameters section.
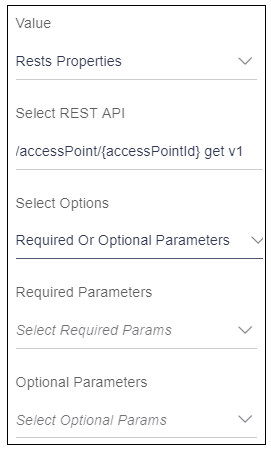
When user will select” Required or Optional Parameters” option, it will display two different select boxes.- Required Parameters: This select box will display all the required parameters of the selected REST API.
- Optional Parameters: This select box will display all the optional parameters of the selected REST API.
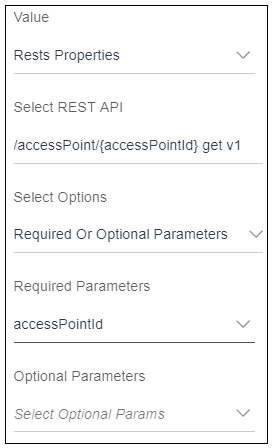
Example: User has a REST API “/accessPoint/{accessPointId} get v1”. In this REST API, accessPointId is a required parameter and user wants this parameter to be filled as in Input and wants to map this property to input text.
Usage:- Select “REST Properties”.
- Select REST API i.e. / accessPoint/{accessPointId} get v1
- Select Required or Optional Parameters
- Map the accessPointId to the input text.
- Payload Properties:
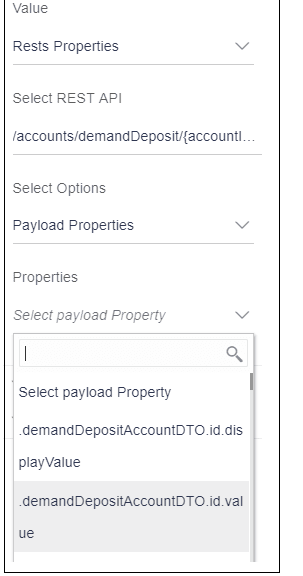
When user select “Payload Properties”, it will display a select box named as “Properties”.
Properties: This select box will display all the payload properties of the selected REST API.
As discussed above, REST API can be used for multiple request types like GET, POST OR PUT.
In the case of GET request, server sends the data to the user. In this case, this response data is considered as payload. All the payload properties listed in this select box will store the server response of that selected REST API. User can map this property to the elements, which display s the data. For example, Row control, Text.
In the of POST or PUT request, user sends the data to the server. In this case, this request data is considered as payload. All the payload properties listed in this select box will store the data entered by the user for that selected REST API. User can map these payload properties to the elements, which accepts the input, and send it to the server.
In the above example, there are two components.
- Row Control to display the account
number
In this case, account number is fetched from the server.
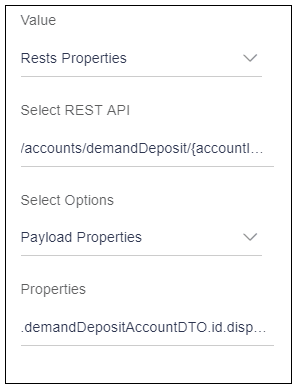
- Select “REST Properties”.
- Select REST API i.e. /accounts/demandDeposits/{accoundId} get v1
- Select Payload Property
- This is the GET request Payload Property will store the response came from the server, hence select the required property from payload i.e. demandDepositeAccountDTO.id.display value and map it to the row control.
- Two date pickers to store the dates.
In this case, dates need to be sent to the server.
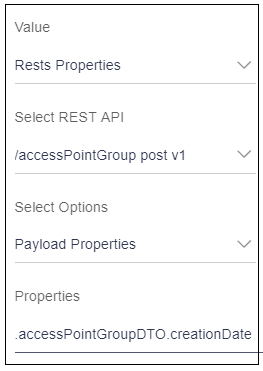
- Select “REST Properties”.
- Select REST API i.e. /accounts/demandDeposits/{accoundId} post v1
- Select Payload Property
- This is the POST request Payload Property will store the input and this payload will be sent to the sever, select the required property from payload i.e. demandDepositeAccountDTO.id.display value and map it to the date pickers.
- Row Control to display the account
number
- Inside table:
If element is inside the table, then select this option.
Example: In the below image, user has Invoice list table as display. All the components, which are used, are inside the table such as checkbox, input box etc. select this option.
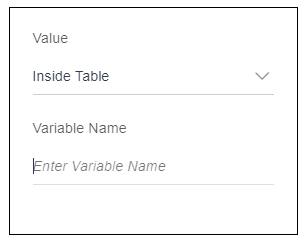
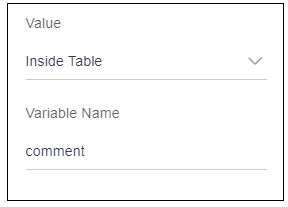
When user will select “Inside table” option, it will display an input box to add a variable name as shown in the below image. This variable is nothing but one of the keys available in the data source object given to the table. This variable can be used to display the data or to store the data.
Example: The datasource object looks like this:datasource[0] { counterPartyName: “OBDX_COUNTER_PARTY”, invoiceNo: ”BULKFUV0126”(this is string) comment: user _comment(this is variable) }Note:
Datasource is an array of objects. The object shown above is just one object for the first row of the table. Data source will have an object for every row. That is why it is written as datasource[0] i.e. first object in an array.Let us consider two cases here:- Invoice No:
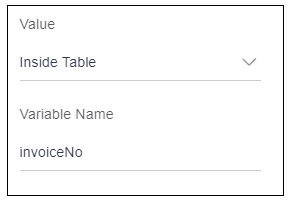
This field is displaying the data. Now user wants to display the invoice BULKFUV0126. As user can see in data source object written above, the key, which stores invoice number(BULKFUV0126), is “invoiceNo”. User will enter this key as a variable name for this field.
- Comments:
This field is accepting the user comments, i.e. it is storing the data entered by the user. User will need a variable to store the data, which is user _comment variable. As user can see in data source object written above, the key, which has a reference to the variable(user _comment) is “comment”. User will enter this key as a variable name for this field.
- Invoice No:
- Inside List/tree view :
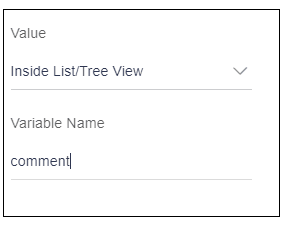
If element is inside the list or tree view, then select this option. This is similar to the table. User will have the data source having all the objects. User will write the key name into the variable name for their respective field.
- Inside loop:
Refer “Add loop” attribute to understand what is loop.
If the element is inside the loop, user will select this option.
referring to the same example of add loop attribute.
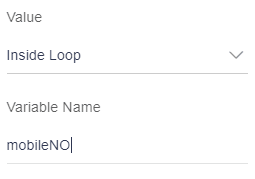
In this example, there are three fields: name, city and mobile number. They are inside the loop. for these elements user will select “Inside loop” as value.
The objective is as follows:
user _data = [{name: “James Smith”, city: “New York”, mobileNo: 3454654},
 {name: “Christopher Robin”, city: “Manhattan”, mobileNo:4758945},
 	{name: “William Turner”, city: “London”, mobileNo:7857694}];
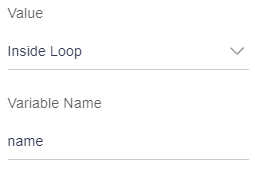
For example, user is adding the first text element, which displays the name. User will select an option as “Inside loop”.
User will enter the key, which is storing the name (James Smith, Christopher Robin and William Turner) of every object. That key is “name”. Enter this “name” key in variable name field as shown in the image below.
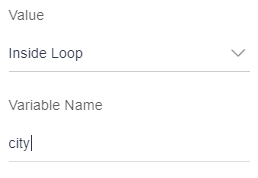
Similar for city and mobile number.
Parent topic: Available Attributes

