6.3 Add a Goal
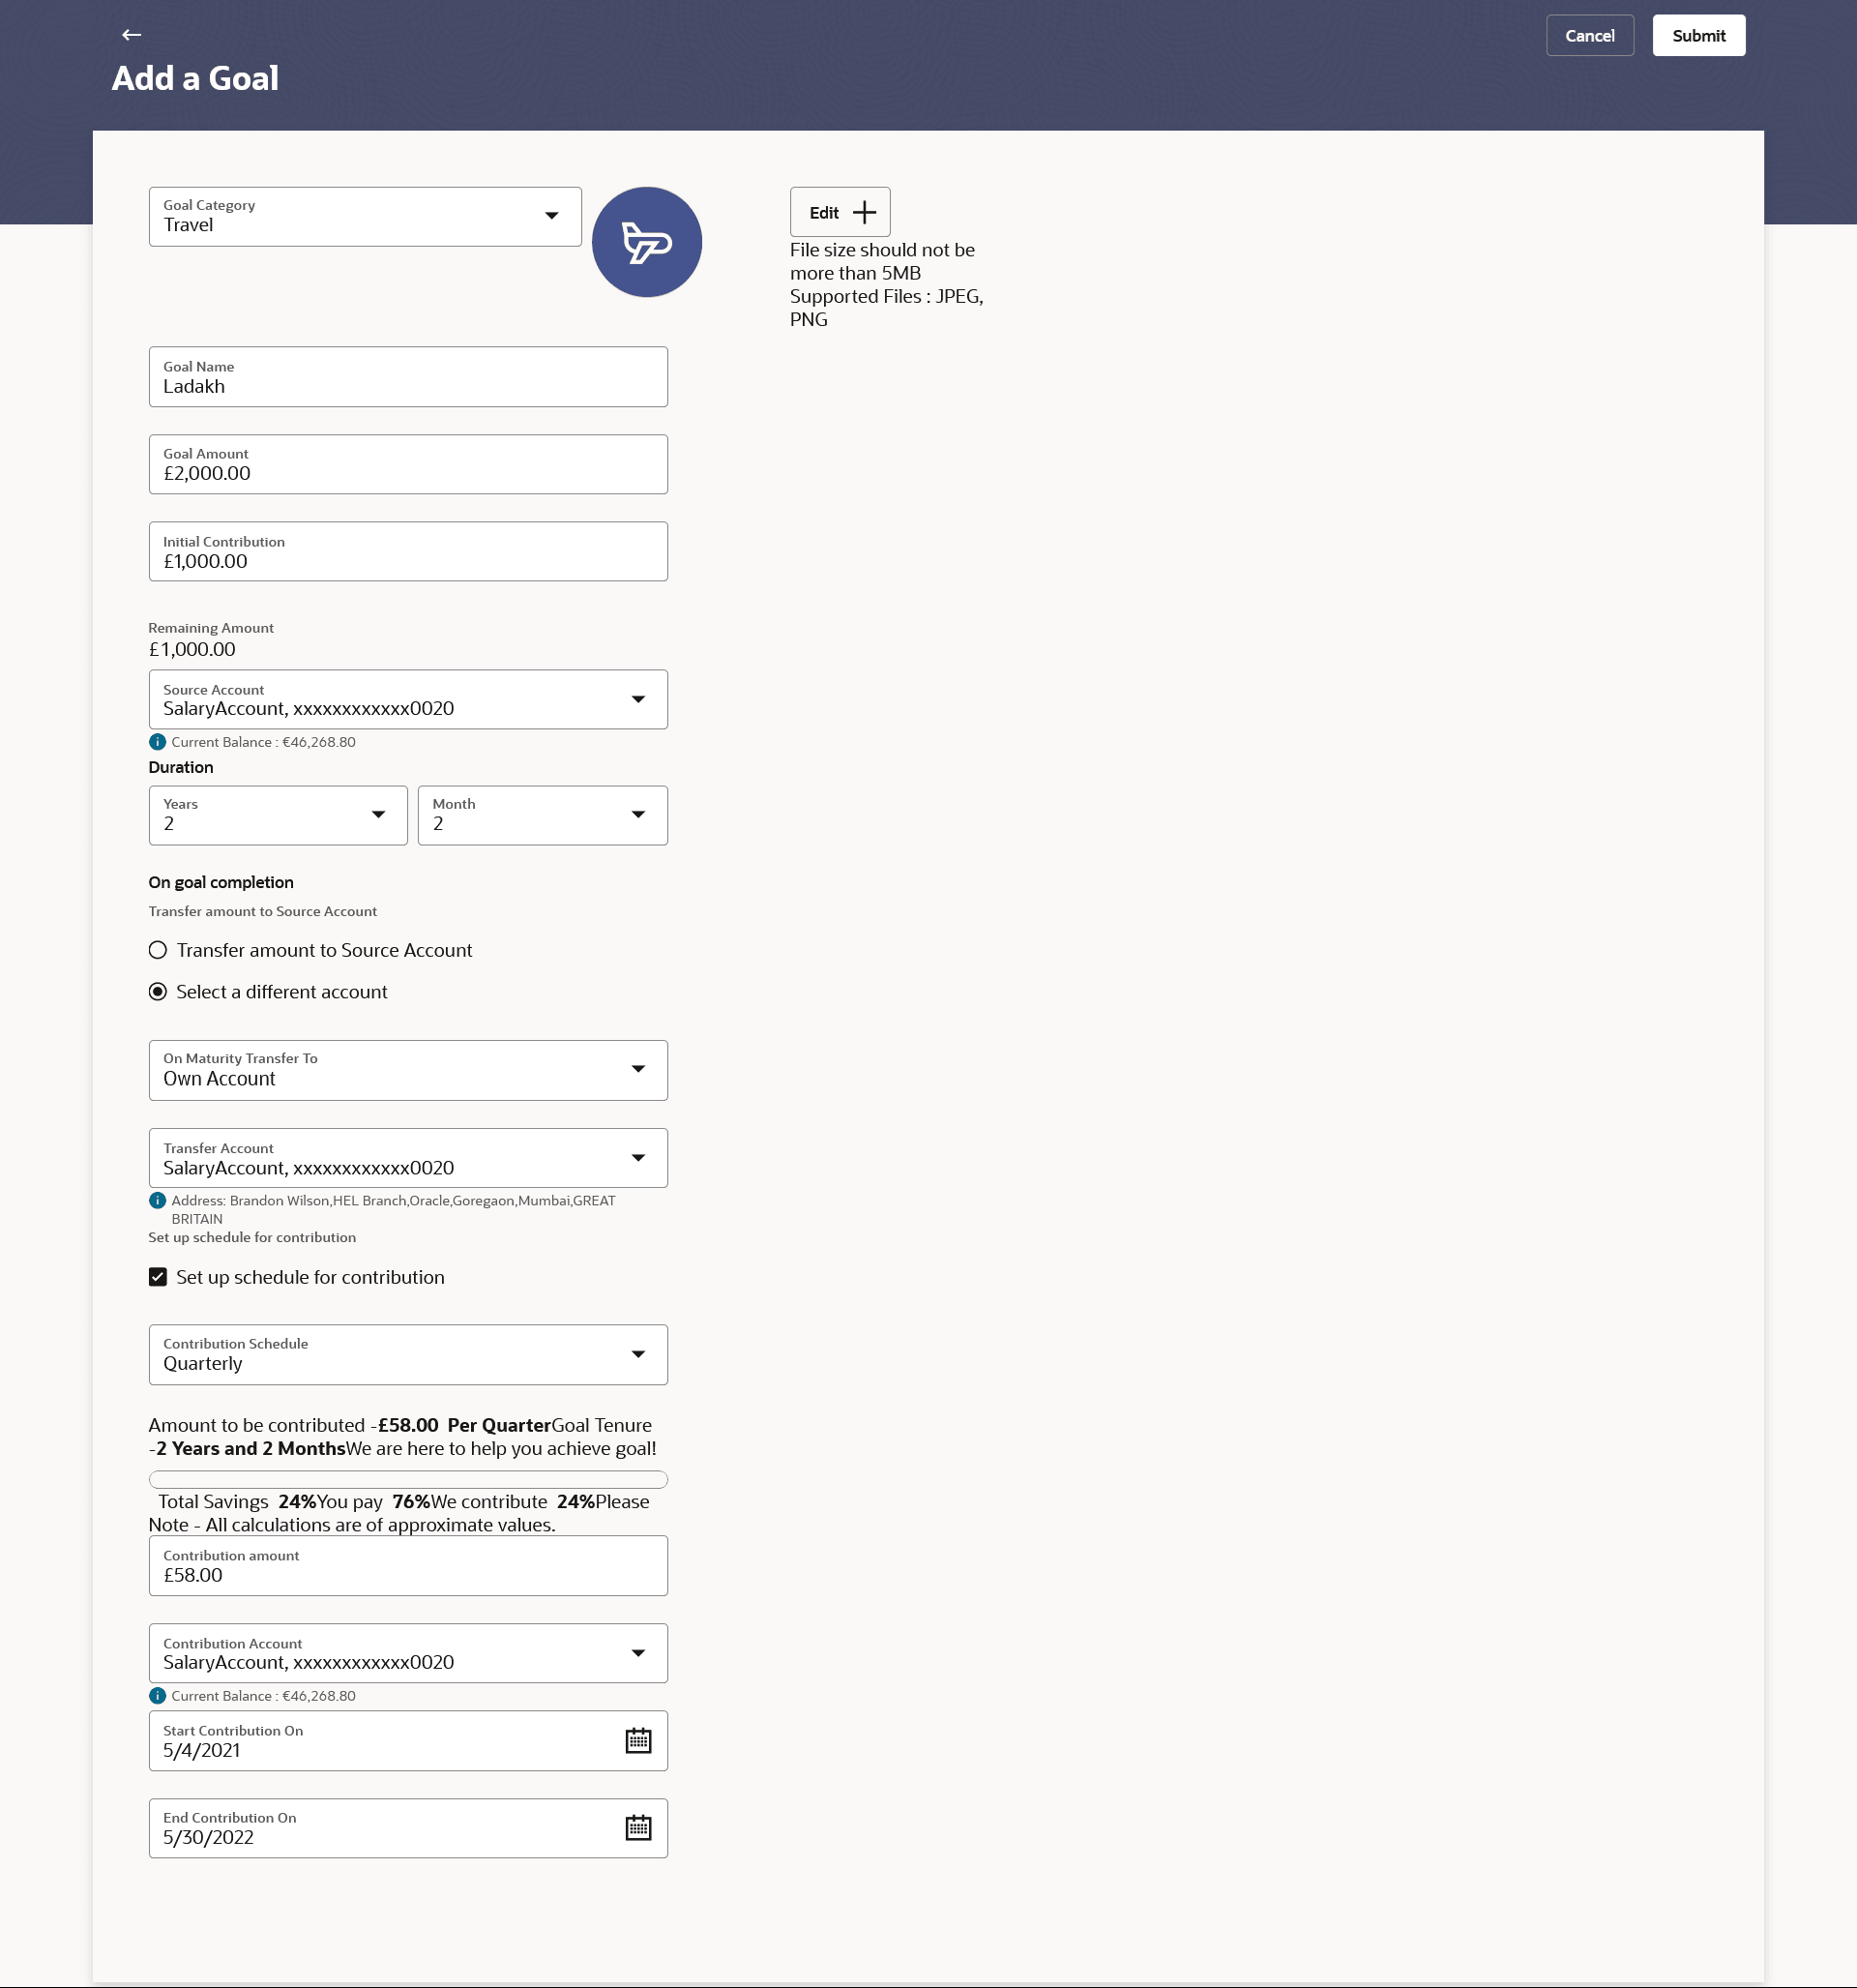
This topic describes the systematic instruction to Add a Goal. The user can specify information in this screen to create a goal by using this screen.
In order to create a goal, the user is required to specify information such as the goal category, the amount that is to be saved in order to achieve the goal, and other details such as the goal tenure, initial contribution amount, etc.
Navigation Path: Perform any one of the following actions.
- From the Dashboard, click Toggle menu, click Menu, then click Personal Finance Management. Under Goals widget, click on the Add a New Goal link.
- In Search bar, type Personal Finance Management - Goals, click Add a Goal, and press Enter.
- In Search bar, type Personal Finance Management - Add a Goal, and press Enter.
Figure 6-3 Add a Goal
Note:
The fields which are marked as Required are mandatory.For more information on fields, refer to the field description table.
Table 6-3 Add a Goal - Field Description
| Field Name | Description |
|---|---|
| Goal Category | Select the category under which you would like to create a goal. |
| Goal Image | The image of the goal.
By default the image assigned by the bank for the specific category will be displayed. You can personalize your goal by adding an image of your choice. Click Edit + to add a goal image. Note:
|
| Goal Name | Specify the name of the goal. |
| Goal Amount | Enter the targeted goal amount. |
| Initial Contribution | Specify the amount that you would like to contribute towards the goal as an initial contribution.
This amount should be within the range specified. |
| Remaining Amount | This is the amount arrived at after having subtracted the initial contribution amount from the goal amount. |
| Source Account | Select the CASA account from which funds are to be debited for the initial contribution amount.
Once an account is selected, the balance of that account is displayed below this field. |
| Duration | The tenure of the goal in years and/or months. |
| The following options are provided for the user to specify the account in which the goal amount is to be transferred upon fulfillment.
By default, on fulfillment, the amount in the goal will be transferred into the source account through internal transfer. The user can, however, choose to have the goal amount credited to a different account when it is fulfilled, by defining the requirements in the following section: |
|
| Goal | The following options are provided for the user to specify the account in which the goal amount is to be transferred upon fulfillment:
By default, on fulfillment, the amount in the goal will be transferred into the source account through internal transfer. The user can, however, choose to have the goal amount credited to a different account when it is fulfilled, by defining the requirements in the following section: |
| On goal Completion | Specify the where the goal amount will be transfer on goal fulfillment.
The options are:
|
| On Maturity Transfer To | Select the account in which the proceeds must be transferred on goal completion.
The options available are:
This field is displayed if you have selected the Select a different accountoption. |
| Own Account - Select a different account | The following field is displayed if you have selected the Own Account option in the Select a different account list. |
| Transfer Account | Select the account number to which the amount has to be transferred after completion of goal.
This field is displayed if the Own Account option is selected in the Select a different account field. |
| Internal Account - Select a different account | The following field is displayed if you have selected the Internal Account option in the Select a different account list. |
| Account Number | Specify the account number to which the amount has to be transferred after completion of goal. |
| Confirm Account Number | Re-enter the account number to which the amount has to be transferred after the completion of goal. |
| Set up a schedule for contribution | Select this check-box if you wish to set instructions for automatic contribution towards the goal. |
| Contribution Schedule | Select the frequency of contribution.
The options are:
|
| Outcome | The system will calculate the amount to be contributed by the user as per the values entered in the fields above, and display the same as follows. |
| Amount to be contributed | Application calculates and displays the amount you will be required to contribute monthly/quarterly/weekly, as generated by the system, based on your entries, will be displayed. |
| Goal Tenure | Displays the tenure to achieve the goal. |
| We are here to help you achieve goal | Displays the contribution of user in percentage. |
| Total Savings | Displays the total savings percentage in the specified period. |
| You Pay | Displays the amount paid by user in percentage. |
| We Contribute | Displays the amount paid by the bank in percentage. |
| Contribution Amount | Specify the amount to be contributed towards the goal per instance. |
| Contribution Account | The account number from which funds will be credited towards the goal at every instance of contribution. |
| Start Contribution On | Specify the start date from which the regular contributions should be executed. |
| End Contribution On | Specify the date until which the regular contributions should be executed. |
To add a goal:
Parent topic: Goals
