6.1.3 Upload Documents
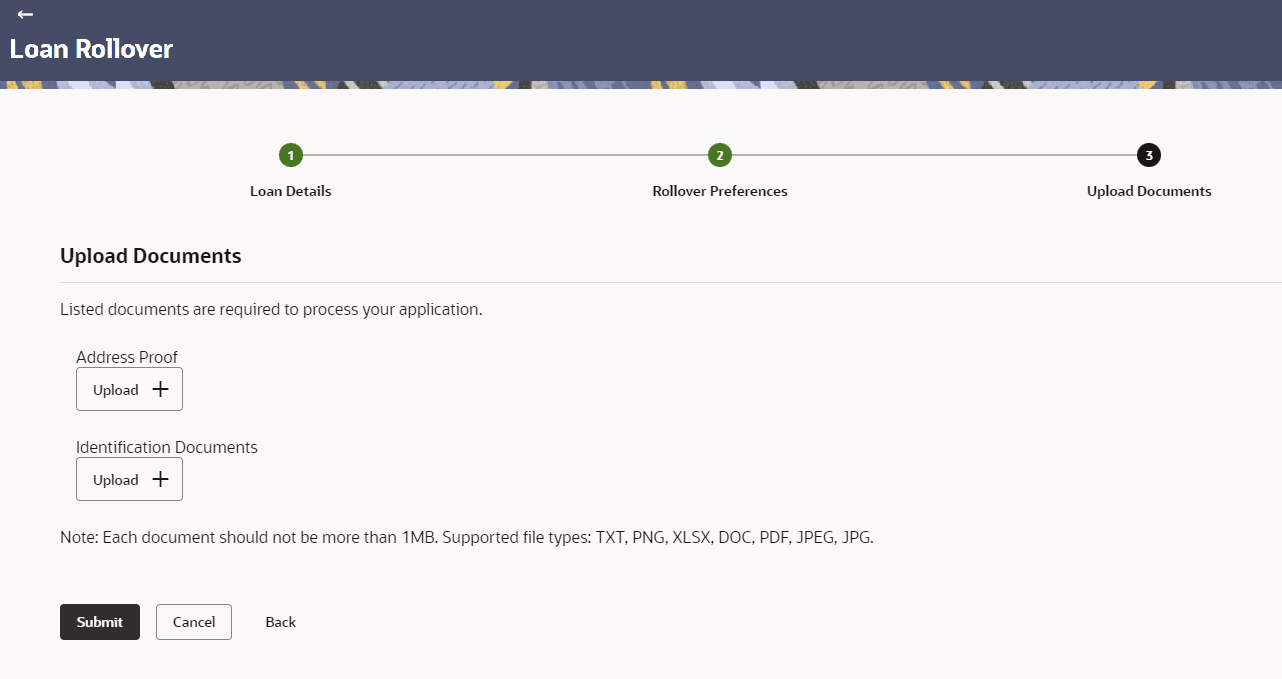
This topic provides the systematic instructions to upload documents for Loan Rollover.
- From the Loan Rollover - Upload Documents screen, click
 against a specific document.
For more information on fields, refer to the field description table below:
Table 6-3 Loan Details - Field Description
Field Description Loan Rollover Request
Displays a process flow diagram representing the various stages of application is depicted. The current stage appears highlighted.
<Name and description of document> Displays the name and a brief description of the document to be uploaded.
The user can click
 to browse and upload the document.
- Once all required documents have been uploaded, perform one of the following actions:
- Click Submit.
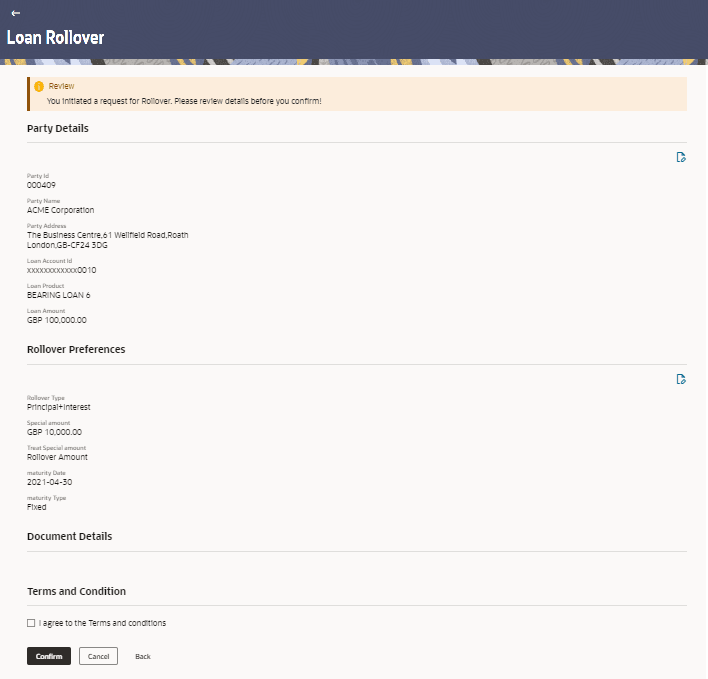
The Review screen displays.
- Click Cancel to cancel the operation.
- Click Back to navigate back to the previous screen.
- Click Submit.
- On the Loan Rollover - Review screen, click
 to edit the application and make any modification, if required.
 - select the I agree to the Terms and conditions checkbox.
- User can also perform one of the following actions:
- Click Confirm.
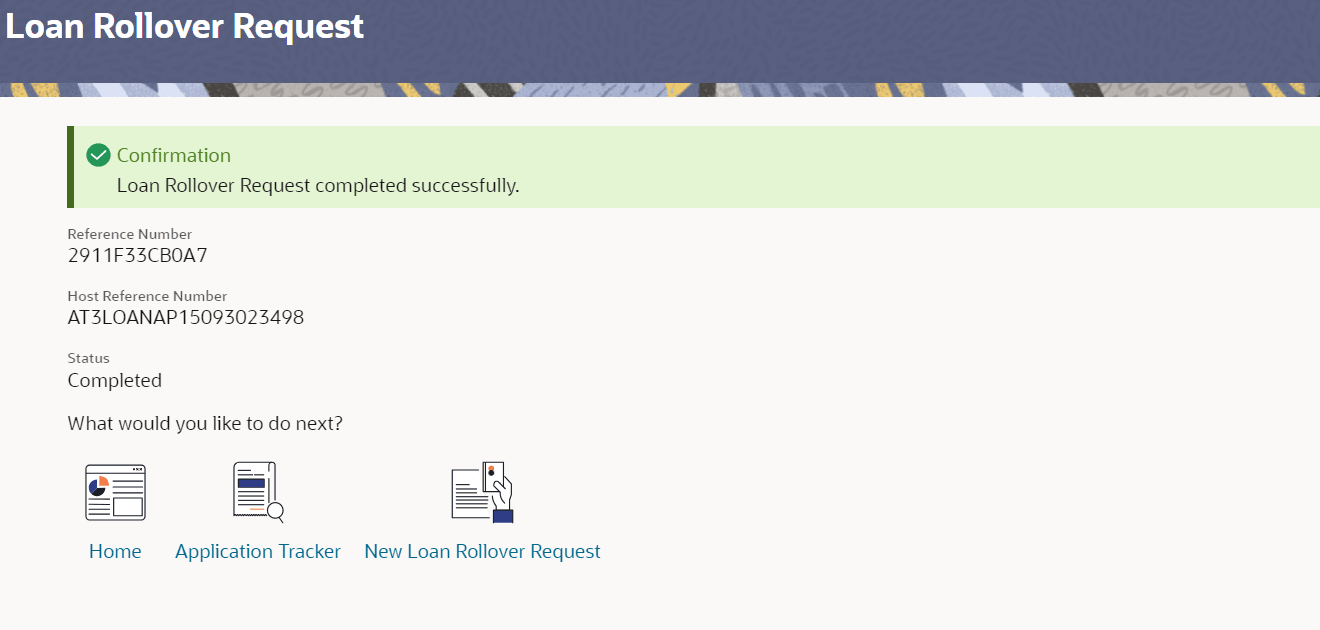
The Confirmation screen displays with a message stating that the request is submitted successfully. The reference number and status of the application are also displayed.
- Click Back to go to the previous screen.
- Click Cancel to cancel the application.
- Click Confirm.
- On the Confirmation screen, perform one of the following actions:
- Click Home to navigate to Home screen.
- Click Application Tracker to navigate to Application Tracker screen.
- Click New Rollover Request to initiate a new Loan Rollover application.
Parent topic: Loan Rollover Request


