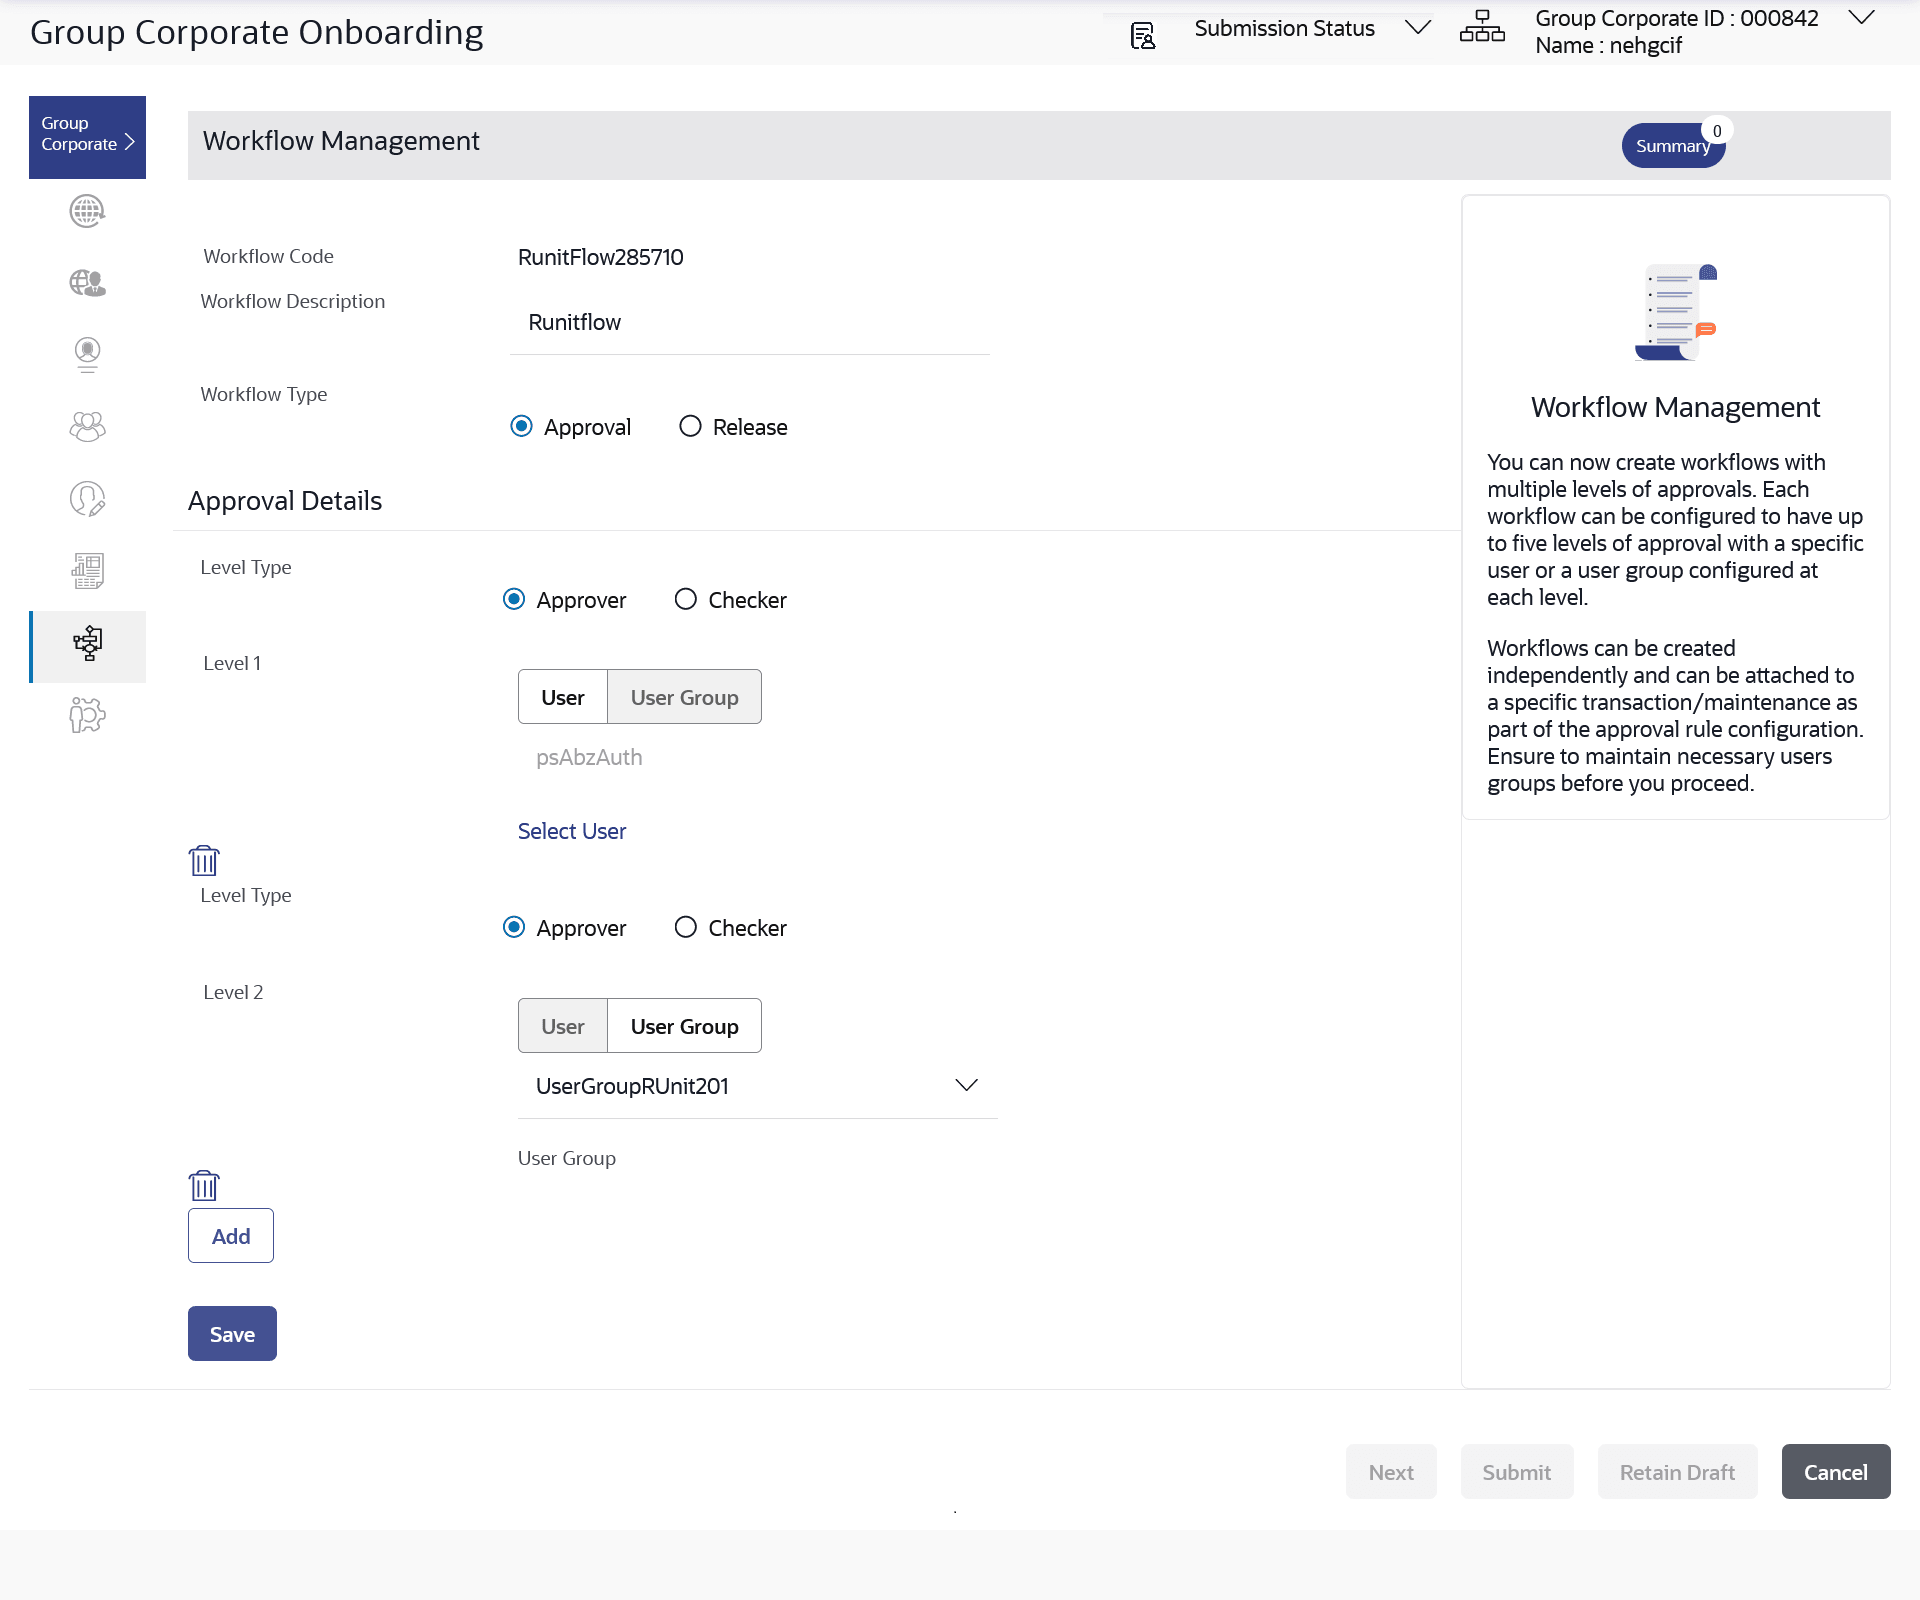
3.10.4 Workflow Management - Edit
This topic provides the systematic instructions to corporate administrators for updating workflow descriptions and manage approval levels by adding or removing them.
To edit an approval workflow:
- Navigate to the Workflow Management screen.
- In the Workflow Management screen, enter the search
parameters and click Search.The Workflow Management screen with search results appears based on the searched criteria.
- Click the Workflow Code link to view details of the
selected Approval Workflow.The Workflow Management - View screen appears.
- Perform one of the following actions:
- Click Edit to edit the
workflow.
The Workflow Management - Edit screen with values in editable form appears.
- Click Cancel to cancel the transaction.
- Click Back to navigate to the previous screen.
Note:
The fields which are marked as Required are mandatory.For more information on fields, refer to the field description table.
Table 3-37 Workflow Management - Edit- Field Description
Field Name Description Edit Workflow code is displayed. Workflow Code Workflow code is displayed. Workflow Description Workflow description is displayed in editable form. Workflow Type Type of workflow can be selected as Approval or Release. The options are:
- Approval
- Release
Approval Details Below fields appears if you select Approval option in the Workflow Type field. Level Type Specify the level type for the workflow. The options are:
- Approver
- Checker
Level Approval levels for a user / user group. Administrator can remove or add approval levels in a workflow.
User Name / User Groups User or a user group maintained at each level of approval. Administrator can edit an existing user/user group maintained at each level and can also specify user/user group for additional approval level.
Release Details Below fields appears if you select Release option in the Workflow Type field. User / User Group To select specific user or a user group to release the transaction. Note:
All the users and user groups created under the Group Corporate will be made available for mapping. - Click Edit to edit the
workflow.
- Edit the required details.
- Perform one of the following actions:
- Click Add to add the selected user/ user group at specific level of approval.
- Click the
 icon to remove specific approval level.
- Perform one of the following actions:
- Click Save to save the
maintenance.
The Review screen appears.
- Click Back to navigate back to previous screen.
- Click Next to proceed to the next logical step.
- Click Submit to submit the steps performed so far for approval.
- Click Retain Draft to save the details entered as draft.
- Click Cancel to cancel the transaction.
- Click Save to save the
maintenance.
- Perform one of the following actions from the Review
screen:
- Verify the details, and click
Confirm.
The success message of saving the approval workflow modification appears along with the transaction reference number and status.
- Click on Add Another to add new Workflow.
- Click Back to navigate back to previous screen.
- Click Cancel to cancel the transaction.
- Verify the details, and click
Confirm.
- Click OK to complete the transaction.
Parent topic: Step 7: Workflow Management
