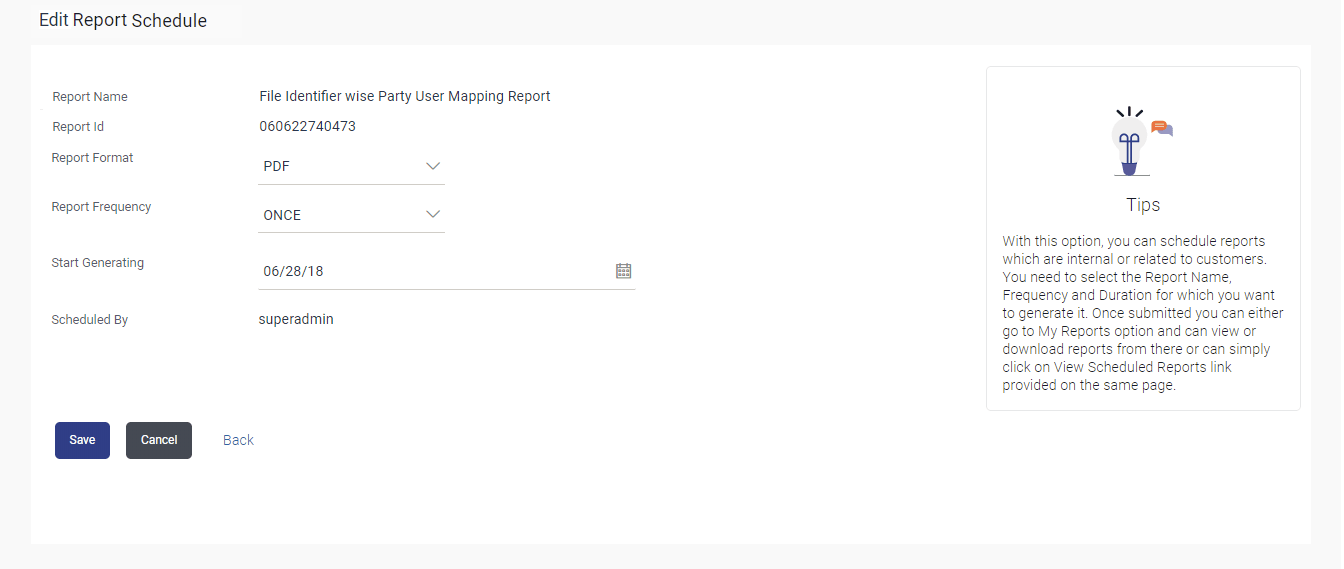
11.2.2 Edit Scheduled Reports
This topic provides the systematic instructions to the corporate administrators for modifying the parameters defined for scheduled reports.
To edit the scheduled reports:
- Navigate to the Reports screen.
- Click the Schedule tab.The scheduled report generation screen appears.
- Click the View Scheduled Reports link.The Scheduled Reports screen appears.
- Click on desired Report ID to edit the details of the
scheduled report.The View Report Schedule screen appears.
- Perform one of the following actions:
- Click Edit to modify the report
schedule.
The Edit Report Schedule screen appears.
- Click Delete to delete the report schedule.
- Click Cancel to cancel the transaction.
- Click Back to navigate to previous screen.
Note:
The fields which are marked as Required are mandatory.For more information on fields, refer to the field description table.
Table 11-6 Edit Reports ScheduledField Description
Field Name Description Report Name Name of the scheduled reports. Name of the report will be displayed in non-editable form.
Report ID ID of the reports that are scheduled. This is a non-editable field.
Report Format The report format of the scheduled report. Report Frequency The frequency of the scheduled report. The options are:- Once
- Daily
- Weekly
- Monthly
Start Generating The start date of the scheduled report. This field can be edited only if the date and time is in future.
Stop Generating The date till which the report is to be generated. Scheduled By User ID of the user who scheduled the report generation. - Click Edit to modify the report
schedule.
- Modify the details, if required. You can modify the Report Format, Report Frequency Start generation date and time (if future date) and Stop Generating date and time.
- Perform one of the following actions:
- Click Save to save the
changes.
The Confirm Edit Report Schedule screen appears.
- Click Back to navigate to previous screen.
- Click Cancel to cancel the transaction.
- Click Save to save the
changes.
- Perform one of the following actions:
- Click
Confirm.
The user will be navigated back to the create screen.
The success message of goal category creation appears.
- Click Cancel to cancel the transaction.
- Click
Confirm.
- Click Ok to close the screen and navigate to the dashboard.
Parent topic: Schedule Reports
