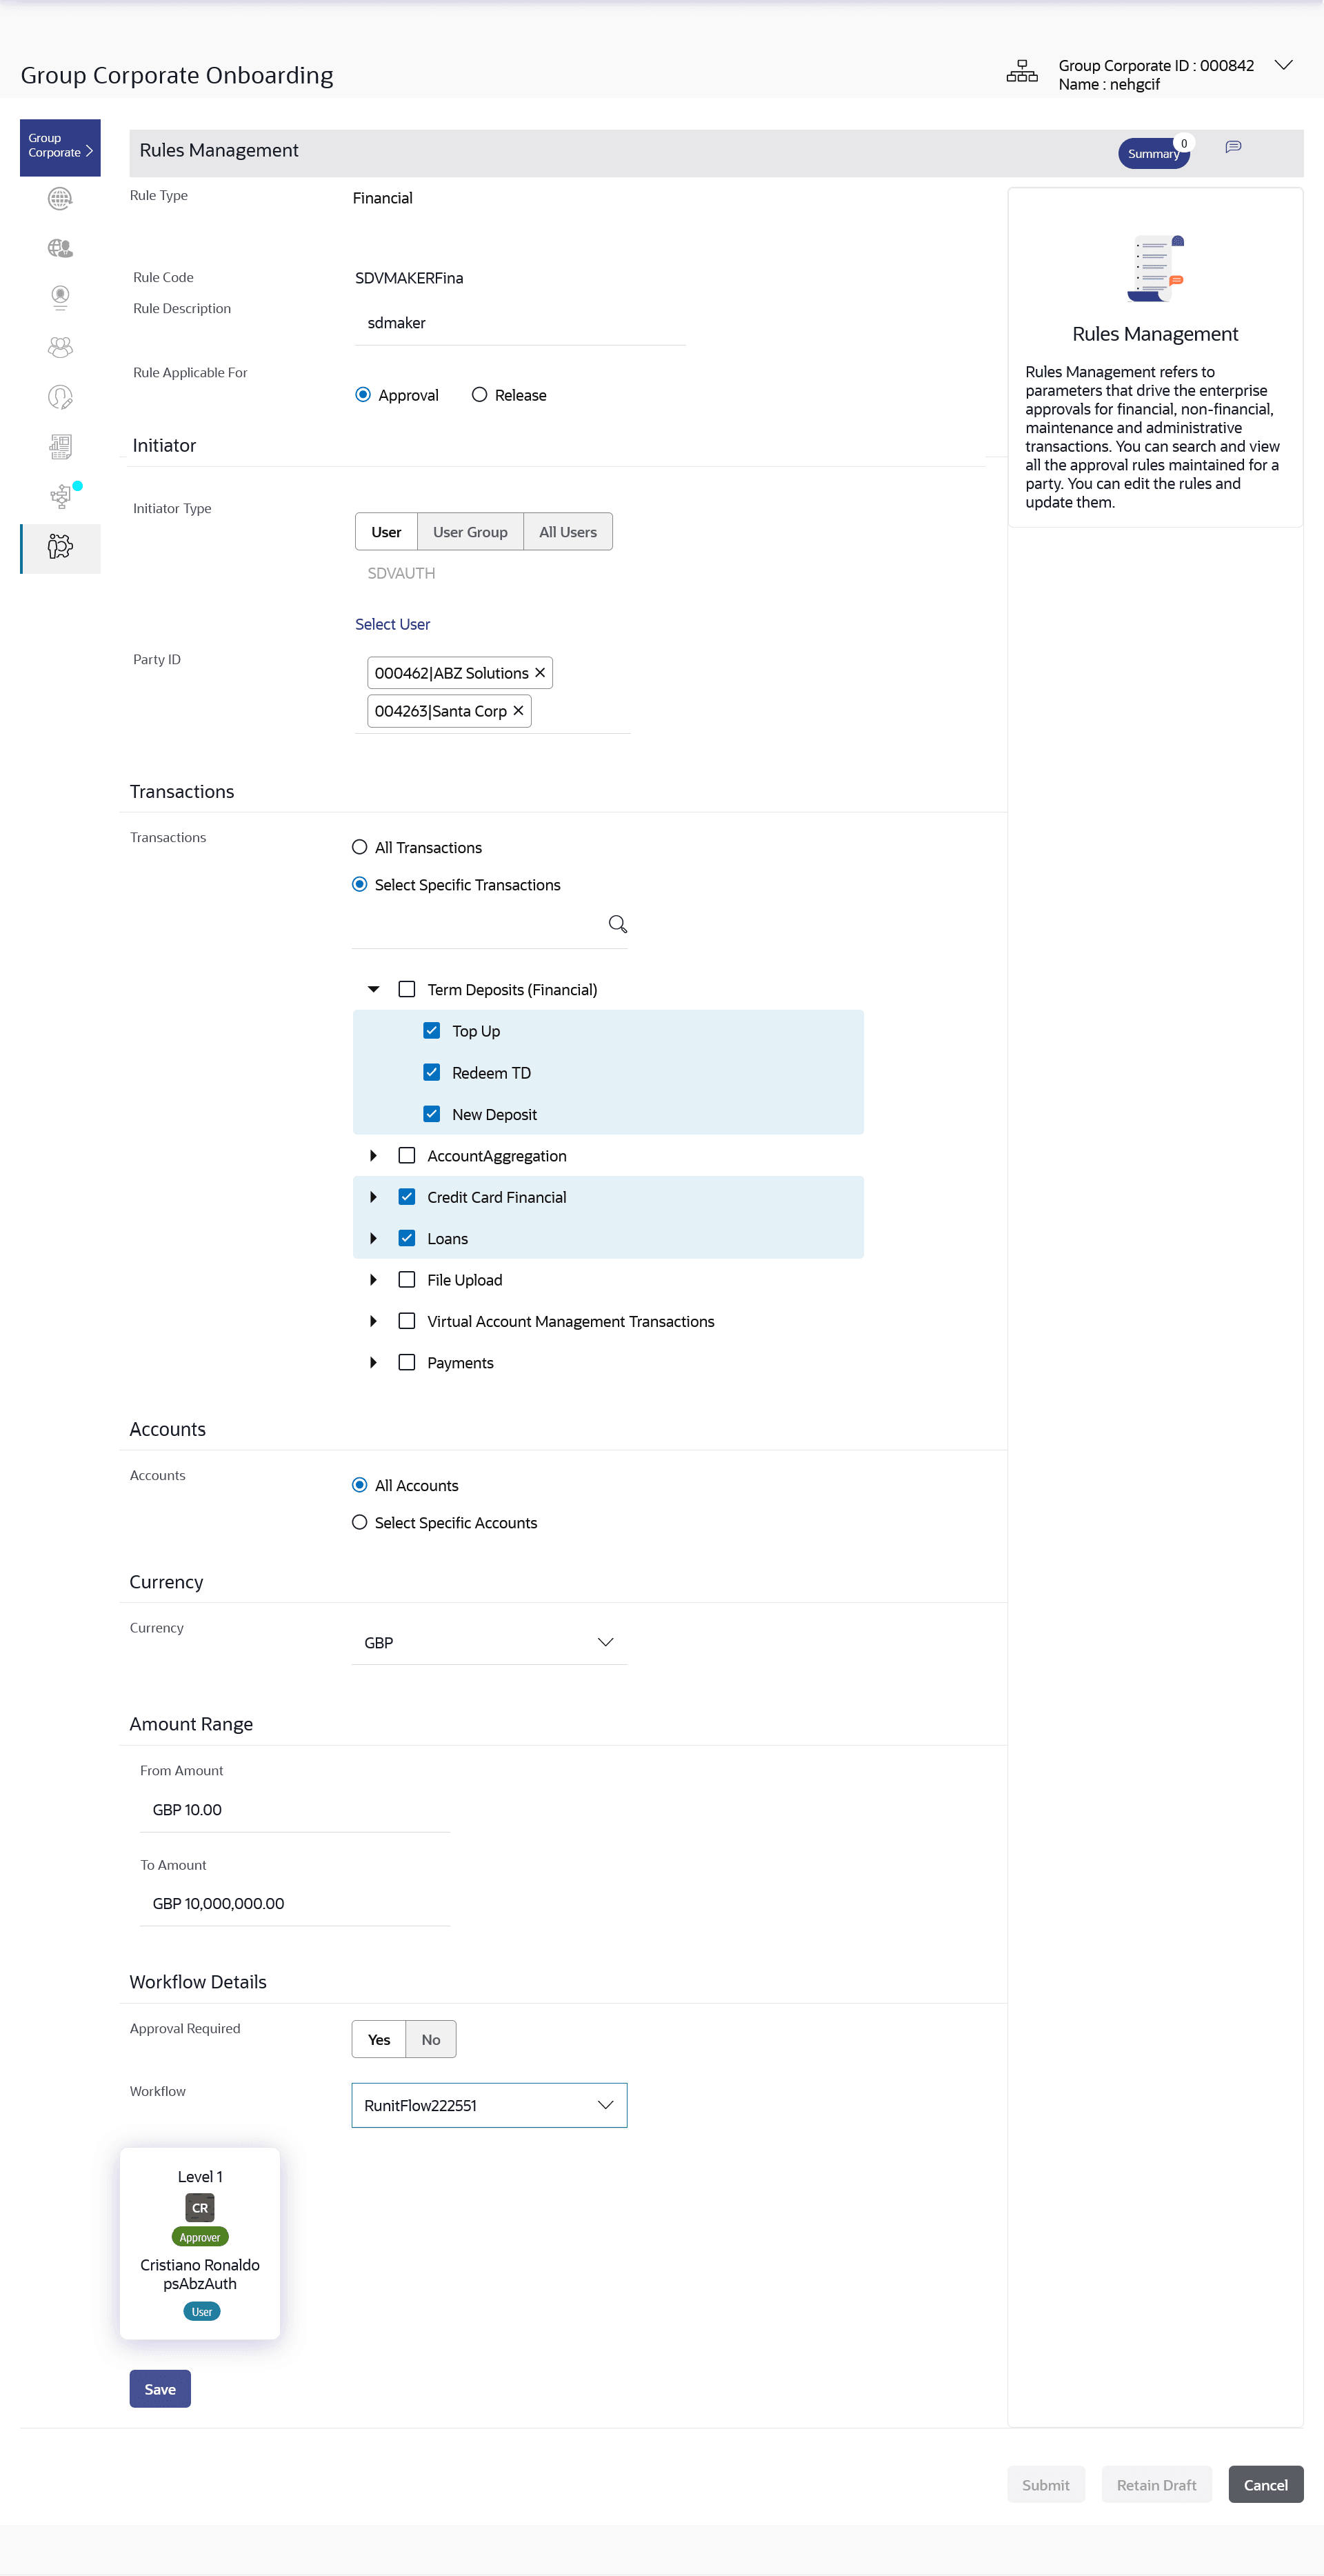
3.11.3 Approval Rules - Edit
This topic provides the systematic instructions of updating approval rule descriptions and parameters.
To edit an approval workflow:
- Navigate to the Approval Rules screen.
- In the Approval Rules screen, enter the search
parameters and click Search.The Approval Rules screen with search results appears based on the searched criteria.
- Click the Rule Code link, for which you want to view the
details.The Approval Rules - View screen appears.
- Click Edit to edit the approval rule.The Approval Rule - Edit screen with values in editable form appears.
Note:
The fields which are marked as Required are mandatory.For more information on fields, refer to the field description table.
Table 3-40 Approval Rules - Edit- Field Description
Field Name Description Rule Type Transaction rule type for which the approval rule is set up will be displayed. The transaction rule for corporate user are:- Financial
- Non Financial
- Maintenance
- Non Account Financial
Rule Code Approval rule code provided by the user. Rule Description Approval rule description provided by the user in editable form. Rule Applicable For The rule applicable for Release or Approval in editable form. Initiator Initiator Type Initiator type who initiates the transaction will be displayed in editable form. Note:
If ‘All Users’ is selected, then the rule being created is applicable for all users of Corporate PartyUser Name / User Groups Name of the user or user group as initiator will be displayed in editable form. If initiator is selected as User, then all the users belonging to the party will be listed for selection.
If initiator is selected as User Group, then all the user groups belonging to the party will be listed for selection.
Party ID The one or multiple Party IDs mapped to the selected Group Corporate ID will be displayed in editable form. Transactions The transactions to set the approval rules will be displayed in editable form. Type of transactions depends on the selection of rule type.
The options are:- All Transactions – If selected, the rule can be setup for all transactions
- Select Specific Transactions – Specific transactions can be selected for which the rule is applicable. The transaction type and names are listed for selection
Accounts Type of accounts based on the Party ID selection will be displayed in editable form. The options are:- All Accounts – If selected, the rule can be setup for all accounts within the selected Party IDs
- Select Specific Accounts – Specific accounts can be selected for which the rule is applicable. The Party ID, Account Type and Account Numbers along with their names are listed for selection
This field appears if you select Financial and Non Account Financial in the Rule Level field.
Currency Currency type in which the financial approval rule for a corporate is defined. Amount Range From Amount/ To Amount Transactions allowed for the user between the defined amounts ranges will be displayed in editable form. This field appears if you select Financial and Non Account Financial in the Rule Level field.
Workflow Details Approval Required Whether approval is required will be displayed in editable form. The options are:- Yes
- No
Approval Type Define the Approval workflow type. Possible value will be - Sequential
- Parallel
This field is enabled if Yes option is selected in Approval Required field and when workflow preference is set at Rule Level in Group Corporate Profiling setup.
Workflow Details of the approval workflow within which different levels are available for approver and checker will be displayed in editable form. For release, the release workflow can be selected.
This field appears if you select Yes in the Approval Required field.
- Edit the required details.
- Perform one of the following actions:
- Click Save to save approval
rule.
The Review screen appears.
- Click Back to navigate back to previous screen.
- Click Next to proceed to the next logical step.
- Click Submit to submit the steps performed so far for approval.
- Click Retain Draft to save the details entered as draft.
- Click Cancel to cancel the transaction.
- Click Save to save approval
rule.
- Perform one of the following actions:
- Verify the details, and click
Confirm.
The success message of saving the approval rule modification appears along with the transaction reference number and status.
- Click on Add Another to add the Approval Rule.
- Click Cancel to cancel the transaction.
- Click Back to navigate back to previous screen.
- Verify the details, and click
Confirm.
- Click OK to complete the transaction.
Parent topic: Step 8: Approval Rules
