3.3 Pay Bill - Payment Type
This topic provides the systematic instructions of the bill payment process for payment type billers, where online bill presentation is not available (though offline presentation may occur), enabling customers to make payments at any time using their current, savings, or credit card accounts, with funds credited to the biller's account.
The customers can pay their bills immediately/ same business date or can schedule the payment. The customers can set up a recurring payment by selecting payment amount and payment frequency. This option allows the customer to manually enter the payment amount.
In case of multiple bill payment, if in Group Corporate Onboarding - Group Corporate Profiling setup, Approval Routing Type is selected as Manual, system will allow initiator to choose the approval workflow from the resolved rules as part of transaction initiation. This selection is applicable to transactions whose status is Initiated. Refer Group Corporate Onboarding - Group Corporate Profiling section in User Manual Oracle Banking Digital Experience Core for more details.
To pay a bill:
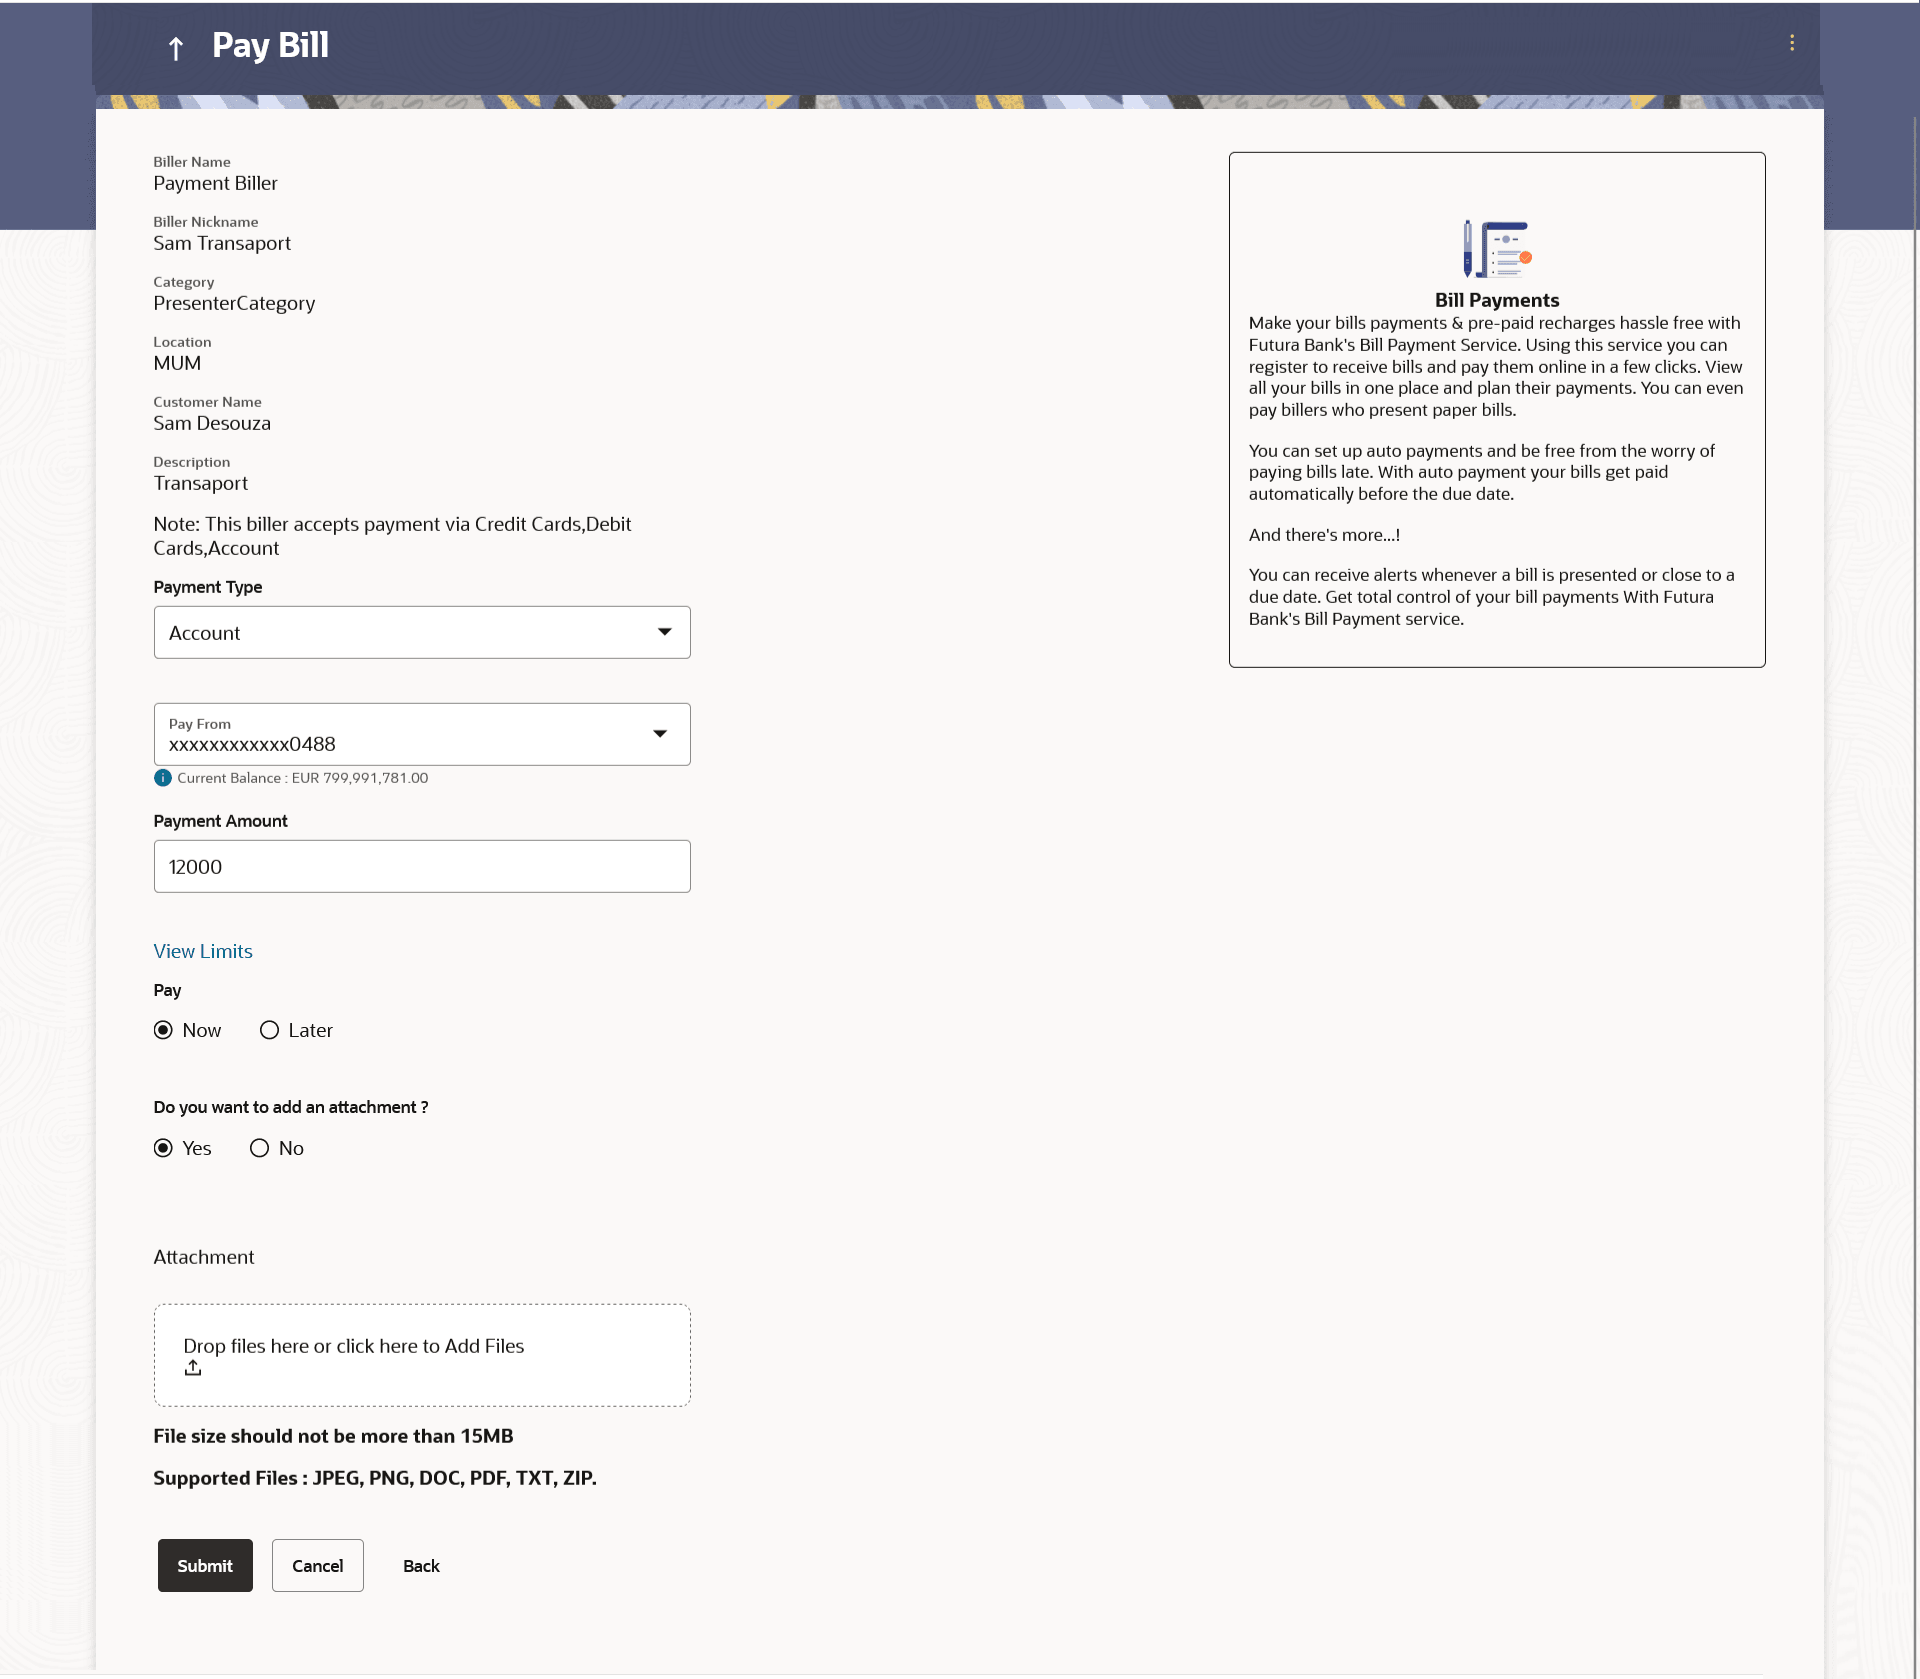
- Click Pay against the biller for which you want to pay the bill. The Pay Bill screen appears.
Note:
The fields which are marked as Required are mandatory.For more information on fields, refer to the field description table.
Table 3-5 Pay Bill - Payment Type- Field Description
Field Name Description Biller Name Name of the biller. Biller Nickname Nickname of the biller. Category The category of the biller. Sub-Category The sub-category of the biller. Location The operational area of the biller. Customer Name Customer name as maintained in biller records (entered by user while adding the biller). Customer Number Customer ID as maintained in biller records (entered by user while adding the biller). Bill Due Date The date on which the bill is payable. Note The text displaying payment methods accepted by the biller appears on the screen. The text is maintained for biller in the administrator biller maintenance. Payment Type User has to select the payment methods accepted by biller.
The payment type can be:
- Account: The user can pay the bill using their current and savings bank account
- Credit Card: The user can pay the bill using their credit cards; user has to select the month and year of expiry.
- Debit Card: The user can pay the bill using their debit cards.
Pay From Depending on the payment method selected, the values in the drop-down will list either the user’s CASA accounts, Credit Cards or Debit Cards. Expiry Date Specify the date on which the credit card will expire in the month and year fields. This field appears only if you have selected the option Credit Card in the Payment Type field.
Payment Amount The amount that is to be paid by the user. In the administrator biller maintenance screen if:
- Part payment flag is Yes: User can change the bill amount to any amount less than the initial bill amount shown. Bill amount cannot be zero.
- Excess payment flag is Yes: User can change the bill amount to any amount more than the initial bill amount as displayed on the screen.
- Part payment and Excess payment flags are set as No: The bill amount will not be editable.
- Late Payment flag is Yes: User is allowed to pay the bill after the due date. However even when Late payment flag is Yes, the editing of the bill amount is as per above conditions.
Pay The facility to specify when the bill payment will be processed. The options are:
- Now: Bill payment processed on same business day subject to processing window availability.
- Later: Bill payment to be processed on a user specified future date
Scheduled Date Future date on which the bill payment will be processed. This field appears if you have selected the option Later from under the Pay field.
Do you want to add an attachment? Select an option to identify whether you would like to add an attachment. - Select option Yes if you would like to add an attachment.
- Select option No if you do not wish to add an attachment.
Attachment Drag and drop or click the  icon to browse and attach a document against one bill payment record.
Note:
- Only one document per bill payment is allowed. To attach multiple documents against one bill payment record, the user has to attach in the form of a ZIP file.
- By default, the supported formats are JPEG, PNG, PDF, TXT, ZIP, and DOC.
- The maximum allowed file size will be 15 MB.
- In the Payment Type field, select the desired payment method to pay the bills.
- From the Pay From list, select the source account/ debit card /
credit card to be debited.
Note:
Click the icon to default the selected account for all the bill payment records. This
option will only be available in case of multiple bill payments.
- From the Expiry Date lists (month and year), select the Card Expiry Date.
- Perform one of the following actions:
- In the Payment Amount field, enter the payable amount.
- Click the View Limits link to check the transfer limit. Refer the Limits section as documented under the Pay Bill – Presented Type section.
- In the Pay field, select the option to indicate when the bill
payment will be processed.
- Perform one of the following actions:
- If you select the option Now, the bill payment will be processed on the same day.
- If you select the option Later, select the date on which
you want to process the bill, from the Scheduled Date
field.
Note:
Click the icon to default the selected date for all the bill payment records.
This option will only be available in case of multiple bill
payments.
- Perform one of the following actions:
- In the Do you want to add an attachment? field, select an option
to add an attachment.
- If you select Yes option to add an attachment;
- Drag and drop or click
 icon to browse and attach zip file against one bill payment record.
Note:
Click icon to remove the attached zip file from the bill payment record. This
option will only be available in case of multiple bill payments.
- Drag and drop or click
- If you select Yes option to add an attachment;
- Click the
 icon against the next bill to enter the payment details for specific bill. This
option will only be available in case of multiple bill payments.
 - Enter the details.
- Click Save to save the payment details of selected biller.
- Perform one of the following actions:
- Click
Submit.
The Review screen appears.
- Click Cancel to cancel the transaction.
- Click Back to navigate back to the previous screen.
- Click
Submit.
- Perform one of the following actions:
- Verify the details and click Confirm.
- Click Back to navigate back to the previous screen.
- Click Cancel to cancel the transaction.
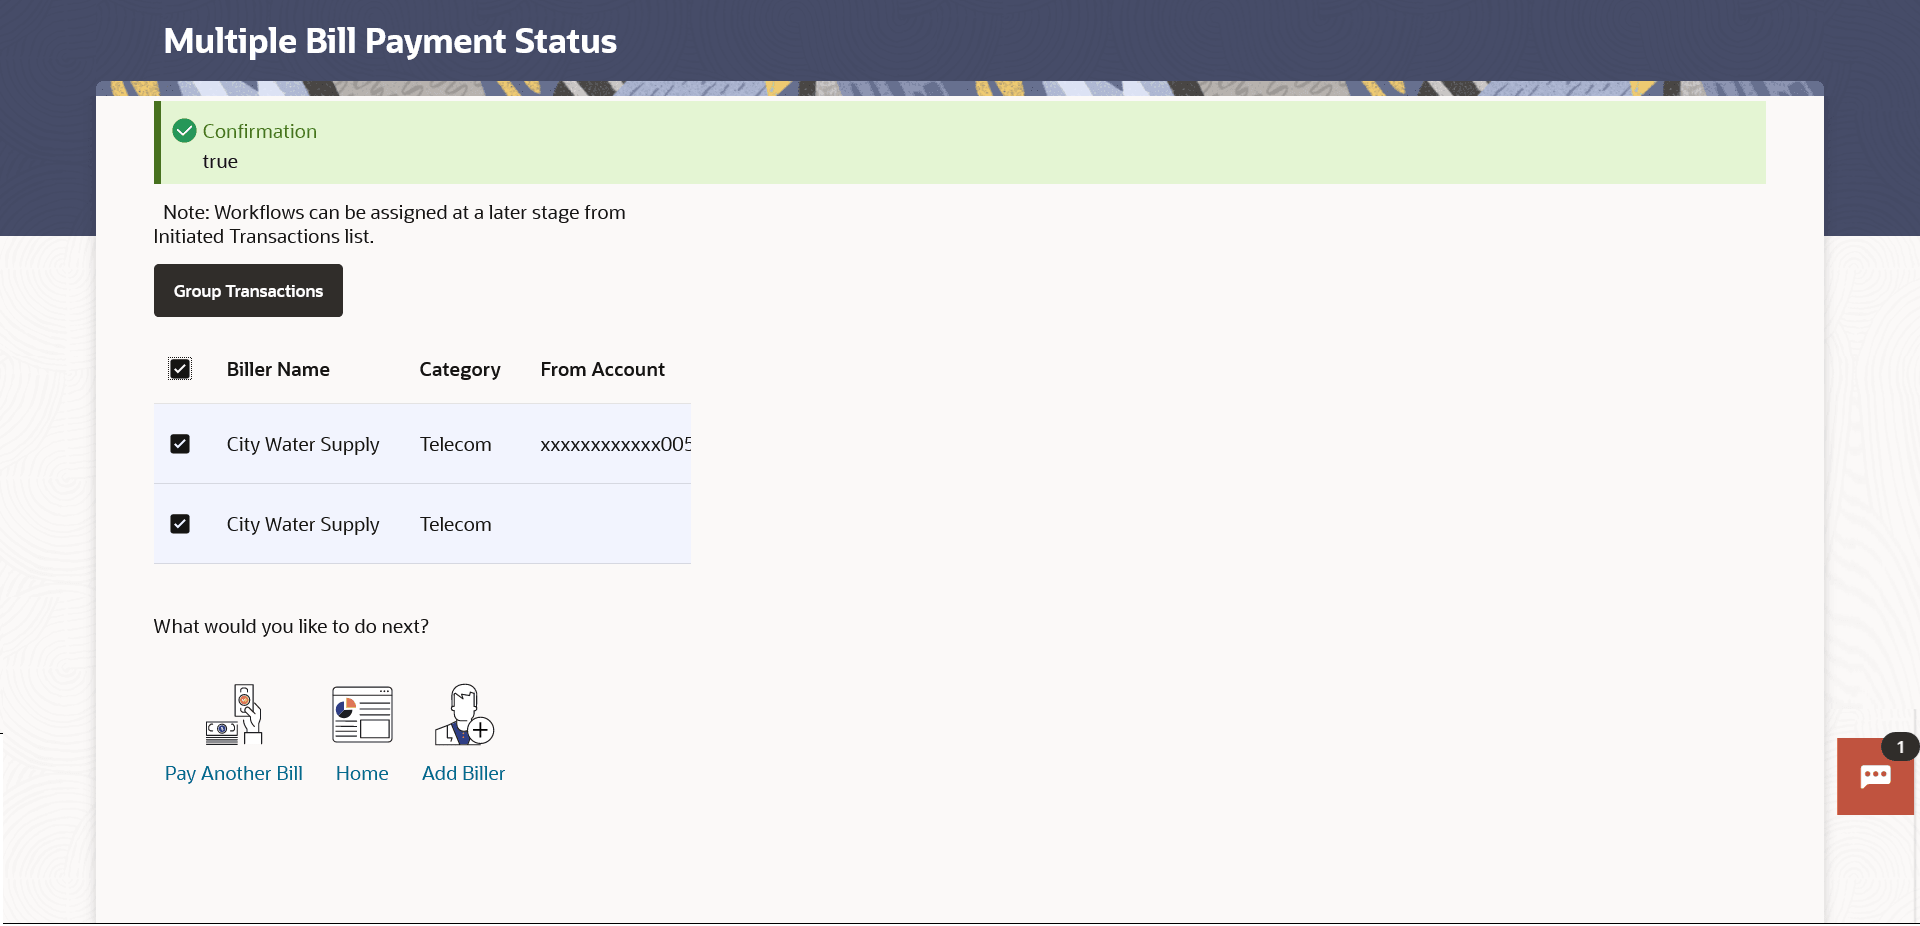
In case of multiple bill payments, the Multiple Bill Payments Status screen appears.
Figure 3-10 Multiple Bill Payments Status
Note:
The fields which are marked as Required are mandatory.For more information on fields, refer to the field description table.
Table 3-6 Multiple Bill Payments Status - Field Description
Field Name Description Biller Name Name of the biller. Category The category of the registered biller. From Account The current and savings bank account from which customer can pay the bill. Amount The amount that is to be paid by the customer along with the currency. Reference Number The generated OBDX reference number. Status The current status of the bill. The different status options are:
- Processed- The transaction was eligible for auto-approval and hence the transaction was automatically approved and sent to the core banking system for further processing. In this case assigning of approval workflow is not required.
- Failed- The transaction has failed in OBDX due to validation errors. In this case, the transaction is not sent to the core banking system for further processing.
- Initiated- The transaction is initiated in OBDX however is pending for approval. The approval will be initiated only once the user selects the approval workflow manually.
Approval Workflow In case of Initiated status, an option is available to assign the approval workflow manually. - If status is Processed, the transaction was eligible for auto-approval and hence the transaction was automatically approved.
- If status is Failed, the transaction has failed in OBDX due to error and hence the failure reason is displayed without any approval.
- If status is Initiated,
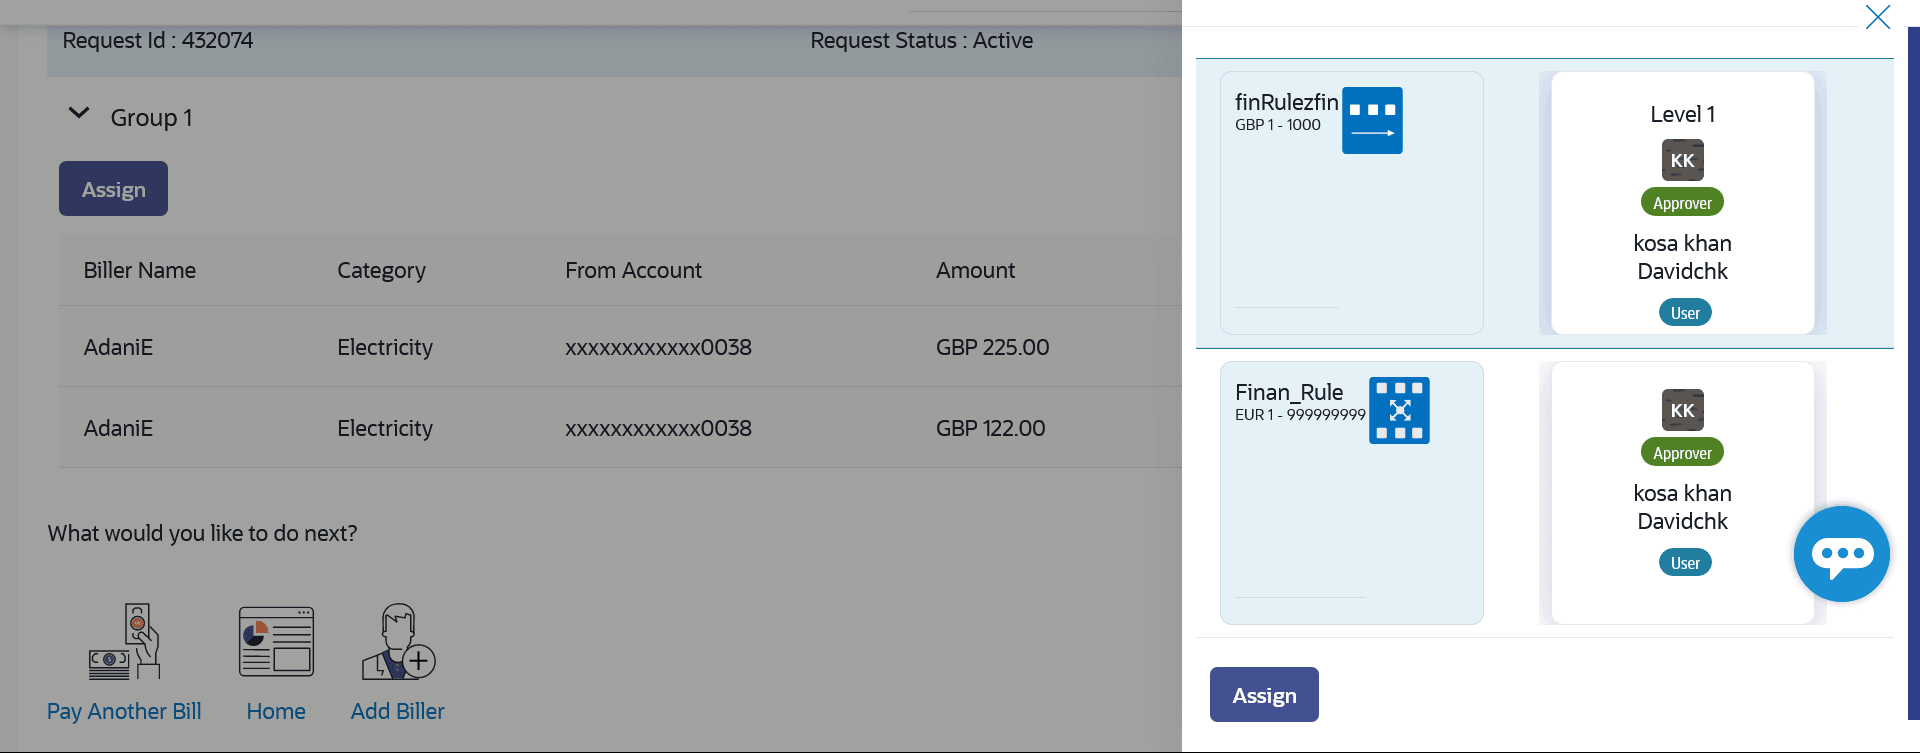
- Click on the Assign link, and all the
resolved rules will be shown on an overlay.
For each resolved rule, details like rule name, approval levels, sequential/parallel, rule amount range, users of a group are displayed.
- Select a workflow from all the resolved rules from the overlay screen.
- Click Assign to assign the workflow, the transaction will be sent for approval as per the selected approval rule.
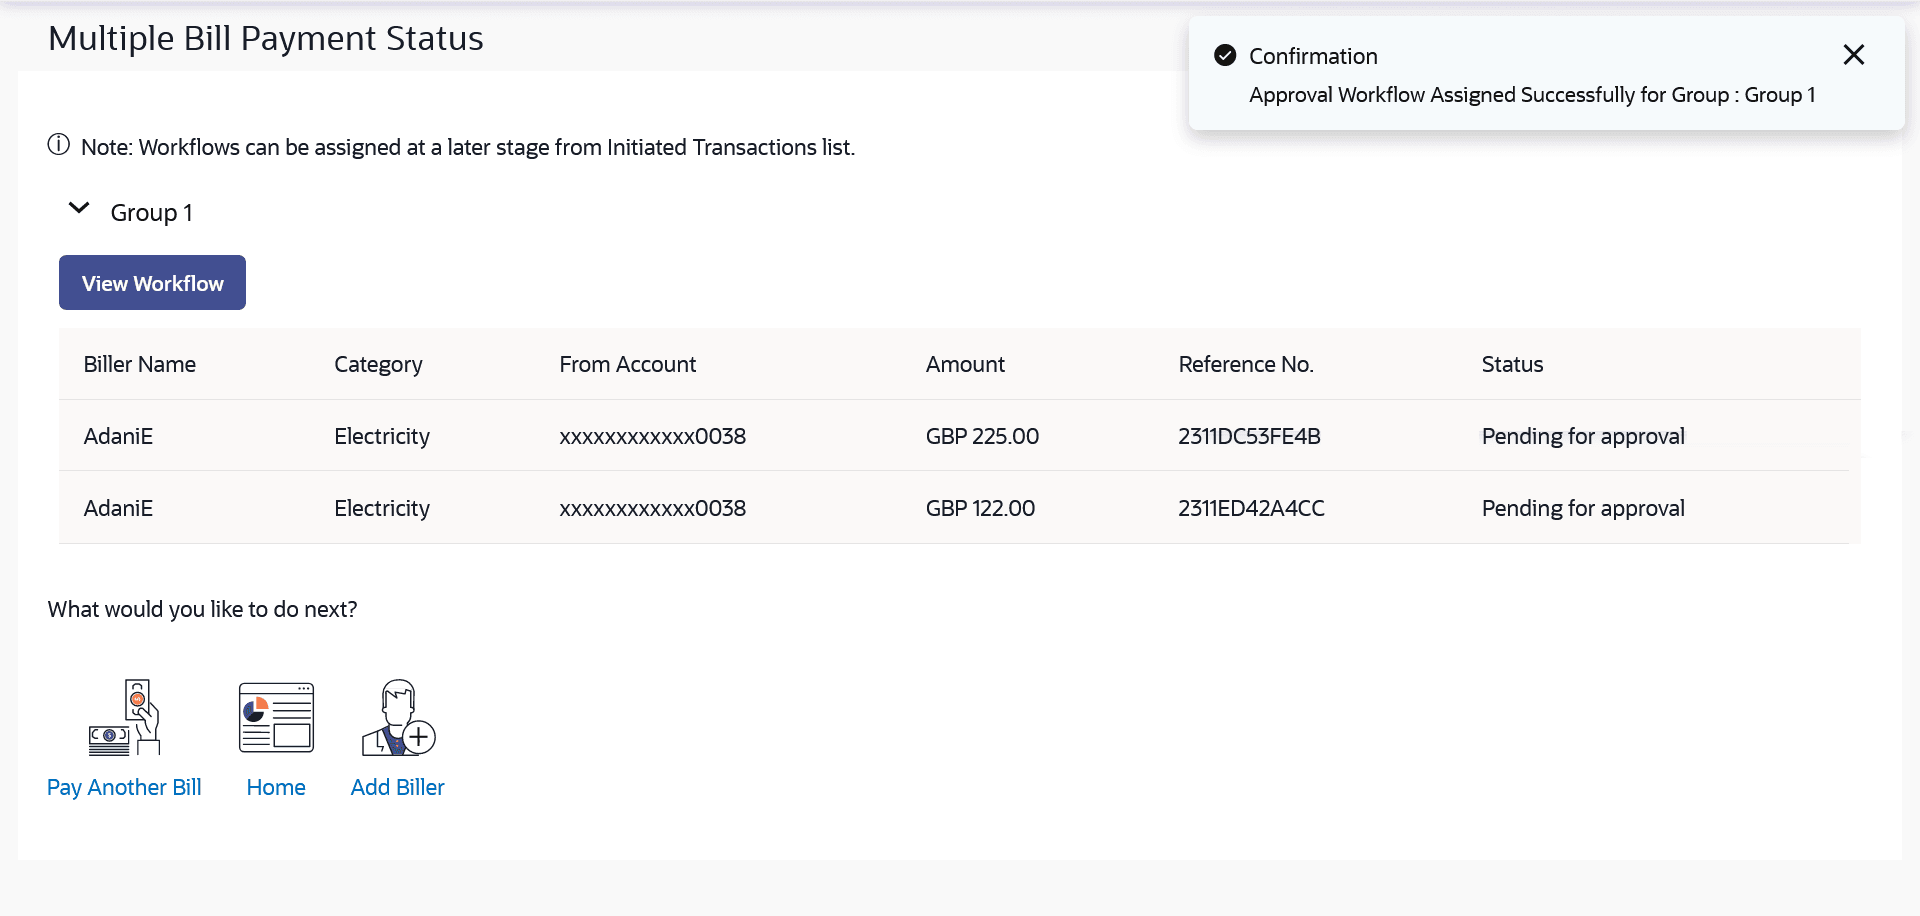
- On assignment, a message of workflow assigned successfully appears
along with the reference number.
The status is updated as Pending for Approval and approval workflow is Assigned.
Figure 3-12 Assign Workflow- success message
Note:
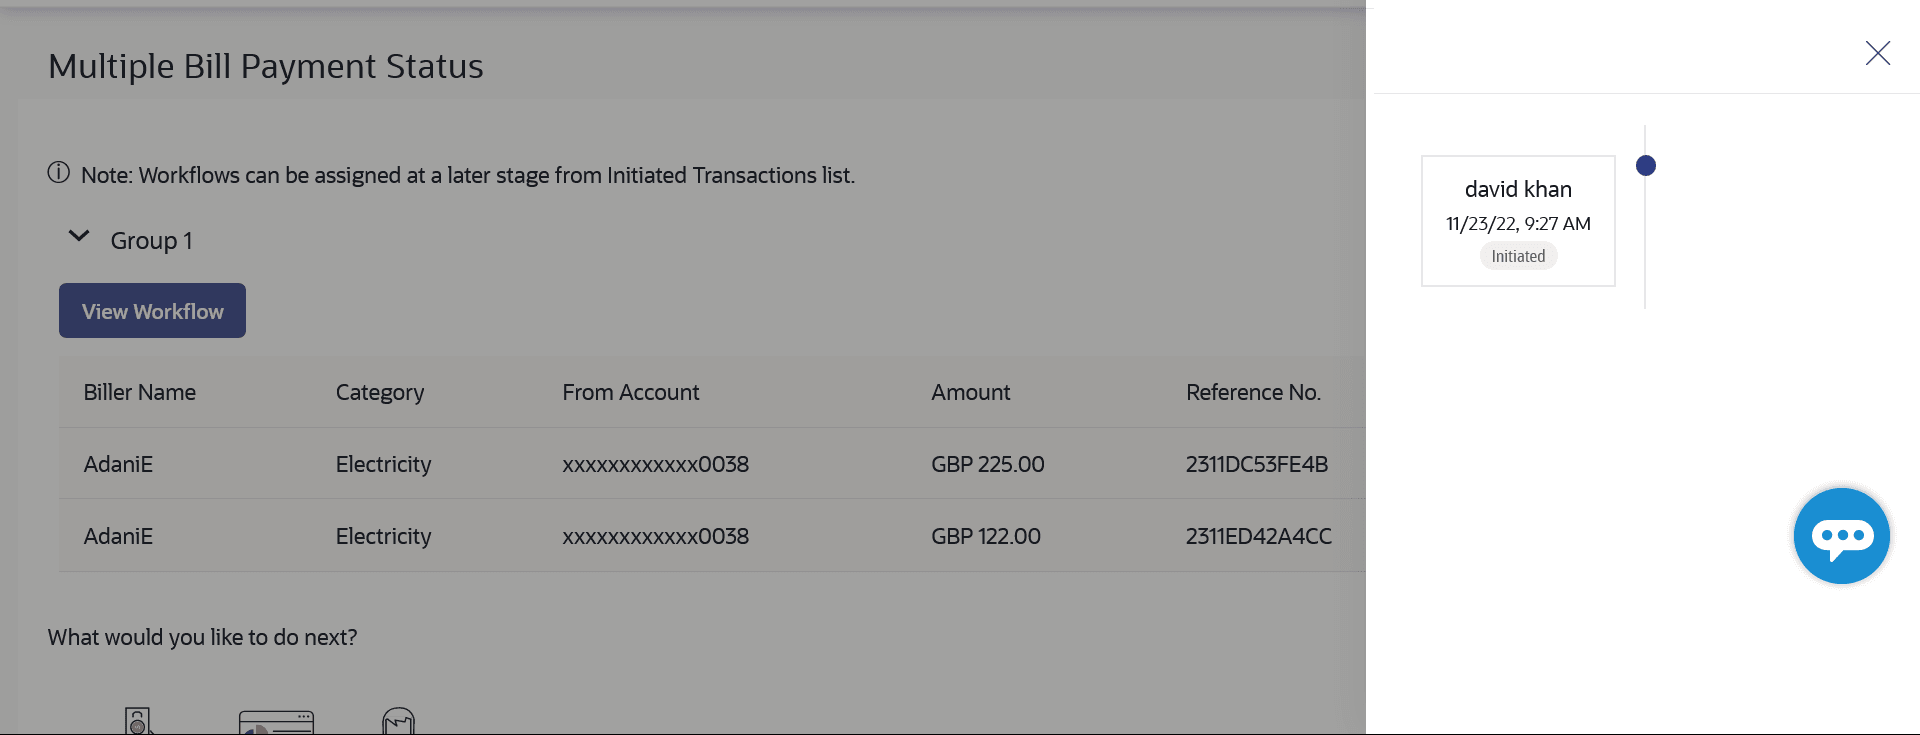
Click the icon to view the transaction journey of the selected workflow. In case
the user wants to assign the workflow at a later stage, then it can be achieved
from the ‘Initiated Transactions’ list.
Figure 3-13 Transaction journey of the workflow
- Click on the Assign link, and all the
resolved rules will be shown on an overlay.
The success message appears along with the reference number, status and payment details with workflow assigned for reference number.
- Perform one of the following actions:
- Click Pay Another Bill to pay another bills.
- Click Home to navigate to the dashboard.
- Click Add Biller to add the billers.
Parent topic: Billers
