6.6 Virtual Identifier Transaction Inquiry
Through this option, the user can search and view the Virtual Account transactions summary for the accessible Virtual Identifier. The user can also download the search results as a statement in a csv format. .
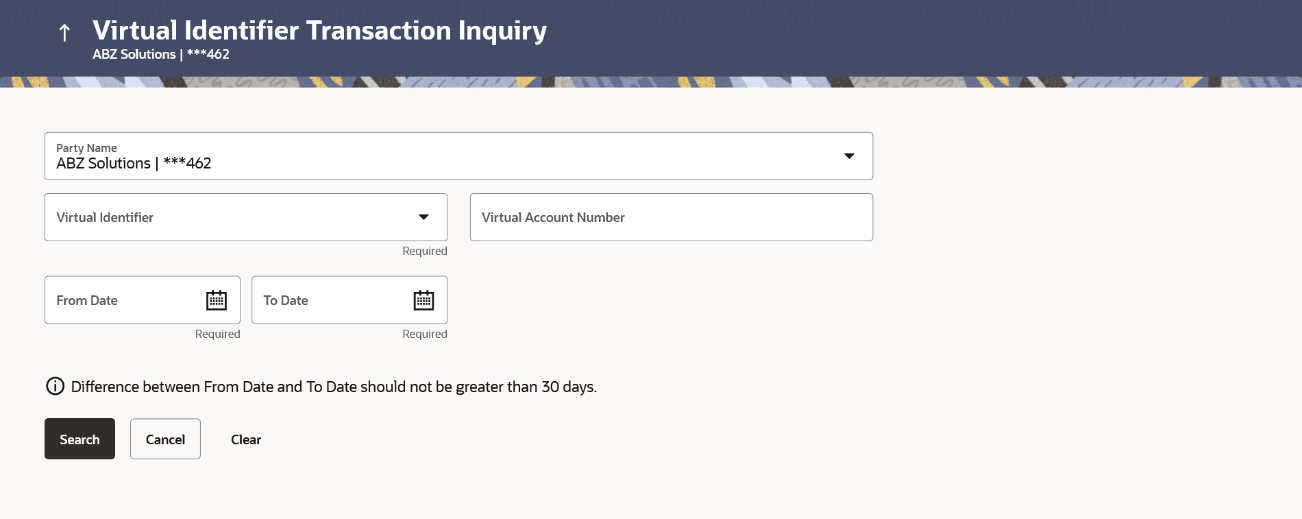
To view and download the Virtual Identifier Transaction Inquiry:- Perform the following navigation to access the screen:
- From the Dashboard, click Menu, and then click Virtual Account Management. From the Virtual Account Management, click Remittance ID, and then click Virtual Identifier Transaction Inquiry.
- In the Party Name field, select the party name and ID from the drop-down list.
- From the Virtual Identifier list, select the Virtual Identifier.
- In the Virtual Account Number field, enter the Virtual Account Number.
- In the From Date field, select the date from when the transactions must be fetched.
- In the To Date field, select the date till when the
transactions must be fetched.
Note:
It is mandatory to select the Virtual Identifier, From Date and To Date to get the search result. - User can perform any one following action: Click Search
to view Remittance ID.
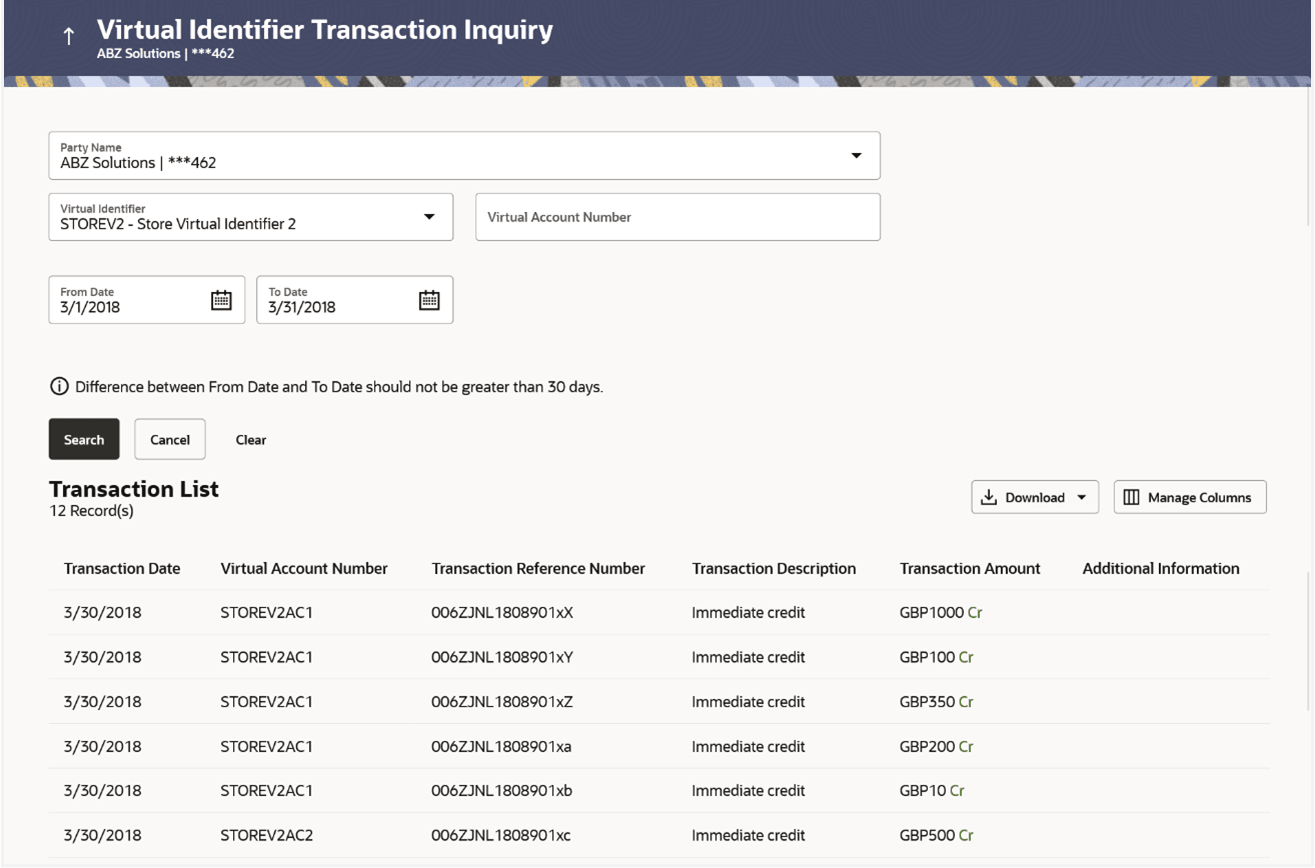
- Click Search. Based on search criteria, the search result appears.
- Click Clear to clear the search criteria.
- Click Cancel to cancel the transaction.
The Virtual Identifier transaction Inquiry screen appears.Note:
Fields marked asrequiredare mandatory.Table 6-5 Virtual Identifier Transaction Inquiry- Field Description
Field Description Party Name Select the party name and ID from the dropdown list to view the applicable Virtual Identifier for transaction inquiry.
By default, the primary party of the logged-in user is selected.
Note:
Based on the party name selection, the mapped Virtual Identifiers are displayed.Virtual Identifier Search and Select the Virtual Identifier. Note:
The user can view the Virtual Identifiers for which he has access to.Virtual Account Number Specify the Virtual account number for which the transaction has to be displayed.
Note:
All Virtual accounts (accessible and inaccessible) that are linked to the selected Virtual Identifier is displayed.From Date Select the date from when the transaction must be displayed for the selected virtual identifier. To Date Select the date till when the transaction must be displayed for the selected virtual identifier. Virtual Identifier Transaction Inquiry – Search Results
Figure 6-9 Virtual Identifier Transaction Inquiry – Search Results
Table 6-6 Virtual Identifier Transaction Inquiry- Field Description
Field Description Transaction Date Displays the date on which the transaction is processed.
Virtual Account Number Displays the virtual account number in which the transaction is processed.
Note:
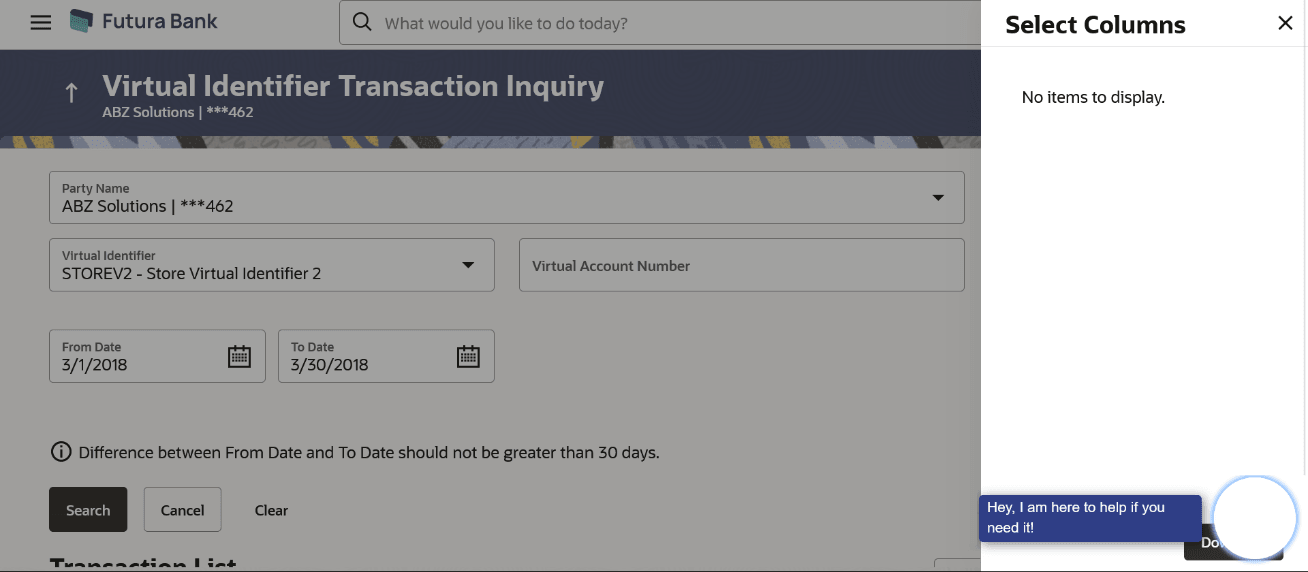
All Virtual accounts (accessible and inaccessible) that are linked to the selected Virtual Identifier is displayed.Transaction Reference Number Displays the reference number for the transaction. Transaction Description Displays the brief description of the transaction. Transaction Amount Displays the debit/credit amount of the transaction. Additional Information Displays the additional information about the transaction. - Click Download and select CSV option to download the transaction
summary in a csv format. The Select Columns overlay screen appears.
Figure 6-10 Virtual Identifier Transaction Inquiry – Select Columns
Note:
The columns cannot be customized since the entire file is directly downloaded from the host.
- Click Download to download the transaction summary in a csv format.
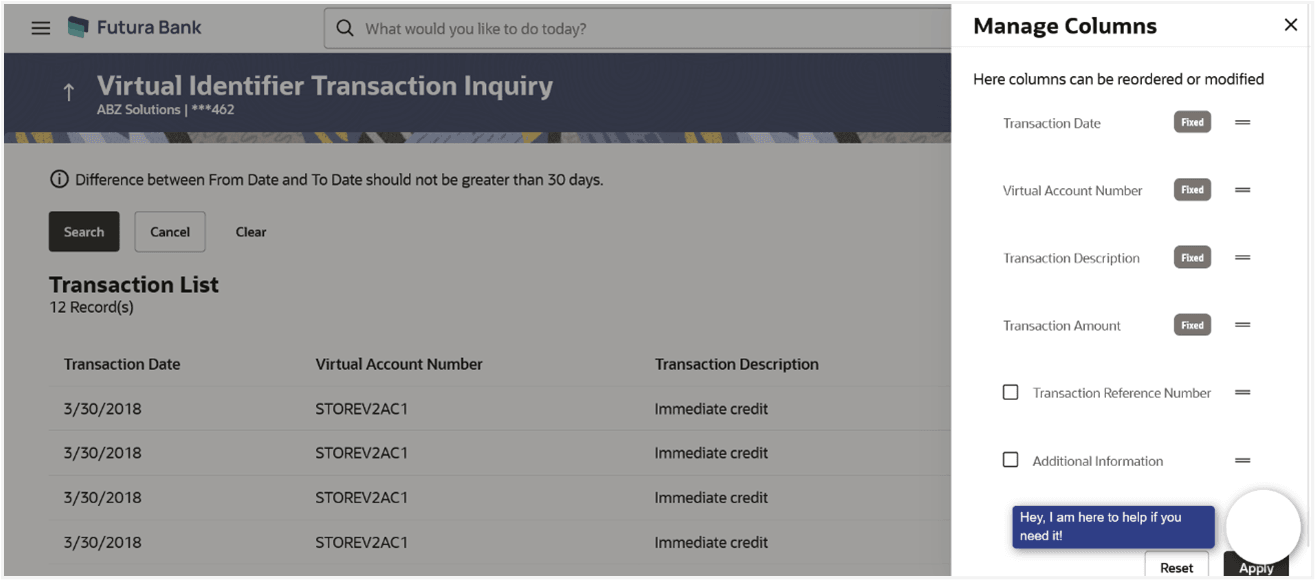
- Click Manage Columns to reorder, modify or save column
preferences in the search result. The Manage Columns overlay screen appears.
Figure 6-11 Virtual Identifier Transaction Inquiry – Manage Columns
- User can Perform any one of the following action:
- Click Apply to apply the modified column preferences.
- Click Reset to reset to the column preferences.
- Click Close to close the Remittance ID.
- Click Cancel to cancel the transaction.
- Click Back to navigate back to previous screen.
Parent topic: Remittance ID


