17.5 Acceptance of Import Collection - Attachments

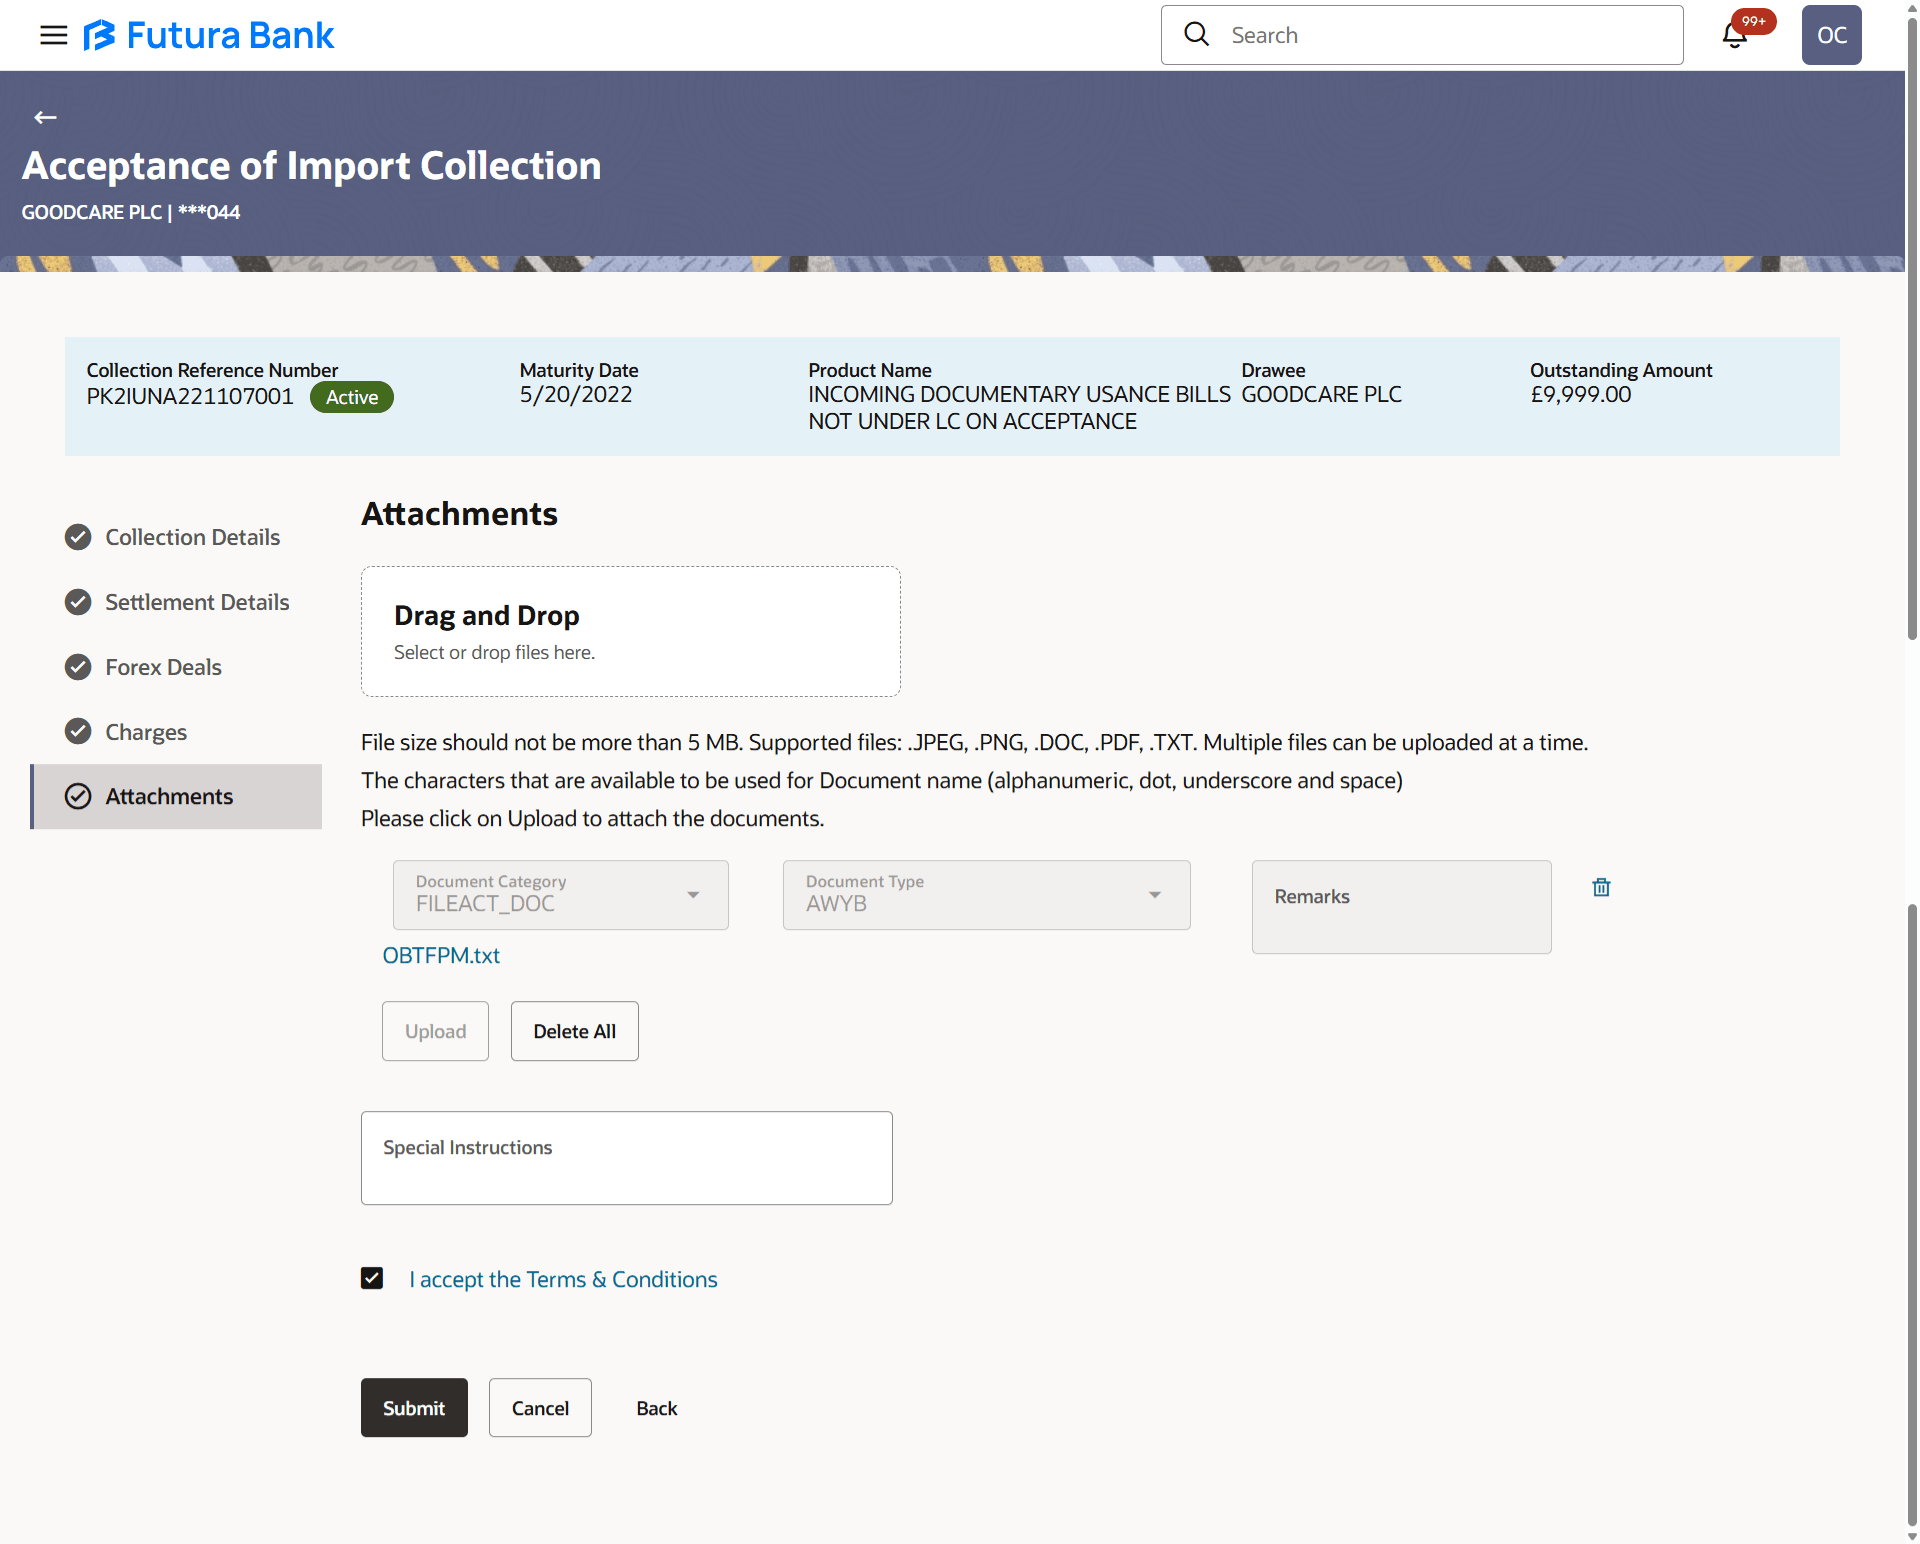
This topic provides the systematic instructions to capture the Attachments details in the application.

The user can attach documents to the Collections in this tab.

To Attach Documents:

  1. Specify the Collection Attachments details.

    Figure 17-6 Acceptance of Import Collection - Attachments


    Note:

    The fields which are marked as Required are manadatory.

    For more information refer to the field description table below:

    Table 17-5 Acceptance of Import Collection - Attachments - Field Description

    Field Name Description
    Drag and Drop Click to browse and select the file to be uploaded or drag and drop the file to be uploaded.
    Document Category Select the category of the document uploaded.
    Document Type Select the type of the document uploaded.
    Remarks Displays the notes added, if any, for attaching the document.
    Delete Click the icon to remove the attached document.
    Document Name Displays the name of the attached documents.

    Displays the link to download the attached document.

    Special Instructions Specify the special instructions that is to be passed to the bank.
    I accept the Terms and Conditions The option to accept standard terms and conditions of the bank.

    View the maintained standard terms and conditions by bank.

  2. Click Drag and Drop to browse and select the required document present on your computer.
    The Attach Document popup window appears
  3. Select the required document present on your computer to upload.
  4. Click Upload to upload document.
  5. Click Delete to remove the attached document.
  6. Click Delete All to delete all the attachments.
  7. Specify the special instructions if any in the Special Instructions field,
  8. Select the I accept the Terms and Conditions check box to accept the Terms and Conditions.
  9. Click Submit.
    The transaction is saved and the Acceptance of Import Collection – Review screen appears.
  10. Perform any one of the following actions:
    • Verify the details, and click Confirm.

      The success message bill settlement appears. Click OK,to complete the transaction.

    • Click Cancel to cancel the transaction.

      The Dashboard appears.

    • Click Back to go back to previous screen.