38.4 Transfer Letter of Credit - Documents and Conditions
This topic provides the systematic instructions to specify the Documents and Condition details in the application.
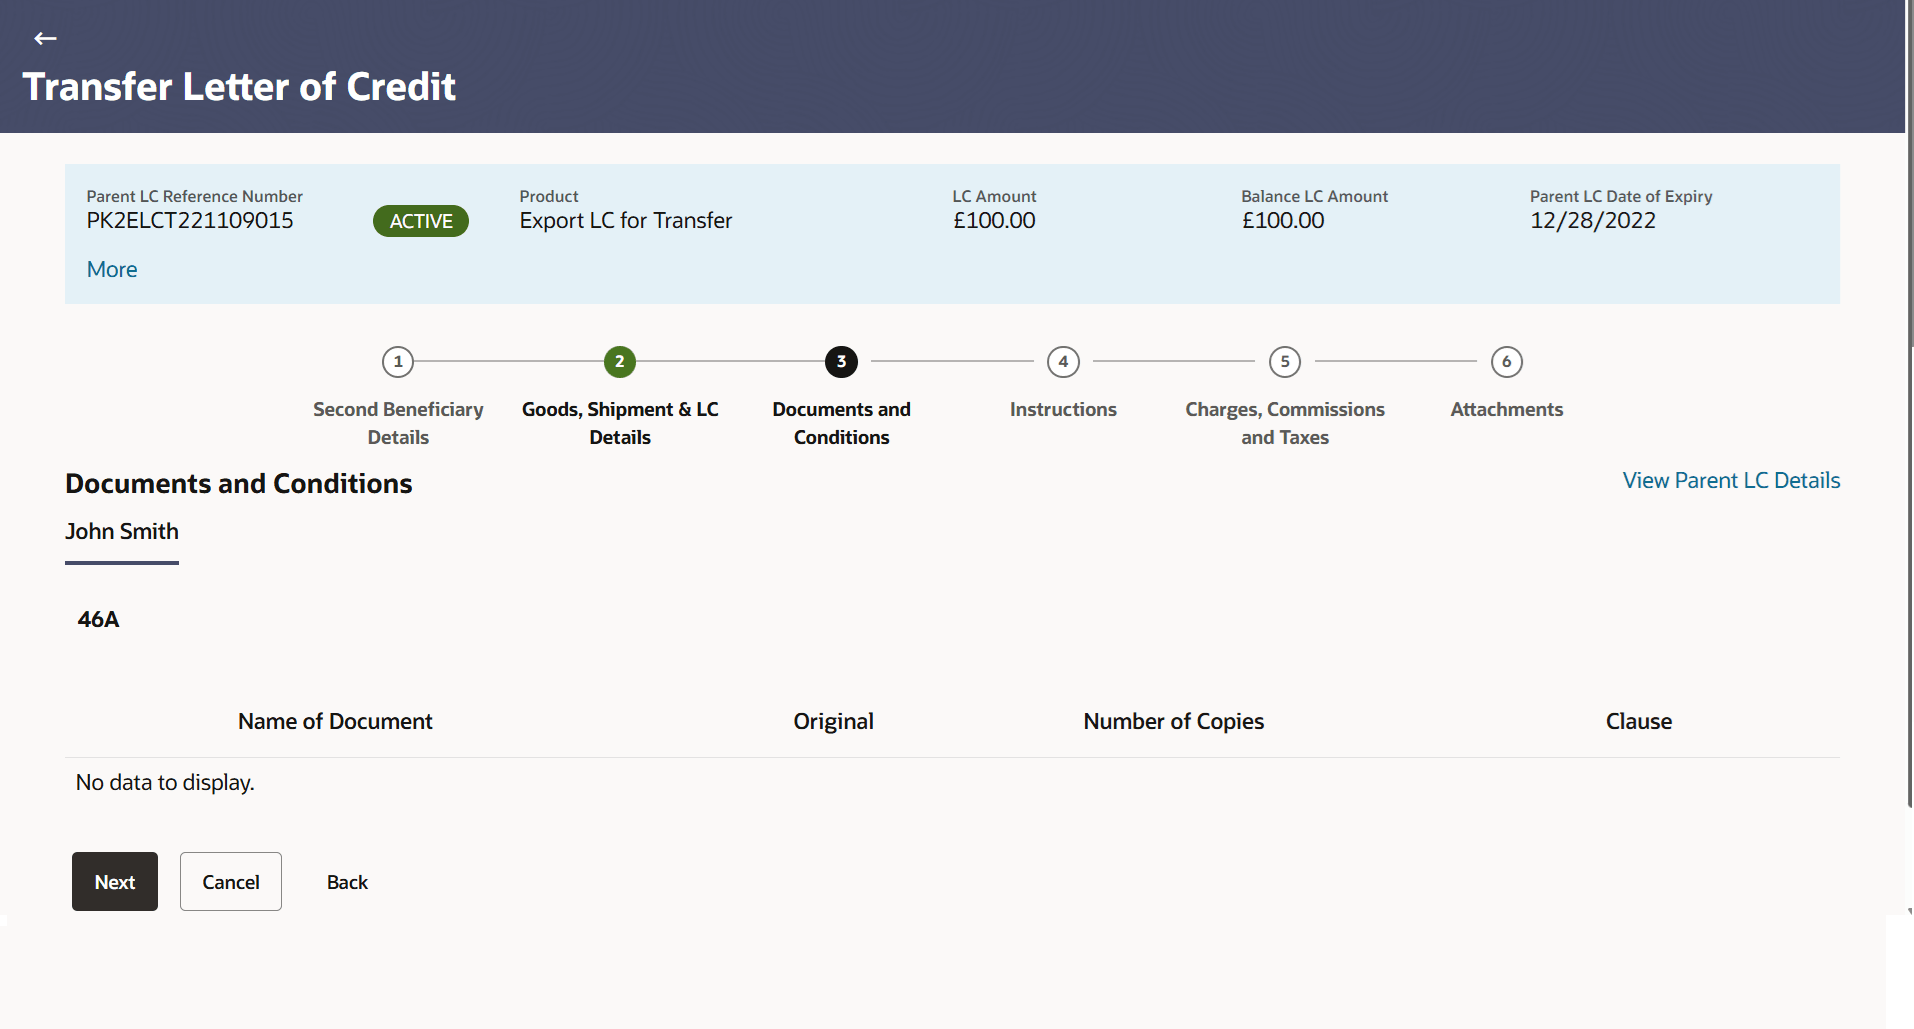
This tab includes the INCO terms (International Commercial Terms) and required document details along with the clauses list related to the documents. . The document list on this tab are populated based on the default LC product(s) mapped. It also provides an option to add a additional conditions in which corporate user can enter the details to have a clause customized to his/her requirement.
- Specify the Documents and Conditions details.
Figure 38-7 Transfer Letter of Credit - Documents and Conditions tab

Description of the illustration transfer-letter-credit-documents-and-condition.pngNote:
The fields which are marked as Required are manadatory.For more information refer to the field description table below:
Table 38-6 Transfer Letter of Credit - Documents and Conditions - Field Description
Field Name Description Name of Document Displays the name of the document to be sent along with the LC. Original Specify the required number of original documents required for the selected document. It is provided as m/n, where m out of n available documents would be submitted to bank.
Number of Copies Specify the required number of copies required for the selected document.. Clause The clauses maintained in the bank application for each of the document. A document can have multiple clauses. Click the View/Edit link to view the clause maintained in the bank application for each of the document or to modify as per needs.
- Date
- Period
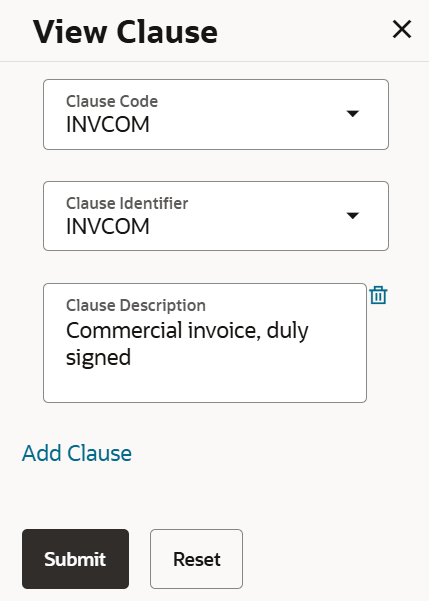
View Clause This section appears if you select a document and click the View Clause link. In this section a user can view already maintained clause or can modify them as per his needs. User can select the pre-maintained clause using the identifiers under each clause. In a blank clause, corporate user can enter the details to have a clause customized to his/her requirement.
Clause Specify the name of the clause. Identifier Select the maintained identifier of the conditions of the documentary credit. Clause Description Display the description and number of the selected clause. - Specify the number of originals required for the selected document in the Original field.
- Specify the number of copies required for the selected document in the Number of Copies field.
- In the Clauses section, list of clauses for each document will be listed and a check
box is available against various clauses, user can choose amongst various clauses. Select
the required clauses for each selected document and click the View/ Edit Clauses link. The
View Clause overlay screen appears, if the clause is already maintained.
- If Clauses are not maintained, click the Add Clause link.
For more information refer to the field description table below:
Table 38-7 View Clause - Field Description
Field Name Description Clause Code Select the clause code. Clause Identifier Select the clause identifer. Clause Description Displays the clause description based on selected clause code. The user can edit and delete the clause description, if required.
- Select the clause code, from the Clause list.
- Select the clause identifer, from the Identifier list.
- In the Clause Description field, view and modify the description of the clause, if required.
- Click
 to remove the clause description that are already added.
 - Perform any one of the following:
- Click Submit. The clause description are saved.
- Click Reset to reset and discard the changes.
- Click the Add Clause link to add a new clause.
- Perform any one of the following actions:
- Click Next to save the entered details and proceed to the next
level.
The Linkages tab appears in the Transfer Letter of Credit screen.
- Click Cancel to cancel the
transaction.
The Dashboard appears.
- Click Back to go back to previous screen.
- Click Next to save the entered details and proceed to the next
level.
Parent topic: Transfer Letter of Credit
