11.1 Add Positive Pay
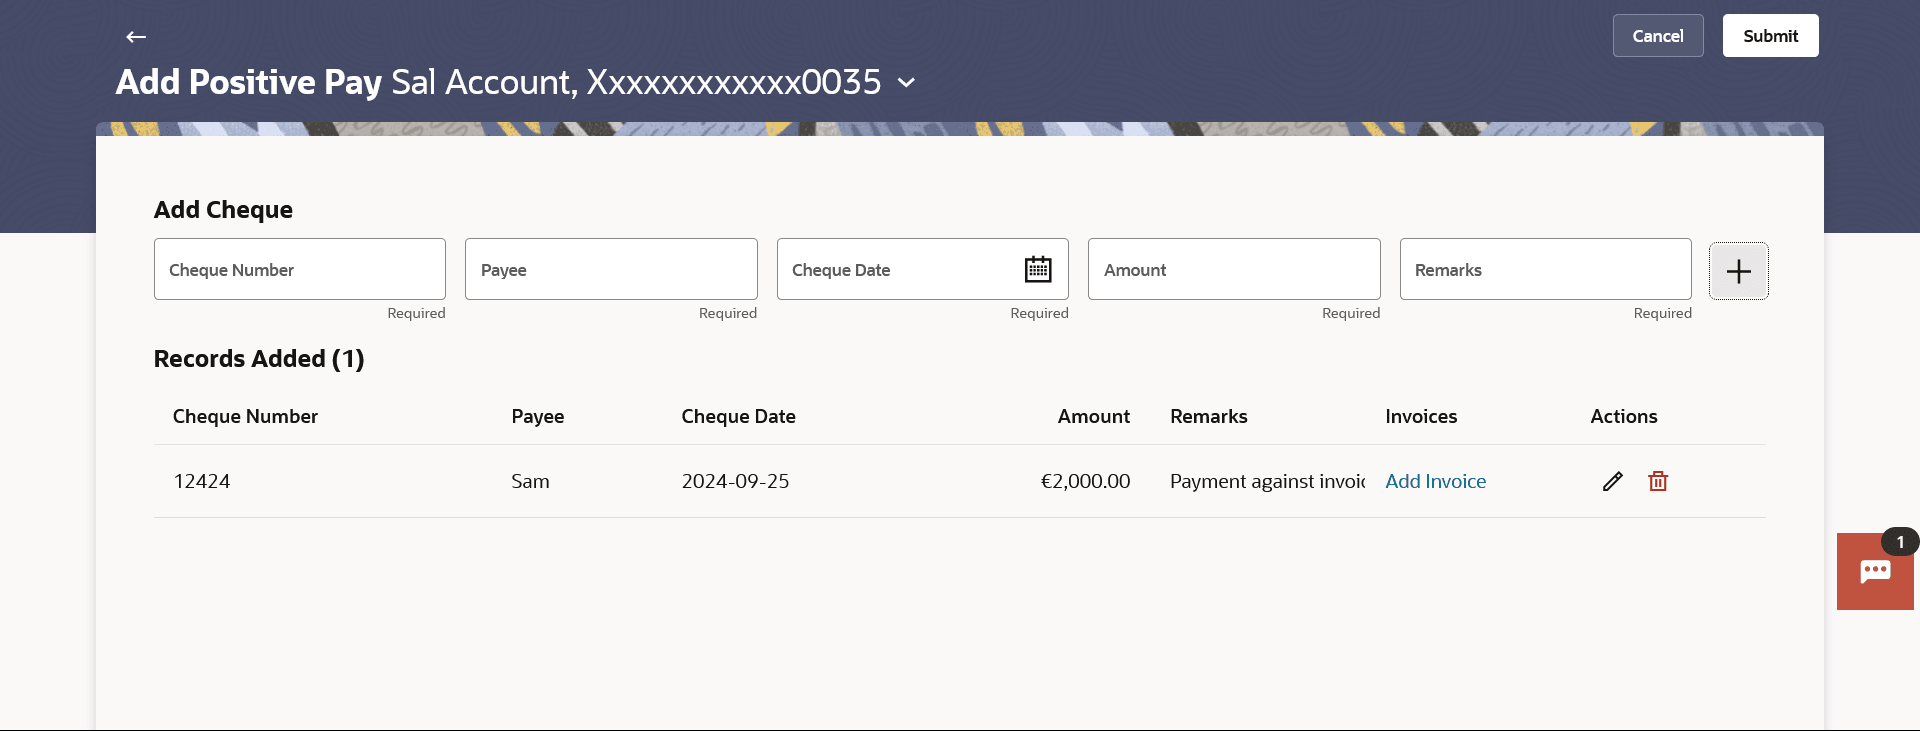
This topic describes the systematic instruction to Add Positive Pay screen. This option allow user to create Positive Pay request for the issued cheques.
When the cheque is presented to the bank for payment via CTS Clearing, the bank will compare the instrument details received against the details user send.
To create a positive pay requests:
- Perform anyone of the following navigation to access the Add Positive Pay screen.
- From the Dashboard, click Toggle menu, click Menu, then click Payments . Under Payments , then click More Actions, and then click Positive Pay, and then click Add Positive Pay.
- From the Search bar, type Positive Pay – Add Positive Payand press Enter.
- From the Debit Account Number list, select a CASA (Current select a CASA (Current Account and Savings Account) account from which payments is to be debited.
- Under the Add Cheque section.
- In the Cheque Number field, enter the cheque number of the cheque to be issued to the beneficiary.
- In the Payee field, enter the beneficiary’s name to whom cheque is issued.
- From the Cheque Date date picker list, select the cheque issuance date.
- In the Amount field, enter the cheque amount of the cheque to be issued to the beneficiary.
- In the Remark field, add comment related to cheque issuance.
- Click on the + icon to cheque details. The record gets added under the Records Added section.
Note:
Click on the + icon to add a new cheque detail record.
- Click on the
 icon against the cheque record to update the cheque record details.
 - The system enables the fields in editable mode.
- Update the details and click on the
 icon to save changes.
- Click on the X icon to cancel the changes.
- Click on the
 icon against the cheque record to delete the record.
Note:
The fields which are marked as Required are mandatory.For more information on fields, refer to the field description table.
Table 11-1 Add Positive Pay - Field Description
Field Name Description Debit Account Number A CASA (Current Account and Savings Account) account from which payments is to be debited. Add Cheque section Information specified in below fields are related to add cheque section. Cheque Number The cheque number of the cheque to be issued to the payee. Payee The payee’s name to whom cheque is issued. Cheque Date The cheque issuance date. Amount The cheque amount of the cheque to be issued to the payee. Remark The comment related to cheque issuance. Record Added section Information specified in below fields are related to record added section. Total count of record Displays the total number of cheque details added. Cheque Number The cheque number of the cheque to be issued to the payee. Payee The payee’s name to whom cheque is issued. Cheque Date The cheque issuance date. Amount The cheque amount of the cheque to be issued to the payee. Remark The comment related to cheque issuance. Invoices Displays the number of invoices added. Displays Add Invoice link in case of no invoice is added, click on the link to add invoice details.
Actions Actions can be performed against the record. The options are:
- Edit- to update the record details.
- Delete - to delete the record added
- Update the details and click on the
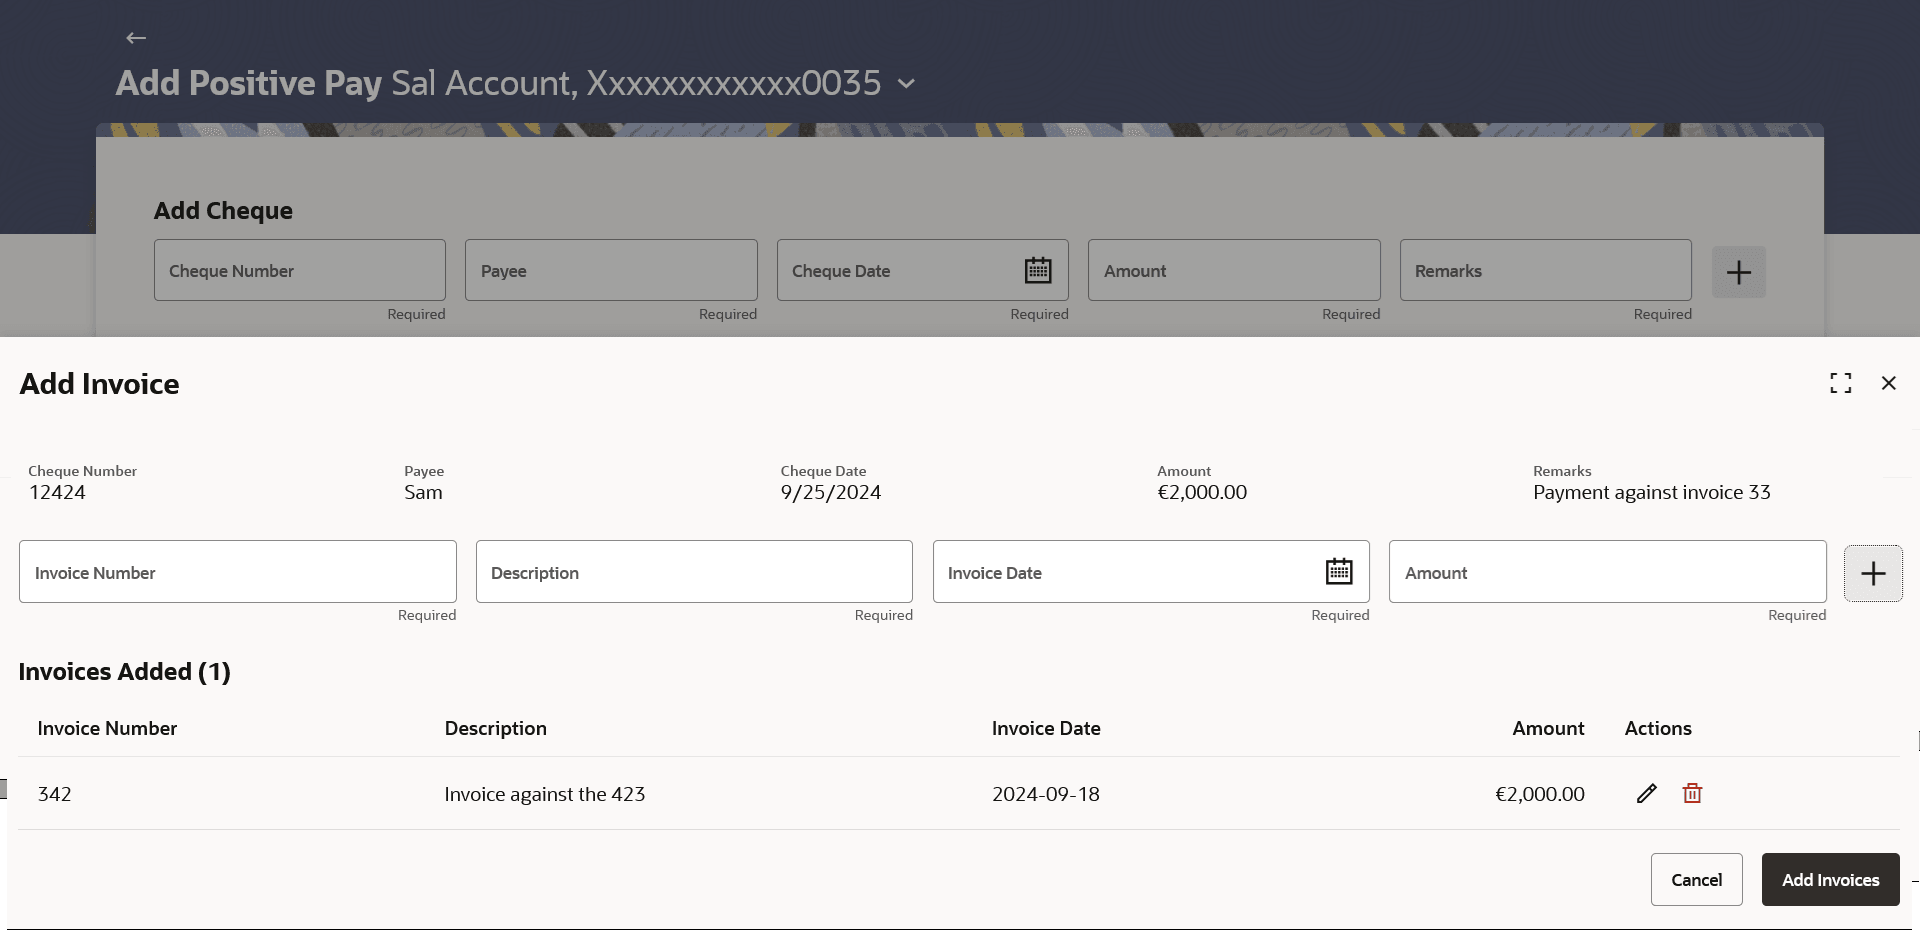
- Click on the Add Invoice link under Invoices column to add the
details. The Add Invoice popup appears.
- In the Invoice Number field, enter the invoice number associated with the cheque issuance.
- In the Description field, enter the description associated with the cheque issuance.
- From the Invoice Date date picker list, select the invoice date for the cheque issuance.
- In the Amount field, enter the cheque amount.
- Click on the + icon to add the new invoice detail record.
Note:
User can add multiple invoice details against a single issued cheque. - Click Add Invoices to save the invoices details.
Click Cancel to cancel the transaction.
Note:
The fields which are marked as Required are mandatory.For more information on fields, refer to the field description table.
Table 11-2 Invoices popup - Field Description
Field Description Invoice Number Number of the invoice as a supporting document against the issued cheque. Description Description added for the invoice created against the issued cheque. Invoice Date Date on which invoice is created. Amount Invoice amount. Actions Actions can be performed against the record. The options are:
- Edit- to update the record details.
- Delete - to delete the record added
- Perform anyone of the following actions:
- Click Submit to set the repeat transfer instruction.
- Click Cancel to cancel the transaction.
- Click Back to navigate back to previous screen.
- Perform anyone of the following actions:
- The Review screen appears. Verify the details and click Confirm.
- Click Cancel to cancel the transaction.
- Click Back to navigate back to previous screen.
The success message of Positive Pay completed appears along with the transfer request number, and Positive Pay Status.
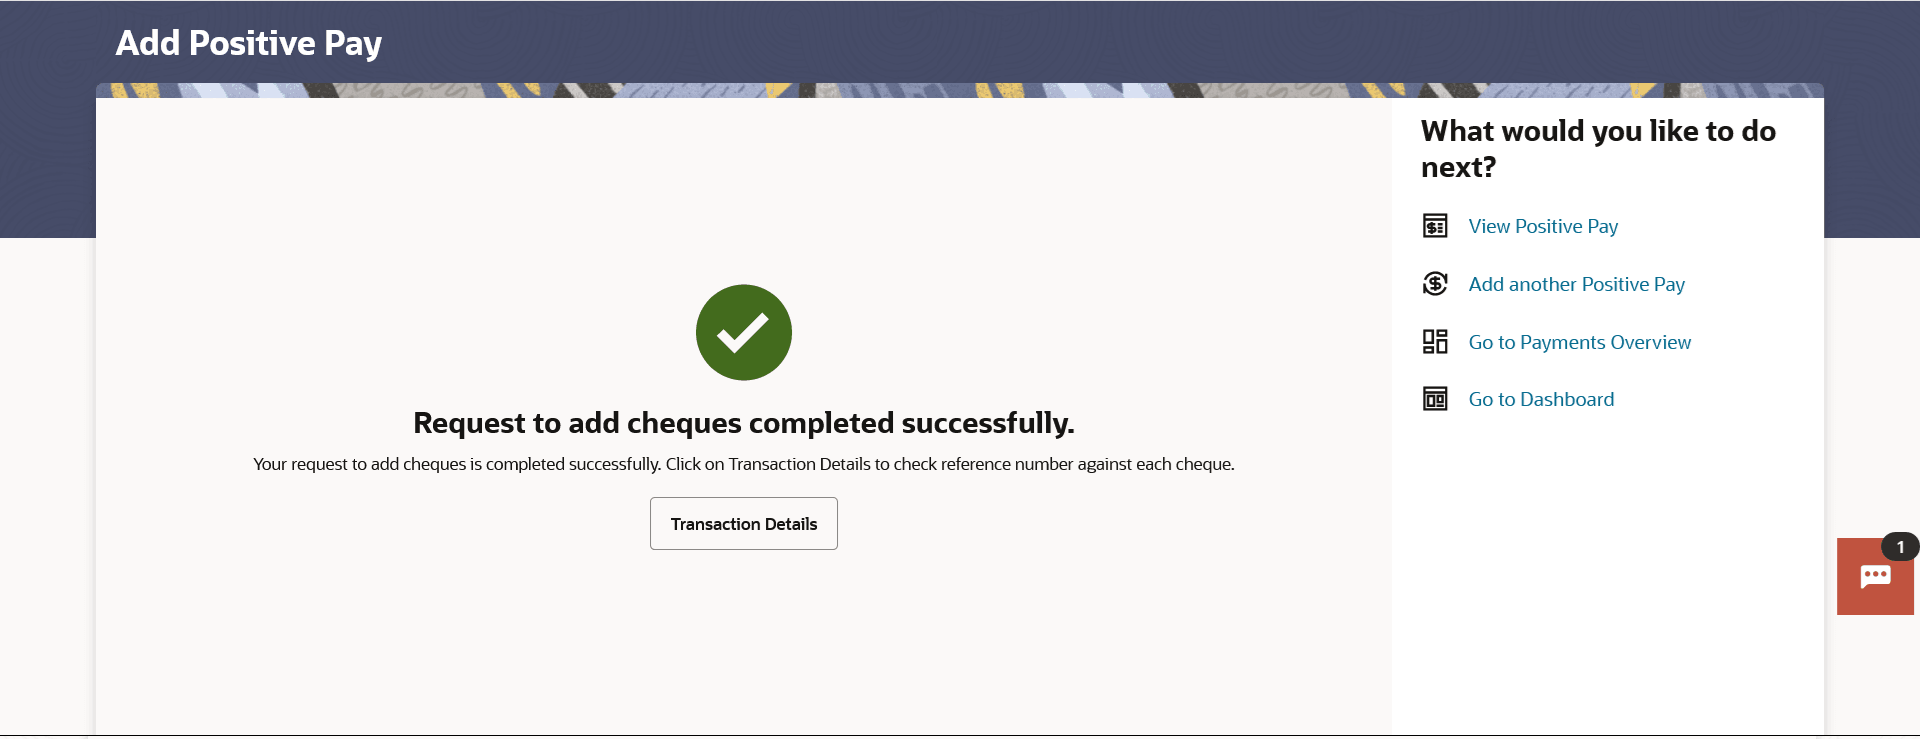
Figure 11-3 Positive Pay Confirmation screen
The success message of add cheques request appears.
- Perform anyone of the following actions:
- Click Transaction Details to view the details of the transaction.
- Click View Positive Pay to go to View Positive Pay screen.
- Click Make Another Positive Pay to initiate another request of adding cheque .
- Click Go to Dashboard to go to the Dashboard screen.
- Click Go to Payments Overview to go to the Payment Overview page.
Parent topic: Positive Pay


