3.9.1 User Report Mapping – Search & View
TThis topic provides the systematic instructions to corporate administrators for searching and viewing the reports mapped to a specific user.
To search and view the reports mapping:
- Navigate to the Group Corporate Profiling screen.
- In the Map Report to field, select the appropriate
option whose mapped reports to be viewed.Perform one of the following actions:
- If you select Group Corporate
option;
The system displays the report mapping summary at group corporate level.
- If you select User option;
- Enter the search criteria, click
Search.
The User Report Mapping screen with search results appears.
OR
Click Clear to clear the search parameters.
OR
Click Cancel to cancel the transaction.
- Enter the search criteria, click
Search.
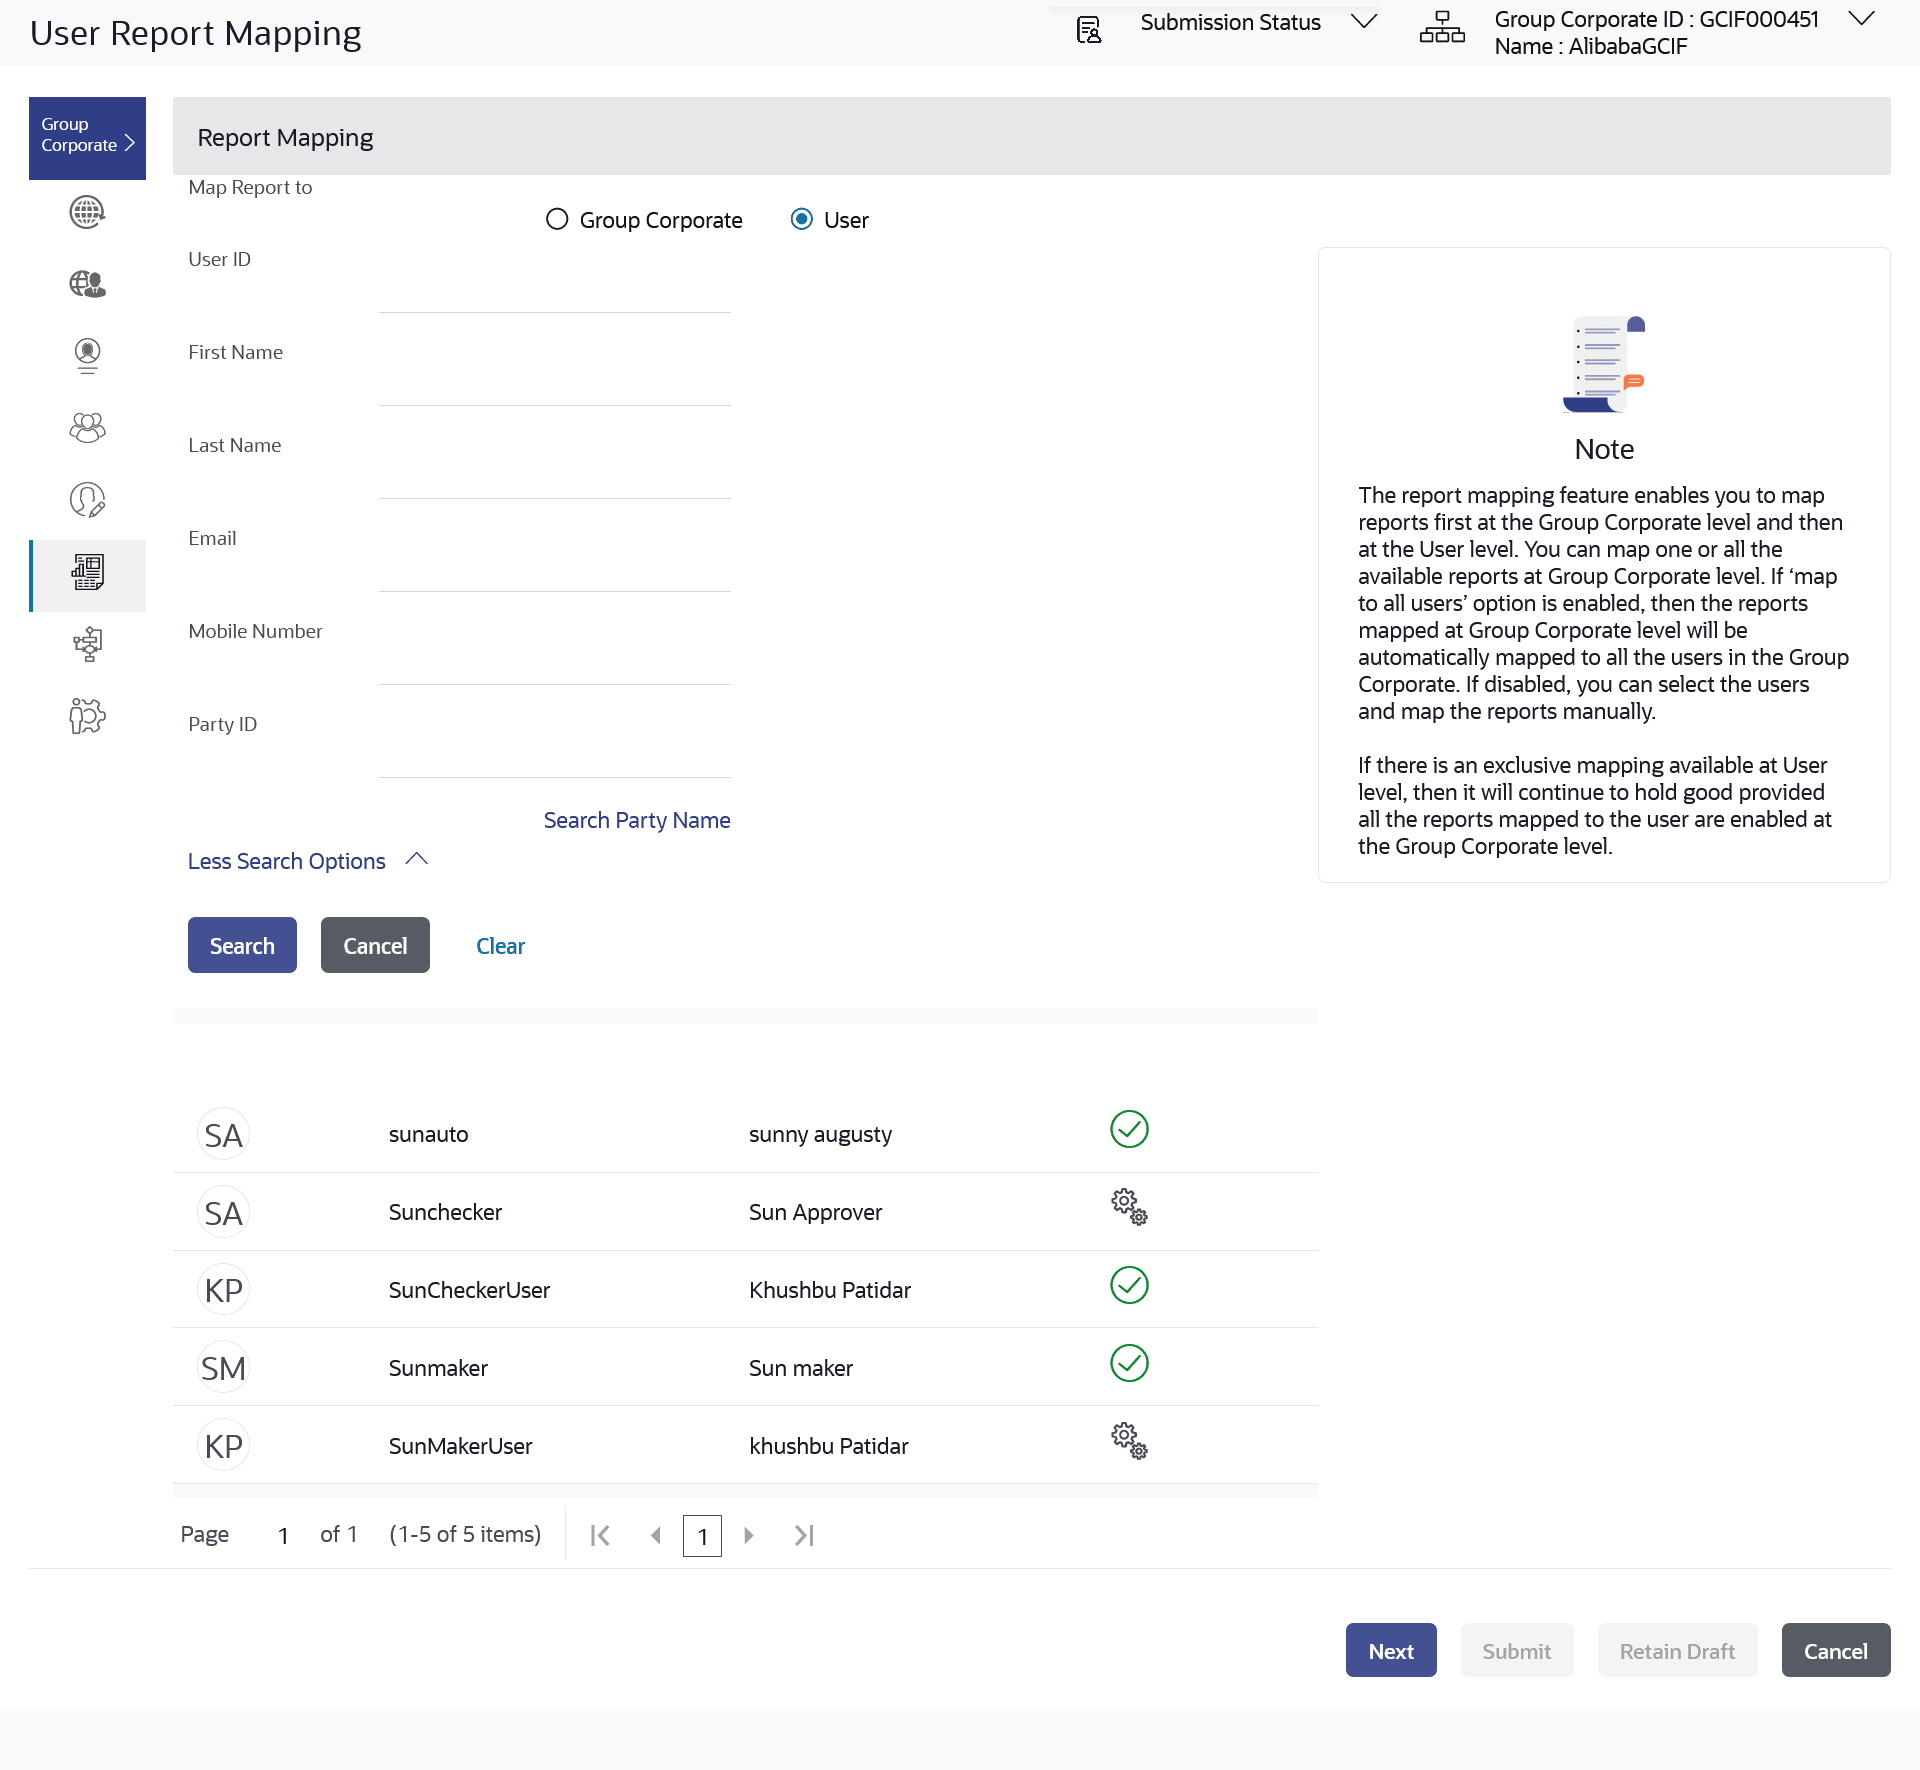
Figure 3-40 User Report Mapping - Mapping Summary (User Level)
Note:
The fields which are marked as Required are mandatory.For more information on fields, refer to the field description table.
Table 3-22 User Report Mapping - Mapping Summary (User Level)- Field Description
Field Name Description Map Report to Select the appropriate option whose mapped reports to be viewed. The options are:
- Group Corporate
- User
Below fields appears if you select User option in the Map Report to field. User ID To search the user with the user ID. Partial search is allowed. First Name To search the user with the user first name. Partial search is allowed. Last Name To search the user with the user last name. Partial search is allowed. Email To search the user with the email address of the user. Partial search is allowed. Mobile Number To search the user with the mobile number of the user. Partial search is allowed. Note:
User can select international subscriber dialing (ISD) code (country code) while selecting mobile number.Party ID To search the user with the party ID. Partial search is allowed. Search Result Initials The initials of the user. User ID User Id of the corporate user. User Details Name of the corporate user. Mapping Displays whether the file identifier is mapped to the user.  - denotes that the report is mapped to the
user
 - denotes that the report is not mapped to
the user.
- If you select Group Corporate
option;
- Click on the record to view the details.The User Report Mapping - View screen appears.
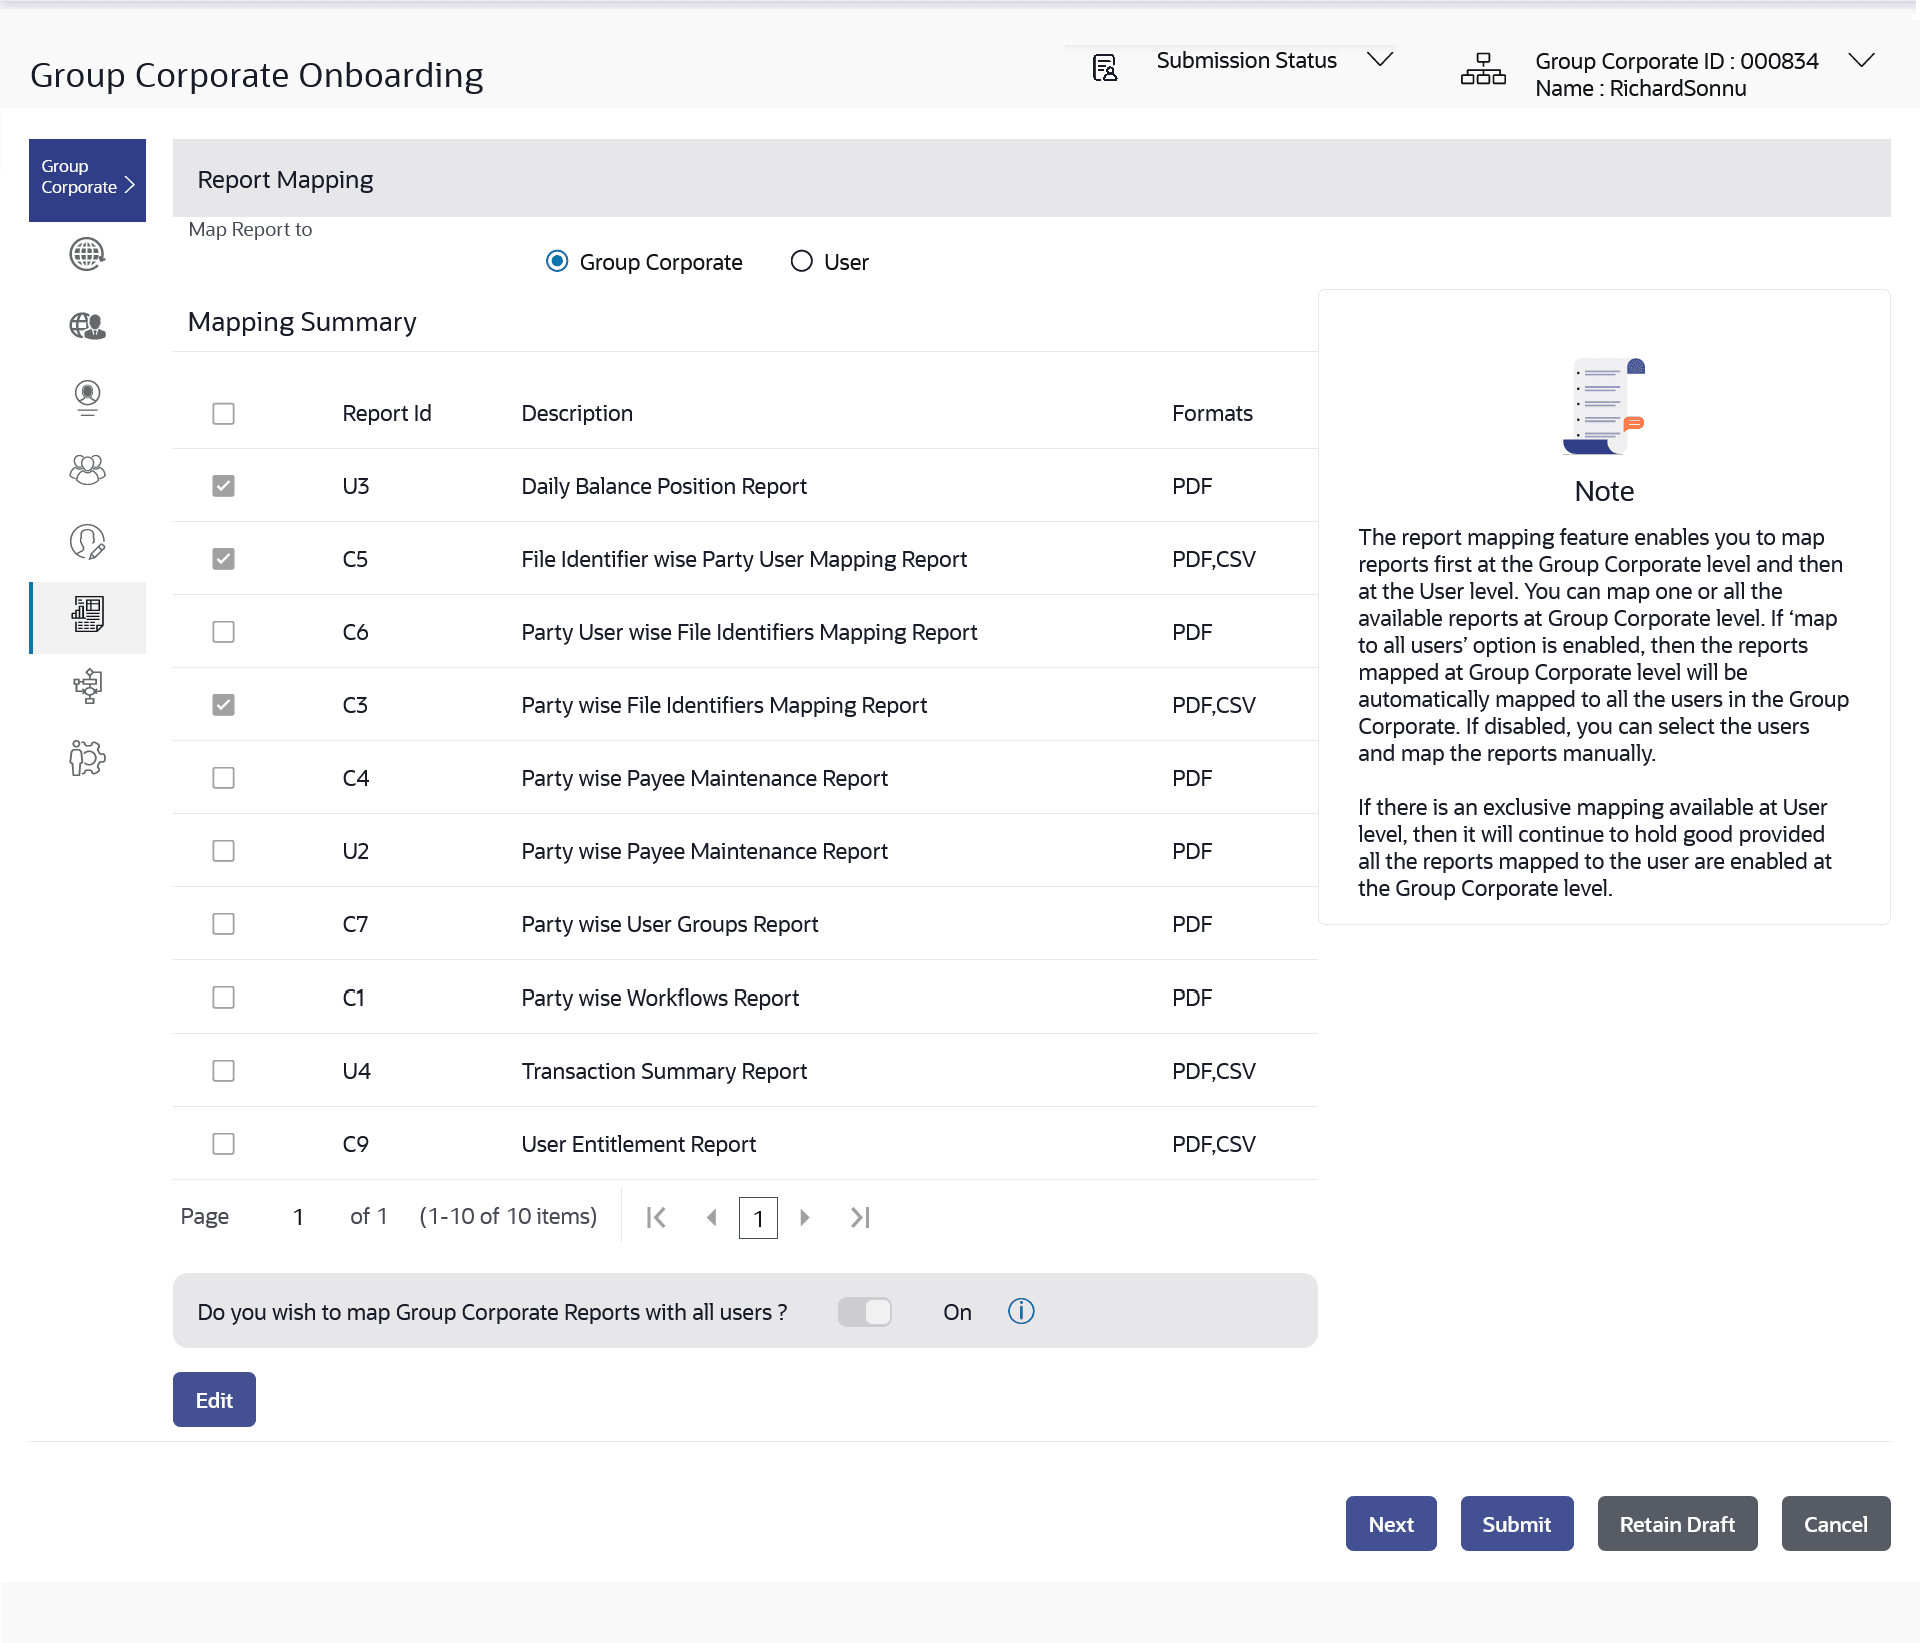
Figure 3-41 User Report Mapping – Mapping Summary (Group Corporate Level)
Note:
The fields which are marked as Required are mandatory.For more information on fields, refer to the field description table.
Table 3-23 User Report Mapping – Mapping Summary (Group Corporate Level)- Field Description
Field Name Description User ID User Id of the corporate user. Mapping Summary Report ID Unique id assigned to the mapped report. Description Description of the report. Formats Formats in which a report can be generated. - Perform one of the following actions:
- Click Edit to update the user report mapping.
- Click Back to navigate back to previous screen.
- Click Next to proceed to the next logical step.
- Click Submit to submit the steps performed so far for approval.
- Click Retain Draft to save the details entered as draft.
- Click Cancel to cancel the transaction.
Parent topic: Step 6: User Report Mapping

