7.1.1.3 Non-XA Enabled Data Source
This topic provides the systematic instructions to create the Non-XA enabled data source in the Weblogic application server.
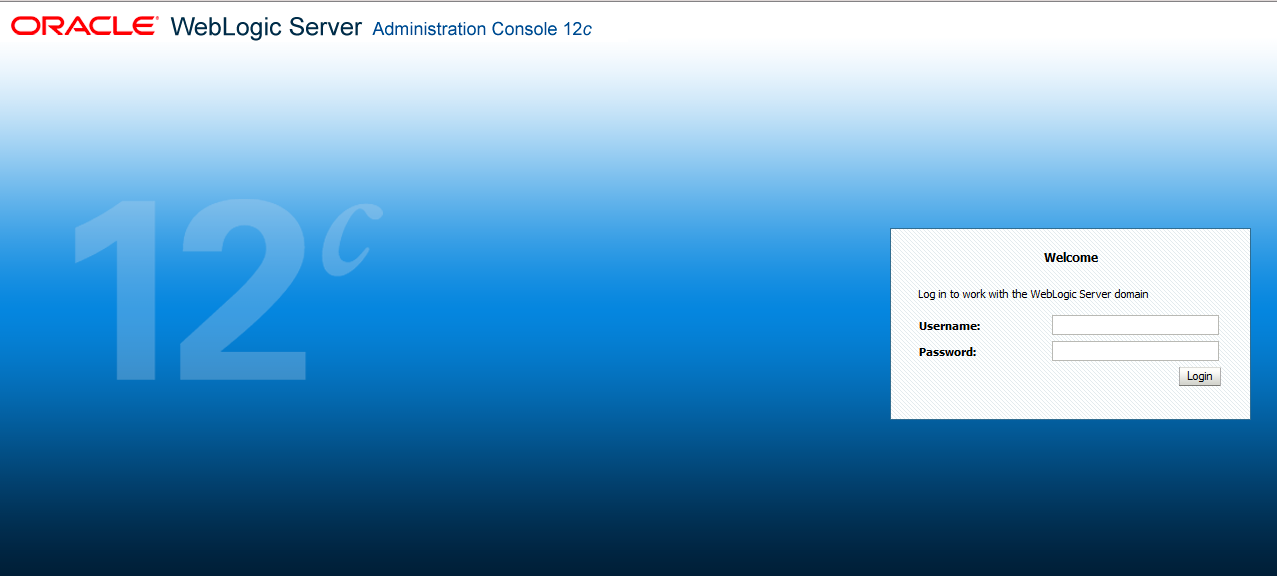
- Start the Administrative Console of the WebLogic application server. Enter the Oracle WebLogic Admin Console URL in the address bar in an internet browser. For example: http://10.10.10.10:1001/console.The Oracle Weblogic Server - Welcome screen displays.
Figure 7-14 Oracle Weblogic Server - Welcome
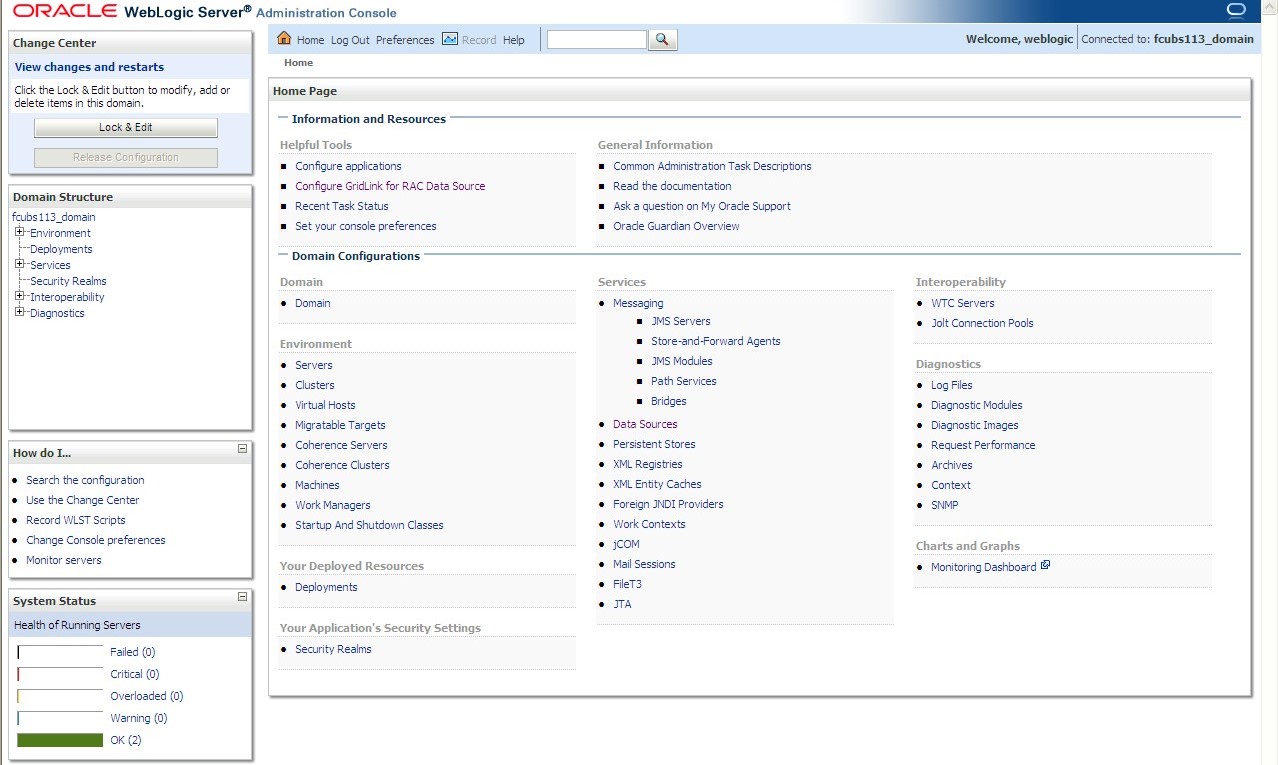
- Specify the WebLogic administrator Username, Password and click Log In.The Oracle Weblogic Server - Home Page screen displays.
Figure 7-15 Oracle Weblogic Server - Home Page
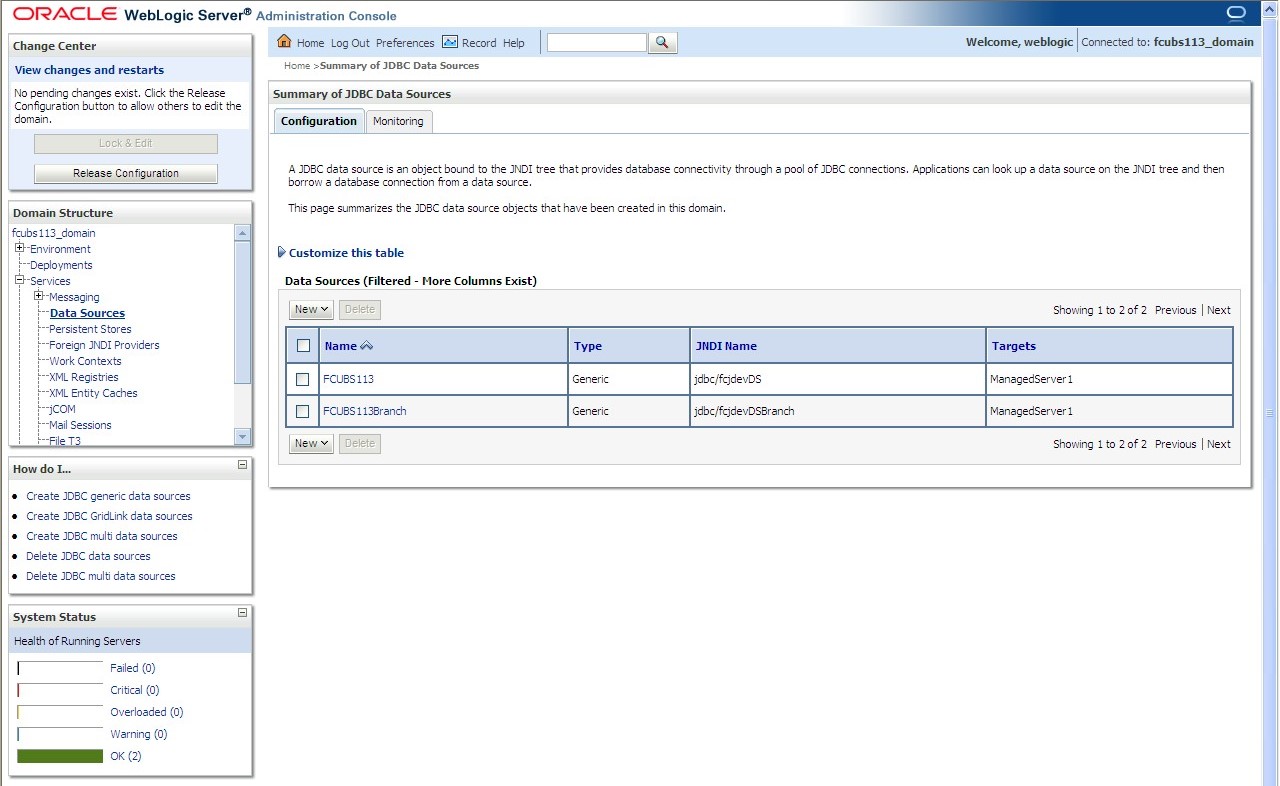
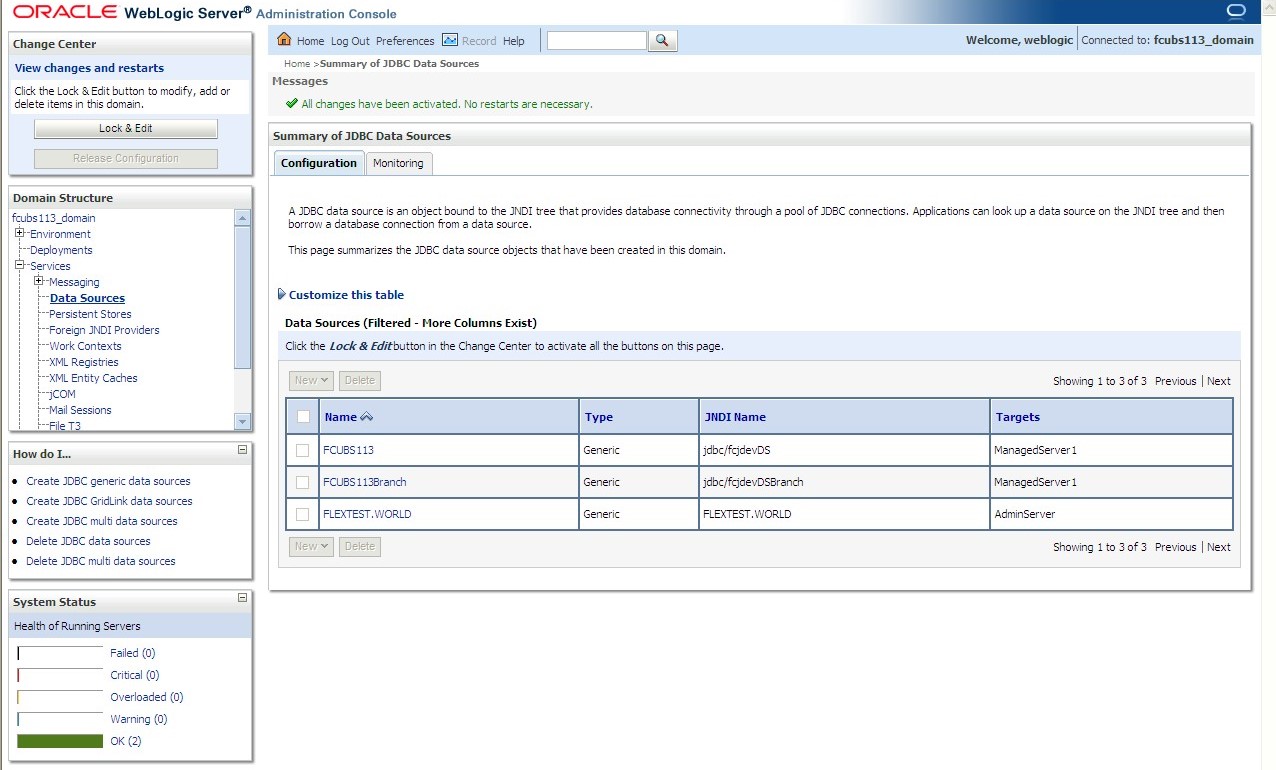
- Go to Data Sources.The Summary of JDBC Data Sources screen displays.
- On the left pane, under Domain Structure, expand Services and then Data Sources under it. Click the Lock & Edit button.The Summary of JDBC Data Sources - Configuration screen displays.
Figure 7-17 Summary of JDBC Data Sources - Configuration
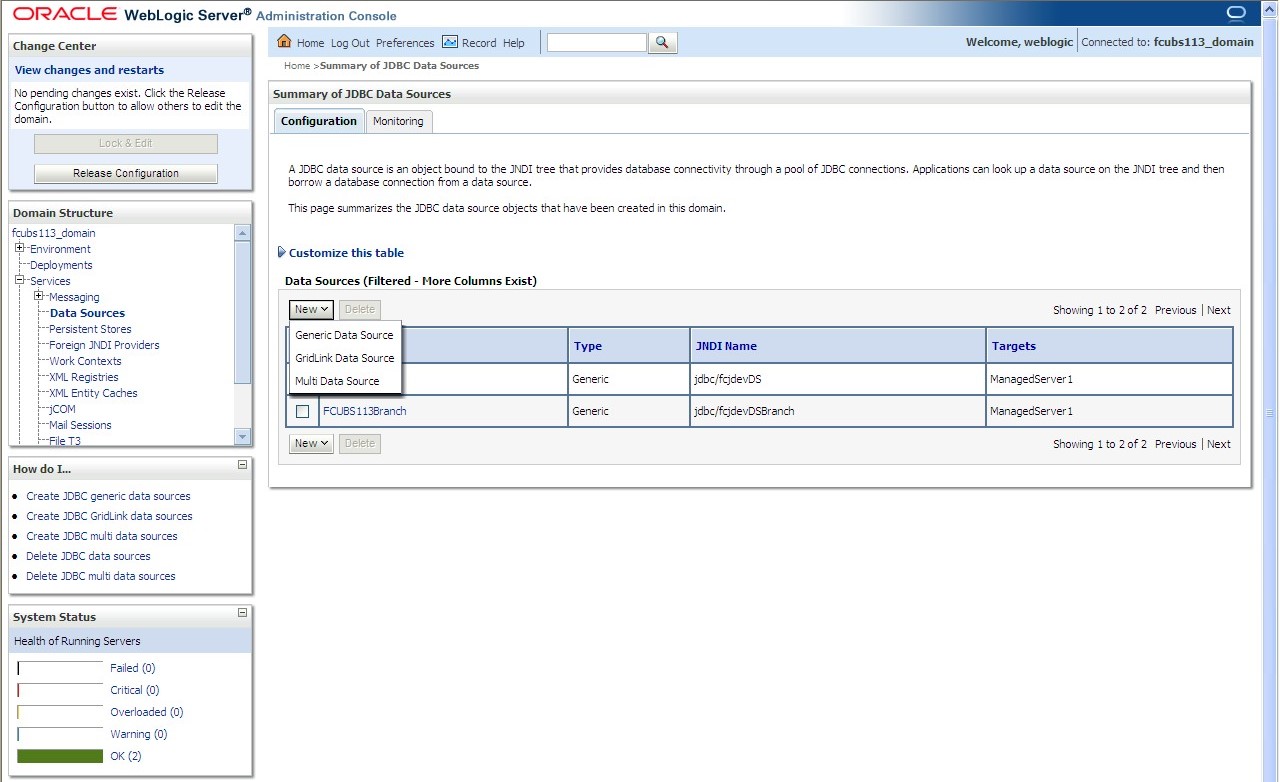
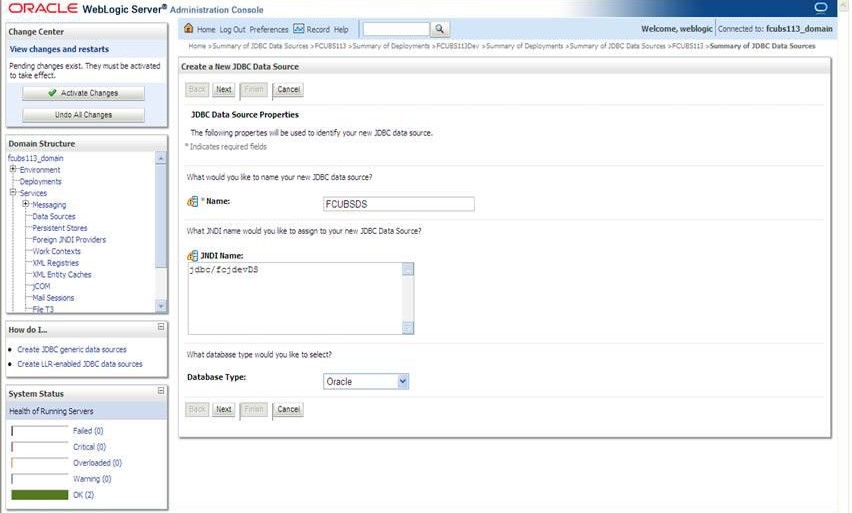
- To create a new data source, click New and select Generic Data Source from the drop-down.The Create a New JDBC Data Source screen displays.
For more information on fields, refer to the field description table.
Table 7-3 Create a New JDBC Data Source
Field Description JDBC Datasource Name Name of the Datasource. JNDI Name JNDI for lookup. Database Type Oracle - Click Next.The Create a New JDBC Data Source - JDBC Data Source Properties screen displays.
Figure 7-19 Create a New JDBC Data Source - JDBC Data Source Properties
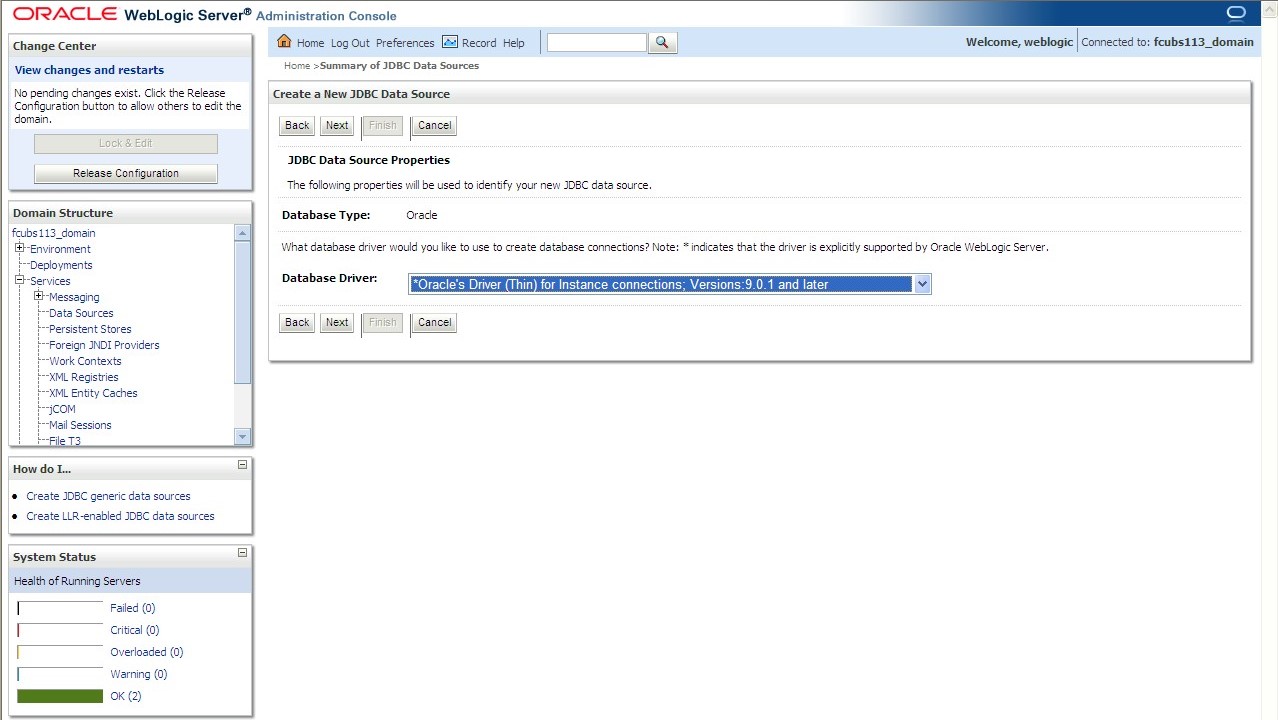
- Select the database driver from the drop-down list and click Next.The Create a New JDBC Data Source - Transaction Options screen displays.
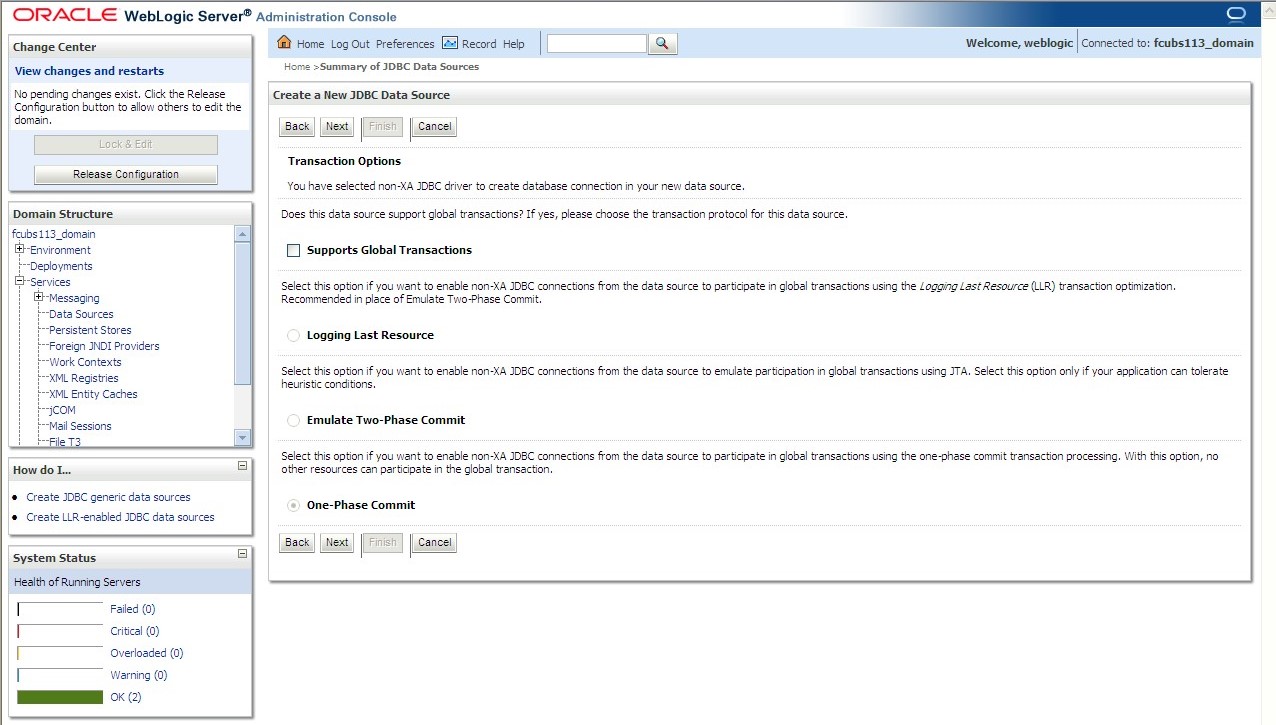
Figure 7-20 Create a New JDBC Data Source - Transaction Options
- Select Logging Last Resource then, uncheck Support Global Transactions and Click Next.The Create a New JDBC Data Source - Connection Properties screen displays.
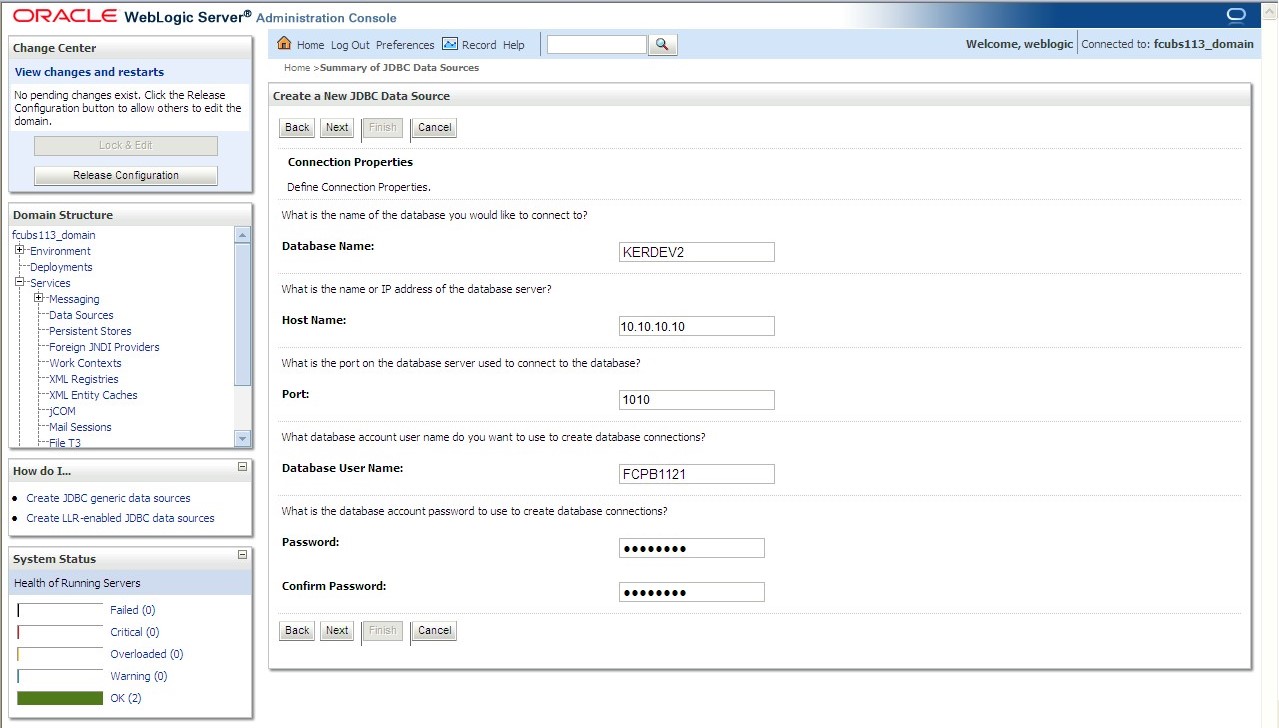
Figure 7-21 Create a New JDBC Data Source - Connection Properties
- The Create a New JDBC Data Source - Connection Properties defines the connection properties.
- Specify the Database Name, Host Name, Port of the database server to connect, Database User Name, Password, and Confirm the password.
- Click Next.The Create a New JDBC Data Source - Test Database Connection screen displays.
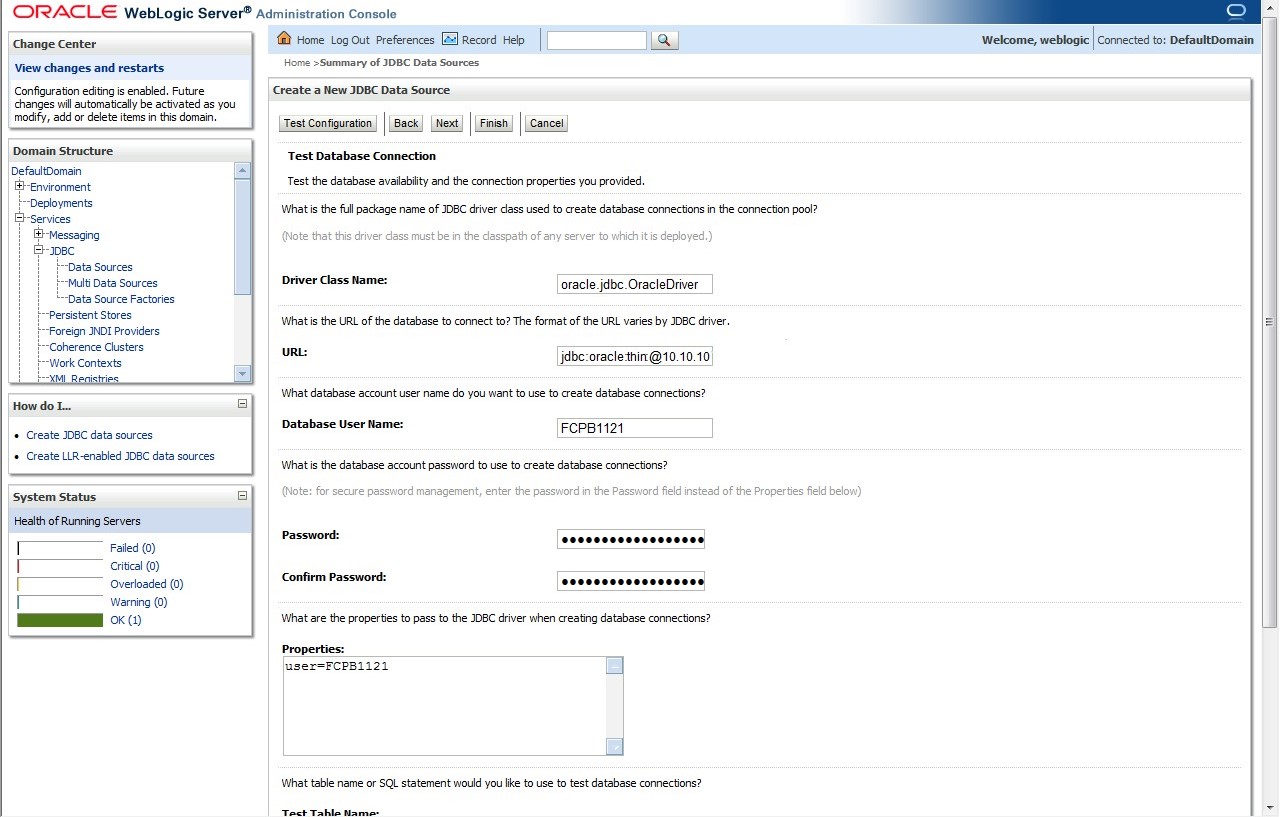
Figure 7-22 Create a New JDBC Data Source - Test Database Connection
- Specify the Driver Class Name (Eg: oracle.jdbc.OracleDriver).
- Specify the URL as jdbc:oracle:oci:@10.10.10.10:1010:<INSTANCE_NAME> from jdbc:oracle:thin:@10.10.10.10:1001<INSTANCE_NAME>.If the target database is Autonomous Database then, the URL Format to connect to Autonomous Database must be as follows: Jdbc:oracle:thin:@<Database Service Connect string >?TNS_ADMIN=<TNS ADMIN PATH>
- Specify the Database Username (Eg: testdb) and password.
- Confirm the password.
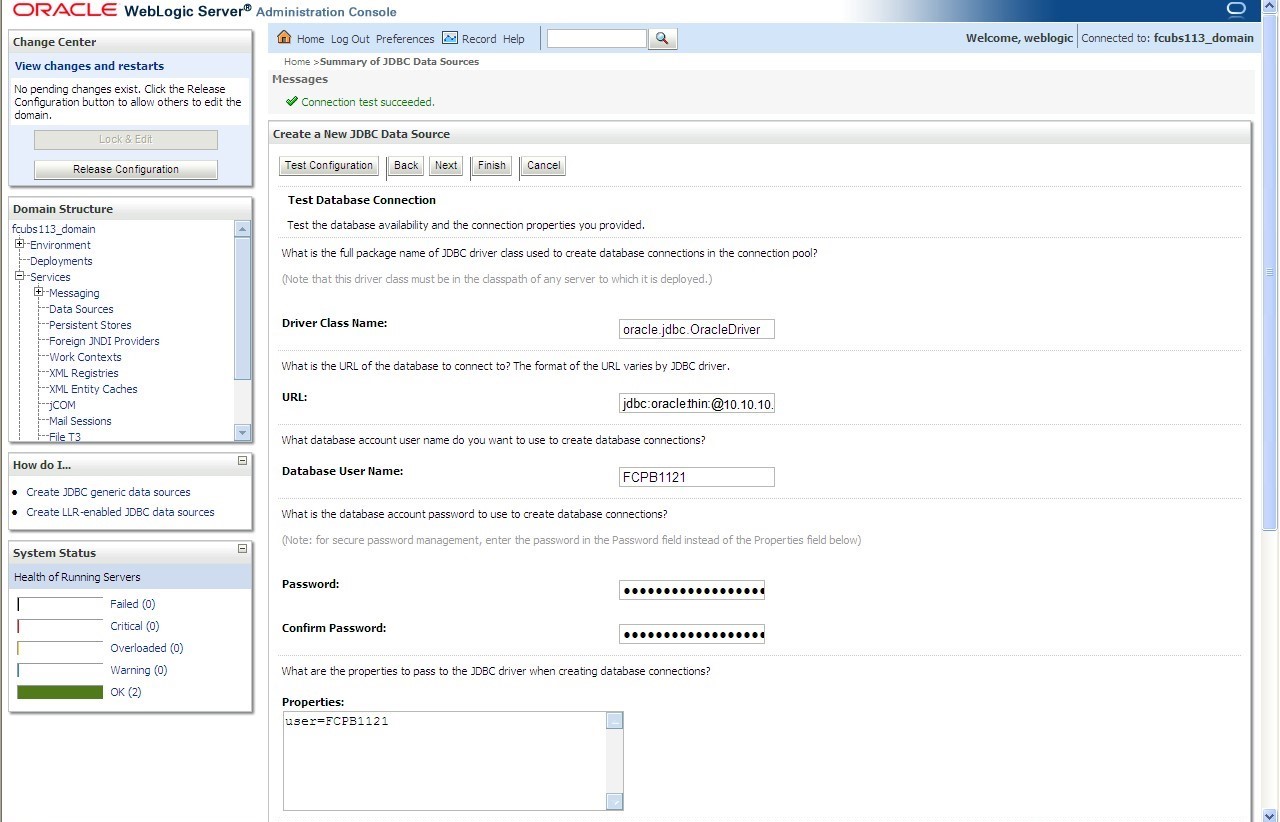
- Click on Test Configuration button.If the connection is established successfully, a message displays on the Create a New JDBC Data Source - Messages screen confirming that Connection test succeeded.
Figure 7-23 Create a New JDBC Data Source - Message
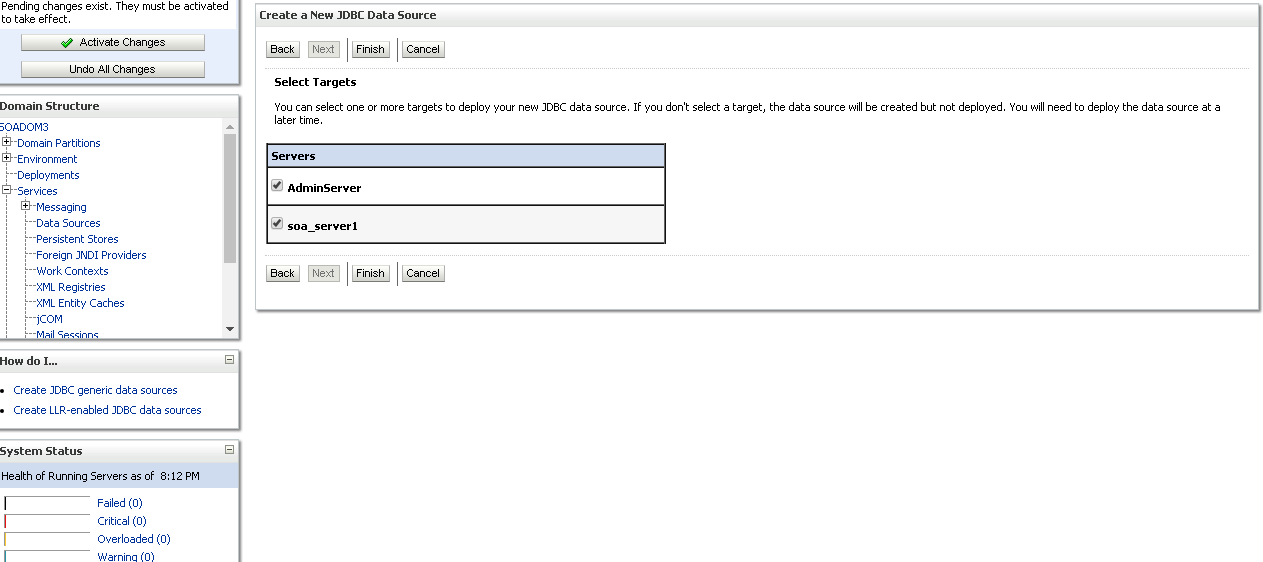
- Click Next.The Create a New JDBC Data Source - Select Targets screen displays.
Figure 7-24 Create a New JDBC Data Source - Select Targets
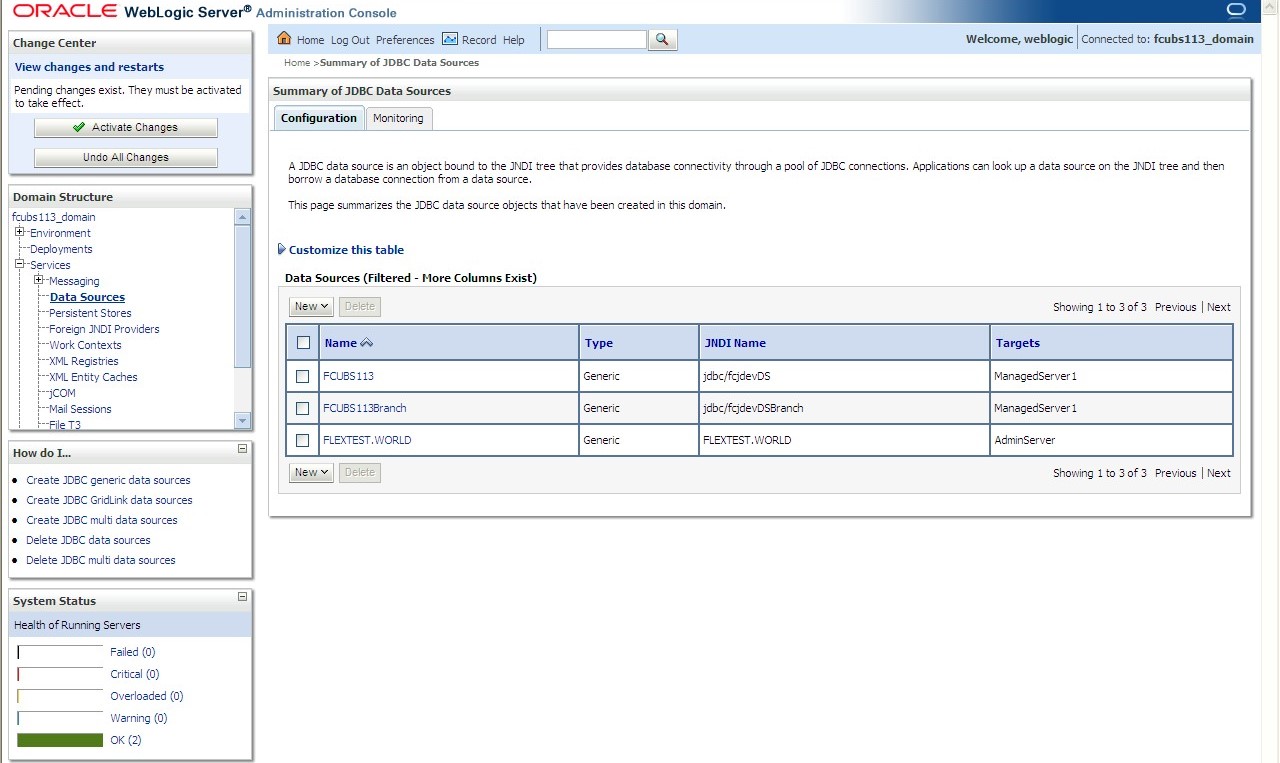
- Select the check boxes against the required servers(for data source jdbc/fcjdevDS, it is mandatory to select the admin server check box as well as the application-deployed server) and click Finish.The Summary of JDBC Data Sources - New Data Source screen displays.
Figure 7-25 Summary of JDBC Data Sources - New Data Source
- Click the Activate Changes button on the left pane.The message displays on the Summary of JDBC Data Sources - Activate Changes Message screen confirming that All the changes have been activated. No restarts are necessary.
Figure 7-26 Summary of JDBC Data Sources - Activate Changes Message
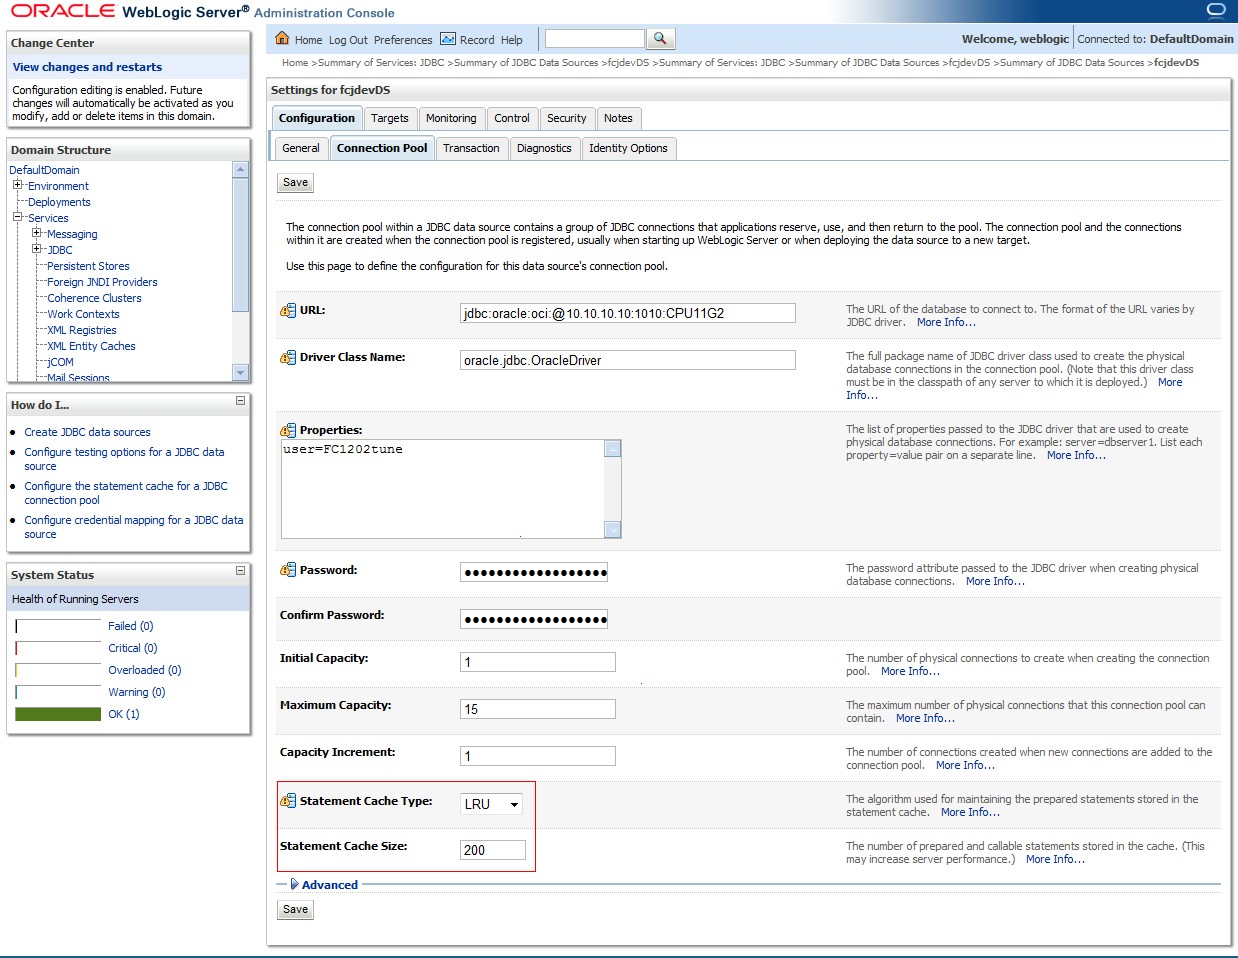
- Click the Datasource, and then click on the Connection Pool tab.The Settings for fcjdevDS - Connection Pool screen displays.
Figure 7-27 Settings for fcjdevDS - Connection Pool
- On the Settings for fcjdevDS - Connection Pool screen, select the statement cache type as LRU from the drop-down list.
- Specify the statement cache size as 200.
- Click Save button.
- Refer to the Resources to be created guide for the list of Non-XA data sources to be created.
Note:
- You need to create another data source for Oracle FCUBS with the JNDI name ‘_ASYNC’ for the batch process. For example, if the Oracle FCUBS HOST Non-XA data source JNDI name is jdbc/fcjdevDS, then you need to create another data source for FCUBS with the JNDI name jdbc/fcjdevDS_ASYNC.
- While creating a branch using the Branch Parameters Maintenance (STDBRANC) screen, if you have created a data source for the branch, then you need to create a corresponding ASYNC data source with the JNDI name _ASYNC.
- You need to create another data source for Oracle ELCM with the JNDI name _EL. For example, if the Oracle FCUBS HOST Non-XA data source JNDI name is jdbc/fcjdevDS then, you need to create another data source for FCUBS with the JNDI name jdbc/fcjdevDS_EL. Ensure that the checkbox Support Global Transaction is checked and select Emulate Two-Phase Commit for the ELCM data source.
The following is the list of data sources that can be created depending on the requirement.For more information, refer to the Resources to be created guide.
Table 7-4 List of Data Sources
Purpose Datasource Name JNDI Name FCUBS FCUBS_Data source jdbc/fcjdevDS SMS SMS_Datasource jdbc/fcjdevDSSMS VAMS VAMS_DATASOURCE jdbc/fcvamDS Gateway FLEXTEST.WORLD FLEXTEST.WORLD Async data source FCUBS DS_ASYNC jdbc/fcjdevDS_ASYNC Scheduler Scheduler_Datasource jdbc/fcjSchedulerDS
Parent topic: Create Data Source
