8.6.2 Create Work Manager

This topic explains systematic instructions to create the work manager.

Create a new work manager with the name GWMDBWM (as mentioned in the property file) by below steps -
  1. Log in to the WebLogic console, and navigate to the Domain Structure, click Environment and then click Work Managers.
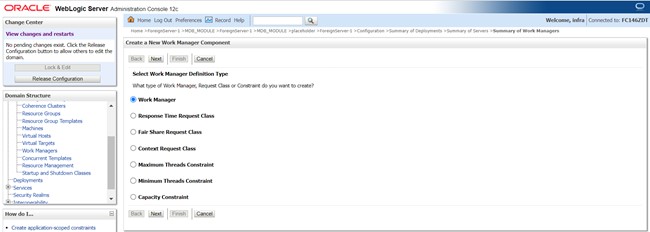
    The Create a New Work Manager Component screen displays.

    Figure 8-8 Create a New Work Manager Component


  2. Select Work Manager, and then click Next.
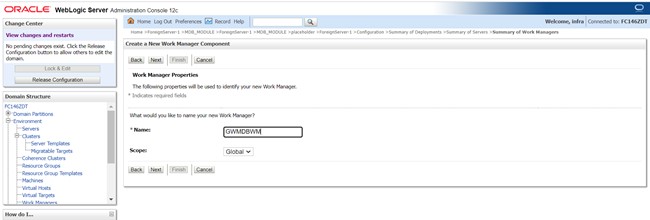
    The Work Manager Properties screen displays.

    Figure 8-9 Work Manager Properties


  3. Specify the field Name as GWMDBWM that is mentioned in the property file, and then click Next.
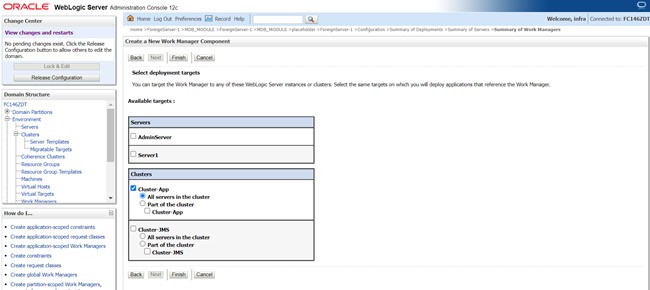
    The Select deployment targets screen displays.

    Figure 8-10 Select deployment targets


  4. Select Cluster-App in available targets, and click Finish.
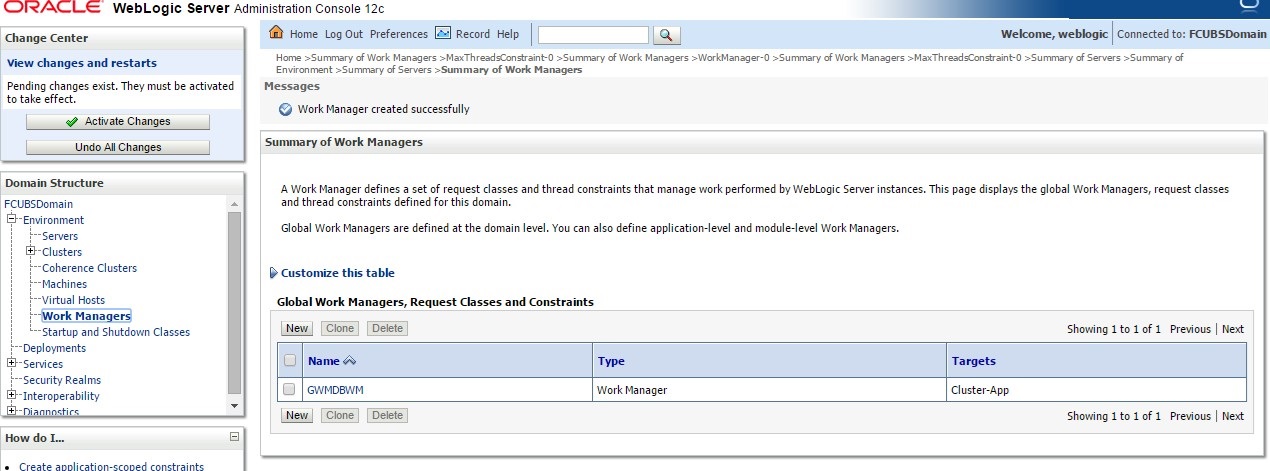
    The Summary of Work Managers screen displays.

    Figure 8-11 Summary of Work Managers


  5. Click New in the Global Work Managers, Request Classes and Constraints table.
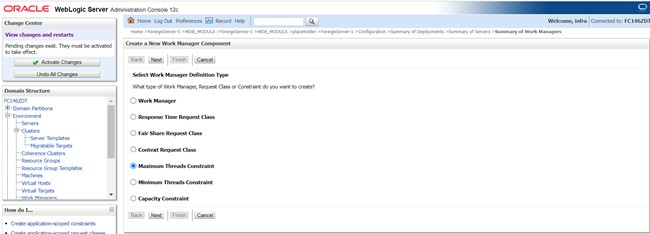
    The Create a New Work Manager Component screen displays.

    Figure 8-12 Create a New Work Manager Component


  6. Select Maximum Threads Constraints, and then click Next.
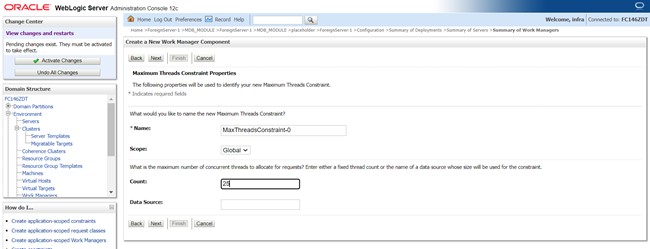
    The Maximum Threads Constraints Properties screen displays.

    Figure 8-13 Maximum Threads Constraints Properties


  7. Specify the desired thread count in the Count field, and then click Next.
    The Select deployment targets screen displays.

    Figure 8-14 Select deployment targets


  8. Select Cluster-App target, and then click Finish.
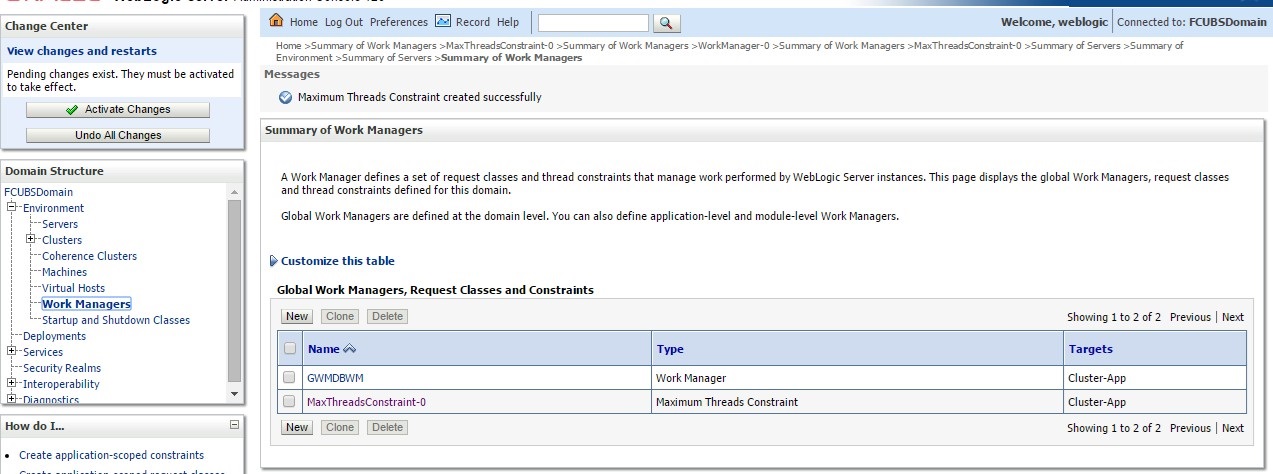
    The Summary of Work Managers screen displays.

    Figure 8-15 Summary of Work Managers


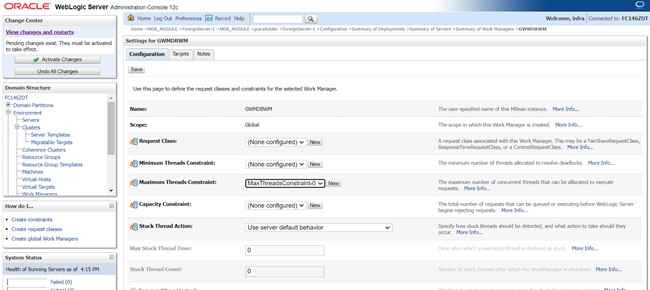
  9. Navigate to newly created Work Manager GWMDBWM.
    The Settings for GWMDBWM screen displays.

    Figure 8-16 Settings for GWMDBWM


  10. Select the Maximum Threads Constraint field to newly created MaxThreadsConstraint-0, and click Save.
  11. Restart managed servers, and notice the change in the number of consumers for the queues.