1.2 Build Application for Setup
This topic explains systematic instructions to build the application for setup using the installer.
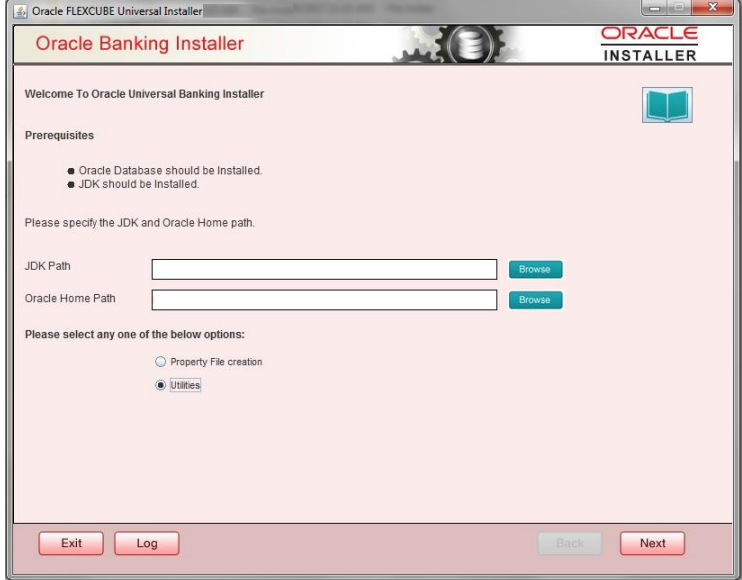
- Double-click FCUBSInstaller.bat batch file to launch the Oracle Application Installer.The Welcome to Oracle Universal Banking Installer screen displays.
Figure 1-1 Welcome to Oracle Universal Banking Installer
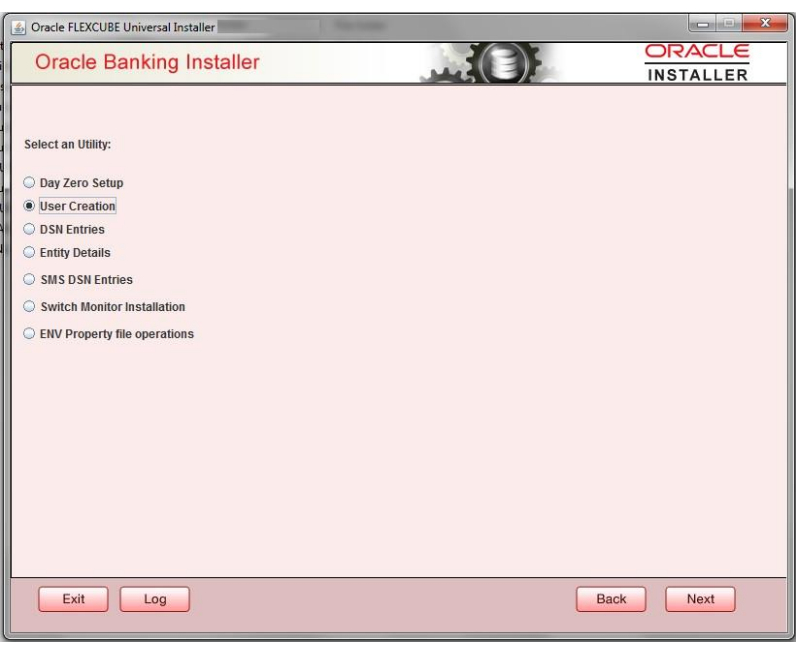
- Select the Utilities option and click Next.The Select an Utility screen displays.
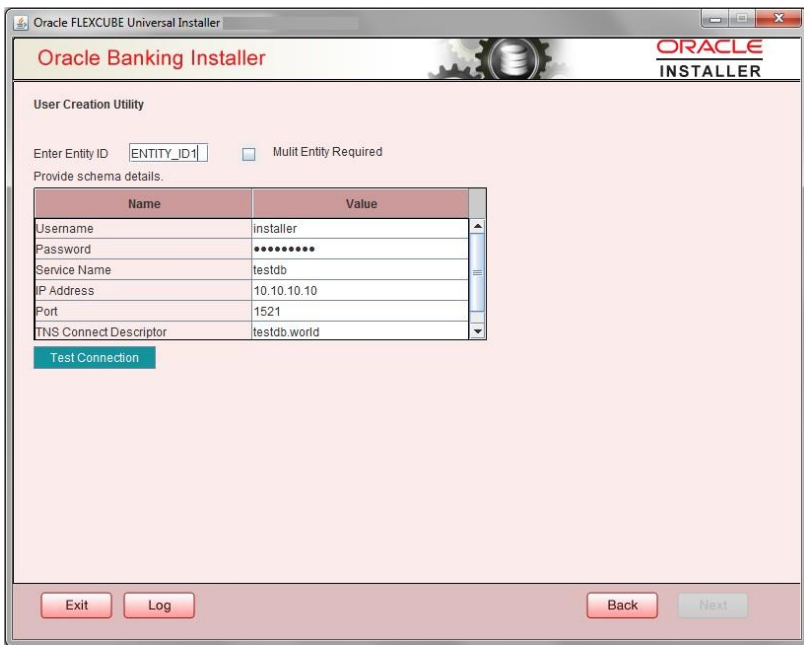
- Select the User Creation option, and click Next.The User Creation Utility screen displays.
- On the User Creation Utility screen, specify the Entity ID.
- Select the Multi-Entity Required checkbox for the multi-entity environment scenario.
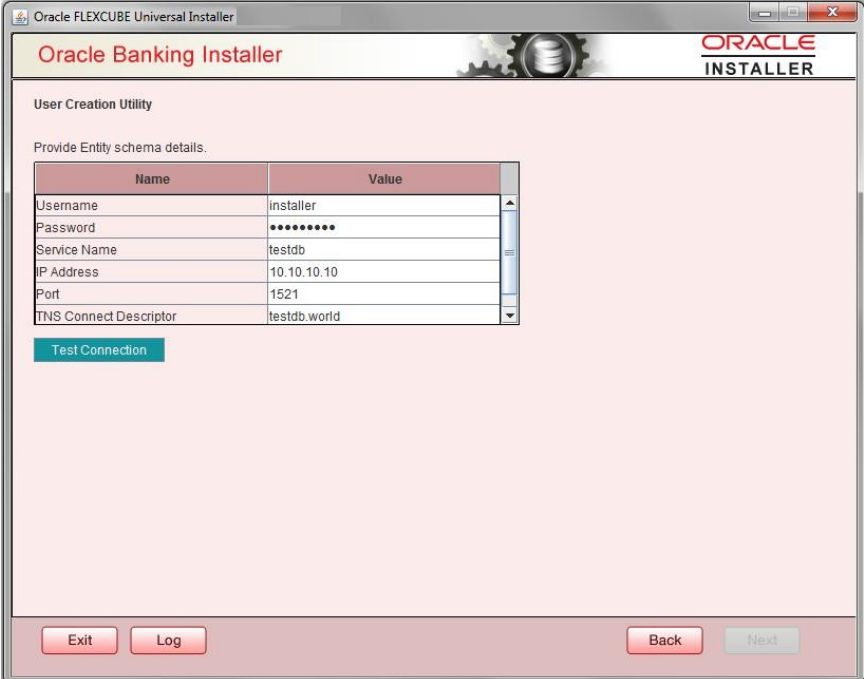
- Specify the following schema details:
For more information on fields, refer to the field description table below:
Table 1-1 DSN Entries Schema Details
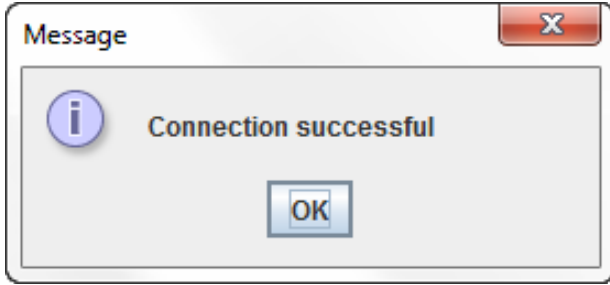
Field Description User Name Specify the user name to access the schema. Password Specify the schema password. Service Name Specify the service name of database. IP Address Specify the IP address of the system where the database schema is installed. Port Specify the port number. TNS Connect Descriptor Specify a valid connect string that contains the details for database connectivity. - Click Test Connection to check the status of the connection to database.If the connection is established, the system displays the following message.
- Click Next to proceed.If you select Multi Entity Required checkbox, the User Creation Utility screen displays to specify the entity schema details.
Figure 1-5 User Creation Utility for Multi Entity Details
- Specify the following entity schema details:
- Username
- Password
- Service Name
- IP Address
- Port
- TNS Connect Descriptor
- Click Test Connection to check the status of the connection to database.If the connection is established, the system displays the Connection Successful message.
- Click Next.The User Creation Utility screen displays.
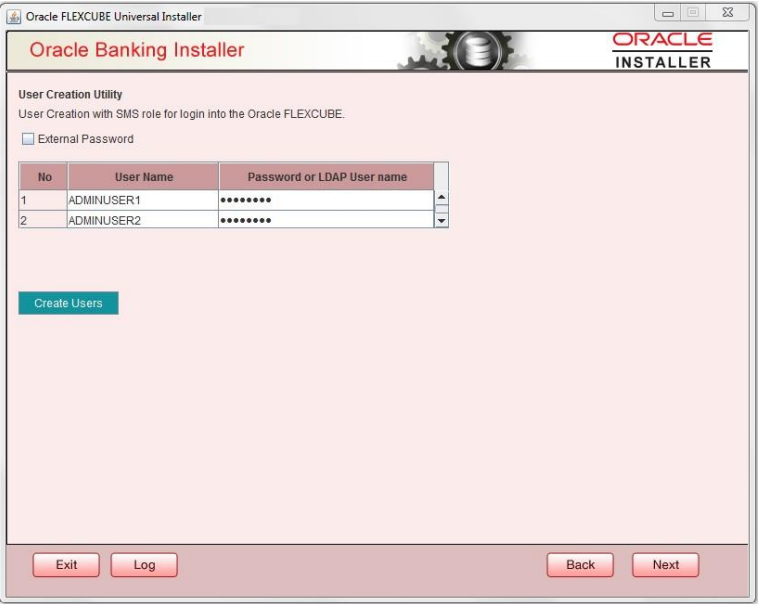
- On the User Creation Utility screen, specify the details in the following fields.
For more information on fields, refer to the field description table below:
Table 1-2 User Creation Utility - Field Description
Field Description User Name Specify the user name. Password Specify the password. Note:
- The user must avoid using underscore ( _ ) in the User Name field.
- Two users can be created at a time.
- Click Create Users.The Users created successfully pop-up message displays which represents the successful creation of users.
- Click OK to save the changes.
Parent topic: User Creation Utility Installation
