2.9 Process Payment Schedules
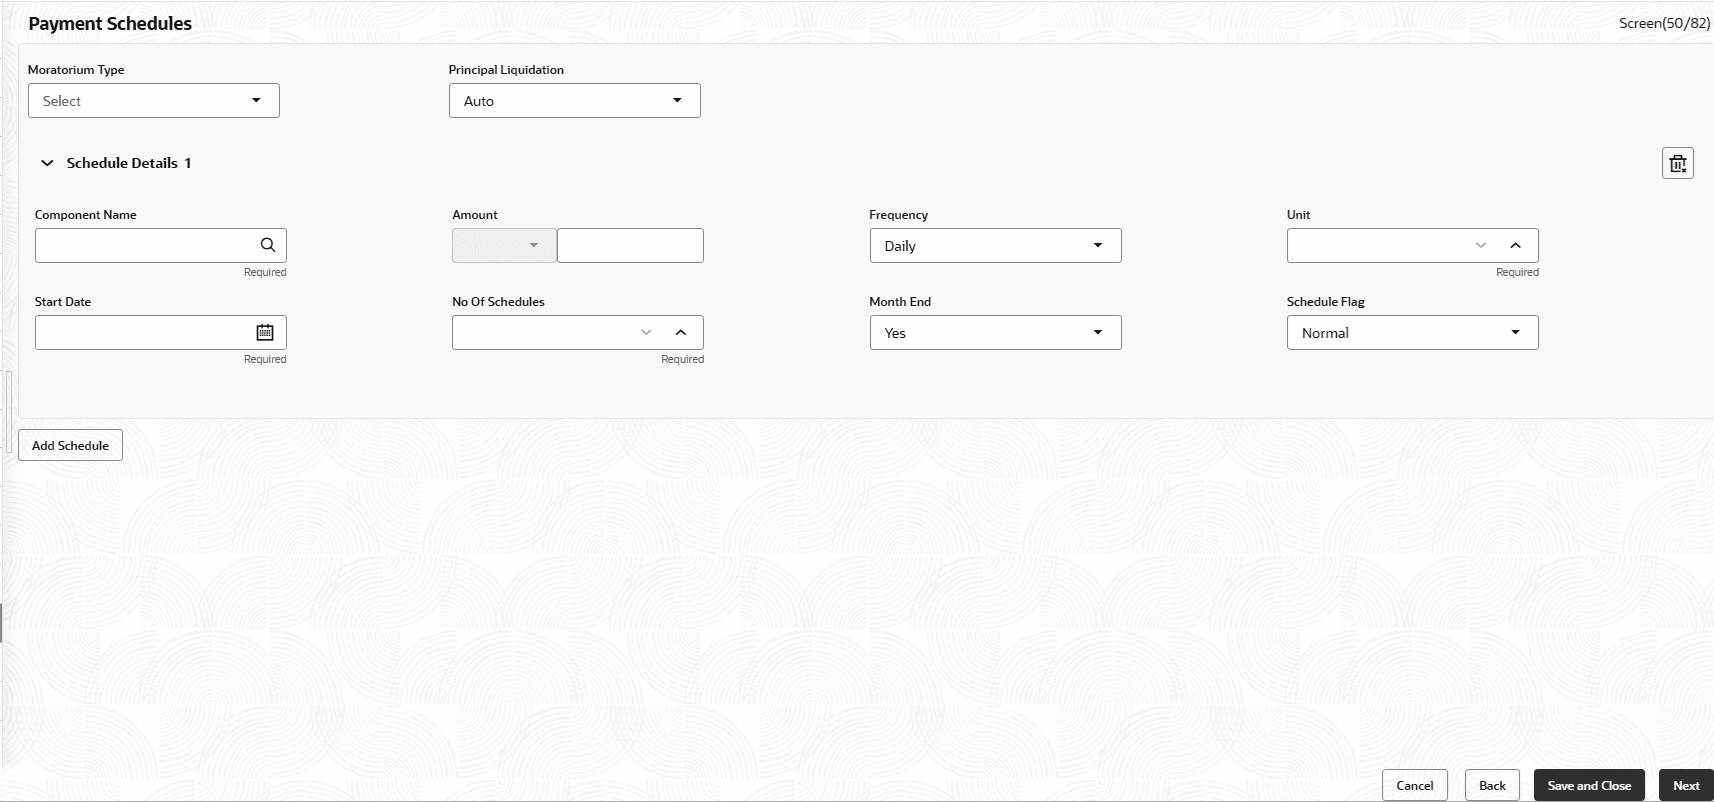
This topic describes the systematic instructions to payment schedules. Users can capture the prepayment schedules for the loan which includes the components such as principal, main interest and penalty components, if any.
For every prepayment component, user can capture the schedule frequency, unit, schedule count, liquidation mode and start date of the payment.
- Initiate a Loan Origination and navigate to a specific data segment.
- From Loan Origination , click Payment
Schedules tab and provide the required details.The Payment Schedules screen displays.
For more information on fields, refer to the field description table.
Table 2-10 Payment Schedules - Field Description
Field Description Moratorium Type Select the moratorium type. The available options are:- Liquidate Immediate
- Liquidate across schedules
- Liquidate with first schedule
- Capitalize
- Consumer Credit
Component Name Select the component (Principal/Interest) for which the schedule to be defined. Component Currency System will default shows the currency for the selected component based on the product set up. Amount Enter the flat amount to be paid for the component for the defined frequency. Frequency Select the frequency of schedule. The available options are:- Daily
- Monthly
- Quarterly
- Semi Annual
- Annual
Unit Enter the number of times the payment to be made for the defined frequency. Start Date Select the start date of the payment schedule for the defined frequency. No Of Schedules Enter the number of schedules for the defined frequency. Principle Liquidation Select the liquidation mode. The available options are:- Auto
- Manual
Month End Select the month end. The available options are:- Yes
- No
Schedule Flag Select the schedule flag. The available options are:- Normal
- Moratorium
Note:
Refer to Payment Details section for the detailed information. - Click Save & Close, to save and close the details.
- Click Next, to navigate to the next screen.
Parent topic: Data Segments
