2.1.2 View Netting Structure

This topic describes the systematic instruction to view, modify, delete, or authorize Netting Structure that have been created.

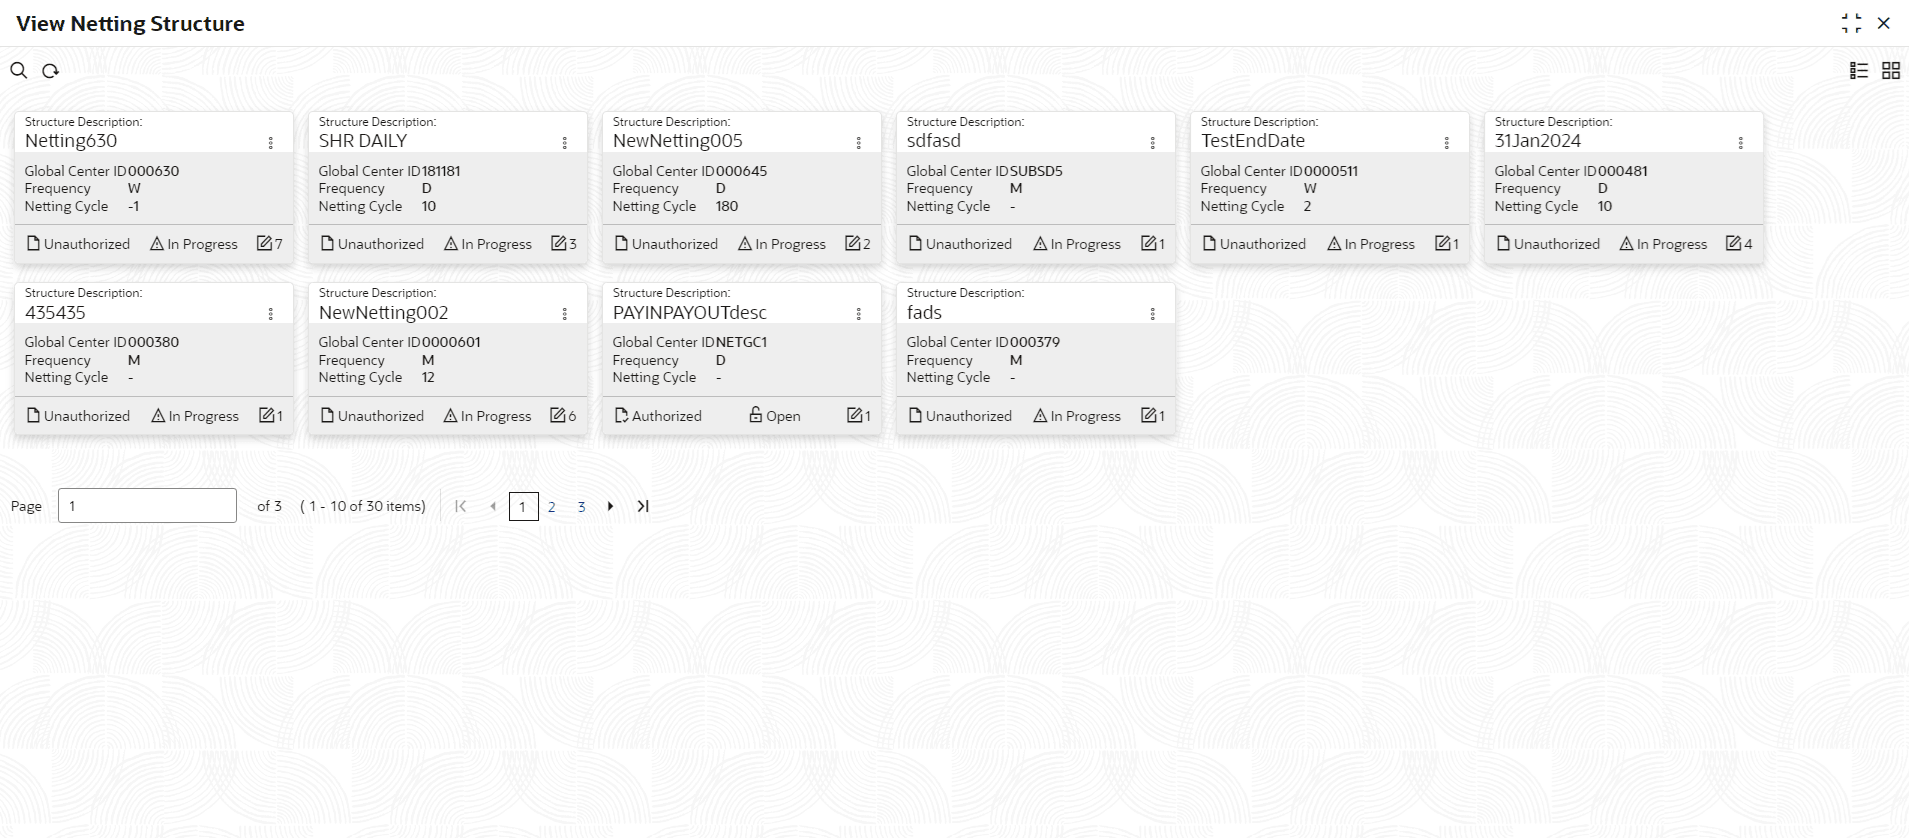
A tile is present for each record that has been created. The bottom portion of each record-tile displays the following:
  • The status, whether Authorized, Unauthorized, or Rejected
  • Open or Closed
  • The number of times the record has been submitted by the Maker added.
  1. On Home screen, click Cash Management. Under Cash Management, click Netting.
  2. Under Netting, click Maintenance. Under Maintenance, click View Netting Structure.
    The View Netting Structure screen displays.

    Figure 2-12 View Netting Structure


    For more information on fields, refer to the field description table.

    Table 2-9 View Netting Structure - Field Description

    Field Description
    Structure Code Displays the unique code for the netting structure.
    Structure Description Displays the description for the netting structure.
    Global Center ID Displays the global netting center ID.
    Frequency Displays the frequency based on which the netting transaction creation batch gets executed for a specific netting structure.
    The options can be:
    • D - Daily
    • M - Monthly
    • W - Weekly
    Netting Cycle Displays the unit of duration (weekly, monthly, daily) that can be in present, past, or future based on which the invoices will be picked up for netting.
  3. Filter the records in the View screen:
    1. Click Search icon to view the filters. The user can filter the records by Structure Description, Global Center ID, Authorization Status and Record Status.
    2. Click Search. or, Click Reset to reset the filter criteria.
    3. Click Refresh icon to refresh the records.
  4. Click More options and then select any of the following options:
    1. Unlock – To modify the record details. Refer to the Create screen for the field level details.
    2. Authorize – To authorize or reject the record. Authorizing/Rejecting requires necessary access rights.
      • Optional: Click View to view the record details.
      • Select the record and click Approve to approve the record.
      • Select the record and click Reject to reject the record. Specify the relevant comments in the pop-up window that appears, and click Confirm.
    3. Delete/Close – To remove the record.
      • Optional: In the confirmation pop-up window, click View to view the record details.
      • Click Proceed to delete the record.
    4. Copy – To copy the record parameters for creating a new record.
    5. View – To view the record details.
    6. Reopen – To reopen the closed record.