- Receivables and Payables User Guide
- Maintenance for Receivables and Payables
- Accounting Maintenance
- Accounting Entries
- Create Accounting Entries
3.1.3.1 Create Accounting Entries
This topic describes the systematic instruction to create accounting entries by mapping entry codes with appropriate product, event, payment mode, and so on.
- On Home screen, click Receivables And Payables. Under Receivables And Payables, click Maintenance.
- Under Maintenance, click Accounting. Under Accounting, click Accounting Entries.
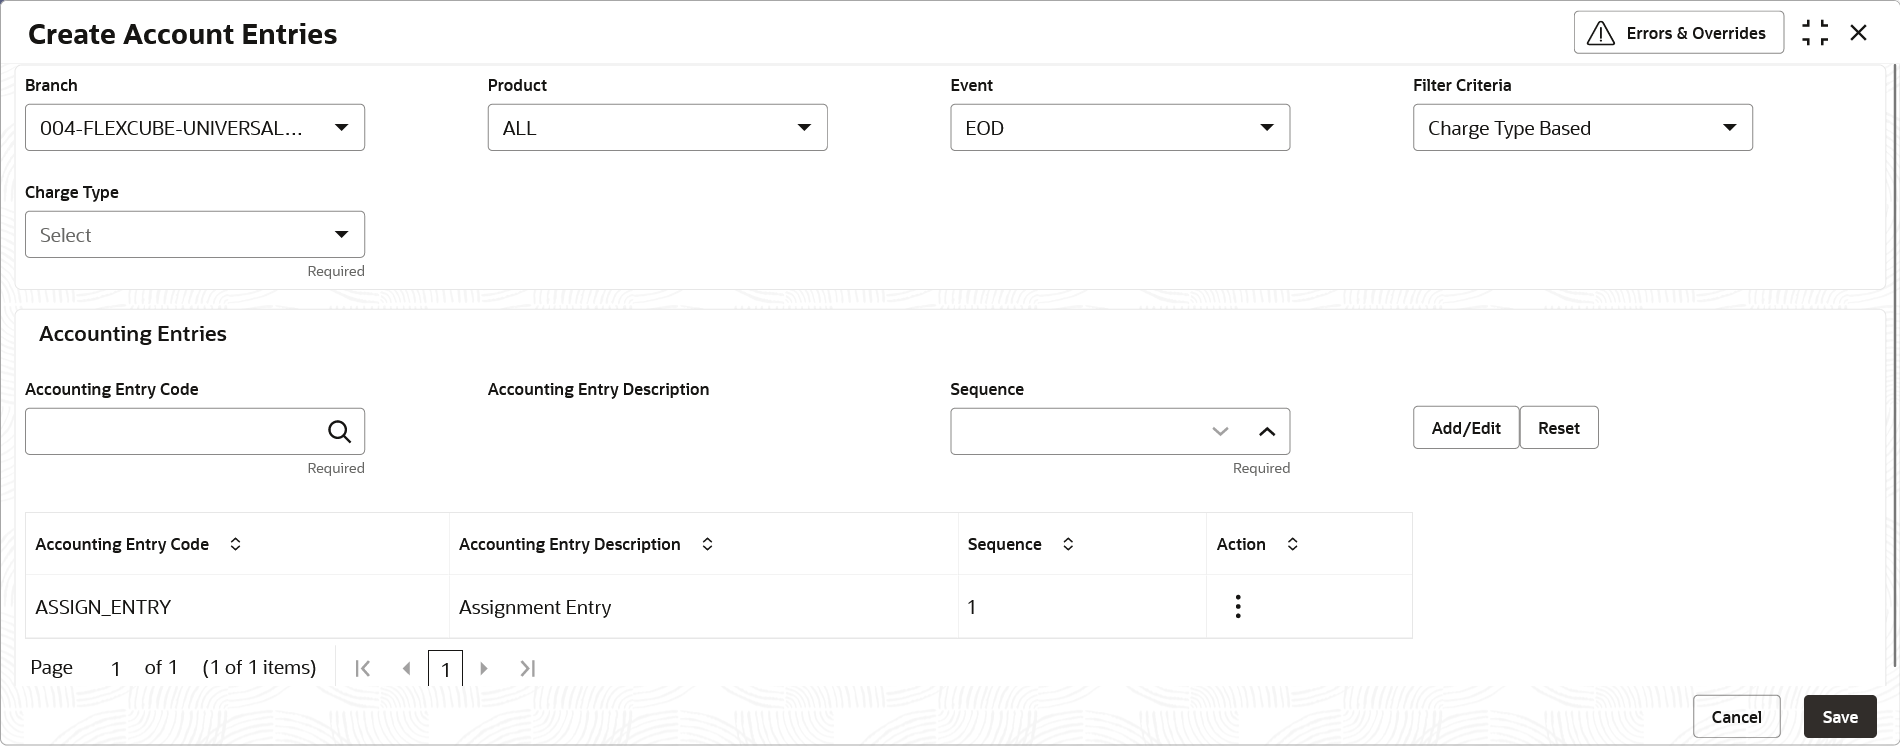
- Under Accounting Entries, click Create Account Entries.The Create Account Entries screen displays.
- Specify the fields on Create Account Entries screen.For more information on fields, refer to the field description table.
Note:
The fields marked as Required are mandatory.Table 3-3 Create Account Entries - Field Description
Field Description Branch Select the branch to add accounting entries for. Values in this field are listed based on your access rights. Product Select the product to add accounting entries for. User can select ‘ALL’ to create the entry code for all the products. Event Select the event to add accounting entries for. Filter Criteria Select the filter criteria for specific application of accounting entries. Charge Type SSelect the charge type as credit or debit. This field is displayed only if Filter Criteria is selected as Charge Type.
Payment Mode Select the mode of the payment. The available options are:- Account Transfer
- Cheque
- EFT
This field is displayed only if Filter Criteria is selected as Instrument Status.
Approved Switch the toggle ON, if accounting has to be set up for those instruments whose status is approved. This field is displayed only if Filter Criteria is selected as Approved Based.
PUA Switch the toggle ON, if the accounting has to be set up for those instruments whose payment is under approval process. This field is displayed only if Filter Criteria is selected as PUA.
Payment Party Select the payment party if the accounting entry set up is separate for a specific payment party. This field is displayed only if Filter Criteria is selected as Payment Party.
Is Financed Switch the toggle ON, if accounting entry is to be set up separately for financed and non-financed instruments. This field is displayed only if Filter Criteria is selected as Is Instrument Financed.
Accounting Entry Code Click the search icon to select the required accounting entry code. Accounting Entry Description Displays the description of the selected entry code. Sequence Select the sequence to be set for the accounting entry code. - Click Add/Edit to add the details to the grid.
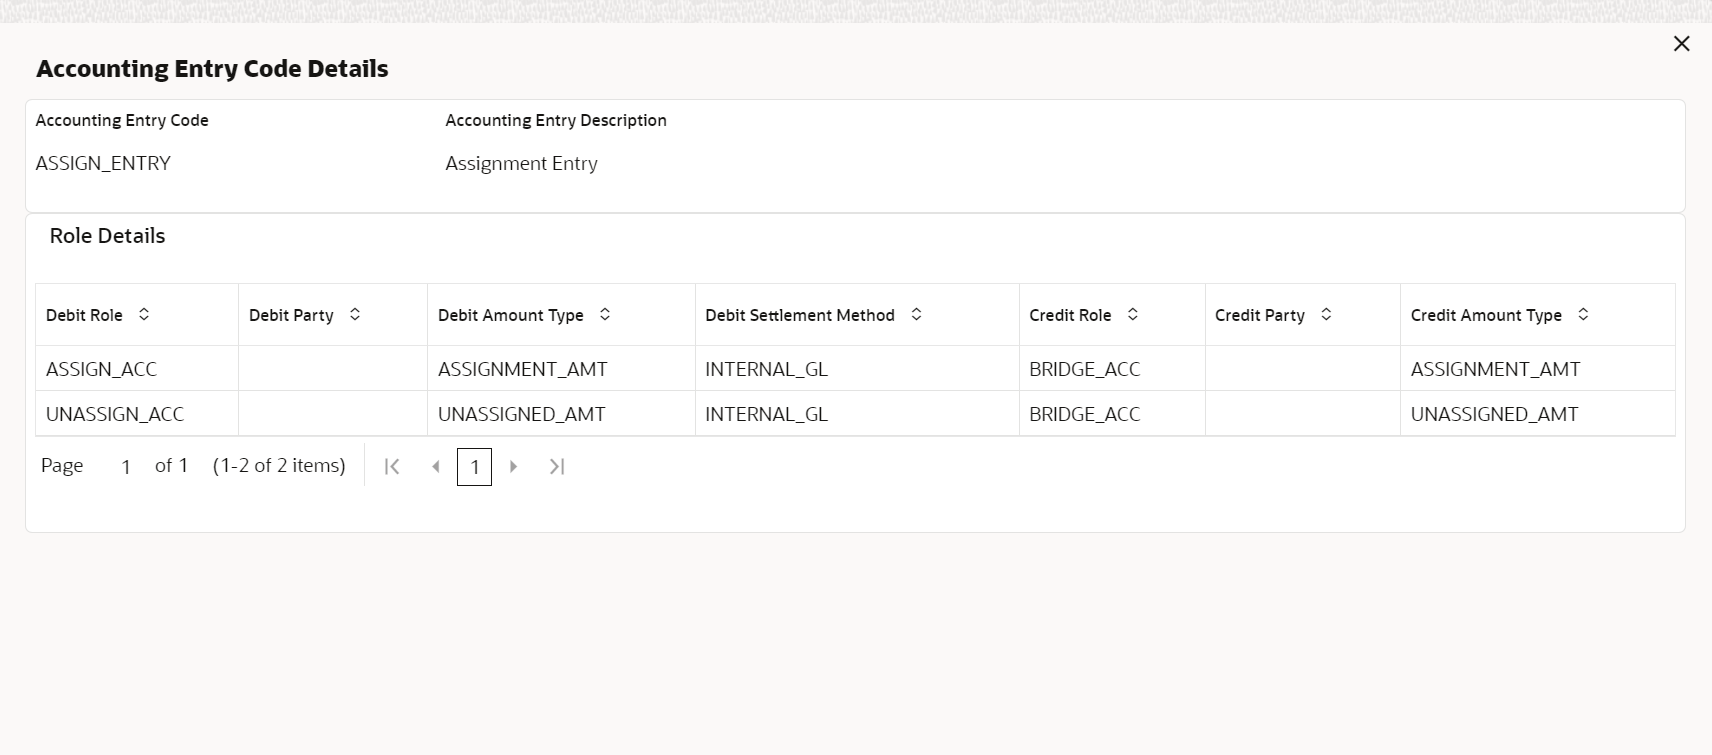
- Click the hyperlink to view the details of the selected Accounting Entry Code.The Accounting Entry Code Details screen displays.
- Perform the following steps to take action on the records in the grid.
- Click
 icon in the Action column to edit or delete the row.
- Click
- Click Reset to clear the selected values, if required.
- Click Save to save the record and send it for authorization (if applicable).
Parent topic: Accounting Entries

